Table of Contents
Advertisement
Quick Links
Model/Modelo/Modèle
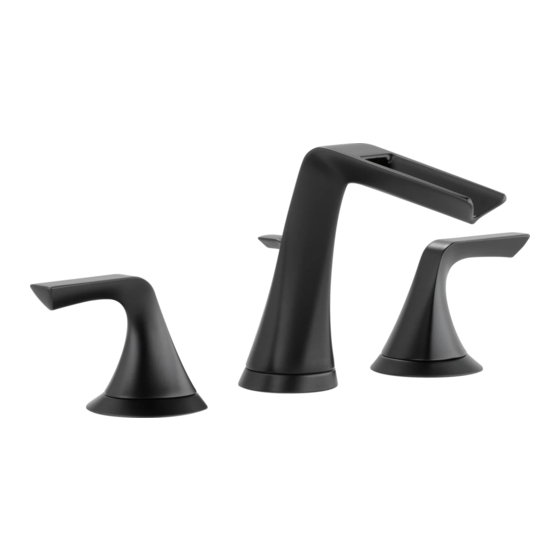
65350LF▲& 65351LF▲
65350LF-ECO▲& 65351LF-ECO▲
Series/Series/Seria
Sotria
TM
Write purchased model number here.
Escriba aquí el número del modelo comprado.
Inscrivez le numéro de modèle ici.
You may need / Usted puede necesitar / Articles dont vous pouvez avoir besoin:
For easy installation of your Brizo
faucet you will need:
• To READ ALL the instructions completely
before beginning.
• To READ ALL warnings, care, and maintenance
information.
• To purchase the correct water supply hook-up.
Para instalación fácil de su llave
Brizo
usted necesitará:
®
• LEER TODAS las instrucciones completamente
antes de empezar.
• LEER TODOS los avisos, cuidados, e
información de mantenimiento.
• Comprar las conexiones correctas para el
suministro de agua.
Pour installer votre robinet Brizo
facilement, vous devez:
• LIRE TOUTES les instructions avant de
débuter;
• LIRE TOUS les avertissements ainsi que toutes
les instructions de nettoyage et d'entretien;
• Acheter le bon nécessaire de raccordement.
www.brizo.com
TWO HANDLE WIDESPREAD LAVATORY FAUCETS
86531
LLAVES DE AGUA / GRIFOS DE CAÑO ALTO
ROBINETS À GRAND ENTRAXE POUR LAVABO
65350LF▲
65350LF▲-ECO
®
®
86531
1
65351LF▲
65351LF▲-ECO
07/10/15 Rev. B
Advertisement
Table of Contents

Related Manuals for Brizo Sotria 65351LF Series


Summary of Contents for Brizo Sotria 65351LF Series
- Page 1 Escriba aquí el número del modelo comprado. 65350LF▲-ECO 65351LF▲-ECO Inscrivez le numéro de modèle ici. You may need / Usted puede necesitar / Articles dont vous pouvez avoir besoin: For easy installation of your Brizo ® faucet you will need: • To READ ALL the instructions completely before beginning.
-
Page 2: Cleaning And Care
Indianapolis, IN 46280 St. Thomas, Ontario, Canada N5P 4L1 1-877-345-BRIZO (2749) 1-877-345-BRIZO (2749) Electronic parts (other than batteries), if any, of this Brizo ® faucet are warranted to the original customerservice@deltafaucet.com customerservice@mascocanada.com consumer purchaser to be free from defects in material and workmanship for 5 years from the date of purchase or, for commercial users, for one year from the date of purchase. No warranty... - Page 3 ▲ Specify Finish Especifíque el Acabado Précisez le Fini RP76565 ▲ Lift rod Barra de alzar Tirettes RP76571 RP73870 Stream Straightener Spline Adapter & Screw Adaptadore de la Ranura y Tornillo Enderezador del Chorro Adaptateur Cannelés et Vis Concentrateur de Jet RP76572 RP76568▲ O-Rings Handle Escutcheon & Nut Anillos “O” Chapa de Cubierta Tuerca Joints Toriques Plaque de Finition et l’écrou RP76563 RP76563-1.2 RP73872 Flow Regulator Mounting nut & Gasket Regulador de flujo Brida de Montaje con Empaque RP76563 Régulateur de débit Collerette avec joint RP76563-1.2 RP53408 Flow Regulator RP75786 Nut & Washer RP75838 Valve Cartridge, Hot Side...
- Page 4 1 1/8" (29 mm) Diameter Min. INSTALLATION OF VALVE ASSEMBLIES & TRIM INSTALLATION OF SPOUT Note: When drilling holes for side valves, it is recommended that hole size must be a Note: When drilling mounting holes for the spout it is recommended that minimum of 1 1/8" (29 mm). Look for a blue label or dot on cold valve assembly and red the hole size must be a minimum of 1 1/8" (29 mm). label or dot on hot valve assembly and install them on appropriate side. Make sure gasket (1) is in place on bottom of spout. Insert spout Install the nuts and washer (1) onto the end valve shank (2). Position gasket assembly into mounting surface. Slip fixing washer (2) over spout (3) into the groove of adapter (4). Place the end valve shank through mounting shank and secure with nut (3). The screws in the nut can be tightened, hole from the bottom. From the top, thread the adapter (4) onto the shank until using a phillips screwdriver, to secure. OPTION: Use silicone under it stops. From underneath, securely tighten the mounting nut. Repeat this step the gasket if deck surface is rough or uneven. for the other side. OPTION: Use silicone under the gasket if deck surface Carefully push coupling tee (1) over o-ring and onto shank. Slip plastic is rough or uneven.
- Page 5 Make sure valve cartridge is in off position. Place glide ring (1) into the groove in Place spline adapters (1) over valve stems (2) and secure with screws (3). the bottom of handle (2). Place handle over end valve spline (3) and onto escutcheon. Make sure handle is properly seated over the spline. The internal magnet will keep the handle in place. Repeat this step for the other handle. NOTE: If handle needs removed to adjust the position, it is best to pull straight up on it to remove it. Asegúrese que el cartucho de la válvula esté en posición cerrada. Coloque el aro Coloque los adaptadores de las lengüetas (1) sobre las espigas de las deslizable (1) en la ranura en la parte inferior de la manija (2). Coloque la manija válvulas (2) y fije con los tornillos (3). sobre la lengüeta de la válvula extrema (3) y en la chapa de cubierta. Asegúrese que la manija esté bien asentada sobre la lengüeta. El imán interno mantendrá la manija en su lugar. Repita este paso en la otra manija. NOTA: Si necesita quitar la manija para ajustar la posición, es mejor halarla directamente hacia arriba para sacarla.
- Page 6 1/2" (12.7 mm) IPS Connect flexible outlet hoses (1) to valve outlet and spout inlet ports as MAKE CONNECTIONS TO WATER LINES: shown. Tighten nuts firmly with a wrench, but do not over tighten. Choose hook-ups for 1/2" I.P.S. connections: (1) Ball nose riser (3/8" O.D. copper tubing), or (2) 1/2" I.P.S. faucet connector. Use two wrenches when tightening. Do not overtighten. Conecte las mangueras flexibles de salida (1) a la salida de la válvula y a la HAGA LAS CONEXIONES A LAS LÍNEAS DE AGUA: entrada del surtidor como se muestra. Apriete las tuercas firmemente con una llave de tuercas, pero no apriete demasiado. Escoja las conexions IPS de 1/2": (1) Conexión Bola-nariz (Tubería de cobre de 3/8" D.E.), o (2) Conector de llave I.P.S. 1/2" Utilice dos llaves de tuercas cuando apriete. No apriete demasiado. RACCORDEZ LES TUYAUX D’EAU CHAUDE ET D’EAU FROIDE. Raccordez les tuyaux de sortie souples (1) aux orifices de sortie des soupapes et d’entrée du bec comme le montre la figure. Serrez les écrous solidement Choisissez des raccords compatibles 1/2 po IPS : avec une clé, mais évitez de trop serrer.
- Page 7 Step 3b Step 3e Pop-up Installation Step 3c Remove pivot nut (1). Install horizontal rod (2) and Apply silicone to underside of flange (1). stopper (3) as removable (4) or non-removable Insert body (2) into sink. Screw flange (1) Remove stopper (1) and flange (2). (5). Hand tighten pivot nut (1). into body (2). Screw nut (1) all the way down. Push Attach horizontal rod (1) to strap (2) using Pivot (1) must face faucet. Pull assembly washer (2) and gasket (3) down. clip (3). Insert lift rod (4) into strap and tighten (2) down firmly and hold in place. screw (5). Connect assembly to drain (6). DO NOT TWIST. Remove tailpiece (1) from body (2), add plumber tape (3), replace tailpiece. Tighten nut/washer/gasket (1), clean off excess silicone (2). DO NOT TWIST. Step 3f Desagüe automático de metal Aplique silicón a la parte interior del reborde Quite la tuerca del pivote (1). Instale la barra Step 3a (1). Inserte el cuerpo (2) en el lavamanos. horizontal (2) y el tapón (3) como desmontable (4) Quite el tapón (1) y el reborde (2). Atornille el reborde (1) en el cuerpo (2).
-
Page 8: Maintenance
Si le robinet fuit par le raccord en T (8), remplacez le joint torique (7). laissez s’écouler l’eau une minute. Important: Il faut laisser A. Prenez soin de fermer les robinets d’arrêt. Retirez l’agrafe (9) du raccord en T (8). s’écouler l’eau pour évacuer les saletés qui pourraient abîmer les éléments internes du robinet. B. Enlevez le raccord en T (8) du manchon en le tirant directement vers le bas. C. Enlevez le vieux joint torique (7) et remplacez-le par un neuf. Vérifiez l’étanchéité de tous les raccords identifiés par une flèche. D. Glissez soigneusement le raccord en T (8) de nouveau sur le manchon et fixez-le Resserrez les raccords au besoin, mais prenez garde de trop avec l’agrafe (9). les serrer. www.brizo.com 86531 Rev. B...