
Related Manuals for RTA 515RTAENI


Summary of Contents for RTA 515RTAENI
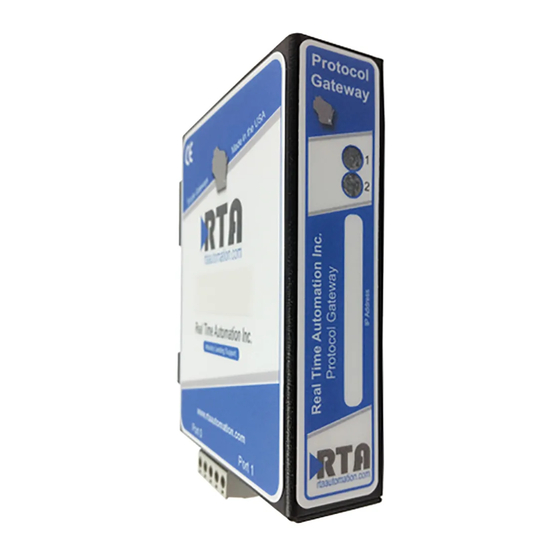
- Page 1 515RTAENI-N34 Protocol Gateway Product User Guide Firmware Version 4.25 Real Time Automation, Inc. 1-800-249-1612...
- Page 2 Trademarks CompactLogix, ControlLogix, PLC-5, MicroLogix, RSLogix 500, SLC, and PanelView are registered trademarks of Rockwell Automation, Inc. EtherNet/IP is a trademark of the ODVA. Microsoft, Windows, and Internet Explorer are registered trademarks of Microsoft Corporation. Kepware is a registered trademark of Kepware Technologies, a software development business of PTC Inc.
-
Page 3: Table Of Contents
Contents Revision History ............................5 Overview ............................... 6 Hardware – N34 ............................7 Physical Specifications Mounting with a DIN Rail ..........................8 Installing Removing Powering the Gateway ..........................9 Pinouts & Wiring ............................11 Pinouts Wiring Accessing the Main Page..........................12 Error: Main Page Does Not Launch Web Configuration Tabs .......................... - Page 4 Other References Reference Links NET ENI Event Log Values Security Configuration Home Tab (Diagnostics) ..........................30 DF1 Status DF1 Counters Ethernet Status Ethernet Status: Counters Logging Msg Log Tab Serial Diagnostic Tab Ethernet Diagnostics Tab LED Behavior ............................... 35 DF1 Node Descriptions Reference Table ....................36 Use of Existing 1761-NET-ENI/W Tools .......................
-
Page 5: Revision History
1. Minor Web Updates 2. EDS File Updated 3. Node 244 and 245 removed Node 248 functional 4.18 12/14/2018 Features Added 4. 1. Updated RTA Images 4.21 9/28/2020 Features Added 1. Added functionality to work with Ingear PC based application. -
Page 6: Overview
Overview The 515RTAENI is a replacement for the Allen-Bradley 1761-NET-ENI and 1761-NET-ENIW modules. The 515RTAENI gateway: • Provides the same Ethernet connectivity for all DF1 serial controllers, PanelView Standard Terminals, and other DF1 full-duplex devices • Communicates between Allen-Bradley Logix and legacy controllers •... -
Page 7: Hardware - N34
Hardware – N34 Physical Specifications Operating range of 8-28VDC, 125mA at 24VDC POWER Power can be received over serial cable TEMPERATURE Industrial Temperature Range -40°C to +85°C CERTIFICATIONS UL, C/UL, CE, FCC, CLASS 1 DIV 2 MOUNTING Din Rail, Panel SIZE 4.2”... -
Page 8: Mounting With A Din Rail
1) Mount your DIN Rail. 2) Hook the bottom mounting flange under the DIN Rail. 3) While pressing the 515RTAENI against the rail, press up to engage the spring-loaded lower clip and rotate the unit parallel to the DIN Rail. -
Page 9: Powering The Gateway
Powering the Gateway The following steps will allow you to properly and safely power the gateway. Warning improper wiring will cause unit failure Use the Barrel Connector the Screw Terminals power connection, both 1. Connect a 24VDC power source to the gateway. a. - Page 10 Hazardous Environment Power & Installation Instructions Cet équipement est conçu pour être utilisé uniquement dans des lieux de classe I, division 2, groupes A, B, C et D, ou non dangereux. AVERTISSEMENT - RISQUE D'EXPLOSION - Ne débranchez pas l'équipement à moins que le courant ne soit coupé...
-
Page 11: Pinouts & Wiring
IMPORTANT: The 1761-CBL-PM02 Ser. C when used with a SLC5/04 has a different pin out and will cause 515RTAENI hardware failure. Any 1761-CBL-PM02 cable is only to be used for MicroLogix PLCs. It is highly recommended to follow wiring recommendations regarding the Allen-Bradley serial cables. -
Page 12: Accessing The Main Page
Accessing the Main Page The following steps will help you access the browser-based configuration of the gateway. By default, DHCP is enabled. If the gateway fails to obtain an IP address over DHCP, it will Auto IP with 169.254.X.Y. For more information on your operating system network setting, refer to the Access Browser Configuration Doc on the CD or download it from our support web site, https://www.rtautomation.com/515rtaenisupport/... -
Page 13: Error: Main Page Does Not Launch
Error: Main Page Does Not Launch If the main page does not launch, please verify the following: 1) Check that the PC is set for a valid IP Address a. Open a MS-DOS Command Prompt b. Type “ipconfig” and press enter c. -
Page 14: Web Configuration Tabs
Web Configuration Tabs The 515RTAENI gateway has a built-in web server that can be accessed by entering the IP address of the gateway into a web browser’s address bar. All configurable fields inside the gateway are grouped into 5 different tabs. Below is a list of tabs and what information can be found on each one: 1) Home –... -
Page 15: Committing Changes To The Gateway
Committing Changes to the Gateway 1) To make changes to the gateway, find the tab identifying which information to change. Next to the section to modify, there is an Edit button. 2) Once the Edit button has been clicked, the icon will change into a Save button and any editable fields under that section will change into text boxes or dropdown lists. -
Page 16: Network Tab
Network Tab Ethernet Settings By default, the gateway is configured for DHCP. There are 2 different options for the gateway to get an IP address: 1) DHCP – Attempts to receive an IP Address every time that the gateway is powered up. If DHCP fails, then an AutoIP address is used to make the webpages accessible and DHCP will continue to attempt to get an address. -
Page 17: Changing From Dhcp To Static Ip
When configuring a static IP address, be sure to update the appropriate values in IP Address, Subnet Mask, and Gateway fields. Changing from DHCP to Static IP 1) Click the Edit button next to Ethernet Settings on the Network Tab in the gateway. 2) Change the dropdown of the IP Settings field to be Static IP. -
Page 18: Serial Settings
See table below for more explanation: Value Description Set the baud rate to match the baud rate configured for the 515RTAENI. Baud Rate 38,400 and 19,200 are the most used baud rates. Cannot be changed: DF1 RS232,8N1 (8N1 meaning 8 data bits, no parity bit, 1... -
Page 19: Email Settings
Email Settings This optional section can be filled out if alarms and messages need to be emailed out on the network. To configure, the following fields can be modified: Field Description This is the TCP/IP address or name (maximum of 64 characters) of SMTP Email server server. -
Page 20: Email Alarms And Messages
“To” address. The controller will send a 485CIF write message to the DF1 destination node that is mapped to the destination email address. For the 515RTAENI to successfully send an email message, the Email Settings configuration needs to be set up correctly. The 515RTAENI stores the destination email address but does not store the actual data that is sent. -
Page 21: Email Message Example
150 in the gateway’s webpage. The format of the email “subject” line is “515RTAENI.MSG”. This is how the MSG instruction would look: NOTE: The two screenshots above display File Name ST10: 0 as a specific example. For the user, the email message data would display whatever String value they have chosen. -
Page 22: Data View Tab
Data View Tab The Data View Tab shows the data that has been sent to the 515RTAENI from the attached serial controller. Using this page, data can also be written back to the serial controller. This page is designed to act as a “scratch-pad”... -
Page 23: Mapping Tab
Node 45 – 49 must be used if talking to CompactLogix/ControlLogix/FlexLogix Config 515RTAENI node addresses 100 through 149 store destination IP addresses. When the 515RTAENI receives a write message to nodes 100 to 149, it stores IP Address the destination IP address in the corresponding map register. - Page 24 IP Routing Table example Configure Node # Function Configure route 0 address Execute Node # Function # Send message to IP address @ DF1 node 100 Real Time Automation, Inc. 1-800-249-1612...
-
Page 25: Utility Tab
Utility Tab The Utility page displays revision information, handles firmware upgrades, configuration files, and security features. Export/Import Configuration The Export Configuration option allows the current configuration of the gateway to be exported and saved to a PC for backup. The Import Configuration option allows the gateway to use a previously saved configuration file. -
Page 26: Restart Gateway
Restart Gateway There are 3 options to restart the gateway: ● Simple Reset—performs a software reboot. ● Reset out of box defaults—brings the device back to its original manufacturing defaults, including setting the gateway to DHCP mode. ● Reset out of box defaults except IP—brings the device back to its original manufacturing defaults, except the current network settings. -
Page 27: Net Eni Event Log Values
NET ENI Event Log Values The NET ENI Event Log values page is a scratch pad where the PLC can write log values. Up to 50 data strings can be displayed here by writing to node 204 at element 0, with the newest event log displayed at the top. -
Page 28: Security Configuration
Security Configuration Access to the web pages inside the 515RTAENI gateway can be controlled by creating different access privileges. The first time the edit button is clicked, only one user can be configured. This is the primary account and will always have full access rights. Once the primary account is configured, the user can then log in to the primary account and create up to nine secondary accounts with different access privileges. - Page 29 Real Time Automation, Inc. 1-800-249-1612...
-
Page 30: Home Tab (Diagnostics)
Home Tab (Diagnostics) The Home tab displays diagnostic counters that show the current gateway status. These diagnostics are useful for troubleshooting communication problems. There is also a logging table that can be used to further troubleshoot the Ethernet, Serial, and general gateway problems. DF1 Status DF1 Counters The counters under DF1 Status can help determine the state of the serial communication:... -
Page 31: Ethernet Status
Ethernet Status Ethernet Status: Counters The counters under Ethernet Status can help determine the state of the Ethernet communication: Field Description Displays the total number of Ethernet messages transmitted Total Num Messages Transmitted by the gateway. Displays the total number of Ethernet messages received by Total Num Messages Received the gateway. -
Page 32: Logging
Logging Msg Log Tab This tab displays the gateway’s internal system status log messages and is only used for advanced troubleshooting. The log can be filtered by Start Up, Error, Event, Assertion, Serial, or TCP messages. Real Time Automation, Inc. 1-800-249-1612... -
Page 33: Serial Diagnostic Tab
Serial Diagnostic Tab The numbers under the DF1 Status can be further broken down by DF1 node by using the Serial Diagnostics table at the bottom of this page. Here, the user can filter a specific DF1 node, if desired, as well as use the following filters: Display All, Display Timeouts, Display Bad BCC/CRC, or Display Queue Full. -
Page 34: Ethernet Diagnostics Tab
Ethernet Diagnostics Tab The numbers under the Ethernet Status can be further broken down by connection by using the Ethernet Diagnostics table at the bottom of this page. Here, the user can filter a specific IP address, if desired. The columns are briefly described as follows: Field Description IP Address... -
Page 35: Led Behavior
LED Behavior LED 1: Serial Port Status Serial communications are active and is Solid Green communicating to the gateway within the Inactivity Timeout configured Blink Green No active communications (Idle) Blink Red No active communications (Timeout) Solid Red Fatal Error LED 2: Ethernet Status Ethernet communication is active, and Solid Green... -
Page 36: Df1 Node Descriptions Reference Table
DF1 Node Descriptions Reference Table This table shows the DF1 nodes the 515RTAENI supports and what they are used for. Node Options/Description Used to forward messages from the serial device to an IP address. A message sent to 0-49 node n is sent to the IP address at node n+100. Therefore, a message sent to node 0 is sent to the IP address stored in node 100. - Page 37 1 address per message, so each node is in a 1-1 relationship with the other. Email Alarms and Messages, p20. Defines URL links. These are shown in the 515RTAENI web configuration in the Reference Links tab on the Utility tab. The 515RTAENI does not validate the URL.
- Page 38 Values on the Utility page: it is a place for the serial controller to log events that can then be viewed in the 515RTAENI Event Log page. The Event Log page can display the 50 most recent event messages, and when the event list displays 50 event strings (i.e. event list full) a new event string written to the list will overwrite the oldest event displayed.
- Page 39 The “ST15:0” is a file and offset in the target Ethernet device. That will, of course, vary by device. Email Settings, p19. ST15:0 17 12345679@abc.com A controller write to node 250 can assign IP address settings to the 515RTAENI. Function Data Type Operation Format aaa.bbb.ccc.ddd (decimal).
- Page 40 Ethernet Settings, p16. A controller write to node 253 can set the serial baud rate in the 515RTAENI. NOTE: Auto-baud is NOT supported by the 515RTAENI gateway. Value Baud Rate 1200 2400 4800 9600 19200 38400 Serial Settings, p18.
-
Page 41: Use Of Existing 1761-Net-Eni/W Tools
ENI /ENIW Utility tool to get the configuration file from the old ENI and then do a “Save To” the 515RTAENI gateway. Note: If you were previously using a BOOTP IP acquisition mode with your 1761-NET-ENI, the 515RTAENI will revert to DHCP. The BOOTP modes are not supported by the 515RTAENI. -
Page 42: Using Rslinx
Types’ dropdown then click ‘Add New…’ and supply it with a suitable name in the resulting popup. 4) Enter the IP address of the 515RTAENI into the ‘Host Name’ entry for Station 0 and click OK. 5) Your serial PLC should now be accessible via the Ethernet driver. If not accessible, verify the serial settings in the 515RTAENI with your PLC. -
Page 43: Troubleshooting Rslinx And Rslogix Comms
Troubleshooting RSLinx and RSLogix Comms In RSLinx, when using EtherNet/IP, the EDS file for When attempting to configure the 515RTAENI in the 515RTAENI must be installed for RSLinx to RSLinx I see “unrecognized device” and a yellow recognize the device type. RTA recommends that question mark. -
Page 44: Application Specific Tips
Figure xx - Rockwell RSLinx EDS Hardware Installation Tool For PanelView Plus communications set up in RSView, verify RSLinx Enterprise finds the 515RTAENI module. Unplug the Ethernet cable to the 515RTAENI gateway. Then right click the unit, and delete it from the communications tree. See image below. - Page 45 Right click the Ethernet Driver and select Add Device. From the Device Selection tool, select the NETENI- connected PCCC devices, select the appropriate processor family folder, and then choose your PLC from the list in the processor folder and click OK. The example screens below show the selection of a MicroLogix 1200 controller.
- Page 46 The RSView software should now be able to communicate over Ethernet to the serial input of the controller using the 515RTAENI gateway. If this procedure doesn’t work the first time, delete the original target and rebuild the Comms as described above.
-
Page 47: Kepware Communications
In the Kepware server there is a NETENI driver for NETENI to MicroLogix communications, but this will not work with the 515RTAENI gateway. In the Kepware server you need to do the following to gather data from a SLC 5/03, SLC 5/04, or MicroLogix using the 515RTAENI.
Need help?
Do you have a question about the 515RTAENI and is the answer not in the manual?
Questions and answers