Table of Contents

Summary of Contents for Fire Mountain K116BFI3S
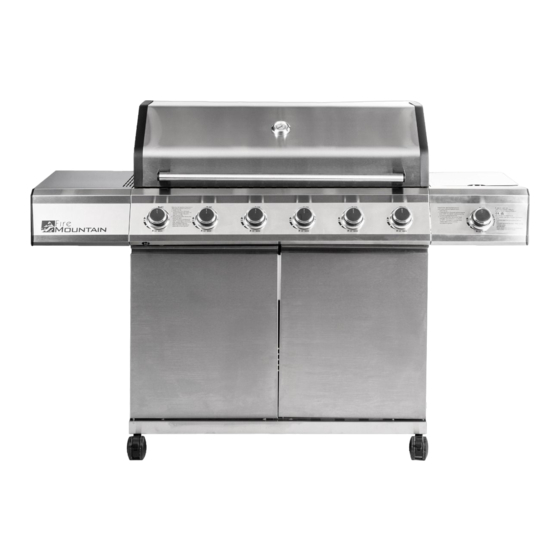
- Page 1 6 Burner + Side Burner BBQ PLEASE READ AND KEEP THESE INSTRUCTIONS FOR FUTURE USE SAP Code: JB03705601 For further assistance, other products and more, join us at: Website: www.firemountain.co.uk Facebook: www.facebook.com/fire-mountain...
- Page 2 Thank you for choosing our Fire Mountain 6 Burner + Side Burner BBQ. Please read this user manual carefully and keep it for future reference. If you need any assistance, please contact our customer service team on the details provided on the back page of this manual.
- Page 3 1. Technical data Model: K116BFI3S...
-
Page 4: Exploded View
2. Exploded View... -
Page 5: Single Part List
3. Single part list appellation appellation Lid set Thermometer Lid handle Warming rack Iron casting cooking grill Iron casting cooking grill 415x185mm 415x240mm Flame tamer Greasy tray Holder of Greasy cup Greasy cup Pot holder Side burner set Right side table Side burner knob decoration strip supporting metal of right... -
Page 6: Fixing Elements
4. Fixing elements 5 . Assembly Instructions Make sure your grill is assembled properly. Detailed assembly instructions are packed with each grill giving specific assembly procedures for each model. Follow these instructions carefully to ensure the correct and safe assembly of the grill. Caution: Although we take every effort to ensure that the assembly process is as easy as possible, it is inherent with fabricated steel parts that corners and edged can cause cuts if improperly handled during assembly procedures. - Page 18 6. Preparation 6.6ddd You will need to purchase a5kg LPG gas bottle and the pressure regulator should correspond to the pressure and gas category of the appliance, which can be obtained from your nearest Gas Retailer. The regulator should be comply with EN16436 0r EN16129 and EN16436 with current version and national regulation.
-
Page 19: Installation
7. Installation After purchasing your gas bottle you will then be ready to set it up with your gas grill. a) When changing the gas bottle which shall be carried out away from any source of ignition. Position the gas bottle at the side of your gas grill, not underneath, keeping in mind that the bottle must be kept away from heat and in a safe position. -
Page 20: Before Testing
How to disconnect a gas bottle a) Except for twin-cylinder installations with a changeover valve, turn off the gas tap if fitted to the appliance. Wait until the burner and pilot light have gone out. For installations with a changeover valve, it is only necessary to switch off the empty cylinder. - Page 21 Install Regulator Hose Install Gas Tank & Regulator Hose Do not use the grill until all connections have been checked and do not leak. ALWAYS CHECK FOR LEAKS AFTER EVERY GAS TANK CHANGE Check all gas supply fittings for leaks before each use. It is handy to keep a spray bottle of soapy water near the shut-off valve of the gas supply line.
-
Page 22: Warning And Safety Points
8. Warning and Safety points Please read the following points before using your gas grill: a) Read the instructions before using the appliance. Please follow all assembly instructions in this manual; if instructions are not followed it may cause problems in use. -
Page 23: Safety Precautions
WARNING: The Handle Black Area (See Above Picture for Reference) Will Become Hot When the Gas grill In Use, BE CAREFUL! Do Not Touch The Black Area. “Since this barbecue has no restriction in the emission of unburned gas, this barbecue must be installed and/or used outdoors or in an amply ventilated area. -
Page 24: Lighting Instructions
10. Lighting Instructions Caution: The lid must be open when lighting the burner! Do not stand with your face directly over the gas grill when lighting it. Your gas grill will have following method of ignition: Pilot Gas Control Ignition: With all gas controls on the Gas grill in the “OFF”... - Page 25 11. Storage Your Gas Bottle must be stored outdoors in a well ventilated area and must be disconnected from your gas grill when not being used. Ensure that you are outdoors and away from any sources of ignition before attempting to disconnect your gas bottle from your gas grill.
-
Page 26: Cleaning Instruction
12. Cleaning Instruction Maintenance is recommended that every 90 days for your gas grill, but it is absolutely necessary to perform maintenance at least once a year. By doing so you will extend the life of your gas grill. Your gas grill is easy to clean with minimum effort, just follow these helpful hints for cleaning convenience. - Page 27 13. BBQ Safety Hints 11. Gas grill Safety Hints Stand your gas grill on a safe level surface, away from inflammable items such as wooden fences or overhanging tree branches. Never use your gas grill indoors! Once lit do not move your gas grill or leave it unattended. Keep children and pets at a safe distance from the gas grill.
- Page 28 15. Change main burner 1.First ,find out which main burner has been broken, if it’s not the far left one(if it’s the far left one, just remove the broken one), remove from the far right burner, take out the circlip, take out the main burner, remove the transmission frame; If the machine do not have transmission frame(like American version ), just remove the main burner, no need to take step 2.
- Page 29 Customer Services: If you would like further advice or information on your product, ensure you have the SAP code ready and please get in touch with us at Fire Mountain on the contact options below: SAP Code: JB03705601 Phone: 0330 002 1177 (Mon –...


Need help?
Do you have a question about the K116BFI3S and is the answer not in the manual?
Questions and answers