Table of Contents
Advertisement
Quick Links
Advertisement
Table of Contents

Related Manuals for SENAO ECB7510


Summary of Contents for SENAO ECB7510
- Page 1 ECB7510 Dual Band Concurrent AP (IEEE 802.11 a/b/g/n) User Manual...
- Page 2 Revision History Version Date Notes 2010/8/22 Initial...
-
Page 3: Table Of Contents
ECB7510 P ..........................6 LACEMENT 2.3. LAN & WAN............................ 7 ETUP 2.4. PC N XP) ..................8 ETWORK DAPTER SETUP INDOWS 2.5. ECB7510 ........................... 10 NITIAL ETUP SYSTEM................................12 3.1............................12 PERATION 3.2................................ 13 TATUS 3.3..............................15 CHEDULE 3.4. - Page 4 TOOLS ................................42 8.1............................. 42 ETTING 8.2..............................43 IAGNOSIS NETWORK CONFIGURATION EXAMPLE....................44 9.1............................44 CCESS OINT 9.2............................45 LIENT RIDGE 9.3. WDS R ............................46 EPEATER 9.4..............................47 EPEATER – EU D ......................48 UROPE ECLARATION OF ONFORMITY...
-
Page 5: Introduction
Dual CPU operates work simultaneously therefore users can enjoy gaming, music or HD video on 5GHz band while web-surfing or emailing on 2.4Ghz. It also provides with built-in 1-port full-duplex 10/100/1000 Fast Switch. ECB7510 is definitely the optimal choice for middle & small businesses. -
Page 6: Key Features
1.2. Key Features Features Advantages Less interference and better 2.4Ghz & 5GhzDual Band Concurrent performance Incredible Data Rate up to Heavy data payloads such as 300+300Mbps** MPEG video streaming User Ethernet cable as power 802.3at PoE Support supply medium SNMP Perfect for network management Multiple SSIDs Enhanced management among... -
Page 7: Package Contents
Open the package carefully, and make sure that none of the items listed below are missing. Do not discard the packing materials, in case of return; the unit must be shipped back in its original package. 1 * Dual Band Concurrent AP (ECB7510) 1 * Power Adapter 2.* Dual Band Antennas... -
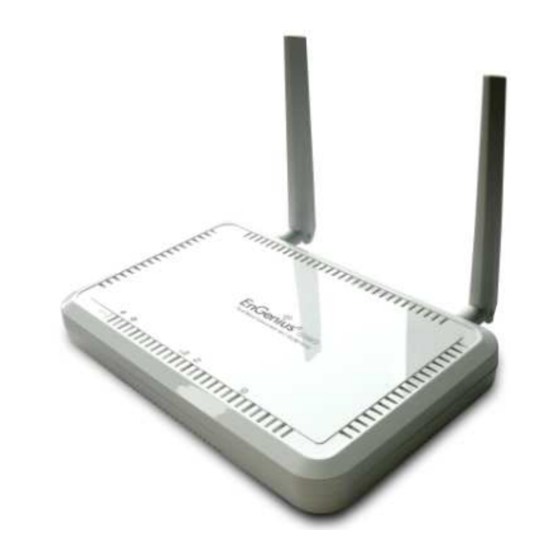
Page 8: Product Layout
1.4. Product Layout Physical Interface LAN: 1 * 10/100/1000 Fast Ethernet RJ-45 Reset Button DC Jack Power push button (Wi-Fi Protected Setup) SMA connectors LEDs Status WPS LED Power/ Status WLAN 2.4GHz WLAN 5GHz Ethernet... -
Page 9: Installation
2. Installation 2.1. Network + System Requirements To begin using the ECB7510, make sure you meet the following as minimum requirements: PC/Notebook. Operating System – Microsoft Windows 7/XP/2000/VISTA 1 Free Ethernet port. Wi-Fi card/USB dongle (802.11 a/b/g/n) – optional. PC with a Web Browser (Internet Explorer, Safari, Firefox, Opera etc.) -
Page 10: Ecb7510 Placement
2.2. ECB7510 Placement You can place ECB7510 on a desk or any other flat surface, or you can mount it on a wall. For optimal performance, place your device in the center of your office (or your home) in a location that is away from any potential source of interference, such as a metal wall or microwave oven. -
Page 11: Setup Lan & Wan
2.3. Setup LAN & WAN Ethernet connection: Connect Ethernet cable between your PC/Notebook LAN port & LAN port on ECB7510. -
Page 12: Pc Network Adapter Setup (Windows Xp)
2.4. PC Network Adapter setup (Windows XP) Enter [Start Menu] select [Control panel] select [Network]. Select [Local Area Connection]) icon=>select [properties]... - Page 13 Select [Internet Protocol (TCP/IP)] =>Click [Properties]. Select the [General] tab. Select both [Use the following IP address] and [Use the following DNS server addresses]. Note: ECB7510 does not support DHCP server so it will not assign any IP addresses to any clients.
-
Page 14: Initial Setup Ecb7510
2.5. Initial Setup ECB7510 ECB7510 provides web-interface for configuration through web browser, such as Internet Explorer, Firefox or Safari. Open your browser (e.g. Internet Explorer). Type in http://192.168.1.1 in the address bar and press [Enter]. The webpage will ask you to enter Username and Password. Please Use [admin] for both Username and Password. -
Page 16: System
3. SYSTEM 3.1. Operation Mode You are allowed to change the operation mode for both 2.4GHz and 5GHz radios. However, there are combinations that are not allowed. Please refer the following table for the mode combinations. Those that marked Yes are considered legal settings. Operation Mode Matrix Disable Disable... -
Page 17: Status
3.2. Status This page allows you to monitor the current status of your AP. You can use the status page to quickly review if you have any updated firmware available (bug fixes, updates). You can navigate from this page with a few interesting options for reminding or skipping this page forever &... -
Page 19: Schedule
3.3. Schedule In the schedule section, you can review your schedule such as Firewall and Power Saving feature. If you would like to modify/add/remove the schedule, you must go to Management->Schedule Setting to do so. -
Page 20: Event Log
3.4. Event Log View operation event log. This page shows the current system log of the AP. It displays any event occurred after system start up. At the bottom of the page, the system log can be saved <Save> to a local file for further processing or the system log can be cleared <Clear>... -
Page 21: Monitor
3.5. Monitor Show histogram for network connection on Ethernet, WLAN1 & WLAN2. Auto refresh keeps information updated frequently. Note: You can click on the [Detail] to view the statistic data generated by Weekly and Monthly. -
Page 22: Network Diagram Example
Access Point wirelessly and surf internet whenever you want. Using Site Survey to scan all the Access Point within the range and configure its SSID and Security Password to associate with it. Connect you station to the LAN port of the ECB7510 via Ethernet. Another radio can still operate as an Access Point. -
Page 23: Wds Mode
4.3. WDS mode ECB7510 is a Dual Band Concurrent Access Point. It can operate the Access Point mode and WDS mode at the same time. Therefore, the two operate can be combined as the WDS repeater mode. It can have Repeater’s ability and it also has the Access Point’s capabilities. -
Page 24: Wireless 2.4G & 5G
5. WIRELESS 2.4G & 5G ECB7510 is a dual band concurrent product, therefore two wireless radio configurations are provided. Both radios share the same features except for open band and available channels under “Basic” section. 5.1. Status This page shows the current wireless status such as your SSID, security type and BSSID. - Page 25 2.4 GHz(B/G): Either an 802.11b or an 802.11g wireless devices are in your environment. 2.4 GHz(N): If all of your clients are 802.11n, select this one. 2.4 GHz(B/G/N): Either 802.11b, 802.11g, or 802.11n wireless devices are in your environment. Band 5G (Only available in Radio 2) 5 GHz (A): If all of your clients are 802.11a, select this one.
-
Page 26: Mode: Cb
5.3. Mode: CB Radio: You can turn on/off wireless radio. If wireless Radio is off, you cannot associate with AP through wireless. Band: You can select the wireless standards running on your network environment. Band 2.4G: 2.4 GHz(B): If all of your clients are 802.11b, select this one. 2.4 GHz(G): If all of your clients are 802.11g, select this one. -
Page 27: Mode: Wds
5.4. Mode: WDS Wireless Distribution System, a system that enables the wireless interconnection of access point, allows a wireless network to be expended using multiple access points without a wired backbone to like them. Each WDS APs need setting as same channel and encryption type. -
Page 28: Mode: Repeater
5.5. Mode: Repeater Radio: You can turn on/off wireless radio. If wireless Radio is off, you cannot associate with AP through wireless. Band: You can select the wireless standards running on your network environment. Band 2.4G: 2.4 GHz(B): If all of your clients are 802.11b, select this one. 2.4 GHz(G): If all of your clients are 802.11g, select this one. -
Page 29: Advanced
5.6. Advanced This tab allows you to set the advanced wireless options. The options included are Authentication Type, Fragment Threshold, RTS Threshold, Beacon Interval, and Preamble Type. You should not change these parameters unless you know what effect the changes will have on the router. - Page 30 CTS Protection: It is recommended to enable the protection mechanism. This mechanism can decrease the rate of data collision between 802.11b and 802.11g wireless stations. When the protection mode is enabled, the throughput of the AP will be a little lower due to a lot of frame-network that is transmitted.
-
Page 31: Security
If you are building a public wireless network, enabling this feature is recommended. Disabling “Broadcast ESSID” can provide better security. Encryption: When you choose to disable encryption, it is very insecure to operate ECB7510. - Page 32 WEP Encryption When you select 64-bit or 128-bit WEP key, you have to enter WEP keys to encrypt data. You can generate the key by yourself and enter it. You can enter four WEP keys and select one of them as a default key. Then the router can receive any packets encrypted by one of the four keys.
- Page 33 Click <Apply> at the bottom of the screen to save the above configurations. You can now configure other sections by choosing Continue, or choose Apply to apply the settings and reboot the device. Enable 802.1x Authentication IEEE 802.1x is an authentication protocol. Every user must use a valid account to login to this Access Point before accessing the wireless LAN.
- Page 34 WPA Pre-Shared Key Encryption Wi-Fi Protected Access (WPA) is an advanced security standard. You can use a pre-shared key to authenticate wireless stations and encrypt data during communication. It uses TKIP or CCMP (AES) to change the encryption key frequently. So the encryption key is not easy to be cracked by hackers.
-
Page 35: Filter
5.8. Filter This wireless router supports MAC Address Control, which prevents unauthorized clients from accessing your wireless network. Enable Wireless MAC Filtering: Enable the wireless access control function Adding an address into the list Enter the "MAC Address" and "Comment" of the wireless station to be added and then click <Add>. -
Page 36: Wps (Wi-Fi Protected Setup)
5.9. WPS (Wi-Fi Protected Setup) WPS is the simplest way to establish a connection between the wireless clients and the wireless router. You don’t have to select the encryption mode and fill in a long encryption passphrase every time when you try to setup a wireless connection. You only need to press a button on both wireless client and wireless router, and the WPS will do the rest for you. - Page 37 Client-side Setup WPS via PIN: You can fill-in the PIN code of the wireless device and press the button to start the WPS process. The router will wait for the WPS request from the wireless device within 2 minutes.
-
Page 38: Client List
5.10. Client List This WLAN Client Table shows the Wireless client associate to this Wireless Router. -
Page 39: Wmm
5.11. -
Page 40: Network
6. Network 6.1. Status The status page shows the current LAN settings. -
Page 41: Lan
6.2. LAN Configure you LAN settings by changing IP address, subnet mask, default gateway and DNS settings. -
Page 42: Management
7. Management 7.1. Admin You can change the password required to log into the broadband router's system web-based management. By default, the password is: admin. Passwords can contain 0 to 12 alphanumeric characters, and are case sensitive. Old Password: Fill in the current password to allow changing to a new password. New Password: Enter your new password and type it again in Repeat New Password for verification purposes Idle Timeout: Define the automatically log out period. -
Page 43: Snmp
7.2. SNMP SNMP Active: Enable/Disable SNMP function from drop-down list. SNMP Version: EOC7510 supports SNMP version v1 and v2c. Read Community: Setup the read only community password. Set Community: Setup the read and write community password. System Location: Define the device location. System Contact: Define the device contact information. -
Page 44: Firmware
7.4. Firmware This page allows you to upgrade the router’s firmware. To upgrade the firmware of your Broadband router, you need to download the firmware file to your local hard disk, and enter that file name and path in the appropriate field on this page. You can also use the Browse button to find the firmware file on your PC. -
Page 45: Reset
7.6. Reset You can reset the AP when system stops responding correctly or stop functions. -
Page 46: Tools
8. Tools 8.1. Time Setting The Time Zone allows your router to reference or base its time on the settings configured here, which will affect functions such as Log entries and Firewall settings. Type: Define the time is Synchronize with PC or from NTP server. Time Zone: Select the time zone of the country you are currently in. -
Page 47: Diagnosis
8.2. Diagnosis This page could let you diagnosis your current network status. -
Page 48: Network Configuration Example
Configure VLAN ID in your wireless device if available. Step4 Select correct authentication type and password. Caution: ECB7510’s Access Point Mode does not provide DHCP server so the Wireless Client IP address must configure manually at the same subnet in Local Area Network... -
Page 49: Client Bridge
Router to join the network. 192.168.1.2 192.168.1.1 192.168.1.10 Internet Access Point / Client ECB7510 Wireless Router Please refer to the previous section to check Access point’s configuration. Client Bridge Step1 Login to the web-based configuration interface with default IP 192.168.1.1... -
Page 50: Wds Repeater
Use this feature to link multiple APs in a network, All clients associated with any APs can communicate each other like an ad-hoc mode. Client 5GHz 5GHz Client 192.168.1.1 192.168.1.2 ECB7510 ECB7510 WDS 2.4GHz 5GHz 5GHz Client Client Client Client Please refer to the previous section to check Access point’s configuration. -
Page 51: Repeater
Configure VLAN ID in your wireless device if available. Step4 Select correct authentication type and password. Caution: Wireless Client IP address must configure manually at the same subnet in Local Area Network or enable DHCP server of ECB7510 to retrieve IP automatically. -
Page 52: Europe - Eu Declaration Of Conformity
Europe – EU Declaration of Conformity This device complies with the essential requirements of the R&TTE Directive 1999/5/EC. The following test methods have been applied in order to prove presumption of conformity with the essential requirements of the R&TTE Directive 1999/5/EC: EN60950-1:2006 A11:2009+A1:2010 Safety of Information Technology Equipment EN50385 : 2002... - Page 53 Bestimmungen der Richtlinie 1999/5/EG befindet. Eesti Käesolevaga kinnitab [tootja nimi = name of manufacturer] seadme [seadme tüüp = [Estonian] type of equipment] vastavust direktiivi 1999/5/EÜ põhinõuetele ja nimetatud direktiivist tulenevatele teistele asjakohastele sätetele. English Hereby, [name of manufacturer], declares that this [type of equipment] is in compliance with the essential requirements and other relevant provisions of Directive 1999/5/EC.
- Page 54 Federal Communication Commission Interference Statement This device complies with Part 15 of the FCC Rules. Operation is subject to the following two conditions: (1) This device may not cause harmful interference, and (2) this device must accept any interference received, including interference that may cause undesired operation. This equipment has been tested and found to comply with the limits for a Class B digital device, pursuant to Part 15 of the FCC Rules.
Need help?
Do you have a question about the ECB7510 and is the answer not in the manual?
Questions and answers