Table of Contents
Advertisement
Quick Links
Advertisement
Table of Contents

Subscribe to Our Youtube Channel
Related Manuals for GME GX600DB


Summary of Contents for GME GX600DB
- Page 1 24 pp folded once to 148 x 210 mm stitched with 2 wires Print CMYK on 130 gsm gloss art GX600D VHF MARINE RADIO PRINTED IN ENGLISH INTERNATIONAL: 0168 ! USA : FCC ID : TXJGX600D CANADA : IC 7332A-GX600D AUSTRALIA: I N S T R U C T I O N M A N U A L...
-
Page 2: Table Of Contents
Privacy WARNING: SAFETY INFORMATION • I nformation overheard but not intended for you cannot The GX600D is a radio transmitting device. lawfully be used in any way. • W hen transmitting, keep any part of your • Indecent or profane language is prohibited. head or body more than 1.5 m from Radio Licenses the antenna. Ship Station License • D o not transmit near electrical blasting When your craft is equipped with a VHF FM radio, you must equipment or in explosive atmospheres. have a current radio station licence before using the radio. It is unlawful to operate a ship station which is not licensed. • D o not allow children to operate a radio transmitter unsupervised. -
Page 3: Introduction
INTRODUCTION Certificate of Proficiency (MROCP), which covers the Congratulations. You have just purchased one of the most operation of both VHF and MF/HF equipment. technically advanced VHF marine radios in the world. Many TAFEs and marine organisations offer courses leading The GME GX600D is a VHF FM radio designed to to examination for the MROVCP and MROCP although operate in the 156 - 163 MHz marine band. such courses are not compulsory. Persons wishing to obtain The GX600D has a number of enhanced features including the MROVCP or MROCP should first purchase a copy of fully user programmable Channel Scanning, Dual Watch the Maritime Radio Operator Handbook which is essential and Triple Watch functions, a programmable ‘Instant’ reading for every boat owner in Australia. channel memory and adjustable back lighting. In addition it The Australian Maritime College (AMC) provides the marine incorporates Digital Selective Calling and supports position examination and certificate service on behalf of the ACA. reporting when connected to a GPS receiver. The AMC can provide the details of organisations and With its compact size and IP67 design it can easily be individuals offering courses and or conducting exams. -
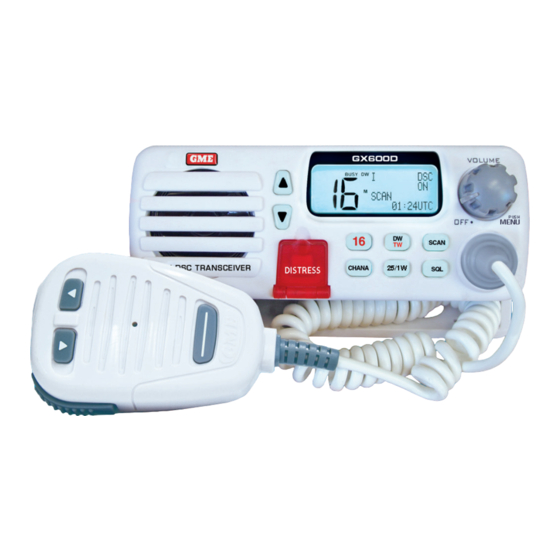
Page 4: Range
USER MMSI one DSC call. Group MMSI’s are usually issued by a club or organisation for use by members participating in group To use the DSC feature you must be registered with the activities (such as yacht racing etc). appropriate licensing authority (AMSA in Australia) who will issue you with your unique user MMSI number. You can RANGE then enter this into your GX600D to enable DSC operation. The range of VHF transmissions depends on antenna height, Having a registered user MMSI means you can be identified transmitter power and the terrain over which the signals much quicker in an emergency. pass. Ship to ship communications should be possible Your GX600D is shipped from the factory without a user over at least 8 nautical miles and up to about 27 nautical MMSI number. It is up to the user to obtain a valid MMSI miles. Ship to shore ranges will often be greater due to the from the appropriate licensing authority and enter the MMSI increased height of the shore antenna and communications into the radio to enable DSC operation. of 25 to 50 nautical miles are possible. GROUP MMSI The Group MMSI is used for DSC Group Calls. A Group Call provides a method for all vessels with a common interest (eg: a yacht club or a fishing fleet) to be contacted with OPERATION CONTROLS C hannel Channel LCD Volume Down Display Speaker Scan Microphone DSC Distress Channel 16 Channel Hi/Low Dual Watch/ Squelch... - Page 5 01. They are selected in the usual way using the Pressing 16 will cancel the keylock and revert to Channel keys. Weather channels are identified by the WX icon on 16 on high power. the display. Pressing DISTRESS will cancel the keylock and activate Private Channels the distress menu. Up to 20 private channels can be programmed into TRANSMITTING the GX600D for organisations that have been officially To Transmit: allocated special frequencies. Private channels are programmed on application by your nearest GME branch Press the Push to Talk (PTT) switch on the microphone. office. All requests for private channel programming must Hold the microphone about 5 - 8 cm from your face and be supported by ACMA (Australian Communications and speak at a normal voice level. The microphone is quite Media Authority) documentation. sensitive so it is not necessary to raise your voice or shout. Release the PTT when you have finished talking. If private channels have been installed they will appear as A0 – A9 and B0 – B9 above CH 88. PTT transmissions are disabled on Channel 70. NOTE: SQUELCH Time-out Timer...
- Page 6 To reset the timer and re-enable the transmitter: • S electing Channel 16 using the 16 key will reset ALL channels to High power. Release the PTT switch and wait 10 seconds. During this time the radio will display ‘TX INHIBITED FOR 10 SECS’. • S electing Channel 16 using the keys resets only channel 16 to High Power but retains any Low power Even if the PTT switch is released during the 10 NOTE: setting on the other channels. second warning period, the PTT will still be inhibited for • T o specifically use Low power on Channel 16, select 10 seconds after the PTT is released. channel 16 then briefly press the 25/1W key to select CHANNEL 16 low power. ‘LO’ will be displayed. Briefly press the 16 key to switch straight to Channel 16. WORKING CHANNEL MEMORY All previous control settings (such as scanning or low The GX600D has a dedicated ‘working channel’ memory transmitter power) will be cancelled and the radio will...
- Page 7 During this time the PTT may be pressed for normal To change the selected channel at any time: transmissions on Channel 16. Once channel 16 has become Press the keys. inactive for 5 seconds the Dual Watch function will resume. To cancel Triple Watch If a signal appears on the selected channel: Briefly press the TW key to switch to Dual Watch mode. Scanning will pause on the selected channel BUT Channel A high beep will be heard 16 will continue to be monitored every 2 seconds. During this time the PTT may be pressed for normal transmissions Press and hold the TW key to return to normal operation. on the selected channel (note that monitoring of Channel A low beep will be heard.
-
Page 8: Digital Selective Calling (Dsc)
To Transmit on Channel 16 while Triple Watching: If the scan is paused on a busy channel and you wish to transmit on that channel: Press the 16 key. Triple Watch will be cancelled and the radio will switch straight to Channel 16. Now press the Simply press the PTT switch. Scanning will be cancelled PTT and transmit in the usual way. When your conversation and the radio will remain on that channel. has ended, press and hold the TW key to resume Triple NOTE: if the PTT is pressed at any other time while Watching. scanning, a low beep will be heard and the PTT will SCANNING be ignored. The Scan function allows the GX600D to scan through To switch immediately to Channel 16: a series of user selected channels looking for activity. - Page 9 can also send your position to another vessel or request 5. W hen the countdown is complete, the DISTRESS call will their position. DSC has a number of advantages over be sent on Channel 70 (whether CH70 is busy or not). voice calls including the ability to handle increased radio After the distress call is sent, the radio switches to CH16 traffic and the automatic identification of your ship and its and the display shows ‘DISTRESS’ and ‘Wait Ack …’ to position in the event of an emergency. indicate it is now in the distress mode and is waiting for an acknowledgement from another radio. DSC is part of the Global Maritime Distress and Safety System (GMDSS) and will eventually replace audible DISTRESS: listening-watches on distress frequencies. It will also be used to announce routine and urgent maritime safety WAIT ACK . . . information broadcasts to other ships in the area. DSC calls are sent and received on CH70. The GX600D While in distress call mode, the GX600D is set on CH16 has two receivers, one of which is dedicated to CH70. and the user cannot change channels. The keys on the Therefore, regardless of which channel you are operating microphone are disabled and all front panel keys except for on, the GX600D will not miss a DSC call.
- Page 10 Press the – key again to return to Normal operating mode c. P ress the CALL button to move to the next digit on CH16. position. Repeat until all 9 digits have been entered. MAKING ALL OTHER DSC CALLS NOTE: To correct an error during entry, press the CALL button repeatedly to move the cursor position to the All other DSC calls - apart from distress calls - are made incorrect digit then use the or keys to change the digit using the CALL button on the microphone. at that location. DSC MENU NAVIGATION 4. O nce the correct MMSI has been entered or selected, To access the DSC Call menu: press the CALL button. ‘SELECT CHNL’ is displayed. Press the CALL button on the microphone. The ‘CALL’ Menu 5. S elect the channel to be used for voice communication will be displayed providing a range of DSC call options.
- Page 11 If an acknowledgment is received but the other GROUP CALL radio is unable to comply: A Group Call is used to contact all ships that have the same This indicates the called vessel’s radio has received and Group MMSI. All ships receiving a Group call will change to acknowledged your call, but could not change to the the specified channel. For example this could be used requested channel. This could mean the called vessel’s radio to alert all yachts in a race to announce a change in the is configured for manual reply or is in a mode where the race conditions. operator does not want the channel to change. To make a Group Call: The radio displays: CALL FROM: 1. Press the CALL button SIRIUS 2. S elect ‘GROUP’ and press the CALL button again. The ACKNOWLEDGE Group MMSI used is the one programmed into your NOT COMPLY radio (see Configuration Menu).
- Page 12 iii. Manually enter the vessel’s MMSI as follows; If the radio you are calling does not have a GPS NOTE: connected or the GPS signal is not valid, the GPS position a. P ress and hold the CALL button to enter the data will be invalid. In that case, the position used will be EDIT mode. the manually set position. If the manual position has not b. U se the or keys to enter the first digit been set or hasn’t been updated within 23 hours, then of the vessel’s MMSI number. position data is sent as: ‘N 99`99 E 999’99’ to indicate position data is invalid. When this is received on the c. P ress the CALL button to move to the next GX600D it will be displayed as: digit position. Repeat until all 9 digits have been entered. CALL FROM: CALL FROM: SIRIUS SIRIUS NOTE: To correct an error during entry, press the CALL POSITION S _ _° _ _._ _’ button repeatedly to move the cursor position to the _ _:_ _ UTC E _ _ _°...
- Page 13 If the GX600D is configured for Manual TX the radio b. U se the or keys to enter the first digit NOTE: will not change channel and the acknowledge call will be of the vessel’s MMSI number. ‘Unable to comply’. c. P ress the CALL button to move to the next digit position. Repeat until all 9 digits have To cancel the alarm, press any key. The radio returns to been entered. ‘Normal’ mode on the current channel. Receiving an All Ships Call To correct an error during entry, press the CALL NOTE: button repeatedly to move the cursor position to the When an All Ships call is received, the GX600D switches to incorrect digit then use the or keys to change the digit CH16 and generates an audible All-Ships Urgency/Safety at that location. alarm. The Display shows: ALL SHIPS: 4. O nce the correct MMSI has been entered or selected, SIRIUS press the CALL button. ‘SEND CALL’ is displayed. URGENCY 5. Press the CALL button to send.
-
Page 14: Configuration Menu
If a chartplotter is connected to your GX600D, the position • W hen entering characters use the or keys to select of the calling ship is displayed on the chartplotter. the character then press the CALL button to move to the next character position. Press any key to clear the display. The radio returns to Normal mode on the current channel. MENU OPTIONS ADDRESS BOOK CONFIGURATION MENU The address book is used to store the names and user The GX600D is easily configured using a menu system. The MMSI’s of other vessels. This makes it easy to identify menu allows access to the following options: incoming DSC calls and to make DSC calls to those stations. • A ddress Book: Add, Edit and Erase frequently called To select the Address Book: stations in your address book 1. F rom the main menu, press the or keys to select • C all Log: Keep track of incoming calls and return calls ‘ADD BOOK’... - Page 15 To EDIT a contact stored in the Address Book: Viewing the Call Logs: 1. S elect ‘EDIT’ from the Address Book menu and press the 1. S elect ‘CALL LOG’ from the main menu and press the CALL button. A list of stored names is displayed. CALL button. 2. P ress the or keys to scroll to the desired name then 2. S elect either ‘ROUTINE’ or ‘DISTRESS’ from the Call Log press the CALL button to select it. The Name and MMSI menu and press the CALL button. of the selected item is displayed with the flashing cursor 3. T he most recently logged call will be displayed as positioned on the first character.
- Page 16 • Auto Channel 2. E nter the name using the or keys to select each character then press the CALL button to move to the • Pos Reply next character position. • Indiv Reply 3. W hen finished press and hold the CALL button. The • UIC MMSI will be automatically transferred from the call list to the Address Entry page. • Chnl Name 4. P ress and hold the CALL button again to confirm and • NMEA-1 store the new contact in the address book. ‘Saving’ will • NMEA-2 be displayed as the address is stored. Key Beep To Erase The Displayed Entry From The Call Log: Changes the volume of the beeps that are heard when the 1. S elect ‘Erase’ from the Address book menu and press the...
- Page 17 Position Reply When the USA Channel Set is selected, weather NOTE: channels will be accessible below Channel 01. The Position Reply function determines whether your radio will automatically send its GPS position to another Channel Name vessel whenever a Position Request is received. (To use Use the Channel name function to apply useful names this feature your GX600D must have a GPS connected or a to channels to help identify their usage (e.g. a club/ manual GPS position must have been entered). working channel). 1. S elect ‘POS REPLY’ from the Setup menu then press the 1. S elect ‘CHNL NAME’ from the Setup menu then CALL button. |press the CALL button. 2. Use the or keys to select ‘Auto’ or ‘Manual’. 2. U se the or keys to select the first character of – S elect ‘Auto’ to allow your position to be sent your channel name.
- Page 18 POSITION The time will be erased after 23 hours or when the NOTE: radio is switched off. Allows manual entry of the latitude and longitude of your vessel’s location. This allows the DSC function to transmit TIME OFFSET your position coordinates in an emergency. The position Lets you set the time difference between UTC time and your must be entered in Degrees, Minutes and Decimal/Minutes local time. This will allow the radio to display local time. A (DMM). list of Time offsets is in the back of this manual. To enter your position To set the Time Offset: 1. S elect ‘POSITION’ from the GPS Menu then press the 1. F rom the ‘GPS SETUP’ menu, select ‘TIME OFFSET’ then CALL button. press the CALL button. 2. Use the or keys to select ‘N’ (North) or ‘S’ (South). 2. U se the or keys to set the time offset from -12:00hrs to +13:00hrs in 30 minute segments.
-
Page 19: Connecting A Gps Receiver
‘un-programmed’. It is up to the user to obtain a valid MMSI Output using the interface settings on your GPS, Plotter or from the appropriate licensing authority and enter the MMSI connected device. into the radio to enable DSC operation. NMEA Input from GPS: GPGLL, GPGAA, GPRMC, It is a requirement of the regulations that the IMPORTANT: GPGNS (v2.x) User MMSI can only be entered ONCE. If there is a need to NMEA Output to plotter: GPDSC (v2.x) GPDSE (v3.x) change the MMSI more than once you will need to contact your authorized GME service centre for advice. For this reason take special care when entering your User MMSI number to ensure it is entered correctly before saving it. Yellow NMEA Out Blue To enter the 9 digit User MMSI number issued to NMEA In you by your local authority: Common (Gnd) Black 1. S elect ‘USER MMSI’ from the Main Menu then press the CALL button. -
Page 20: Installation
• T he microphone and all controls should be readily INSTALLATION accessible and the loud speaker easily heard from the normal steering position. An extension speaker (SPK600) NOTE: Your GX600D is designed for connection to negative can be installed if required. earth electrical systems only. • F or best results connect the battery leads directly to the Selecting a location vessel’s battery. If you need to extend the power leads to It is advisable to spend a little time selecting the best reach the battery use heavy insulated automotive wire of location for your GX600D. The mounting bracket can be at least #10 gauge. rotated above, below or behind the radio enabling the radio • C omponents and currents in the radio create magnetic to be mounted in a wide range of locations. In addition, fields. To avoid interference to ships compasses or using the optional flush mounting kits (MK600, MK001, autopilot sensors, the GX600D should be mounted at MK002) the GX600D can be mounted directly in a panel or least 300 mm from such equipment. dashboard. The flush mounting kits allow for installation or replacement of any existing VHF radio. INSTALLING THE UNIT UPRIGHT OR OVERHEAD MOUNTING After choosing your location, hold the unit with the mounting bracket attached into the desired position and Keep the following points in mind when choosing a location. - Page 21 Rear Panel Connections DC Power Cable Extension Speaker Socket NMEA 1 NMEA 2 Gimbal Knob Antenna Socket Mounting Bracket DC Connections Noise Suppression Connect the RED power lead to the Positive (+) side of the The inherent design of VHF FM radios results in a high battery or to an accessory point in the vessel’s fuse box. level of resistance to ignition and electrical interference. However in some installations it may be necessary to Connect the BLACK power lead to the Negative (-) side of take additional steps to help reduce or eliminate noise the battery or to a ground point in your vessel’s fuse box. interference. During installation, try to route the DC battery leads, the antenna lead or any accessory wires away from NOTE: The RED power lead is fitted with a 10 Amp fuse. the engine compartment, ignition or alternator wiring. If the If the fuse blows, use only a standard 10 Amp (3AG type) noise continues, it may be necessary to fit a suppression kit. fuse as a replacement. Use of higher rated fuses or ‘slow Contact your local marine dealer for more information. blow’ types could result in damage to your radio which would void the warranty. Similarly, if the interference you are experiencing is from other electronic equipment such as a depth sounder, try to Connect the antenna cable to the rear antenna socket on keep the depth sounder’s DC leads and transducer cable the radio using a PL259 coaxial connector. well away from your GX600D’s wiring. If required, an SPK600 extension speaker may be installed near the steering position or outside the cabin to improve the reception clarity in those areas. The SPK600 is specifically designed for the GX600D with a watertight...
-
Page 22: Specifications
SPECIFICATIONS ELECTRICAL Conducted Spurious Emission: < -70 dBm General Current Consumption: • Muted: < 200 mA Complies with: AS/NZS4415.1.2003 • Full volume: 700 mA Frequency Range: 155 – 165 MHz DSC RECEIVER Channel Spacing: 25 kHz Modulation: FM IF frequencies: • 1st: 38.85 MHz • 2nd: 455 kHz Channels Sets: • International, USA, Canada • Private – 20 Channels ( Note: all DSC limits are for 10e-2 BER) • USA Weather Channels Sensitivity: -120 dBm Supply Voltage: • 12 volt nominal Spurious Rejection: > 75 dB • 10.5 – 15.6 volt max. range Intermodulation • Negative Earth Rejection: > 73 dB Frequency Stability: ±... -
Page 23: Warranty
2.3 T o the extent permitted by law, our sole liability for breach to the relevant instruction manual; or of a condition, warranty or other obligation implied by law ( f) g oods where the serial number has been removed or is limited made illegal. (a) i n the case of goods we supply, to any one of the 4. Warranty period following as we decide – 4.1 W e provide the following warranty on GME and Kingray (i) t he replacement of the goods or the supply of products. No repair or replacement during the warranty equivalent goods; period will renew or extend the warranty period past the (ii) t he repair of the goods; period from original date of purchase. (iii) t he cost of repairing the goods or of acquiring equivalent goods;... - Page 24 A division of: Standard Communications Pty. Ltd. HO: Locked bag 2086, North Ryde, NSW 1670, Australia. T: +61 (0)2 9844 6666 F: +61 (0)2 9844 6600 Adelaide: Unit 1, 14 Phillips St, Thebarton, SA 5031 Perth: Unit 1, 10-12 Harvard Way, Canning Vale, WA T: (08) 8234 2633 F: (08) 8234 5138 6155 T: (08) 9455 5744 F: (08) 9455 3110 Brisbane: Unit 1, 89-101 Factory Rd, Oxley, QLD 4075 Sydney: Unit B, 22-24 College St, Gladesville, NSW 2111 T: (07) 3278 6444 F: (07) 3278 6555 T: (02) 9879 8888 F: (02) 9816 4722 Melbourne: 7 Micro Circuit, Dandenong South, VIC 3165 Auckland: 2/24 Bishop Dunn Pl, East Tamaki, Manakau, T: (03) 9798 0988 F: (03) 9798 0177 2163 NZ T: (09) 274 0955 F: (09) 274 0959 For customers outside Australia and New Zealand please contact your local GME retailer or email: export@gme.net.au www.gme.net.au Part Number: 310350 Drawing Number: 43464-4 GX 600D...
Need help?
Do you have a question about the GX600DB and is the answer not in the manual?
Questions and answers