Table of Contents
Advertisement
Advertisement
Table of Contents

Related Manuals for Veria Control ET45


Summary of Contents for Veria Control ET45
- Page 1 Veria Control T45 Installation guide...
-
Page 2: Table Of Contents
- Select how to control your floor heating system - Recommended settings - Setting the clock - Setting the maximum floor temperature - Reading the floor temperature - Frost protection mode Timer functionality - Activate Timer Mode - Programming the timer Technical specifications Veria Warranty... -
Page 3: Introduction
Introduction Veria Control T45 is an advanced digital timer thermostat, which allows you to control your floor heating system by either the floor temperature, the room temperature or combined. Please follow the instructions in this manual to ensure many years of trouble free usage. -
Page 4: Button And Display Description
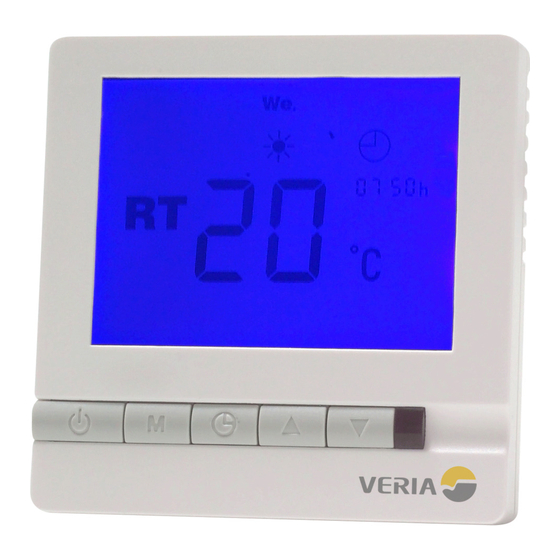
Button and display description Current floor temperature Current room temperature Frost protection mode activated Thermostat on Day of the week Timer mode activated On/off Mode Down Heating element Clock warming... -
Page 5: Installing And Wiring The Thermostat
Installing and wiring the thermostat To mount the thermostat to the wall box/wall socket, first open the thermostat by gently pushing the tabs in the buttom of the thermo- stat. To fix the thermostat, screw in properly sized screws into the wall socket/wall box. -
Page 6: Select How To Control Your Floor Heating System
To turn thermostat on or off press “ ” SELECT HOW TO CONTROL YOUR FLOOR HEATING SYSTEM Your Veria floor heating system can be controlled either by the: • Floor temperature - program mode 2 The heating element turns on/off around a floor temperature... -
Page 7: Recommended Settings
Basic functionality RECOMMENDED SETTINGS Veria recommends the following settings for different type of floor constructions: Top flooring Wooden Tiled Program mode floor* floor** (room sensor) If total effect: 0W-1840W (floor sensor) If total effect: 0W-2990W (combined floor and room sensor) -
Page 8: Setting The Clock
Basic functionality SETTING THE CLOCK With the thermostat turned on. Press “ ” once, hour will be flash. Use the Up/Down key to select the hours. Press “ ” again, minute will be flash. Use the Up/Down key to select the minutes. Press “... -
Page 9: Reading The Floor Temperature
Basic functionality READING THE FLOOR TEMPERATURE (only in program mode 3 and 5) With the thermostat turned on. Press “M” once, the “ FT ” will be flashed, and the display will show the floor temperature. In program mode 2 (floor sensor) the display always shows the current floor temperature. -
Page 10: Timer Functionality
Timer functionality ACTIVATE TIMER MODE When using the timer mode, you must first activate the timer mode: With the thermostat turned on, hold the “M” button for 3 seconds. You can select below settings: 00 = Override (disable timer functionality) 01 = Programmable. - Page 11 Timer functionality Example, weekdays: Period 1 starting at 07.00 - Temperature setting 22C Period 2 starting at 08.30 - Temperature setting 18C Period 3 staring at 17.00 - Temperature setting 22C Period 4 starting at 23.00 - Temperature setting 18C Example, weekend: Period 1 staring at 09.00 - Temperature setting 22C Period 2 staring at 23.00 - Temperature setting 18C...
- Page 12 Timer functionality How to progamme the timer: Hold the “ ” for 3 seconds, the number 1 and “Mo Tu We Th Fr” are displayed. This indicates that you can program the first switching time for the week-day. Use Up/Down key to set the required start time. Press “...
- Page 13 Notes...
-
Page 14: Technical Specifications
Technical specifications External sensor: NTC 10 kOhm at 25° C Sensor values: 15°C 14,8 kOhm 18°C 13,1 kOhm 20°C 12,1 kOhm 22°C 11,2 kOhm Display: Power consumption: <2W Set-point range: Room: 5°C to 35°C Floor: 20°C to 35/45°C Accuracy: ±1°C Buttons: Touch pad Switch current rating:... -
Page 15: Veria Warranty
Veria warranty Warranty certificate Name: Address: Zip code/City: Telephone: Please notice! In order to obtain the Veria warranty an authorized electrician/ installer must fill in the below fields. Electrician/installer: Installation date: Thermostat name: Article number: Stamp: Stamp:... - Page 16 Veria Ulvehavevej 61 7100 Vejle Denmark E-mail: mail@veria.dk...
Need help?
Do you have a question about the Control ET45 and is the answer not in the manual?
Questions and answers