Advertisement
Quick Links
Advertisement

Related Manuals for Monacor HDCAM-5090


Summary of Contents for Monacor HDCAM-5090
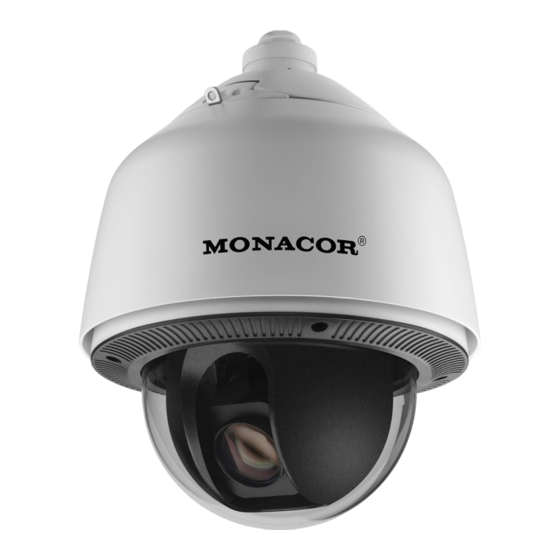
- Page 1 HDCAM-5090 HIGH SPEED DOME CAMERA USER’S MANUAL...
-
Page 2: Table Of Contents
Table of Contents Precautions………………………………………………………………..2 Features……………………………………………………………………….3 Technical Data……………………………………………………………..9 Installation Guide…………………………………………………………10 Dome Settings…………………………………………………………..…17 Operation Instructions…………………………………………………20... -
Page 3: Precautions
1 Precaution 1. Please read this manual carefully before the installations and operations. 2. Transportation Security No heavy stress, violent vibration or water splash are allowed during transportation, storage. The unit should be transported in separated packing. In shipments of distributor and delivery of maintenance, any damages caused by integral packing are not covered by warranty. -
Page 4: Features
Television, radio transmitter, voltage changer and audio amplifier. 6. Camera Protection Avoid shooting very bright objects directly into the camera’s CCD (such As the sun or light fittings) and avoid fixating the camera lens on bright static object for long time, as it will cause Irreparable damage to the camera’s CCD. - Page 5 • Timing actions for 7 days of programmable schedule • Built-in Semi-conductor heater & digital temperature sensor • PWM cooling fan vari-speed temperature control • Reserved network interface and space for network module • Pan Tilt accuracy +/- 0.1 , 220preset positions 8 cruising tracks, each cruising track has 32 presets •...
- Page 6 2.4 All-weather Outdoor Design • 6 Inch High die-cast alloy aluminum construction • High Precision Mould with high heat conductivity • Fully enclosed isolation design for heat sink • Nanometer Dustproof, waterproof and fog-proof lens • IP66 Waterproof • 3000V lightning and surge current protection 2.5 Function Instructions •...
- Page 7 The preset position can be programmed to be recalled in a set of sequences. This sequence can be set to let the camera scan from one position to the next in a cycle at a set speed. This feature is called the “auto cruise”. The cruise sequence and dwell time of each preset can be set.
- Page 8 Users can set speed dome operation task at total 8 timing areas during 7 days. • Coordinates and Directions Display User can define the dome’s direction of due north, which will help to show up the exact moving directions on screen. And zone title is supported to display when the dome moves to the specified zone.
- Page 9 5) Auto/Manual White Balance Auto/Manual WB adjust depending on the environment light changes. 6) Day and Night Switch (Only for Day/Nigh Camera) Speed dome camera can auto switch according to the environmental illumination changes. 7) OSD Setup (Only for camera with menu) Call upon preset No.95 to enter into OSD menu setup interface.
- Page 10 3 Technical Specifications Power Supply DC12V+10% 50W Night IR Distance 120/150/180meters Pan 0.01 , Tilt 0.01 (high speed) / ~360 ~120 Manual Speed Pan:0.5 /S, Tilt:0.5 /S (Vair-speed) Preset Speed /S (high speed) / 20 /S (Vari-speed) Pan Angle continuous pan rotation Tilt Angle (Auto Flip) Presets Positions...
-
Page 11: Installation Guide
Camera Module Auto Compatible SONY,LG,Samsung,CNB,HITACH,etc. Baud Rate 2400/4800/9600bps Operating Humidity 0~90% Operating Temp ~ +60 4 Installation Guide 4.1 Preparations 1) Basic Requirements All the electric work must be finished under the latest electric & fire prevention law and rules (and any related law and rules). Please check according to the packing list if every accessory is included. - Page 12 RG59/U 750ft(229m) RG6//U 1,000ft(305m) RG11/U 1,500ft(457m) 4) Setup Dip Switch for Dome Address *Please turn to Part 5 for details. 4.2 Installation Method The IR speed dome could be installed in wall-mount and pedant-mount...
- Page 13 Wall Mount Bracket ①─ Installation Screws (M5X8) ②─ IR Dome Body ③─ Pedant Mount Bracket ④─ 4.3 Installation Dimensions Wall Mount...
- Page 14 Pendant Mount...
- Page 15 4.4 Installation Procedures *Notice: The wall and ceiling must be thick enough to install the expansion bolts and can bear 4 times the weight of the dome camera itself. Wall-mount Installation Procedures: 1) Take out the bracket from the package (as shown), mark the installation hole positions on the wall referencing to the bottom of bracket.
- Page 16 2) Drill the hole and install 4 pieces of M8 expansion bolt into the hole. 3) Take out the IR speed dome and put the cables through the bracket. Use M5 screws to fix the bracket and dome body.
- Page 17 4) Use 4 pieces of M8 screw nuts with washer to fix the bracket on the wall. Pendant-mount Installation Procedures: 1) Take out the bracket from the package (as shown), mark the installation hole positions on the ceiling referencing to the bottom of bracket. 2) Drill the hole and install 4 pieces of M8 expansion bolt into the hole.
- Page 18 3) Take out the IR speed dome and put the cables through the sockets on the bottom of the pendant bracket. Use M5 screws to fix the bracket and dome body. 4) Use screw nuts with washer to fix the bracket on the wall. Notice: Pendant-bracket is not designed for outdoor installation.
-
Page 19: Dome Settings
Dome Setting Before the dome is installed, please finish the setup of the communication protocol, baud rate and dome address. Set the DIP switch inside the dome body. The relative DIP switch site and connecting wires are diagramed below for reference. - Page 20 SW1— Dip switch for the dome address SW2— Dip switch for the dome protocol 1) Protocol Setup Our IR speed dome supports three protocols including Pelco P, Pelco D and HS. All of them supports baud rate of 9600bps、4800bps、2400bps. Set the No.1~4 dip switch for the protocol configuration. Protocol SW2-1 SW2-2...
- Page 21 PELCO D Reserved … … … … 2) Baud Rate Setup Set the No.5~6 dip switch for the baud rate configuration. Baud Rate SW2-5 SW2-6 9600 4800 2400 Reserved … … 3) Dome Address Setup PELCO-P & PELCO-D Protocol Add SW-1 SW1-2 SW1-3 SW1-4 SW1-5 SW1-6 SW1-7 SW1-8...
- Page 22 … … … … … … … … … 4) Cable Definition BNC Connector: Video Coaxial Cable...
-
Page 23: Operation Instructions
Power Connector: DC12V Red: RS485A Yellow: RS485B Operation Instructions 1) Main Functions Fast Call Up Our IR Speed dome supports 220 preset positions. You can activate some special functions by calling upon code number 65-99. Serial Command Fast Call Up Note Default to start auto scan of Start Auto Scan... - Page 24 3) OSD Menu Operations Call Preset 95 to enter the main OSD menu (or call preset No.1 two times continuously within two seconds) Control the joystick to move the cursor around the menu Press “Iris Open” to enter the menu for selections Serial No.
- Page 25 LANGUAGE...
- Page 26 The language for the on-screen menus is Selectable. To change the display language: Press Iris Open to enter selection. All on-screen menus are changed to the selected language. SYSTEM INFORMATION...
- Page 27 The user can check the dome system information as required. The system information includes: Dome ID, dome address, baud rate, protocol, temperature, voltage, alarm info, dome title, version, date, time, and temperature scale. Use the following steps to display the System Information screens: 1.
- Page 28 Display setup allows the user to define the way to display the dome titles on the monitor. The displayed titles are listed as follows: DOME TITLE Indicate dome PRESET Indicate the dwell time for preset title MOTION Indicate the dwell time for auto function titles (auto scan/auto cruise/pattern tour) ZONES Indicate the dwell time for zone titles...
- Page 29 work mode under this OSD mean. (Under normal operation mode, the user can press IRIS OPEN and IRIS CLOSE to adjust the IR LED power): 1) CONTROL MODE: AUTO: IR LED will be opened or closed automatically according to the light conditions. TIMING: LED will be adjusted according to Open and Close Time.
- Page 30 period of time, the dome will run the actions as defined. 1) TIME: Move the cursor to “TIME” and press IRIS OPEN to enter, and move the joystick up and dome to select among 30 sec, 1 min, 5 min, 10 min and 30 min. And press IRIS OPEN to confirm. ACTION: Move the cursor to “ACTION”...
- Page 31 OUT1 An alarm action will close AUX 1 output.. OUT2 An alarm action will activate AUX2 output. RESET TIME: Set up time for the alarm output (such as an alarm buzzed) when is triggered by the detector. . START /STOP TIME: Set up the time to start alarm and stop alarm ONLY under the AUTO mode under ALARM MODE.
- Page 32 CLOCK The dome can display the data and time. And the user could enter this CLOCK menu to set up the DATE and TIME. DATE: Move the cursor here and press IRIS OPEN to enter. Move the joystick left and right to choose the date position and move it up and dome to adjust the figures.
- Page 33 PASSWORD The dome features password protection function to prevent unanthorized changes to the dome settings. If the PASSWORD function is enabled, the operator can not access any dome setting without entering a valid password. EDIT PASSWORD: Move the cursor here and press IRIS OPEN to enter.
- Page 34 DOME TITLE The user can set up the dome title to define each camera. Dome title support up to 12 characters. Move the cursor according the left steps and select INPUT. Press IRIS OPEN to enter. 1) Move the joystick left and right to position “←”, and press IRIS OPEN to delete the character at“←”.
- Page 35 SOFT ADDRESS SET The use can set up the SOFT ADDRESS, SOFT PROTOCOL and SOFT BAUD RATE under this menu here to activate the soft address function. And then the defined dome address by dip switch will be disabled. 1) Move the cursor to INPUT (under DOME ID) and press IRIS OPEN to enter the mode of setting dome ID, Move the joystick to position the cursor beside :0 1 2 3 4 5 6 7 8 9”...
- Page 36 The user can set up the auxiliary output to trigger other devices from an alarm or a controller. Move the cursor to AUX and press IRIS OPEN to enter to select “ON” or “OFF” to enable or disable this function.
- Page 37 SOFT LIMIT The user can set up the soft limit to define the left and right boundaries for the pan movement. SOFT LIMIT: Move the cursor here and press IRIS OPEN to enter. Move the joystick to select “ON” or “OFF” to enable or disable this function.
- Page 38 DOME SPEED To make a selection of the dome speed, the user can enter this menu to set up. Move the cursor to DOME SPEED and press IRIS OPEN to enter. Move the joystick to select the dome speed when doing the pan movement.
- Page 39 POWER ON ACTION The user can define the dome action when power on, Move the cursor to POWER ON ACTION and press IRIS OPEN to enter the mode of setup. NONE (default) No action. PRESET Dome goes to preset. (Default as Preset 1) SCAN Dome starts auto scan (Default as Auto Scan 1) Dome runs auto cruise (Default as Auto Cruise 1)
- Page 40 CAMERA The dome can automatically recognize the main camera modules in the market. For the cameras it can not recognize, the user can set up here CAMERA: Move the cursor here and press IRIS OPEN to enter the setup mode. Move the joystick up and down to select the camera types.
- Page 41 COMMUNICATION TEST The dome can do self diagnosis for the communications between keyboard and speed dome. The test needs to match with our software VK200. If the self testing is successfully finished via the software, the system will show up the testing results as left diagram.
- Page 42 OTHERS The user can set up TEMP MODE, INTERNAL FAN, PRESET FREEZE, STOP TIME. MENU OFF TIME and NORTH ZERO here under the menu of “OTHERS” TEMP MODE: To set up the control mode of dome fans and heaters. It includes three modes of AUTO, FAN HIGH SPEED and FAN LOW SPEED.
- Page 43 CAMERA The user can make adjustment for the cameras under this menu. FOCUS MODE: AUTO FOCUS allows the camera lens to remain in focus during zooming in, zooming out and pan/tilt movement. Move the cursor here and press IRIS OPEN to enter.
- Page 44 CAMERA ADVANCED The use can set up more detailed parameters of camera here under the menu of CAMERA ADVANCED. WB: To set up the white balance of the camera. Options include AUTO, MANUAL. INDOOR and OUTDOOR. The use can select different mode according the different locations. RED GAIN: Only can be adjusted whet WB set as manual.
- Page 45 PRESET The dome supports 220 presets. Please check the following steps to set up a preset. 1) PRESET NO.: Move the cursor here and press IRIS OPEN to enter the setup of Preset Number. Move the joystick to select a preset number (1-64 and 100-255) and press IRIS OPEN to confirm.
- Page 46 AUTO SCAN The dome supports 8 groups of auto scan. Please check the following steps to set up a scan. 1) SCAN NO.: Move the cursor here and press IRIS OPEN to enter the setup of SCAN Number. Move the joystick to select a preset number (1-8) and press IRIS OPEN to confirm.
- Page 47 AUTO CRUISE (SEQUENCE) The dome supports 8 groups of auto cruise and each cruise supports 32 presets. . Please check the following steps to set up cruise. 1) SEQ NO.: Move the cursor here and press IRIS OPEN to enter the setup of Sequence Number.
- Page 48 PATTERN TOUR The dome supports 4 pattern tours and each pattern cover at most 10 Minutes of 500 commands. Please check the following steps to set up a pattern. 1) PATTERN NO.: Move the cursor here and press IRIS OPEN to enter the setup of Pattern Number.
- Page 49 ZONES The use can set up zone title when the camera moves to a defined location, which will make it much easier for the user to identify the location. The dome supports 8 zone titles. Please check the following steps to set up a zone 1) ZONE NO.: Move the cursor here and press IRIS OPEN to enter the setup of Zone Number.
- Page 50 TIMING ACTION TIMING ACTION allows the user to set up the actions of the dome in 7 days (each day with 8 timing segments). When fishing the setup, the dome will do the actions according to the setup motion during the defined time segment. NO.: Here shows the day within a week.
- Page 51 MOTION DETECT The user can set up 8 motion detection scenes (each scene with 4 detecting areas) under this menu. The alarm output will be triggered when moving objects enter these detecting areas SCENE NO.: Move the cursor here and press IRIS OPEN to enter the setup of Scene Number.
- Page 52 AUTO TRACKING (ONLY AUTO TRACKING MODEL) Under the auto tracking mode, the dome will auto track the moving objects entering the scene. When the object is moving out of the scene, the dome will return to a preset position as defined after the defined time.
- Page 53 RESTART The dome allows the user to reset its settings remotely under this menu. Move the cursor here and press IRIS OPEN to enter. Select “OK” or “CANCEL” to continue the reset or cancel the reset.
- Page 54 FACTORY DEFAULTS FACTORY DEFAULTS will allow the user to recover all the setting to factory default setting. Move the cursor here and press IRIS OPEN to enter. Select “OK” or “CANCEL” to continue the reset or cancel the reset.
Need help?
Do you have a question about the HDCAM-5090 and is the answer not in the manual?
Questions and answers