Table of Contents
Advertisement
Quick Links
IF YOU CANNOT READ OR UNDERSTAND THESE INSTALLATION INSTRUCTIONS
INTRODUCTION
This SKYTECH remote Wireless Wall Timer system was developed to provide safe, reliable, and user-friendly remote
control system for gas heating appliances. This dry contact system can be operated manually from the transmitter. The
system operates on one of 65,536 security codes that are programmed into the transmitter at the factory.
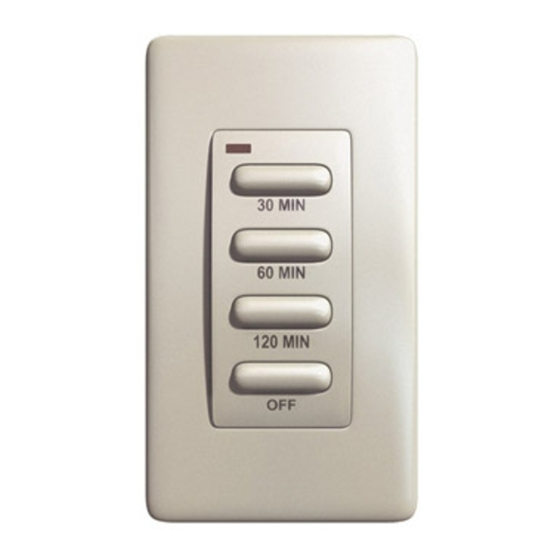
WALL TIMER
Indicator
30 MIN
Light
60 MIN
120 MIN
OFF
CALIFORNIA PROPOSITION 65
WARNING
This product can expose you to Tetrabromobisphenol-A,
which is known to the state of California to cause cancer.
(For more information, go to www.p65warnings.ca.gov)
TO INSTALL BATTERIES
1. Remove face from backing plate by insetting a small
screwdriver into the small slot
at the top or bottom of the faceplate as shown below then snap OFF.
2. Locate the (2) holders for the 3V button cell batteries.
3. Place the button cell batteries into the battery holders and snap into place.
(Make sure that the batteries are installed with the (+) plus side as shown to the right.
4. After the batteries are installed replace the faceplate on the base
TO REMOVE THE BATTERIES
1.Remove face from backing plate by insetting a small screwdriver into the small slot
on the side at the top or bottom of the faceplate as shown to the right then snap OFF.
2.Locate the (2) holders for the 3V button cell batteries.
3.Insert a small screwdriver into the slot at the button cell battery and pop the
battery out (Slots shown in picture above).
4.After the batteries are installed replace the faceplate.
Skytech: TM-R-2A
Model: TM-R-2A
INSTALLATION AND OPERATING INSTRUCTIONS
DO NOT ATTEMPT TO INSTALL OR OPERATE
The wall timer operates on a (2) 3V button cell batteries (included) made
specifically for remote controls and electronic lighters. Before using the wall
transmitter, install the two (2) 3V button cell batteries. Follow the instructions below.
The wall timer has a 30 min, 60 min, 120 min, and OFF buttons. When any buttons
on the wall timer are pressed, a signal light on the wall timer illuminates briefly to
verify a signal has been sent. If the signal light does not illuminate, check the
batteries. Upon initial use, there may be a delay of five seconds before the remote
Receiver will respond to the wall timer.
Insert small screwdriver
into slot at the top and
sides to pop cover o
3 0
6 0
1 2
0
O F
F
.
Insert batteries
under tabs; snap
into holder
30 MIN
60 MIN
120 MIN
OFF
+
+
Plus
Plus
Side
Side
Insert small screwdriver
into slot and pop out
batteries from holder
REV. 10-12-18 Page 1
Advertisement
Table of Contents

Related Manuals for Skytech TM-R-2A


Summary of Contents for Skytech TM-R-2A
- Page 1 DO NOT ATTEMPT TO INSTALL OR OPERATE INTRODUCTION This SKYTECH remote Wireless Wall Timer system was developed to provide safe, reliable, and user-friendly remote control system for gas heating appliances. This dry contact system can be operated manually from the transmitter. The system operates on one of 65,536 security codes that are programmed into the transmitter at the factory.
- Page 2 Follow instructions carefully during installation. Any modifications of the SKYTECH remote control or any of its components will void the warrant and may be pose a fire hazard. Do not connect any gas valve or electronic module directly to 110-120VAC power. Consult gas appliance manufacturer’s instructions and wiring schematics for proper placement of all wires.
- Page 3 Push the White Button over the receiver slide Button switch only after making sure the remote receiver has LEARNED the transmitter’s security code (see LEARNING TRANSMITTER TO RECEIVER) section. Cover Plate Plastic Switch Box Skytech: TM-R-2A REV. 10-12-18 Page 3...
- Page 4 24VAC transformer to either of the wire on the remote receiver. Connect another wire (included) 24VAC between the other receiver wire terminal and the TH (thermostat) terminal on the ELECTRONIC MODULE. REMOTE RECEIVER hot wire 120VAC Skytech: TM-R-2A REV. 10-12-18 Page 4...
- Page 5 4. To clear the codes from the receiver and start programming over or add new transmitters, press and hold the LEARN button in for (10) seconds and release. Then, the receiver will emit a series of three long “Beeps,” indicating that the receiver has cleared all codes and is ready to accept new codes. Skytech: TM-R-2A REV. 10-12-18 Page 5...
- Page 6 If you encounter problems with your fireplace system, the problem may be with the fireplace itself or it could be with the SKYTECH remote. Review the fireplace manufacturer’s operation manual to make sure all connections are properly made. Then check the operation of the SKYTECH remote in the following manner: •...
Need help?
Do you have a question about the TM-R-2A and is the answer not in the manual?
Questions and answers