
Related Manuals for Perlick BBRN Series


Summary of Contents for Perlick BBRN Series
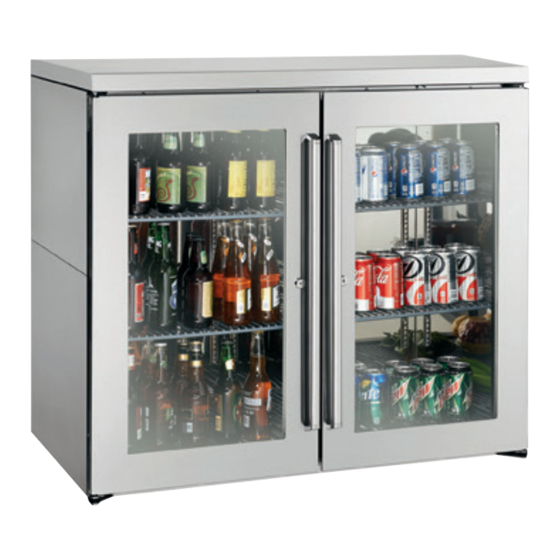
- Page 1 Installation & Operation Manual Commercial Back Bar Narrow Back Bar Remote & Self-Contained Models BBRN & BBSN Series Model BBRN40 Shown Form No. 2322013 Rev. 03.27.18...
-
Page 2: Table Of Contents
For your own protection, never return Serial Number: _________________________ merchandise for credit without our approval. Purchase Date: _______________________ We thank you for selecting a Perlick product Dealer Name & Address and assure you of our continuing interest in your ______________________________________ satisfaction. -
Page 3: Prior To Installation
If damage is condensate to be plumbed to an external drain. discovered, file your claim immediately with the transport company. Perlick is not responsible for Electrical damage in transit. The cabinet must be connected to a separately... -
Page 4: Installation
Models BBRN/BBSN Installation & Operation Manual INSTALLATION General Information Installing the Unit If unit has been laid on its • For units equipped with a power cord, the CAUTION cord and plug may be aligned with a recess in back or sides, place unit the back panel to allow the unit to be pushed upright and allow minimum of 24 hours before closer to the wall. -
Page 5: Operation
Models BBR/BBS Installation & Operation Manual Sealing Cabinet to Floor Cabinet For units without casters or legs, it may be necessary to seal the base of the cabinet to Bead Silicon the floor. This can be accomplished by laying a Sealer (RTV) bead of silicone sealant between the base of the cabinet and the floor (Figure 1). -
Page 6: Adjustments
Tools Required step 3. • Large flat head screwdriver • Regular Phillips head screwdriver • Hinge Kit from Perlick Hole plugs Hinge brackets • Plastic putty knife and mounting screws Procedure SUPPORT... - Page 7 Models BBR/BBS Installation & Operation Manual 5. Using the screws removed in step 3, install Front panel the top and bottom hinge brackets from kit (Figure 5). Hinge brackets and mounting screws Hinge brackets and mounting Corner screws need not be screws removed to remove front panel Figure 5.
- Page 8 Models BBRN/BBSN Installation & Operation Manual 10. Attach the top and bottom door hinges using screws removed in step 6 (Figure 9). 11. Place lower V-block into lower cabinet hinge with notch parallel to cabinet (Figure 10). Top hinge and screws Insert top pin Bottom hinge into bearing...
-
Page 9: Maintenance
Models BBR/BBS Installation & Operation Manual MAINTENANCE Never attempt to repair or the metal is passive and stainless. If the passive DANGER perform maintenance on film of stainless steel has been broken, equipment the unit until the main electrical power to the starts to corrode and rust. - Page 10 Models BBRN/BBSN Installation & Operation Manual Keep food equipment clean. Use alkaline Glass panels may be cleaned using any standard chlorinated or non-chloride cleaners at glass cleaner available on the market. recommended strength. Clean frequently to avoid To clean interior and exterior non-metallic surfaces build-up of hard, stubborn stains.
- Page 11 Models BBR/BBS Installation & Operation Manual Recommended Cleaners for Specific Situations Cleaning Agent Comments Routine cleaning. Soap, ammonia, detergent Apply with sponge or soft cloth. Fingerprints and smears. Areal 20, Lac-O-Nu, Lumin Wash, Provides barrier film to minimize finger- O’Ceder Cream Polish prints.
-
Page 12: Troubleshooting
LED Controller display is flashing Controller has a data or memory failure. Reset both compartment presets. “EE”. If problem persists, contact your Perlick Service Department. Unit is not running. No power to the unit. Home circuit breaker tripped. Reset circuit breaker. - Page 13 Perlick products and offer superior • Write to Perlick Corporation, Customer service life. The use of non-Perlick parts can Service Department, 8300 West Good Hope damage the unit and may void the warranty. Road, Milwaukee, WI 53223.
-
Page 14: Dimensions
Models BBRN/BBSN Installation & Operation Manual DIMENSIONS Printed in USA 0213... - Page 15 Models BBR/BBS Installation & Operation Manual Printed in USA 0213...
- Page 16 Models BBRN/BBSN Installation & Operation Manual Printed in USA 0213...
-
Page 17: Wiring Diagrams
Models BBR/BBS Installation & Operation Manual WIRING DIAGRAMS Printed in USA 0213... - Page 18 Models BBRN/BBSN Installation & Operation Manual Printed in USA 0213...
- Page 19 Models BBR/BBS Installation & Operation Manual Printed in USA 0213...
-
Page 20: Warranty
IF ANY ITEMS ARE statement of their agreement. Any changes to an SHORT OR DAMAGED, DO NOT ACCEPT THE Order must be in writing and signed by Perlick SHIPMENT UNLESS THE CARRIER MAKES A and Buyer. NOTATION OF THIS ON YOUR FREIGHT BILL. - Page 21 $35.00, whichever is Perlick’s one year labor warranty provides greater. that Perlick will pay for the cost of any labor to replace any defective part for up to one year ONE YEAR PARTS WARRANTY...
- Page 22 Models BBRN/BBSN Installation & Operation Manual NOTES Printed in USA 0213...
- Page 23 Models BBR/BBS Installation & Operation Manual NOTES Printed in USA 0213...
- Page 24 8300 West Good Hope Road • Milwaukee, WI 53223 • Toll Free 800.558.5592 • Fax 414.353.7069 • www.perlick.com...
Need help?
Do you have a question about the BBRN Series and is the answer not in the manual?
Questions and answers