Table of Contents
Advertisement
Available languages
Available languages
Quick Links
Advertisement
Chapters
Table of Contents

Related Manuals for Schwinn S5477D


Summary of Contents for Schwinn S5477D
- Page 1 Owner s Manual ’ Cruiser Bicycle This manual contains important safety, performance and maintenance information. Read the manual before taking your first ride on your new bicycle, and keep the manual handy for future reference. To register your bike visit www.schwinnbikes.com/registerbike...
-
Page 3: Table Of Contents
Contents 1 Safety . . . . . . . . . . . . . . . . . . . . . . . . . . . . . . . . . . . . . . . . . . . . 4 5 Use . - Page 4 Congratulations About This Manual on your new bicycle! Proper assembly and operation of your It is important for you to understand your new bicycle. bicycle is important for your safety and enjoyment. Our By reading this manual before you go out on your first ride, you’ll customer service department is dedicated to your satisfaction know how to get better performance, comfort, and enjoyment with Pacific Cycle and its products. If you have questions or need from your new bicycle. It is also important that your first ride on advice regarding assembly, parts, performance, or returns, your new bicycle is taken in a controlled environment, away from please contact the experts at Pacific Cycle. Enjoy the ride! cars, obstacles and other cyclists. Toll free: 1-800-626-2811 . This manual contains important information regarding safety, Customer Service hours: Monday - Friday 8 AM- 5 PM Central assembly, use, and maintenance of the bicycle but is not Standard Time (CST) intended to be a complete or comprehensive manual covering all aspects concerning bicycle ownership. We recommend You may also reach us at: consulting a bicycle specialist if you have any doubts or concerns Web: www.pacific-cycle.com regarding your experience or ability to properly assemble and Email: customerservice@pacific-cycle.com maintain the bicycle. Mail: P . O . Box 344 A Special Note For Parents and Guardians 4730 E .
- Page 5 Helmets Save Lives! Correct Fitting Make sure your helmet covers your forehead • ALWAYS WEAR A PROPERLY FITTED HELMET WHEN RIDING YOUR BICYCLE • DO NOT RIDE AT NIGHT • AVOID RIDING IN WET CONDITIONS Incorrect Fitting Forehead is exposed and vulnerable to serious injury...
-
Page 6: Safety
1 Safety Safety ❶ SAFETY SIGNAL WORDS USER RESPONSIBILITY WARNING! The following safety signal words indicate a safety message. The symbol alerts you to potential hazards. Failure to follow the warning may result in damage to property, injury, or death. Do not install any kind of power plant or internal combustion engine to a bicycle. -
Page 7: Bicycle Setup
Safety 1 BICYCLE SETUP WARNING! Wheel Size Riders Approximate Height 12 inch 28 - 38 inches tall Inability to safely reach the handlebars and dismount the 16 inch 38 - 48 inches tall bicycle may result in loss of control of the bicycle. If the bicycle has a top tube on the frame, ensure there is one to 18 inch 42 - 52 inches tall... - Page 8 1 Safety Seat Height and Handlebar Reach WARNING! Improperly adjusted seat height could affect the rider’s ability to reach the handlebar and pedals resulting in unexpected movement, loss of control, and serious injury or death. Follow these guidelines when adjusting the seat height. Always ensure the seat post minimum insertion marks are below the seat clamp and cannot be seen.
- Page 9 Safety 1 Quick-release Levers WARNING! Seat post Improper setup or maintenance of the quick-release levers may result in an unexpected movement, loss of control, and serious injury or death. Before riding always check that the Seat tube quick-release lever is firmly locked in place and the seat does Minimum insertion not move.
-
Page 10: Personal Safety
1 Safety PERSONAL SAFETY WARNING! • Pants with loose pant legs. If necessary, always tuck pant legs into a sock or use a leg band to avoid the clothing becoming Riding a bicycle without protective gear, clothing, or a helmet caught in the drive chain. - Page 11 Safety 1 Helmet Use Important! Many states have passed helmet laws regarding children. Make sure you know your state’s helmet laws. It is your job to enforce these rules with your children. Even if your state does not have a children’s helmet law, it is recommended that everyone wear a helmet when cycling.
- Page 12 1 Safety Reflectors WARNING! Missing, damaged, or dirty reflectors will affect the ability of others to see and recognize you as a moving bicyclist increasing the risk of being hit, serious injury or death. Always check the reflectors are in place and make sure they are clean, straight, Rear (red) unbroken and securely mounted before riding the bicycle.
-
Page 13: Riding Safety
Safety 1 RIDING SAFETY WARNING! • Wear proper riding attire, reflective if possible, and avoid open toe shoes. Riding the bicycle in unsafe conditions (i.e. at night), in an unsafe • Do not use items that may restrict your hearing and vision. manner, or disregarding traffic laws may result in an unexpected •... - Page 14 1 Safety Night Riding Cornering Technique • Important! Riding a bicycle at night is not recommended. • Brake slightly before cornering and prepare to lean your body Check your local laws regarding night riding. into the corner. • Ensure bicycle is equipped with a full set of correctly •...
-
Page 15: Before You Ride Safety Checklist
Safety 1 BEFORE YOU RIDE SAFETY CHECKLIST Before every ride, it is important to carry out the following Chains safety checks. Do not ride a bicycle that is not in proper □ The chain is oiled, clean and run smoothly. working condition! Cranks and Pedals Accessories... -
Page 16: Parts Identification
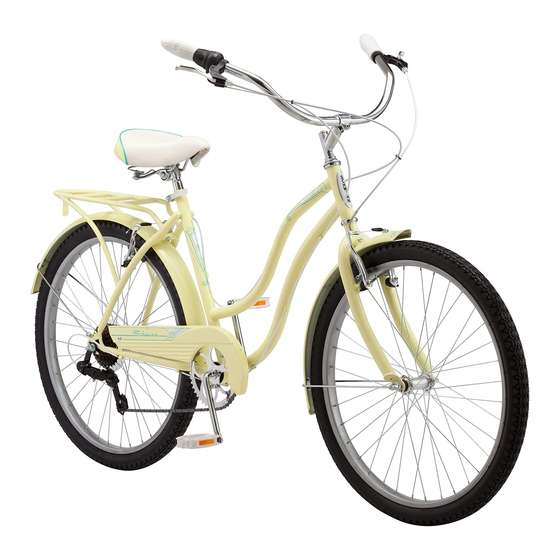
Parts Identification ❷ Cruiser Bicycle Get to know the parts of your bicycle. This will help with assembly, maintenance, and troubleshooting. Color, style and parts may vary. Torque Torque Torque Part name Part name Part name (in. lb) (in. lb) (in. - Page 17 Parts Identification 2...
-
Page 18: Assembly
3 Assembly Assembly ❸ WARNING! WARNING! If you need replacement parts or have questions pertaining to the assembly of your bicycle, call the service line direct at: 1-800-626-2811. Monday - Friday 8:00 am to 5:00 pm Central • Improper assembly of this product may result in serious Standard Time (CST). injury or death. Always follow the instructions in this manual and check critical components (e.g. wheels, seat, TOOLS REQUIRED pedals, brakes, derailleurs, tires) before each use. • Phillips head screw driver • We recommend that you consult a bicycle specialist if you have doubts or concerns as to your experience or ability to • 4 mm, 5 mm, 6 mm and 8 mm Allen wrench properly assemble, repair, or maintain your bicycle. If your • Adjustable wrench or a 9 mm, 10 mm, 14 mm and 15 mm bicycle was obtained assembled, we recommend that you open and box end wrenches read these instructions and perform checks specified in this manual before riding. • A pair of pliers with cable cutting ability Your new bicycle was assembled and tuned in the factory and then partially disassembled for shipping. You may have purchased the bicycle already fully assembled and ready to ride or in the shipping carton in the partially disassembled form. The following instructions will enable you to prepare your bicycle for years of enjoyable cycling. -
Page 19: Getting Started
Assembly 3 GETTING STARTED ❶ Open the carton from the top and remove the bicycle. Handlebar Figure 3.2 assembly Basket ❷ Remove the straps and protective packaging from the Seat bicycle. Important! Do not discard packing materials until assembly is complete to ensure that no required parts are Seat post accidentally discarded. Bell Frame ❸ Inspect the bicycle and all accessories and parts for possible shortages. It is recommended that the threads and all moving parts in the parts package be lubricated prior to installation. Note: We recommend using a lithium based grease on the parts before assembly. Not all bicycles will come equipped with accessories such as baskets and bells. Pedals Front Front wheel fender... -
Page 20: Attach The Handlebar
3 Assembly ATTACH THE HANDLEBAR ❸ Using a 6 mm Allen wrench tighten the stem binder bolt at WARNING! the top of the stem post. Check the handlebar binder bolt(s) to be sure they are properly tightened and the handlebar is • Improper attachment of the handlebar may result in clamped in place. Note: See Section 4: Adjusting the damage to the stem post, steerer tube and result in loss of Handlebar if adjustments are needed. control, serious injury or death. Ensure the minimum insertion marks on the stem post are not visible above the top of the headset. • Failure to properly tighten handlebar components may result in loss of control, serious injury or death. Always Handlebar binder bolt(s) check the handlebar cannot move and is secured to the frame before riding the bicycle. Stem binder bolt ❶ Turn the front fork to face forward. Figure 3.3 Stem post Headset Position the handlebar assembly over the steerer tube. Look Minimum at all the cables to be sure they run in a smooth arc from insertion the shifter or brake lever to the front brake or cable stop on marks the frame. Important! If they are twisted or kinked, the... -
Page 21: Attach The Brake Cables
Assembly 3 ATTACH THE BRAKE CABLES WARNING! Cable adjustment Cable nut slot barrel slot Failure to properly set the brakes may result in the inability to stop the bicycle movement and cause serious injury or death. Be sure the brakes are functioning properly before using the bicycle. Brake cable slot Brake lever There are two brake options, Caliper and Linear Pull. Figure 3.4 Follow these steps if the brake cables are not attached to the brake levers: ❶ Rotate the cable adjustment barrel and cable nut until the slots are aligned with the slot on the brake lever body. Figure 3.4 ❷ Press the brake lever towards the grip. Brake cable Cable head Figure 3.5 ❸ Slide the brake cable through the slots and place the cable head into the brake lever. Figure 3.5 ❹ Release the brake lever. Figure 3.6 ❺ Lightly pull on the cable and rotate the cable nut and cable barrel so they are no longer aligned. -
Page 22: Attach The Front Fender And Front Wheel
3 Assembly ATTACH THE FRONT FENDER AND FRONT WHEEL There are two types of front wheel and fender assemblies; nutted wheel with flat fender brace and quick-release with rounded fender brace. Note: Quick-release wheels may be on both the front and rear wheels or just one. Also, some tire tread patterns have a direction, so compare your front tire and rear tire of the bicycle so that both tread patterns face the same way. Washer Screw Nutted Front Wheel with Flat Fender Brace ❶ Position the front fender so the fender bracket is on the inside of the frame. The fender is attached to the fork crown. Align the hole in the bracket to the hole in the fork crown. Figure 3.7 ❷ Place a washer on the screw and insert the screw through Fender the holes in the bracket and fork crown. bracket ❸ Place a washer on the screw. Washer ❹ Place the hex nut on the screw and tighten. Hex nut Flat fender brace Figure 3.7... - Page 23 Assembly 3 ❺ Position the front wheel between the front fork legs with the axle resting inside the fork drop out. Important! Be sure the wheel is as centered as possible between the fork legs. Figure 3.8 ❻ Place the clip retaining washer on the axle and slide it up against the fork drop out. Make sure the hooked end is Figure 3.9 Figure 3.10 inside the small hole of the fork dropout. Figure 3.9 ❼ Insert the end of each fender brace over the clip retaining washer. Figure 3.10 Fender braces ❽ Place the two outer axle nuts on and tighten evenly. Tighten Wheel centered one side part way, then tighten the other side and repeat between forks until both sides are tightened securely. Be sure that the wheel remained centered between the fork legs. ❾ If the wheel is off center, loosen the axle nut on the side that has a smaller gap between tire and fork leg and use your hand to push the wheel to a centered position; hold the Fork wheel with one hand and tighten the axle nut and check dropout again. Repeat if needed to be sure the wheel is centered Axle nut and securely tightened. Clip retaining washer Figure 3.8...
- Page 24 3 Assembly Quick-release Front Wheel with Rounded Fender Brace If you have a quick-release front wheel with rounded fender brace attach the fender first. ❶ Position the front fender so the fender bracket is on the inside of the frame. The fender is attached to the fork Washer Screw crown. Align the hole in the bracket to the hole in the fork crown. Figure 3.11 ❷ Place a washer on the screw and insert the screw through the holes in the bracket and fork crown. ❸ Place a washer on the screw. ❹ Place the hex nut on the screw and tighten. Fender bracket ❺ Place the rounded fender braces over the small hole on the back of the fork dropout. Washer ❻ Insert the small screws through the rounded fender brace and screw into the fork dropout. Hex nut ❼ Position the fender and loosely tighten the screws. ❽ Attach the wheel and firmly fasten the fender in place. Rounded fender brace Figure 3.11...
- Page 25 Assembly 3 Quick-release Front Wheel ❻ Slide the wheel into the fork dropout slots. Note: If you have a wheel with disc brakes insert the disc rotor into the WARNING! center of the disc brake at the same time you are inserting the wheel axle into the fork drop out. • All quick-release levers should be inspected before every ride to be sure they are fully closed and secure. Failure to Important! Be sure the wheel is as centered as possible properly close a quick-release lever can cause loss of control between the fork legs. of the bicycle resulting in injury or death. Front fork • Make sure the wheel is properly seated and the quick-release lever is properly closed. Quick-release Outer Skewer Inner lever spring spring ❶ Some tire tread patterns have a direction, so compare your front tire and rear tire of the bicycle so that both tread patterns face the same way. ❷ Locate the skewer from the small parts carton of your Adjustment bicycle. Figure 3.12 ❸ Unscrew the adjustment nut from the skewer, remove outer spring and slide the skewer through the front wheel axle so the quick-release lever is on the side of the bike opposite the chain.
- Page 26 3 Assembly ❼ Move the quick-release lever into the open position. With Important! You should feel resistance when you close one hand on the quick-release lever and one hand on the the quick-release lever that should leave a temporary adjustment nut, start to hand tighten the adjustment nut impression on your fingers. Open and close the handle to until you start to feel some resistance against the fork. ensure the wheel is securely locked in place. Figure 3.13 ❾ Re-check that the handlebars are perpendicular to the front ❽ Try to close the quick-release lever. If it closes easily, open wheel. Adjust if needed. it up and tighten the adjustment nut further. If it is too difficult to close, open the quick-release lever up and loosen the adjustment nut a little and try again. Do not attempt to tighten by turning the quick-release lever. The quick-release lever is for closing, the adjustment nut is for adjusting the tension. Quick-release lever in closed position Important! Only tighten Quick-release the quick-release with the lever in the adjustment nut. open position Figure 3.13...
-
Page 27: Attach The Seat
Assembly 3 ATTACH THE SEAT WARNING! ❸ Tighten the seat clamp bolt to lock the seat in place. Improperly adjusted seat height could affect the rider’s ability ❹ Check the seat to be sure it does not move. to reach the handlebar and pedals may resulting in unexpected movement, loss of control and serious injury or death. Follow these guidelines when adjusting the seat height. Always ensure the seat post minimum insertion marks are below the seat clamp and cannot be seen. Ensure the seat clamp is locked and the seat cannot move. There are two kinds of seat clamps; bolted and quick-release, and two kinds of seat posts standard and micro-adjust. The seat Minimum assembly should be adjusted with the seat centered on the rails insertion and level. It is recommended to add some grease to all threads marks and binders on a bicycle, especially on the outside of the seat post. Otherwise it may corrode over time and not be able to be adjusted again. Use a 5 mm Allen wrench to loosen and Bolted Seat Clamp tighten the seat clamp ❶ Using a 5 mm Allen wrench, loosen the seat clamp bolt and insert the seat post into the seat tube. Figure 3.14 ❷ Adjust the seat height up or down until the rider feels they Seat tube have control of the bicycle and is comfortable. - Page 28 3 Assembly Quick-release Seat Clamp ❶ Unlock the quick-release lever and insert the seat post into the seat tube. Figure 3.15 ❷ Adjust the seat height up or down until the rider feels they have control of the bicycle and is comfortable. Seat post Important! Be sure the minimum insertion marks do not go past the top of the seat clamp and are not visible. See Minimum insertion marks on the seat post Section 1, Fig. 1.2: Seat Height and Handlebar Reach. Quick-release ❸ Close the quick-release lever and lock the seat in place. seat clamp Adjustment nut If there is not enough pressure to hold the seat in place open the quick-release lever. With one hand on the quick- Quick-release lever release lever and one hand on the adjustment nut, start to hand tighten the adjustment nut until you start to feel some Seat tube Figure 3.15 resistance against the seat post clamp. Do not attempt to tighten by turning the quick-release lever. The quick-release...
-
Page 29: Attach The Pedals
Assembly 3 ATTACH THE PEDALS WARNING! • Attachment of an incorrect pedal into a crank arm can strip pedal threads and cause irreparable damage. Visually match the R and L stickers on the pedal and crank arm before attaching the pedals. Before your first ride, please check to ensure your pedals are attached correctly. • It is very important that you check the crank set for correct adjustment and tightness before riding your bicycle. ❶ Match the pedal marked R with the right-hand crank arm and match the pedal marked L with the left-hand crank arm. Figure 3.17 ❷ Place the threaded pedal into the threaded hole on the crank arm. ❸ By hand, slowly turn the spindle the correct direction. Clockwise for right side pedal, counterclockwise for left side pedal. Important! Stop if you feel resistance! This may be The left pedal turns an indication the spindle is entering the hole at an counter-clockwise and the angle. Remove the spindle and repeat step two and three. right pedal turns clockwise. ❹ If the spindle is entering the hole cleanly then use a 15 mm wrench or pliers to tighten completely. ❺ Repeat steps 1- 4 for the remaining pedal. Figure 3.17... -
Page 30: Attach The Basket
3 Assembly ATTACH THE BASKET WARNING! Clamps Failure to securely attach the basket to the bicycle may cause the basket to fall off and cause an accident resulting in serious injury or death. Always make sure the basket is secured before riding. Do not carry pets in the basket or loads greater Screws than 10 lbs. (4.5 kgs). Note: Not all bicycles will come equipped with baskets Figure 3.18 Figure 3.19 ❶ Place the mounting bracket on the handlebars so the clamps are on either side of the stem and the basket plate is facing forward. The bottom brace should fit snug against the bicycle. Figure 3.18 ❷ Make sure the clamps have a snug fit against the handlebars. Use the shims provided as needed to create the right fit. ❸ Align clamp holes with mounting bracket holes and insert Release the screws. Tighten all four screws evenly. Figure 3.19 button ❹ To adjust the angle of the basket, use a 4 mm Allen wrench on the bolt at the side of the bracket. Once adjusted to the correct angle, tighten to secure. Basket ❺ To attach the basket, push the basket down onto the basket plate plate until it clicks into place. To remove the basket, push the red release button located on the basket bracket and lift Figure 3.20 the basket up. Figure 3.20... -
Page 31: Attach The Bell
Assembly 3 ATTACH THE BELL Note: Not all bicycles will come equipped with a bell. ❶ Place the bell assembly on top of the handlebar. Figure 3.21 Bell assembly ❷ Place the bottom bracket under the handlebar, aligning the holes in the bottom bracket with the holes in the top bracket. ❸ Insert the screws up into the holes of the bottom bracket, into the top bracket and tighten the screws with a small phillips head screwdriver. Bottom bracket Screws Figure 3.21... -
Page 32: Adjustments
4 Adjustments Adjustments ❹ TOOLS REQUIRED After your bicycle is assembled you will need to make adjustments. If you need replacement parts or have questions • Phillips head screw driver pertaining to the assembly of your bicycle, call the service line •... -
Page 33: Adjusting The Brakes
Adjustments 4 ADJUSTING THE BRAKES Adjusting the Brake Pads WARNING! ❸ Check the brake cable is seated in the brake lever. Using a 5 mm Allen wrench loosen the cable anchor bolt enough so Failure to properly set the brakes may result in the inability the brake cable can move freely. - Page 34 4 Adjustments Important! Before riding the bicycle it is important to check the Center the Brake Pads brakes. If you squeeze the brake lever and one brake arm moves more than the other (or not at all) the brake is not centered. You Rotate the wheel and look straight down at the gap between will need to fine-tune the brake pads.
- Page 35 Adjustments 4 ❷ If the gap between the brake pad and wheel is uneven, adjust the position of the brake pad. • Using a phillips head screwdriver, adjust the brake arm screws on either side of the brake arm. Note: Turning the screw clockwise moves the pad away from the rim.
- Page 36 4 Adjustments Adjusting the Side-pull Caliper Brake Attaching the Brake Cable to the Brake Carrier ❶ If the brake cable is disconnected at the caliper, thread the Brake cable brake wire through the adjustment barrel. Figure 4.8 ❷ Loosen the cable anchor bolt until you can see a gap large Cable enough for the cable wire.
- Page 37 Adjustments 4 Adjusting the Brake Pads Center the Brake Pads Important! Before riding the bicycle it is important to check the Rotate the wheel and look straight down at the gap between brakes. If you squeeze the brake lever and one brake arm moves the rim, brake pads and fork.
- Page 38 4 Adjustments ❷ If the gap between the brake pad and wheel is uneven, adjust the cable tension. Figure 4.13 Loosen the cable anchor nut. Using one hand, squeeze the brake pads against the rim. Pull the slack out of the cable. While holding tension on the cable, tighten the cable anchor nut.
- Page 39 Adjustments 4 Check the Brakes ❶ After adjusting the brake, squeeze the brake lever as hard as you can several times and re-inspect the brake pads, 1/3 distance to centering and brake lever travel. If the brake pads are no handlebar longer square to the rim, repeat brake pad adjustments.
-
Page 40: Adjusting The Rear Derailleur
4 Adjustments ADJUSTING THE REAR DERAILLEUR ❹ Shift the rear shifter to gear one and place the chain on the largest cog. WARNING! ❺ Adjust the low limit screw in quarter turn increments until Ensure all bolts are secured tightly and the chain does not fall the guide pulley and the largest cog are aligned vertically. -
Page 41: Adjusting The Seat Height
Adjustments 4 ADJUSTING THE SEAT HEIGHT WARNING! Improperly adjusted seat height could affect the rider’s ability to reach the handlebar and pedals may result in an unexpected movement, loss of control and serious injury or death. Follow these guidelines when adjusting the seat height. Always ensure the seat post minimum insertion marks are below the seat clamp and cannot be seen. - Page 42 4 Adjustments Quick-release Seat Clamp ❶ Unlock the quick-release lever. Figure 4.19 ❷ Adjust the seat height up or down until the rider feels they have control of the bicycle and are comfortable. Seat post Important! Be sure the minimum insertion marks do not go past the top of the seat clamp and are not visible.
-
Page 43: Adjusting The Handlebar
Adjustments 4 ADJUSTING THE HANDLEBAR Adjust the Handlebar Angle WARNING! ❹ Using a 6 mm Allen wrench loosen the handlebar binder bolt(s). • Improper adjustment of the handlebar may result in ❺ Rotate the handlebar into the desired position. Figure 4.21 damage to the stem post, steerer tube and result in loss of control, serious injury or death. -
Page 44: Adjusting The Headset
4 Adjustments ADJUSTING THE HEADSET ❷ Stiffness: Lift the front of the frame so the front wheel is off the ground. The handlebar and wheel should flop to The headset is an assembly of parts that connects the front fork one side or another. - Page 45 Adjustments 4 ❸ With the front wheel resting on the ground, use an adjustable, or headset wrench and hold the upper threaded race in place. Figure 4.23 ❹ Loosen the locknut clockwise about 1/32nd of a turn. Note: The front wheel must be straight to gauge adjustment. ❺...
-
Page 46: Adjust The Bottom Bracket
4 Adjustments ADJUST THE BOTTOM BRACKET ❹ Repeat process of checking for play and re-tightening cone a slight amount until no play is felt. Note: The one-piece Typically the bottom bracket contains four major pieces: crank systems do not use a polished bearing system. lockring, adjustable cone, bearings, and washers. -
Page 47: Use
Use 5 ❺ WARNING! to know the environment that you are riding on. For example, a dry paved road is very predictable when stopping. But if you add Failure to follow all local and state regulations and laws rain, gravel, snow or anything else, the rider needs to be extra pertaining to bicycle use as well as the safety warnings in this careful, and allow extra stopping distance, and slow down manual may result in serious injury or death. - Page 48 5 Use Hand Operated Brakes To best avoid this: • Apply the front and rear brakes simultaneously, while shifting WARNING! your body weight back slightly to compensate for braking force. If the front brake is applied too quickly or too hard, the front •...
-
Page 49: Gear Operation
Use 5 GEAR OPERATION WARNING! • Once you have successfully shifted gears, it is OK to start to pedal hard if desired. Improper shifting can result in the chain jamming, or becoming • Pedaling hard while shifting can cause the chain to skip and derailed resulting in loss of control, serious injury or death not engage the appropriate gear. - Page 50 5 Use Using the Rear Shifter Twist-style Shifter The rear shifter (right) will have an indicator that reads either low to high or a series of numbers from 1 and up. Low or “1” is the lowest gear. This is used for slower riding, hill climbing, or to allow for easier pedaling.
-
Page 51: Security
Use 5 SECURITY You just bought a new bicycle! Don’t lose it. It is advisable that the following steps be taken to prepare for and help prevent possible theft: • Maintain a record of the bicycle’s serial number, generally Service sticker is located above the located on the frame underneath the bottom bracket. -
Page 52: Maintenance
6 Maintenance Maintenance ❻ BASIC MAINTENANCE WARNING! • Failure to conduct maintenance on the bicycle may result The following procedures will help you maintain your bicycle for in malfunction of a critical part and serious injury or death. years of enjoyable riding. Proper maintenance is critical to the performance and safe • For painted frames, dust the surface and remove any loose operation of the bicycle. dirt with a dry cloth. To clean, wipe with a damp cloth soaked in a mild detergent mixture. Dry with a cloth and polish with • The recommended intervals and need for lubrication and car or furniture wax. Use soap and water to clean plastic maintenance may vary depending on conditions the bicycle parts and rubber tires. Chrome plated bikes should be wiped is exposed to. Always inspect the bicycle and conduct over with a rust preventative fluid. necessary maintenance before each use of the bicycle. • Store your bicycle under shelter. Avoid leaving it in the rain or exposed to corrosive materials. This section presents important information on maintenance • Riding on the beach or in coastal areas exposes your bicycle and will assist you in determining the proper course of action to to salt which is very corrosive. Wash your bicycle frequently take if you do have a problem with the operation of the bicycle. and wipe or spray all unpainted parts with an anti-rust If you have questions regarding maintenance please call our treatment. Make sure wheel rims are dry so braking customer service, toll free, at 1-800-626-2811 or see a qualified performance is not affected. After rain, dry your bicycle and bicycle mechanic. Do not call the store where the bicycle was apply anti-rust treatment. If the hub and bottom bracket... -
Page 53: Lubrication Schedule
Maintenance 6 LUBRICATION SCHEDULE Component Lubricant Method Weekly Chains Chain lube or light oil Brush on or squirt Brake calipers Three drops from oil can Brake levers Two drops from oil can Freewheel Two drops from oil can Derailleur Systems Light oil or grease All pivot points should be lubricated (more often in severely rainy or muddy conditions). Wipe off any excess oil. Brake cables Lithium based grease Remove cable from casing. Grease entire length. Wipe off excess lubrication from other surfaces. Brake lever and caliper pivot points Light oil Two to three drops from oil can Shifting cables Thin layer of grease Clean and grease Yearly Bottom bracket Lithium based grease Disassemble Pedals Lithium based grease Disassemble Wheel bearings Lithium based grease Disassemble Headset Lithium based grease... -
Page 54: Parts Maintenance
6 Maintenance PARTS MAINTENANCE Tires Frequency: Inspect and maintain at least each use. Inspect Action Maintenance Tire Inflation Check tire pressure. Inflate tire to the pressure indicated on the tire sidewall. Check the bead is properly seated while inflating Reduce air pressure in the tube and re-seat the bead. or refitting the tire. Spin wheel and check rotation / alignment Loosen axle nut(s) and adjust until properly seated. If the hub is smooth and even. bearings need repair see a bicycle mechanic for repair. Bead Seating Check for broken or loose spokes. See bicycle mechanic for repair. Tread Inspect for signs of excessive wear, flat spots or Replace tire. cuts and damage. Valves Check that valve caps are fitted and free of dirt. Clean dirt from the valve. Wheels Frequency: Inspect and maintain at least each use. Inspect Action Maintenance Rims Inspect for dirt and grease. Use a clean rag or wash with soapy water, rinse, and air dry. Wheels Check the wheels are securely fastened to the Adjust if necessary and tighten axle nuts. bicycle and axle nuts are tight. - Page 55 Maintenance 6 Drivetrain (pedals, chains, chainwheel, crank set, freewheel) Frequency: as noted Inspect Action Maintenance Pedals Every month, check each pedal is securely set and tighten into If necessary, re-set and tighten. the crank arm. Before each ride, check each front and rear pedal reflectors are Clean or replace. clean and in place. Pedal Bearings Every ride, check the pedal bearings are properly adjusted. See bicycle mechanic for repair. Move the pedal up and down, left and right. If looseness or roughness is detected adjustment, lubrication or replacement is required. Chains Every week, check the chain is clean, properly lubricated, Lubricate if necessary. Replace if rusted, rust-free, and is not stretched, broken, or has stiff links. stretched, or broken. Crank Set Every month, check the crank set (crank arms, chain rings, See bicycle mechanic for repair. and bottom bracket axle and bearings) is correctly adjusted and tight.
- Page 56 6 Maintenance Brakes Frequency: Inspect and maintain before each use Inspect Action Maintenance Levers Check the levers are securely fastened to the handlebar. Position the levers to fit the rider’s grip and screw tight to handlebar. Pads Check pad position, gap and pressure. See Section 4: Adjusting the Brakes Cables Check the outer casing for kinks, stretched coils and damage. Replace cable. Check cables for kinks, rust, broken strands or frayed ends. Check the outer casing for kinks, stretched coils and damage. Check the housing is seated properly into each cable stop of It is recommended that the cables and the bicycle. housing be replaced every riding season.
-
Page 57: Hub Bearings
Maintenance 6 HUB BEARINGS INFLATING THE TIRE TUBE WARNING! Hub bearings require special thin wrenches called cone wrenches. If you do not own these tools, do not attempt hub • An unseated tire can rupture unexpectedly and cause bearing adjustments. Have a qualified bicycle mechanic perform the adjustment if you have any doubts. serious injury or death. Be sure the tire is properly seated when inflating the tube. ❶ Check to make sure neither locknut is loose. • Over inflation or inflating the tube too quickly may result in the tire blowing off the rim and damaging the bicycle or ❷ To adjust, remove wheel from bicycle and loosen the locknut causing injury to the rider. Always use a hand pump to on one side of the hub while holding the bearing cone on inflate the tube. Do not use a gas station service pump to the same side with a cone wrench. inflate the tube. ❸ Rotate the adjusting cone as needed to eliminate free play. Follow these steps to inflate a tire: ❹ Re-tighten the locknut while holding the adjusting cone in position. ❶ Remove the valve cap and add air. ❺ Re-check that the wheel can turn freely without excessive ❷ Be sure the tire is evenly seated on the rim, both sides. -
Page 58: Repairing A Flat Tire
6 Maintenance REPAIRING A FLAT TIRE ❾ Insert the valve stem through valve stem hole in rim. WARNING! ❿ Start at the valve stem and install the first bead onto the An unseated tire can rupture unexpectedly and cause serious rim. Repeat for the second bead. injury or death. Be sure the tire is properly seated when inflating the tube. ⓫ Slowly inflate the tire tube, checking the tire is seated properly and not pinched as the tire tube is inflated. Follow these steps to fix a flat tire: ⓬ Inflate to recommended pressure (see tire sidewall). ❶ Match tube size and tire size (see tire sidewall for size). ❷ Remove the wheel from the bicycle. Deflate the tire tube completely. ❸ Squeeze the tire beads into the center of the rim. ❹ Opposite the valve, use a bicycle tire lever to pry the tire bead up and out of the rim. Repeat around the wheel until one bead is off the rim. ❺ Remove tube. Release second tire bead. ❻ Remove tire. ❼ Carefully inspect inside of the rim and tire for the cause of the flat. ❽ Inflate the tube ¼ full and place inside tire. -
Page 59: Troubleshooting Guide
Maintenance 6 TROUBLESHOOTING GUIDE Problem Possible Cause Remedy Gear shifts not • Derailleur cables sticking/stretched/ damaged • Lubricate/tighten/replace cables working properly • Rear derailleur not adjusted properly • Adjust derailleurs • Indexed shifting not adjusted properly • Adjust indexing Slipping chain • Excessively worn/chipped chain wheel or freewheel sprocket • Replace chain wheel, sprockets and teeth chain • Chain worn/stretched • Replace chain • Stiff link in chain • Lubricate or replace link • Non compatible chain/chain wheel freewheel • Seek advice at a bicycle shop Chain jumping off • Chain wheel out of true • Re-true if possible, or replace... - Page 60 6 Maintenance Problem Possible Cause Remedy Freewheel does not • Freewheel internal pawl pins are jammed • Lubricate. If problem persists, replace freewheel rotate Brakes not working • Brake pads worn down • Replace brake pads effectively • Brake pads/rim greasy, wet or dirty • Clean pads and rim • Brake cables are binding/stretched/damaged • Clean/adjust/replace cables • Brake levers are binding • Adjust brake levers • Brakes out of adjustment • Center brakes When applying the • Brake pads worn down • Replace pads brakes they squeal/ • Brake pads toe-in incorrect • Correct pads toe-in squeak...
- Page 61 Maintenance 6 Problem Possible Cause Remedy Steering not • Wheels not aligned in frame • Align wheels correctly accurate • Headset loose or binding • Adjust/tighten headset • Front forks or frame bent • Take bike to a bike shop for possible frame realignment Frequent • Inner tube old or faulty • Replace inner tube punctures • Tire tread/casing worn • Replace tire • Tire unsuited to rim • Replace with correct tire • Tire not checked after previous puncture • Remove sharp object embedded in tire • Tire pressure too low • Correct tire pressure • Spoke protruding into rim • File down spoke...
-
Page 62: Warranty
7 Warranty Warranty ❼ LIMITED LIFETIME WARRANTY AND POLICY ON REPLACEMENT PROCEDURES AND RESPONSIBILITIES Your purchase includes the following warranty which is in lieu of all other express warranties. This warranty is extended only to the initial consumer purchaser. No warranty registration is required. -
Page 63: Purchase Record
Warranty 7 PURCHASE RECORD Fill in immediately and retain as a record of your purchase. Please retain your sales receipt for any possible warranty claims. Service sticker is located above the Your Name: bottom bracket Address: City: State: Date Purchased: Place of Purchase: Model and Brand Information: The serial number is... - Page 64 MANUAL DE LA BICICLETA PARA LOS DUENOS ESTE MANUAL CONTIENE IMPORTANTE INFORMACION DE SEGURIDAD, FUNCIONAMIENTO, Y MANTENIMIENTO. LEE EL MANUAL ANTES DE IR A EL PRIMER PASEO EN SU BICICLETA NUEVA, Y GUARDE EL MANUAL REFERENCIA FUTURE. Para registrar su bicicleta visite www.schwinnbikes.com/registerbike...
- Page 65 Contenido Ajuste del juego de dirección ......44 1 Seguridad ......... . . 4 Ajuste el pedalier .
- Page 66 ¡Enhorabuena Sobre este manual por su nueva bicicleta! Es importante el montaje y Es importante que entienda su nueva bicicleta. funcionamiento correctos de su bicicleta para su seguridad y Al leer este manual antes de salir en su primer recorrido, sabrá disfrute. Nuestro departamento de Servicio al Cliente está cómo obtener mejor rendimiento, confort y disfrute de su nueva dedicado a su satisfacción con Pacific Cycle y sus productos. bicicleta. También es importante que realice el primer recorrido Si tiene preguntas o necesita asesoramiento con respecto al en la nueva bicicleta en un ambiente controlado, lejos de los montaje, partes, funcionamiento o devoluciones, póngase en coches, obstáculos y otros ciclistas. contacto con los expertos en Pacific Cycle. ¡Disfrute su recorrido! Este manual contiene información importante sobre seguridad, montaje, uso y mantenimiento de la bicicleta, pero no pretende Llamada sin costo: 1-800-626-2811. ser un manual completo o integral que cubra todos los aspectos Horario de Servicio al Cliente: De lunes a viernes de 8 am a 5 pm relativos a la posesión de la bicicleta. Le recomendamos horario estándar central (CST) consultar a un especialista en bicicletas si tiene dudas o inquietudes con respecto a su experiencia o capacidad para También puede encontrarnos en: montar y mantener la bicicleta adecuadamente. Web: www.pacific-cycle.com Aviso especial para padres y tutores Correo electrónico: customerservice@Pacific-Cycle.com Correo: P. O. Box 344...
- Page 67 ¡Los cascos salvan vidas! • USE SIEMPRE UN CASCO Ajuste correcto CORRECTAMENTE AJUSTADO CUANDO Asegúrese de que el casco cubra su frente MONTE EN BICICLETA • NO MONTE EN BICICLETA POR LA NOCHE • EVITE MONTAR EN BICICLETA EN CONDICIONES HÚMEDAS Ajuste incorrecto La frente está expuesta y es vulnerable a lesiones graves...
-
Page 68: Seguridad
1 Seguridad Seguridad ❶ PALABRAS DE ADVERTENCIA DE ¡ADVERTENCIA! SEGURIDAD Indica una práctica de riesgo o inseguridad que dará como Las siguientes palabras de advertencia de seguridad indican un resultado lesiones graves o la muerte. No leer, entender y mensaje de seguridad. El símbolo lo alerta de riesgos potencia- respetar la información de seguridad de este manual puede dar les. -
Page 69: Responsabilidad Del Usuario
Seguridad 1 RESPONSABILIDAD DEL USUARIO ¡ADVERTENCIA! Un adulto responsable siempre debe supervisar el uso de la bicicleta por parte de un niño. Debe asegurarse de que: No instale ningún tipo de planta eléctrica o motor de combustión interna en una bicicleta. Modificar una bicicleta •... -
Page 70: Configuración De La Bicicleta
1 Seguridad CONFIGURACIÓN DE LA BICICLETA ¡ADVERTENCIA! Tamaño de la rueda Altura aproximada del ciclista 12 pulgadas 28 - 38 pulgadas de alto La incapacidad para alcanzar el manillar y desmontar de la 16 pulgadas 38 - 48 pulgadas de alto bicicleta de forma segura puede dar como resultado la pérdida de control de la bicicleta. - Page 71 Seguridad 1 Palancas de liberación rápida ¡ADVERTENCIA! Tija del sillín Una configuración o mantenimiento incorrectos de las palancas Las marcas de de liberación rápida pueden dar como resultado un movimiento inserción mínima inesperado, pérdida de control, lesiones graves o la muerte. Tubo del sillín están situadas en la Compruebe siempre, antes de montar, que la palanca de...
- Page 72 1 Seguridad Altura del sillín y alcance del manillar ¡ADVERTENCIA! ❷ Debe poder alcanzar el manillar con los brazos ligeramente flexionados (aproximadamente 10 grados) en el codo. La altura del sillín incorrectamente ajustada puede afectar la capacidad del ciclista para alcanzar el manillar y los pedales, lo que puede ocasionar un movimiento inesperado, pérdida de control y lesiones graves o la muerte.
-
Page 73: Seguridad Personal
Seguridad 1 SEGURIDAD PERSONAL ¡ADVERTENCIA! sujetapantalón para evitar que la ropa quede atrapada en la cadena de transmisión. Montar en bicicleta sin equipo, ropa o casco de protección, • Zapatos con cordones desatados. puede dar lugar a lesiones graves o la muerte. Use siempre casco, ropa y equipo de protección cuando monte en bicicleta. - Page 74 1 Seguridad Uso del casco ¡Importante! Muchos estados han aprobado leyes sobre el uso del casco con respecto a los niños. Asegúrese de conocer las leyes sobre el uso del casco de su estado. Es su trabajo hacer que sus hijos cumplan estas reglas. Aunque su estado no tenga una ley sobre el uso del casco para niños, se recomienda que todo el mundo utilice un casco cuando practica ciclismo.
- Page 75 Seguridad 1 Reflectores ¡ADVERTENCIA! Los reflectores faltantes, dañados o sucios afectarán la capacidad de los demás para verlo y reconocerlo como ciclista Parte trasera en movimiento, aumentando el riesgo de ser golpeado, lesiones (rojo) graves o la muerte. Revise siempre que los reflectores estén Más o menos 5 grados de en su lugar y asegúrese de que estén limpios, rectos, intactos...
-
Page 76: Seguridad Al Montar En Bicicleta
1 Seguridad SEGURIDAD AL MONTAR EN BICICLETA ¡ADVERTENCIA! • Obedezca las leyes de tráfico (por ejemplo, detenerse en un semáforo en rojo o una señal de stop, dando paso a los Montar en bicicleta en condiciones inseguras (por ejemplo, en la peatones). - Page 77 Seguridad 1 Técnica de montaña • Frene antes, le tomará una distancia mayor parar. • Ponga una marcha menor antes de una subida y siga bajando • Los baches y las superficies resbaladizas como las líneas de marchas lo que sea necesario para mantener la velocidad pintadas y las vías de tren se vuelven todos más peligrosos de pedaleo.
-
Page 78: Lista De Comprobación De Seguridad Antes De Montar En Bicicleta
1 Seguridad LISTA DE COMPROBACIÓN DE SEGURIDAD Reglas de seguridad al montar en bicicleta para niños ANTES DE MONTAR EN BICICLETA • Muchos estados exigen que los niños usen casco mientras van en bicicleta. Use siempre un casco correctamente ajustado. Antes de cada recorrido, es importante llevar a cabo las •... - Page 79 Seguridad 1 Frenos Dirección □ Los frenos delantero y trasero funcionan correctamente. □ El manillar y el poste están correctamente ajustados y □ apretados, y permiten una dirección adecuada. Las zapatas del freno no están excesivamente desgastadas y □ están colocadas correctamente en relación con los aros de El manillar está...
-
Page 80: Identificación De Las Partes
Identificación de las partes ❷ Bicicleta Cruiser Conozca las partes de su bicicleta. Esto ayudará con el armado, mantenimiento y solución de problemas. El color, el estilo y las partes pueden variar. Par de Par de Par de Nombre de la parte torsión Nombre de la parte torsión... - Page 81 Identificación de las partes 2...
-
Page 82: Ensamblado
3 Ensamblado Ensamblado ❸ ¡ADVERTENCIA! Si necesita piezas de repuesto o tiene preguntas relativas al montaje de su bicicleta, llame a la línea de servicio directo al: 1-800-626-2811. De lunes a viernes de 8:00 am a 5:00 pm • Un montaje defectuoso de este producto puede dar como horario estándar central (CST). resultado graves lesiones o la muerte. Siga siempre las instrucciones de este manual y compruebe los componentes críticos (por ejemplo, ruedas, sillín, pedales, HERRAMIENTAS NECESARIAS frenos, cambios, llantas) antes de cada uso. • Destornillador de estrella • Le recomendamos que consulte con un especialista en bicicletas si tiene dudas o preocupaciones en cuanto a su • Llave Allen de 4 mm, 5 mm, 6 mm y 8 mm experiencia o capacidad para montar, reparar o mantener • Llave inglesa ajustable o llaves abiertas y cerradas de 9 mm, correctamente su bicicleta. Si adquirió su bicicleta ya 10 mm, 14 mm y 15 mm ensamblada, le recomendamos que lea estas instrucciones y realice las comprobaciones especificadas en este manual • Un par de alicates con capacidad para cortar cable antes de subirse a ella. Su nueva bicicleta se montó y ajustó en la fábrica y luego se desmontó parcialmente para su envío. Puede comprar la bicicleta ya completamente ensamblada y lista para usarseo en la caja de envío en forma parcialmente desmontada. Las siguientes instrucciones le permitirán preparar su bicicleta para años de disfrute del ciclismo. -
Page 83: Para Empezar
Ensamblado 3 PARA EMPEZAR ❶ Abra la caja por arriba y saque la bicicleta. Figura 3.2 Conjunto del manillar Cesta ❷ Quite las correas y el embalaje de protección de la bicicleta. ¡Importante! No tire los materiales de embalaje hasta que Sillín termine el montaje para estar seguro de que no se descarten accidentalmente piezas necesarias. Tija del Cuadro Timbre ❸ Inspeccione la bicicleta y todos los accesorios y piezas por si sillín faltase alguna. Se recomienda que las roscas y todas las piezas móviles del paquete de piezas se lubriquen antes de la instalación. Nota: Le recomendamos que utilice una grasa con base de litio en las piezas antes de ensamblarlas. No todas las bicicletas vendrán equipadas con accesorios tales como cestas y timbres. Pedales Rueda delantera Guardabarros... -
Page 84: Fije El Manillar
3 Ensamblado FIJE EL MANILLAR ¡ADVERTENCIA! 1.2: Altura del sillín y alcance del manillar para ver los lineamientos. ¡Importante! Asegúrese de que las marcas • Una instalación incorrecta del manillar puede dar como de inserción mínimano vayan por encima de la parte resultado daños al poste de la potencia o del tubo de superior del juego de dirección y que no sean visibles. dirección y provocar pérdida de control, lesiones graves o la muerte. Asegúrese de que las marcas de inserción mínima ❸ Utilice una llave Allen de 6 mm para apretar el perno fijador del poste de la potencia no sean visibles por encima de la de la potencia en la parte superior del poste de la potencia. parte superior del juego de dirección. Compruebe los pernos fijadores del manillar para estar seguro de que están correctamente apretados y que el • No apretar correctamente los componentes del manillar manillar está fijo en su lugar. -
Page 85: Fije Los Cables Del Freno
Ensamblado 3 FIJE LOS CABLES DEL FRENO ¡ADVERTENCIA! Ranura del barril Ranura de la tuerca del cable de ajuste del cable No fijar apropiadamente los frenos puede dar como resultado la incapacidad de detener el movimiento de la bicicleta y ocasionar lesiones graves o la muerte. Asegúrese de que los frenos funcionan correctamente antes de usar la bicicleta. Ranura del Maneta de freno cable de freno Figura 3.4 FIJE LOS CABLES DEL FRENO Hay dos opciones de freno, Pinza y Tracción lineal . Siga estos pasos si los cables de freno no están fijados a las manetas de freno: ❶ Gire el barril de ajuste del cable y la tuerca del cable hasta que las ranuras estén alineadas con la ranura del cuerpo de Cable del Cabeza del Figura 3.5 la maneta de freno. Figura 3.4 freno cable ❷ Presione la maneta de freno hacia la empuñadura. -
Page 86: Fije El Guardabarros Y La Rueda Delanteros
3 Ensamblado FIJE EL GUARDABARROS Y LA RUEDA DELANTEROS Hay dos tipos de conjuntos de guardabarros y rueda delanteros; rueda atornillada con soporte plano del guardabarros y liberación rápida con soporte redondeado del guardabarros. Nota: Las ruedas de liberación rápida pueden estar tanto en ambas ruedas como sólo en una. También, algunos dibujos de la banda de rodamiento de la llanta tienen una dirección, así que Arandela Tornillo compare las llantas delantera y trasera de la bicicleta para que ambos dibujos miren hacia el mismo lado. Rueda delantera con tuerca con el soporte del guard- abarros plano ❶ Posicione el guardabarros delantero de modo que el soporte del guardabarros esté en el interior del cuadro. El... - Page 87 Ensamblado 3 ❺ Posicione la rueda delantera entre las patas de la horquilla delantera con el eje descansando dentro de la puntera de la horquilla. ¡Importante! Asegúrese de que la rueda esté lo más centrada posible entre las patas de la horquilla. Figura 3.8 ❻ Coloque la arandela de retención de clip en el eje y Figura 3.9 Figura 3.10 deslícela hacia arriba contra la puntera de la horquilla. Asegúrese de que el extremo curvo esté dentro del pequeño orificio de la puntera de la horquilla. Figura 3.9 Soportes del guardabarros ❼ Inserte el extremo de cada abrazadera del guardabarros sobre la arandela de retención de clip. Figura 3.10 Rueda centrada entre las horquillas ❽ Coloque las dos tuercas externas del eje y apriételas uniformemente. Apriete parcialmente un lado, luego apriete el otro lado y repita hasta que ambos lados estén firmemente apretados. Asegúrese de que la rueda se haya mantenido centrada entre las patas de la horquilla. Horquilla puntera ❾ Si la rueda está descentrada, afloje la tuerca del eje del lado Tuerca del que tiene un espacio menor entre la llanta y la pata de la horquilla y use la mano para empujar la rueda a una posición centrada; sujete la rueda con una mano, apriete la tuerca del eje y revise de nuevo. Repita si es necesario para estar seguro de que la rueda esté centrada y bien apretada.
- Page 88 3 Ensamblado Rueda delantera de liberación rápida con el soporte del guardabarros redondo Si tiene una rueda delantera de liberación rápida con soporte de guardabarros redondo, fije primero el guardabarros. ❶ Posicione el guardabarros delantero de modo que el soporte Arandela Tornillo del guardabarros esté en el interior del cuadro. El guardabarros se fija en la corona de la horquilla. Alinee el orificio del soporte con el de la corona de la horquilla. Figura 3.11 ❷ Coloque una arandela en el tornillo e inserte el tornillo a través de los orificios del soporte y de la corona de la horquilla. Soporte del guardabarros ❸ Coloque una arandela en el tornillo. Arandela ❹ Coloque una tuerca hexagonal en el tornillo y apriete. Tuerca ❺ Coloque los soportes del guardabarros redondo sobre el hexagonal...
- Page 89 Ensamblado 3 Rueda delantera de liberación rápida ¡ADVERTENCIA! ❺ Comience a enroscar la tuerca de ajuste nuevamente en el cierre, pero no la apriete demasiado. Deje suficiente holgura • Todas las palancas de liberación rápida deben inspeccionarse para que pueda colocar el eje en la puntera de la horquilla. antes de cada recorrido para estar seguros de que están totalmente cerradas y seguras. No cerrar correctamente una ❻ Deslice la rueda en las ranuras de las punteras de la horquilla. palanca de liberación rápida puede provocar la pérdida de Nota: Si tiene una rueda con frenos de disco, inserte el rotor control de la bicicleta dando como resultado lesiones o la de disco en el centro del freno de disco al mismo tiempo que muerte. inserta el eje de la rueda en la puntera de la horquilla. • Asegúrese de que la rueda esté correctamente asentada y la ¡Importante! centrada posible entre las patas de la horquilla. palanca de liberación rápida esté correctamente cerrada. ❶ Algunos dibujos de la banda de rodamiento de la llanta tienen una dirección, así que compare las llantas delantera y trasera de la bicicleta para que ambos dibujos miren hacia Horquilla delantera el mismo lado. Palanca de ❷ Localice el cierre entre las piezas pequeñas de la caja de su Muelle Cierre Muelle liberación exterior...
- Page 90 3 Ensamblado ❼ Mueva la palanca de liberación rápida a la posición de de liberación rápida. La palanca de liberación rápida es para abierta. Con una mano sobre la palanca de liberación cerrar, la tuerca de ajuste es para ajustar la tensión. rápida y otra en la tuerca de ajuste, empiece a apretar la ¡Importante! Al cerrar la palanca de liberación rápida debe tuerca de ajuste a mano hasta que comience a sentir cierta sentir una resistencia que debe dejarle una impresión resistencia contra la horquilla. Figura 3.13 temporal en los dedos . Abra y cierre la palanca para estar seguro de que la rueda está bien bloqueada en su lugar. ❽ Intente cerrar la palanca de liberación rápida. Si se cierra fácilmente, ábrala y apriete más la tuerca de ajuste. Si se ❾ Vuelva a verificar que el manillar esté perpendicular a la cierra con demasiada dificultad, abra la palanca de rueda delantera. Ajústelo si se requiere. liberación rápida, afloje la tuerca de ajuste un poco y vuelva a intentarlo. No intente apretar girando la palanca Palanca de liberación rápida en posición cerrada Palanca de ¡Importante! Apriete la liberación rápida liberación rápida sólo con en posición la tuerca de ajuste. abierta Figura 3.13...
-
Page 91: Instalar El Sillín
Ensamblado 3 INSTALAR EL SILLÍN Importante! Asegúrese de que las marcas de inserción ¡ADVERTENCIA! mínima no pasen la parte superior de la abrazadera del sillín y no sean visibles. Vea Sección 1, Fig. 1.2: Altura del sillín y Una altura del sillín incorrectamente ajustada puede afectar la alcance del manillar. capacidad del ciclista para alcanzar el manillar y los pedales, lo que puede ocasionar un movimiento inesperado, pérdida de ❸ Apriete el perno de la abrazadera del sillín y bloquee el sillín control y lesiones graves o la muerte. Siga estas directrices en su lugar. para ajustar la altura del sillín. Asegúrese siempre de que la marca de inserción mínima de la tija del sillín esté por debajo ❹ Compruebe el sillín para asegurarse de que no se mueve. de la abrazadera del sillín y no se vea. Asegúrese de que la abrazadera del sillín esté bloqueada y que éste no se pueda mover. - Page 92 3 Ensamblado Abrazadera de liberación rápida del sillín ❸ Cierre la palanca de liberación rápida y bloquee el sillín en su lugar. Si no hay suficiente presión para sujetar el sillín en ❶ Accione la palanca de liberación rápida e inserte la tija del su lugar, abra la palanca de liberación rápida. Con una mano sillín en el tubo del sillín. Figura 3.15 sobre la palanca de liberación rápida y otra en la tuerca de ajuste, empiece a apretar la tuerca de ajuste hasta que ❷ Ajuste la altura del sillín hacia arriba o abajo hasta que el comience a sentir cierta resistencia contra la abrazadera de ciclista sienta que tiene el control de la bicicleta y esté la tija del sillín. No intente apretar girando la palanca de cómodo. liberación rápida. La palanca de liberación rápida es para cerrar, la tuerca de ajuste es para ajustar la presión. ¡Importante! Asegúrese de que las marcas de inserción Figura 3.16 mínima no pasen la parte superior de la abrazadera del sillín y no sean visibles. Vea Sección 1, Fig. 1.2: Altura del sillín y ❹ Intente cerrar la palanca de liberación rápida. Si se cierra alcance del manillar.
-
Page 93: Fije Los Pedales
Ensamblado 3 FIJE LOS PEDALES ¡ADVERTENCIA! • El ajuste de un pedal incorrecto en una biela puede estropear el pedal y causar daños irreparables. Visualmente haga coincidir las pegatinas R y L del pedal y la biela antes de colocar los pedales. Antes de su primer recorrido, verifique que los pedales estén correctamente colocados. • Es muy importante que compruebe el ajuste y la tirantez correctos del conjunto de la biela antes de montar su bicicleta. ❶ Haga coincidir el pedal marcado R con la biela derecha y haga coincidir el pedal marcado L con la biela izquierda. Figura 3.17 ❷ Coloque el pedal roscado en el orificio roscado de la biela. ❸ A mano, gire lentamente el eje en la dirección correcta. Hacia la derecha para el pedal derecho y hacia la izquierda para el izquierdo. ¡Importante!¡Pare si percibe resistencia! Esto puede ser una indicación de que el eje está entrando en ángulo en el orificio. Retire el eje y repita los pasos dos y tres. El pedal izquierdo gira hacia la izquierda y el ❹ Si el eje está entrando correctamente en el orificio, utilice pedal derecho gira hacia una llave de 15 mm o alicates para apretarlo la derecha. completamente. Figura 3.17 ❺ Repita los pasos 1 al 4 para el pedal restante. -
Page 94: Fije La Cesta
3 Ensamblado FIJE LA CESTA ¡ADVERTENCIA! ❺ Para fijar la cesta, presiónela contra la placa hasta que encaje en su lugar. Para quitar la cesta, pulse el botón de No fijar de modo seguro la cesta en la bicicleta puede liberación rojo ubicado en el soporte de la misma y provocar que se caiga y cause un accidente dando como levántela. Figura 3.20 resultado lesiones graves o la muerte. Asegúrese siempre de que la cesta esté segura antes de montar en la bicicleta. No Abrazaeras lleve animales domésticos en la cesta ni cargue más de 10 libras. (4.5 kg). Nota: No todas las bicicletas vendrán equipadas con cestas Tornillos ❶ Coloque el soporte de montaje en el manillar de modo que las abrazaderas estén a ambos lados de la potencia y la placa de la cesta esté mirando hacia delante. La abrazadera Figura 3.18 Figura 3.19 inferior debe ajustarse apretadamente contra la bicicleta. Figura 3.18 ❷ Asegúrese de que las abrazaderas tengan un ajuste apretado contra el manillar. Utilice las calzas proporcionadas según sea necesario para crear el ajuste correcto. -
Page 95: Fije El Timbre
Ensamblado 3 FIJE EL TIMBRE Nota: No todas las bicicletas vendrán equipadas con un timbre. ❶ Coloque el conjunto del timbre en lo alto del manillar. Conjunto Figura 3.21 del timbre ❷ Coloque la abrazadera inferior bajo el manillar, alineando los orificios de la abrazadera inferior con los de la superior. ❸ Inserte los tornillos en los orificios de la abrazadera inferior y en los de la superior, y apriételos con un destornillador de estrella. Abrazadera inferior Tornillos Figura 3.21... -
Page 96: Ajustes
4 Ajustes Ajustes ❹ HERRAMIENTAS NECESARIAS Deberá hacer ajustes después de que esté montada su bicicleta. Si necesita piezas de repuesto o tiene preguntas relativas al • Destornillador de estrella montaje de su bicicleta, llame a la línea de servicio directo al: •... -
Page 97: Ajustar Los Frenos
Ajustes 4 AJUSTAR LOS FRENOS Ajustar las zapatas del freno ¡ADVERTENCIA! ❸ Revise que el cable del freno esté asentado en la maneta de freno. Usando una llave Allen de 5 mm, afloje el perno de No fijar apropiadamente los frenos puede dar como resultado anclaje del cable lo suficiente para que el cable del freno se pueda mover libremente. - Page 98 4 Ajustes ¡Importante! Antes de montar en la bicicleta es importante esté uniformemente centrada en el rin. Apriete de nuevo el revisar los frenos. Si aprieta la maneta de freno y uno de los perno después de posicionar la zapata correctamente. Figura 4.5 brazos del freno se mueve más que el otro (o no se mueve en absoluto), el freno no está...
- Page 99 Ajustes 4 ❷ Si el espacio entre la zapata del freno y la rueda es desigual, ajuste la posición de la zapata del freno. • Utilizando un destornillador de estrella, ajuste los tornillos de ambos lados del brazo de freno. Nota: Girar el Espacio uniforme entre la zapata de tornillo hacia laderecha separa la zapata del rin.
- Page 100 4 Ajustes Ajuste del freno de pinza de tracción lateral con el rin, apriete el perno de anclaje del cable completamente con una llave de 10 mm. Nota: Use el barril Conecte el cable del freno al transportador del freno de ajuste para afinar la tensión del cable del freno.
- Page 101 Ajustes 4 Ajustar las zapatas del freno que esté uniformemente centrada en el rin. Apriete de ¡Importante! Antes de montar en la bicicleta es importante nuevo el perno después de posicionar la zapata revisar los frenos. Si aprieta la maneta de freno y uno de los correctamente.
- Page 102 4 Ajustes ❷ Si el espacio entre la zapata de freno y la rueda es desigual, ajuste la tensión del freno. Figura 4.13 Afloje la tuerca de anclaje del cable. Con una sola mano, apriete las zapatas del freno contra el rin. Tire del cable para que no esté...
- Page 103 Ajustes 4 Revise los frenos ❶ Después de ajustar el freno, apriete la maneta del mismo tan fuerte como pueda varias veces y vuelva a inspeccionar 1/3 de distancia al las zapatas del freno, el centrado y el recorrido de la maneta manillar de freno.
-
Page 104: Ajustar El Cambio Trasero
4 Ajustes AJUSTAR EL CAMBIO TRASERO ❹ Desplace la palanca de cambio trasero hacia el engranaje uno y coloque la cadena en el piñón más grande. ¡ADVERTENCIA! ❺ Ajuste el tornillo de límite bajo en incrementos de un cuarto Asegúrese de que todos los pernos estén bien apretados y que de giro hasta que la polea guía y el piñón más grande estén la cadena no caiga en ninguna dirección. -
Page 105: Ajustar La Altura Del Sillín
Ajustes 4 AJUSTAR LA ALTURA DEL SILLÍN ¡ADVERTENCIA! La altura del sillín incorrectamente ajustada puede afectar la capacidad del ciclista para alcanzar el manillar y los pedales, lo que puede ocasionar un movimiento inesperado, pérdida de control y lesiones graves o la muerte. Siga estas directrices para ajustar la altura del sillín. - Page 106 4 Ajustes Abrazadera de liberación rápida del sillín ❶ Desbloquee la palanca de liberación rápida. Figura 4.19 ❷ Ajuste la altura del sillín hacia arriba o abajo hasta que el ciclista sienta que tiene el control de la bicicleta y esté cómodo.
-
Page 107: Ajuste Del Manillar
Ajustes 4 AJUSTE DEL MANILLAR ❸ Apriete el perno fijador de la potencia y compruebe que el manillar esté sujeto firmemente y no pueda moverse. ¡ADVERTENCIA! Ajuste el ángulo del manillar • Una fijación incorrecta del manillar puede dar como ❶... -
Page 108: Ajuste Del Juego De Dirección
4 Ajustes AJUSTE DEL JUEGO DE DIRECCIÓN ❷ Rigidez: Levante la parte delantera del cuadro para que la El juego de dirección es un conjunto de piezas que conectan la rueda delantera se separe del suelo. El manillar y la rueda horquilla delantera y el tubo de dirección del cuadro. - Page 109 Ajustes 4 ❸ Con la rueda delantera apoyada en el suelo, use una llave Si no puede solucionarse la holgura en el juego de dirección con ajustable o de estrella y mantenga la carrera superior estos ajustes, vea a un mecánico de bicicletas cualificado para enroscada en su lugar.
-
Page 110: Ajuste El Pedalier
4 Ajustes AJUSTE EL PEDALIER Normalmente el pedalier contiene cuatro piezas principales: gire ligeramente hacia la izquierda el cono de ajuste para contratuerca, cono ajustable, rodamientos y arandelas. La apretarlo. Vuelva a fijar la contratuerca y revise de nuevo. contratuerca tiene muescas. El cono ajustable tendrá muescas para una llave inglesa o herramienta de pedalier. -
Page 111: Uso
Uso 5 ❺ ¡ADVERTENCIA! Se recomienda practicar el frenado de modo que tenga control sobre lo rápido que se detiene la bicicleta. También es No seguir las normativas y leyes locales y estatales relativas al importante conocer el entorno por el que va a circular. Por uso de la bicicleta, así... - Page 112 5 Uso Frenos accionados a mano La mejor forma de evitar esto: • Accione simultáneamente los frenos delantero y trasero, ¡ADVERTENCIA! mientras desplaza el peso de su cuerpo ligeramente hacia atrás para compensar la fuerza de frenado. Si se acciona el freno delantero demasiado rápido o •...
-
Page 113: Funcionamiento De Las Marchas
Uso 5 FUNCIONAMIENTO DE LAS MARCHAS ¡ADVERTENCIA! • Es correcto montar todo el tiempo en sólo una marcha si está cómodo. Un cambio incorrecto puede dar como resultado el bloqueo de • Cambie sólo mientras pedalea hacia delante y sentado. la cadena, o hacerla descarrilar dando como resultado la Mientras cambia de marcha, disminuya la presión ejercida pérdida de control, lesiones graves o la muerte. - Page 114 5 Uso Uso de la palanca de cambio trasero Uso de la palanca de cambio trasero Palanca de cambios de tipo giro La palanca de cambio trasero (derecha) tendrá un indicador que La palanca de cambio trasero (derecha) tendrá un indicador que señale respectivamentebajo o alto o una serie de números del 1 señale respectivamentebajo o alto o una serie de números del 1 en adelante.
-
Page 115: Seguridad
Uso 5 SEGURIDAD ¡Acaba de comprar una bicicleta nueva! No la pierda. Es recomendable que dé los pasos siguientes para prepararse para un posible robo y evitarlo: • Mantenga un registro del número de serie de la bicicleta, La pegatina de generalmente ubicado en el cuadro, debajo del pedalier. -
Page 116: Mantenimiento
6 Mantenimiento Mantenimiento ❻ MANTENIMIENTO BÁSICO ¡ADVERTENCIA! • No realizar el mantenimiento de la bicicleta puede Los procedimientos siguientes le ayudarán a mantener su bicicleta ocasionar un mal funcionamiento de una pieza crítica y durante años de conducción agradable. lesiones graves o la muerte. Un mantenimiento adecuado • En el caso de cuadros pintados, retire el polvo de la superficie y es fundamental para un rendimiento y funcionamiento quite la suciedad suelta con un paño seco. Para lavar, limpie con seguros de la bicicleta. un paño húmedo empapado en una mezcla ligera de detergente. Seque con un paño y pula con cera de coche o de • Los intervalos recomendados y la necesidad de lubricación muebles. Utilice agua y jabón para las piezas de plástico y las y mantenimiento pueden variar dependiendo de a qué llantas de goma. Las bicicletas cromadas deben limpiarse con un condiciones esté expuesta la bicicleta. Inspeccione siempre líquido preventivo del óxido. la bicicleta y realice el mantenimiento necesario antes de cada uso. • Guarde su bicicleta bajo abrigo. Evite dejarla bajo la lluvia o expuesta a materiales corrosivos. Esta sección presenta información importante sobre el • Montar en bicicleta en la playa o en zonas costeras la expone a mantenimiento y le ayudará a determinar el curso de acción la sal, que es muy corrosiva. Lave frecuentemente su bicicleta y correcto a seguir si tiene un problema con el funcionamiento de limpie o rocíe todas las partes sin pintar con un tratamiento la bicicleta. Si tiene preguntas acerca del mantenimiento llame, antioxidante. Asegúrese de que los rines estén secos para que el sin ningún costo, a Servicio al Cliente al 1-800-626-2811 o vea a rendimiento del frenado no se vea afectado. Después de la... -
Page 117: Programa De Lubricación
Mantenimiento 6 PROGRAMA DE LUBRICACIÓN Componente Lubricante Método Semanalmente Cadenas Lubricante de cadena o Cepillo o chorro aceite ligero Pinzas de frenos Aceite Tres gotas de la lata de aceite Manetas de freno Aceite Dos gotas de la lata de aceite Piñón libre Aceite Dos gotas de la lata de aceite Sistemas de cambio Aceite ligero o grasa Todos los puntos de pivotado deben estar lubricados (más a menudo en condiciones severamente lluviosas o con barro). Limpie el exceso de aceite. Cables de freno Grasa con base de litio Quite el cable de la carcasa. Engrase a todo lo largo. Limpie el exceso de lubricación de otras superficies. Maneta de freno y puntos de Aceite ligero Dos o tres gotas de la lata de aceite pivote de la pinza Cable del cambio Capa fina de grasa Limpie y engrase Nota: La frecuencia de mantenimiento debe aumentar con el uso en condiciones húmedas o polvorientas. No lubrique en exceso. Quite el exceso de lubricante para evitar la acumulación de suciedad. Nunca utilice un desengrasante para lubricar las cadenas (WD-40®). -
Page 118: Mantenimiento De Las Partes
6 Mantenimiento Anualmente Abrazadera inferior Grasa con base de litio Desmontaje Pedales Grasa con base de litio Desmontaje Rodamientos de la rueda Grasa con base de litio Desmontaje Juego de dirección Grasa con base de litio Desmontaje Tija del sillín Grasa con base de litio Desmontaje Pedales: que pueden desmontarse Vea a un mecánico de bicicletas para el mantenimiento. MANTENIMIENTO DE LAS PARTES Llantas Frecuencia: Inspeccione y mantenga al menos en cada uso. Inspeccione Acción Mantenimiento Inflado de la Compruebe la presión de la llanta. Infle la llanta a la presión indicada en la pared lateral de la misma. llanta Compruebe que el reborde esté debidamente Reduzca la presión de aire en la cámara y reposicione el reborde. asentado mientras infla o vuelve a montar la llanta. Gire la rueda y verifique que la rotación y la Afloje las tuercas del eje y ajuste hasta que asiente alineación sean suaves y uniformes. correctamente. Si los rodamientos del buje necesitan reparación, vea a un mecánico de bicicletas para que lo haga. - Page 119 Mantenimiento 6 delanteras (blanco) Frecuencia: Inspeccione y mantenga al menos en cada uso. Inspeccione Acción Mantenimiento Rines Inspeccione por si hay suciedad o grasa. Use un trapo para limpiar o lave con agua jabonosa, aclare y seque al aire. delanteras Compruebe que las ruedas estén bien fijadas a la Ajuste si es necesario y apriete las tuercas del eje. (blanco) bicicleta y que las tuercas del eje estén apretadas. Gire la rueda y verifique que la rotación y la Vea a un mecánico de bicicletas para las reparaciones. alineación sean correctas. Radios Compruebe que no haya radios rotos o sueltos. Vea a un mecánico de bicicletas para las reparaciones. Rodamientos Levante cada rueda y vea si hay movimiento de Vea a un mecánico de bicicletas para las reparaciones. del buje lado a lado.
- Page 120 6 Mantenimiento Tren de transmisión (pedales, cadenas, plato, conjunto de la biela, piñón libre) Frecuencia: como se señale Inspeccione Acción Mantenimiento Pedales Todos los meses, revise que cada pedal esté firmemente Si es necesario, vuelva a ajustar y apretar. ajustado y apriételo en el brazo de la biela. Antes de cada viaje, compruebe que cada reflector delantero y Limpie o reemplace. trasero del pedal esté limpio y en su lugar. Rodamientos En cada viaje, verifique que los rodamientos del pedal estén Vea a un mecánico de bicicletas para las del pedal bien ajustados. Mueva el pedal hacia arriba y hacia abajo, a reparaciones. izquierda y derecha. Si se detecta soltura o aspereza, es necesario ajustar, lubricar o sustituir. Cadenas Cada semana, compruebe que la cadena esté limpia, bien Lubrique si es necesario. Reemplácela si está lubricada, sin óxido y que no esté estirada, rota o tenga oxidada, estirada o rota. eslabones rígidos. Conjunto de la Cada mes, revise que el conjunto de la biela (brazos de la biela, Vea a un mecánico de bicicletas para las biela...
-
Page 121: Rodamientos Del Buje
Mantenimiento 6 Frenos Frecuencia:Inspeccione y mantenga antes de cada uso Inspeccione Acción Mantenimiento Palancas Compruebe que las palancas estén firmemente sujetas al Coloque las palancas para ajustarse al manillar. agarre del ciclista y atorníllelas fijamente al manillar. Zapatas Revise la posición de las zapatas, el espacio y la presión. Vea la sección 4: Ajustar los frenos Cables Compruebe la carcasa exterior por si hay torceduras, bucles Reemplace el cable. estirados y daños. Compruebe los cables por si hay torceduras, óxido, hebras rotas o extremos deshilachados. Compruebe la carcasa exterior por si hay torceduras, bucles estirados y daños. Compruebe que la cubierta esté correctamente asentada en Se recomienda que los cables y las fundas se cada tope del cable de la bicicleta. sustituyan cada temporada ciclista. RODAMIENTOS DEL BUJE Los rodamientos del buje requieren llaves finas especiales ❸ Gire el cono de ajuste según sea necesario para eliminar el llamadas llaves cónicas. Si no dispone de estas herramientas, no juego. trate de ajustar los rodamientos del buje. Vaya a un mecánico de bicicletas cualificado para realizar el ajuste, si tiene alguna ❹ Apriete la contratuerca mientras sostiene el cono de ajuste... -
Page 122: Desinfle La Cámara De La Llanta
6 Mantenimiento DESINFLE LA CÁMARA DE LA LLANTA ¡ADVERTENCIA! ❺ Asegúrese de que la llanta esté uniformemente asentada en el rin por ambos lados. Si no, libere un poco de aire y repita los pasos del tres al seis. • Una llanta mal asentada puede pinchar inesperadamente y ocasionar lesiones graves o la muerte. Asegúrese de que ❻ Compruebe que no haya suciedad en el tapón de la válvula o la llanta esté debidamente asentada al inflar la cámara. en el vástago. Limpie la suciedad del tapón de la válvula o • Un inflado excesivo o demasiado rápido de la cámara del vástago. puede provocar que la llanta salga volando del rin y dañe la bicicleta o le provoque lesiones al ciclista. Utilice ❼ Vuelva a colocar firmemente el tapón de la válvula en el siempre una bomba de mano para inflar la cámara. No vástago. utilice el servicio de bomba de las gasolineras para inflar la cámara. Siga estos pasos para inflar una llanta: ❶ Retire el tapón de la válvula yañada aire. ❷ Asegúrese de que la llanta esté uniformemente asentada en el rin por ambos lados. ❸ Gire la rueda y busque zonas altas y bajas. ❹ Complete el inflado al valor psi recomendado en la pared lateral de la llanta. -
Page 123: Reparar Una Llanta Pinchada
Mantenimiento 6 REPARAR UNA LLANTA PINCHADA ¡ADVERTENCIA! ❽ Infle la cámara a 1/4 del total y colóquela dentro de la llanta. Una llanta mal asentada puede pinchar inesperadamente y ❾ Introduzca el vástago de la válvula a través del agujero ocasionar lesiones graves o la muerte. Asegúrese de que la correspondiente en el rin. llanta esté debidamente asentada al inflar la cámara. ❿ Empiece con el vástago de la válvula e instale el primer reborde en el rin. Repita con el segundo reborde. Siga estos pasos para reparar una llanta pinchada: ⓫ Infle lentamente la cámara, compruebe que la llanta esté ❶ Revise que coincidan el tamaño de la cámara y de la llanta correctamente asentada y no quede pellizcada mientras infla (vea el tamaño en la pared lateral de la llanta). la cámara de la llanta. ❷ Quite la rueda de la bicicleta. Desinfle totalmente la cámara ⓬ Infle a la presión recomendada (vea la pared lateral de la de la llanta. llanta). ❸ Apriete el reborde de la llanta en el centro del rin. ❹ Enfrente de la válvula, utilice una palanca de llanta de bicicleta para apalancar el reborde de la llanta y que salga del rin. Repita alrededor de la rueda hasta que uno de los rebordes esté fuera del rin. ❺ Quite la cámara. Libere el segundo reborde de la llanta. ❻ Quite la llanta. ❼ Inspeccione cuidadosamente en el interior del rin y de la llanta para ver la causa del pinchazo. -
Page 124: Guía De Identificación Y Solución De Problemas
6 Mantenimiento GUÍA DE IDENTIFICACIÓN Y SOLUCIÓN DE PROBLEMAS Problema Causa probable Remedio El cambio de marchas • Los cables del cambio están pegados, estirados o dañados • Lubrique/apriete/reemplace los cables no funciona • El cambio trasero no está ajustado adecuadamente • Ajuste los cambios correctamente • El cambio indexado no está ajustado adecuadamente • Ajuste el indexado La cadena patina • Dientes del plato o del piñón libre excesivamente • Reemplace el plato, los piñones y la desgastados o mellados cadena • Cadena desgastada/estirada • Reemplace la cadena • Eslabón rígido en la cadena • Lubrique o reemplace el eslabón • Cadena incompatible con el plato y el piñón libre • Pida asesoramiento en una tienda de... - Page 125 Mantenimiento 6 Problema Causa probable Remedio Ruidos chirriantes • Rodamientos del pedal demasiado apretados • Ajuste los rodamientos cuando pedalea • Rodamientos del pedalier demasiado • Ajuste los rodamientos apretados • Ajuste la línea de la cadena • La cadena traba los cambios • Limpie y lubrique las ruedas direccionales • Ruedas direccionales del cambio sucias o trabadas El piñón libre no gira • Los pernos de trinquete interno del piñón • Lubrique. Si el problema persiste, cambie el piñón libre están atascados libre Los frenos no funcionan • Las zapatas del freno están gastadas • Reemplace las zapatas del freno con eficacia • Las zapatas del freno o el rin están • Limpie las zapatas y el rin grasientos, húmedos o sucios • Limpie/ajuste/reemplace los cables...
- Page 126 6 Mantenimiento Problema Causa probable Remedio Golpeteo o • Hay un bulto en el rin o el rin está • Alinee la rueda o llévela a una tienda de bicicletas para temblor cuando se desalineado su reparación accionan los • Los pernos de instalación del freno están • Apriete los pernos frenos flojos • Centre los frenos o ajuste la convergencia de las zapatas • Los frenos están desajustados del freno • Horquilla suelta en el tubo de cabezal • Apriete el juego de dirección Rueda • Eje roto • Reemplace el eje tambaleante • Rueda desalineada • Alinee la rueda • El buje se afloja • Ajuste los rodamientos del buje • El juego de dirección se traba...
-
Page 127: Garantía
Garantía 7 Garantía ❼ GARANTÍA LIMITADA Y POLÍTICA SOBRE PROCEDIMIENTOS Y RESPONSABILIDADES DE REEMPLAZO Su compra incluye la siguiente garantía que sustituye a todas las demás garantías explícitas. Esta garantía se extiende sólo al comprador inicial. No se necesita registrar la garantía. Esta garantía le otorga derechos legales concretos y es posible que tenga también otros derechos que varían según el estado. -
Page 128: Registro De Compra
7 Garantía REGISTRO DE COMPRA Rellénelo inmediatamente y consérvelo como registro de su compra. Conserve su recibo de venta para cualquier posible La pegatina de reclamación de la garantía. servicio está situada encima Su nombre: Dirección: Ciudad: Estado: Fecha de compra: Lugar de compra: El número de serie Información del modelo y marca:... - Page 130 WWW.SCHWINNBIKES.COM OMSCCR 4902 Hammersley Road Madison, WI 53711 WARNING: This product can expose you to chemicals including lead, Service: 1-800-626-2811 which is known to the State of California to cause cancer and birth defects or ©2017 Pacific Cycle, Inc. www.pacific-cycle.com other reproductive harm.
Need help?
Do you have a question about the S5477D and is the answer not in the manual?
Questions and answers