Table of Contents
Advertisement
USING THE RANGE
Surface Units . . . . . . . . . . . . . . . . . . . . . . . . . . . 8
Oven Controls . . . . . . . . . . . . . . . . . . . . . . . . . .10
Special Features . . . . . . . . . . . . . . . . . . . . . . . . 11
Oven Racks . . . . . . . . . . . . . . . . . . . . . . . . . . . . 12
Aluminum Foil and Oven Liners . . . . . . . . . . . 12
Cookware . . . . . . . . . . . . . . . . . . . . . . . . . . . . . . 12
Cooking Modes . . . . . . . . . . . . . . . . . . . . . . . . .13
Cooking Guide . . . . . . . . . . . . . . . . . . . . . . . . .14
CARE AND CLEANING
Cleaning the Range - Exterior . . . . . . . . . . . .15
Cleaning the Range - Interior . . . . . . . . . . . .18
Oven Light . . . . . . . . . . . . . . . . . . . . . . . . . . . . .19
Oven Door . . . . . . . . . . . . . . . . . . . . . . . . . . . . 20
Storage Drawer. . . . . . . . . . . . . . . . . . . . . . . . 20
Write the model and serial
numbers here:
Model # _________________
Serial # _________________
You can find the rating label on
the front behind the range drawer.
GE is a trademark of the General Electric Company. Manufactured under trademark license.
. . . . . . . . . . 3
. . . . . . . 23
. . . . . . . . . . . . 26
. . . . . . . . . . . . . . . . . . . . 27
. . . . . . . . . . . 28
OWNER'S MANUAL
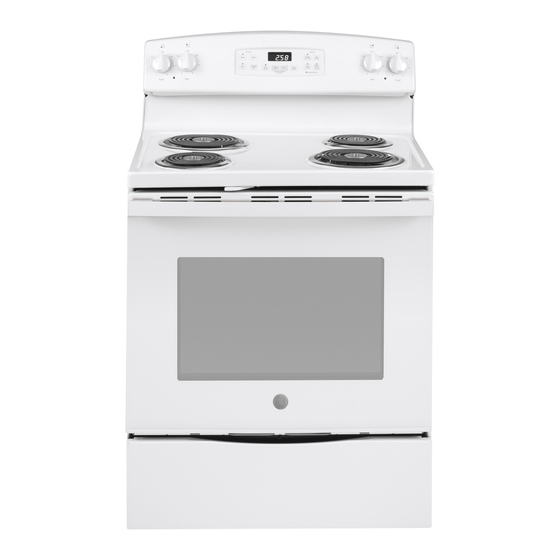
JB258 - 30" Free-Standing Range
ESPAÑOL
Para consultar una version en
español de este manual de
instrucciones, visite nuestro sitio de
internet GEAppliances.com.
49-2000950 Rev. 1 12-21 GEA
Advertisement
Table of Contents

Related Manuals for GE JB258


Summary of Contents for GE JB258
-
Page 1: Table Of Contents
GEAppliances.com. Serial # _________________ You can find the rating label on the front behind the range drawer. GE is a trademark of the General Electric Company. Manufactured under trademark license. 49-2000950 Rev. 1 12-21 GEA... - Page 2 THANK YOU FOR MAKING GE APPLIANCES A PART OF YOUR HOME. Whether you grew up with GE Appliances, or this is your first, we’re happy to have you in the family. We take pride in the craftsmanship, innovation and design that goes into every GE Appliances product, and we think you will too.
-
Page 3: Safety Information
IMPORTANT SAFETY INFORMATION READ ALL INSTRUCTIONS BEFORE USING THE APPLIANCE Read all safety instructions before using the product. Failure to follow these instructions may result WARNING in fire, electrical shock, serious injury or death. ANTI-TIP DEVICE WARNING To reduce the risk of tipping the range, the range must be secured by a properly Tip-Over Hazard installed anti-tip bracket. - Page 4 IMPORTANT SAFETY INFORMATION READ ALL INSTRUCTIONS BEFORE USING THE APPLIANCE WARNING GENERAL SAFETY INSTRUCTIONS (Cont.) ■ Do not touch the surface units, the heating elements ■ Avoid scratching or impacting glass doors, cook or the interior surface of the oven. These surfaces tops or control panels. Doing so may lead to glass may be hot enough to burn even though they are breakage.
- Page 5 IMPORTANT SAFETY INFORMATION READ ALL INSTRUCTIONS BEFORE USING THE APPLIANCE WARNING COOKTOP SAFETY INSTRUCTIONS ■ Never leave the surface units unattended. Boilovers ■ When using glass/ceramic cookware, make sure cause smoking and greasy spillovers that may it is suitable for cooktop service; others may break ignite.
- Page 6 IMPORTANT SAFETY INFORMATION READ ALL INSTRUCTIONS BEFORE USING THE APPLIANCE WARNING OVEN SAFETY INSTRUCTIONS ■ Stand away from the range when opening the oven ■ When using cooking or roasting bags in the oven, door. Hot air or steam which escapes can cause follow the manufacturer’s directions. burns to hands, face and/or eyes. ■ Pull the oven rack to the stop-lock position when ■ Do not use the oven if a heating element develops loading and unloading food from the oven. This a glowing spot during use or shows other signs helps prevent burns from touching hot surfaces of of damage.
- Page 7 IMPORTANT SAFETY INFORMATION READ ALL INSTRUCTIONS BEFORE USING THE APPLIANCE WARNING SELF-CLEANING OVEN SAFETY INSTRUCTIONS The self-cleaning feature operates the oven at temperatures high enough to burn away food soils in the oven. Follow these instructions for safe operation. ■ Do not touch oven surfaces during self-clean ■ If the self-cleaning mode malfunctions, turn the operation. Keep children away from the oven during oven off and disconnect the power supply.
-
Page 8: Surface Units
Surface Units FIRE HAZARD: Never leave the range unattended with the cooktop ON above a Lo setting. Keep WARNING flammable items away from the cooktop. Turn off all controls when done cooking. Failure to follow these instructions can result in fire, serious injury or death. Throughout this manual, features and appearance may vary from your model. How to Set Push the knob in and turn in either direction to the setting you want. - Page 9 Surface Units (Cont.) More about Cookware ■ Place only dry pans on the surface elements. Do not place lids on the surface elements, particularly wet lids. Wet pans and lids may stick to smooth surface when cool. ■ Do not use woks that have support rings. This type of Check pans for flat bottoms by wok will not heat on the cooktop. using a straight edge.
-
Page 10: Oven Controls
Oven Controls 1. Traditional Cooking Modes: 9. Timer: Your oven has Works as a countdown timer. Press the the following traditional cooking modes: Bake and Timer pad and the +/- pads to program the time in Broil Hi/Lo. See the Cooking Modes section for more hours and minutes. Press the Start pad. The timer information. -
Page 11: Special Features
Special Features There are several different special features on your range. To change the settings of these special features: ■ P ress the Bake and Broil pads at the same time and hold for three seconds. ■ “ SF” will appear in the display. ■ S elect the feature you want to change. ■ W hen the change has been made, press the Start key to save the change and return to the time of day. -
Page 12: Oven Racks
Oven Racks Recommended rack positions for various types of foods are provided in the Cooking Guide. Adjusting rack position is one way to impact cooking results. For example, if you would prefer darker tops on cakes, muffins, or cookies, try moving food one rack position higher. -
Page 13: Cooking Modes
Cooking Modes Your new oven has a variety of cooking modes to help you get the best results. These modes are described below. Refer to the Cooking Guide section for recommendations for specific foods. Remember, your new oven may perform differently than the oven it is replacing. -
Page 14: Cooking Guide
Cooking Guide RECOMMENDED RECOMMENDED FOOD TYPE MODE(S) RACK POSITION(S) ADDITIONAL SUGGESTIONS Baked Goods Layer Cakes, sheet cakes, bundt cakes, muffins, quick breads on Bake Use shiny cookware. a Single Rack Ensure adequate airflow Layer cakes* on Multiple Racks Bake 3 and 5 (see illustration below). -
Page 15: Cleaning The Range - Exterior
Cleaning the Range – Exterior WARNING Be sure all controls are off and all surfaces are cool before cleaning any part of the range. Tip-Over Hazard If your range is removed for cleaning, servicing or any reason, be sure the anti- WARNING A child or adult can tip the range and be killed. - Page 16 Cleaning the Range – Exterior (Cont.) Porcelain Enamel Cooktop The porcelain enamel finish is sturdy but breakable if For other spills such as fat spatterings, wash with soap misused. This finish is acid-resistant. However, any and water or cleansing powders after the surface has acidic foods spilled (such as fruit juices, tomato or cooled.
- Page 17 Cleaning the Range – Exterior (Cont.) Drip Pans Remove the surface units. Then lift out the drip pans. NOTE: If your cooktop is equipped with shiny, silver- colored drip pans, do not clean them in the self-cleaning For best results, clean the drip pans by hand. Place oven.
-
Page 18: Cleaning The Range - Interior
Cleaning The Oven - Interior The interior of your new oven can be cleaned manually or by using Self Clean. Spillage of marinades, fruit juices, tomato sauces and basting liquids containing acids may cause discoloration and should be wiped up immediately. Let hot surfaces cool, then clean and rinse. Manual Cleaning Do not use oven cleaners (unless certified for self- soap and water or vinegar and water solution. -
Page 19: Oven Light
Oven Light SHOCK OR BURN HAZARD: Before replacing oven light bulb, disconnect the electrical power to the WARNING range at the main fuse or circuit breaker panel. Failure to do so may result in electric shock or burn. BURN HAZARD: The glass cover and bulb should be removed when cool. Touching hot glass with CAUTION bare hands or a damp cloth can cause burns. -
Page 20: Oven Door
Oven Door The door is very heavy. Be careful when removing and lifting the door. Do not lift the door by the handle. To remove the door: To replace the door: 1. Fully open the door. 1. Firmly grasp both sides of the door at the top. 2. - Page 21 Notes 49-2000950 Rev. 1...
- Page 22 Notes 49-2000950 Rev. 1...
-
Page 23: Troubleshooting Tips
Troubleshooting Tips ... Before you call for service Save time and money! Review the charts on the following pages first and you may not need to call for service. Problem Possible Cause What To Do Surface units will not Improper cookware being used. Use pans which are flat and match the diameter of maintain a rolling boil the surface unit selected. - Page 24 Troubleshooting Tips ... Before you call for service Problem Possible Cause What To Do “Crackling” or This is the sound of the metal heating and This is normal. “popping” sound cooling during both the cooking and cleaning functions. Why is my range Your range cycles the heating elements by This is normal.
- Page 25 Troubleshooting Tips ... Before you call for service Problem Possible Cause What To Do Display goes blank A fuse in your home may be blown or Replace the fuse or reset the circuit breaker. the circuit breaker tripped. The clock is turned off. See the Special features section.
-
Page 26: Limited Warranty
GE Appliances with information on your appliance. If you do not want your appliance data to be sent to GE Appliances, please advise your technician not to submit the data to GE Appliances at the time of service. -
Page 27: Accessories
Cleaning Supplies CitruShine™ Stainless Steel Wipes Stainless Steel Appliance Cleaner Non-scratch Cleaning Pads for Ceramic Cooktops Ceramic Cooktop Cleaner Ceramic Cooktop Scraper Kit (Kit includes cream and cooktop scraper) Graphite Lubricant *The large broiler pan does not fit in 20”/24” ranges. **The XL broiler pan does not fit in 24” wall ovens, 27”drop ins or 20”/24” ranges NOTE: Go to GE Appliances website to view recommended cleaners. 49-2000950 Rev. 1... -
Page 28: Consumer Support
Have a question or need assistance with your appliance? Try the GE Appliances Website 24 hours a day, any day of the year! You can also shop for more great GE Appliances products and take advantage of all our on-line support services designed for your convenience. In the US: GEAppliances.com...
Need help?
Do you have a question about the JB258 and is the answer not in the manual?
Questions and answers