Table of Contents
Advertisement
Quick Links
Qualcast
46cm Petrol Hand Push
Lawnmower
Assembly Manual
Important
- Please read these instructions fully before starting assembly
These instructions contain important information that will help you get the best from your
lawnmower, ensuring it is assembled correctly and safely.
XSS46D
Technical Support & Parts
01904 727500
Mon-Fri 9am-5pm Sat-Sun 11am-4pm
www.gardenservicecentre.co.uk
Scan to watch
our instruction
videos!
Aug 2016 Rev B
Advertisement
Chapters
Table of Contents

Related Manuals for Qualcast XSS46D


Summary of Contents for Qualcast XSS46D
- Page 1 Qualcast 46cm Petrol Hand Push Lawnmower Assembly Manual XSS46D Technical Support & Parts 01904 727500 Mon-Fri 9am-5pm Sat-Sun 11am-4pm www.gardenservicecentre.co.uk Scan to watch our instruction videos! Important - Please read these instructions fully before starting assembly These instructions contain important information that will help you get the best from your lawnmower, ensuring it is assembled correctly and safely.
-
Page 2: Table Of Contents
Contents Safety Information .............................3 Warning Symbols ............................3 General Safety ..............................3 Personal Safety ............................3 In the Box ................................4 Parts ................................4 Tools ................................4 Assembly ................................5 Preparing to assemble the lawnmower ......................5 Step 1 ................................5 Step 2 ................................5 Step 3 ................................6 Step 4 ................................6 Step 5 ................................7 Getting help ...............................7 Customer Helpline 01904 727500... -
Page 3: Safety Information
Safety Information Important - Please read these instructions fully before starting assembly Warning Symbols The following warning symbols appear throughout this assembly manual and indicate the appropriate safety measures you should take when assembly and operating the lawnmower. This symbol indicates there is a danger of serious personal injury or death if you do not observe the warning. -
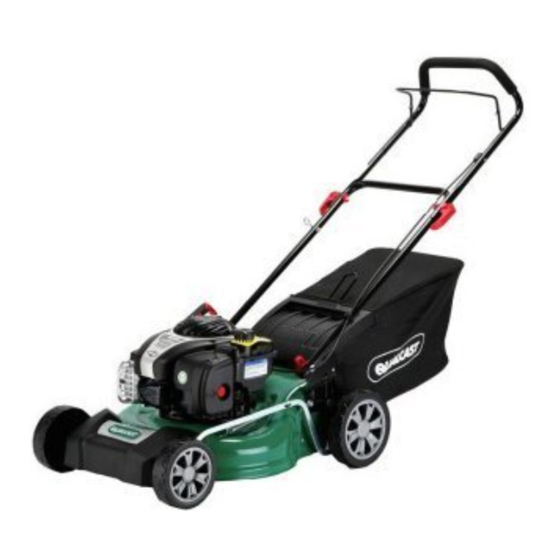
Page 4: In The Box
In the Box Tools Parts Main mower deck Grass collecting Spanner & philips Lower handle fixing (with upper handle bag 1pc screwdriver 1pc knob with nut M8 attached) 2pcs Cable clip 1pc Lower handle Rope guide 1pc (attached to the Quick release 2pcs lower handle) You will also need:... -
Page 5: Assembly
Assembly Preparing to assemble the lawnmower WARNING! - Always take care when removing the packaging to prevent damage to you or to the lawnmower. - This item requires a two person lift to remove from the packaging. Make sure that you have sufficient space to put the lawn mower down. -
Page 6: Step 3
Assembly Step 3 Lift the upper handle, and lock in place using the quick release lever and tensioning bolts that are attached to the handle. Ensure the lower and upper handles are firmly connected. Pull on/off lever and gently pull the rope. Hook it around the guide rope Step 4 IMPORTANT! Make sure the grass collection box is in place before starting the engine. -
Page 7: Getting Help
Assembly Step 5 Ensure that the cables clips supplied are used to fix the cable to the lower handle STOP! Do not start the engine before putting 500ml of SAE 30 oil into the engine. Failure to do so will result in irreparable damage to the engine and invalidate your warranty. Getting Help Customer Helpline 01904 727500 Our dedicated UK based customer helpline is open 7 days a week to assist you with assembly,... - Page 8 Qualcast 46cm Petrol Hand Push Lawnmower Operation and Maintenance Manual XSS46D Technical Support & Parts 01904 727500 Mon-Fri 9am-5pm Sat-Sun 11am-4pm www.gardenservicecentre.co.uk Scan to watch our instruction videos! Important - Please read these instructions fully before starting assembly These instructions contain important information that will help you get the best from your lawnmower, ensuring it is assembled correctly and safely.
- Page 9 Maintenance Schedule ..........................15 Cleaning ..............................15 Clean/ Replace Air filter ..........................16 Clean or Replace Spark Plug ........................16 Changing the Oil ............................17 Replacing Cutting Blade ..........................17 List of Consumable Qualcast Parts ......................18 Troubleshooting ............................19 Technical Data ..............................20 Disposal................................20 Getting Help ..............................20 Guarantee ...............................21 Customer Helpline 01904 727500 www.gardenservicecentre.co.uk...
-
Page 10: Safety Information
Safety Information Important - Please read these instructions fully before operating or maintaining Warnings Symbols The following warning symbols appear throughout this manual and indicate the appropriate safety measures you should take when operating and maintaining the lawnmower. Read instruction handbook before operating this machine. Keep bystanders away. -
Page 11: General Safety
Safety Information Important - Please read these instructions fully before operating or maintaining General Safety WARNING! - Keep this operating and maintenance manual in a safe place for reference at a later date. - Read the instructions carefully. Be familiar with the controls and the proper use of the equipment. - Never allow children or people unfamiliar with these instructions to use the lawnmower. -
Page 12: Operation Safety
Safety Information Important - Please read these instructions fully before operating or maintaining Operation Safety WARNING! - Do not operate the engine in a confined space where dangerous carbon monoxide fumes can collect. - Mow only in daylight or in good artificial light. - Avoid operating the equipment on wet grass, where feasible. -
Page 13: Maintenance And Storage Safety
Safety Information Important - Please read these instructions fully before operating or maintaining Maintenance and Storage WARNING! - Keep all nuts, bolts and screws tight to be sure the equipment is in safe working condition. - Never store the equipment with petrol in the tank inside a building where fumes can reach an open flame or spark. -
Page 14: Preparing To Operate The Lawnmower
Preparing to Operate the Lawnmower Step 1 - Filling with Engine Oil IMPORTANT! - The following procedures and adjustments must be performed before the engine is started. Do not attempt to make any of these adjustments while the engine is running. - Always use high quality detergent oil classified SAE30 oil (or equivalent eg 5W 30, often termed as 4 Stroke lawn mower oil). -
Page 15: Step 2 - Filling With Engine Fuel
4 Clean up any overflow or splashes of petrol before starting the engine. 5 Tighten the filler cap after filling, finger tight only. NOTE! The Qualcast 46cm Hand Push Lawnmower has a maximum fuel capacity of 750ml. Customer Helpline 01904 727500... -
Page 16: Operating The Lawnmower
Operating the Lawnmower Step 1 - Setting the Cutting Height WARNING! - The blade can cause serious injury. Before adjusting the mower height, stop the engine and wait for the mower blade to stop completely. 1 Pull the lever towards the wheel, then move it forward or backward to adjust the cutting height. 2 Move it to any one of the 7 positions (25mm~75mm) for the desired cutting height. - Page 17 Operating the Lawnmower Step 2 - Starting the Engine (continued) 2a Press the primer bulb (A) 3-5 times. When starting a cold engine, press down the primer fully 3~5 times. Pressing the primer button too many times could cause the engine to flood. NOTE! When starting a warm engine, the primer does not need to be used.
-
Page 18: Step 3 - Mowing
Operating the Lawnmower Failure to start If the engine won’t start after you have operated the starter several times, the engine may be flooded with excess fuel. Use following procedure to clear and start a flooded engine: A. Release the stop/start bar. B. -
Page 19: Step 4 - Emptying The Grass Bag
Operating the Lawnmower Step 4 - Emptying the Grass Bag - Raise the discharge flap with one hand and remove the grass bag using its handle with your other hand. To maintain safety, the discharge flap will close back to cover the mulching plug, when you release the flap. -
Page 20: Maintenance
Maintenance Storing the Lawnmower for Short Periods After mowing please follow the below actions prior to placing the lawnmower in storage. • Allow the engine to fully cool. • Ensure the grass bag is empty. • Clean all debris from under the mower deck. •... -
Page 21: Maintenance Schedule
Maintenance Maintenance Schedule WARNING! - Before you tip the lawn mower onto its side, completely empty the fuel tank using a petrol suction pump. - Never turn the mower upside down. - Before commencing any maintenance always disconnect the spark plug Performing routine maintenance correctly on your lawnmower will ensure you get years of trouble free use. - Page 22 Maintenance Cleaning or Replacing Air Filter WARNING! Never run the engine without the air filter element installed. 1. Loosen the fastener that holds the cover. 2. Open the cover and remove the filter. 3. To loosen debris, gently tap the filter on a hard surface. If the filter is excessively dirty, replace with a new filter.
-
Page 23: Changing The Oil
Maintenance Changing the Oil Changing the Oil Tilt the lawnmower towards the oil filler, have a container ready to catch the oil and remove the dipstick. Once the oil has been emptied, wipe clean any spillages. Refill with 500ml SAE30 oil or equivalent ie SAE5W/30, SAE10W/30). When the dipstick is screwed into the filler pipe, the oil level must be between the min and max marks on the dipstick. -
Page 24: List Of Consumable Qualcast Parts
NOTE! If you are unsure about performing this operation call our helpline or go to an authorised dealer to change the blade for you. . List of consumable Qualcast parts QC12YC Spark plug... -
Page 25: Troubleshooting
Troubleshooting General Troubleshooting WARNING! - Always switch off the engine and pull the ignition cable before starting any inspection or adjustment work. - If, after making an adjustment or repair to the engine, you let it run for a few minutes, remember that the exhaust and other parts will get hot. -
Page 26: Technical Data
Technical Data Technical Data Table Property Value Engine type Single cylinder 4-stroke Engine displacement 125cc Engine max. power 1.8kW/3000/min Engine speed 3000/min Cutting width 46cm Cutting height 25~75mm, 7 positions Grass bag capacity Ignition T.C.I Fuel tank 0.8L Oil tank 0.5L Meassured sound pressure level 93 dB(A) -
Page 27: Guarantee
Guarantee Dear Customer, In the unlikely event that your device develops a fault, please contact our customer service department on the telephone number shown below. 1. These guarantee terms cover additional guarantee rights and do not affect your statutory warranty rights. Claims must be accompanied by Proof of Purchase.
Need help?
Do you have a question about the XSS46D and is the answer not in the manual?
Questions and answers