TRENDnet TEW-648UBM User Manual
Micro n150 wireless usb adapter
Hide thumbs
Also See for TEW-648UBM:
- User manual (29 pages) ,
- Quick installation manual (13 pages) ,
- Datasheet (2 pages)
Table of Contents
Advertisement
Quick Links
Advertisement
Table of Contents

Subscribe to Our Youtube Channel
Related Manuals for TRENDnet TEW-648UBM


Summary of Contents for TRENDnet TEW-648UBM
- Page 1 Cover Page TRENDnet User’s Guide...
-
Page 2: Table Of Contents
WPS connection using the built in utility (Virtual Push Button) ......11 Mac® OS ........................12 WPS connection using the built in utility (Virtual Push Button) ......12 Technical Specifications ..............14 Troubleshooting ................15 Appendix ..................16 © Copyright 2017 TRENDnet. All Rights Reserved. -
Page 3: Product Overview
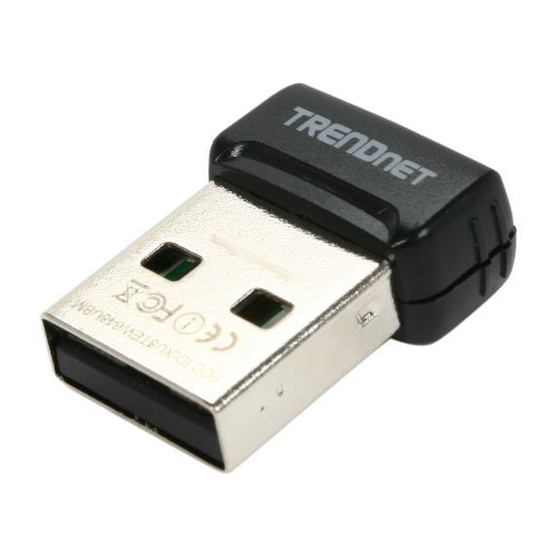
TRENDnet User’s Guide Features Product Overview TRENDnet’s Micro N150 Wireless USB Adapter, model TEW-648UBM, connects a laptop or desktop computer to a high-speed WiFi N network. Seamlessly stream video, download files, and play games with this ultra-compact wireless n adapter. WiFi Multimedia Quality of Service prioritizes important video, audio, and gaming traffic. -
Page 4: Installing Your Wireless Adapter
Windows® OS Installation Supported operating systems: Windows® 10, 8.1, 8, 7, Vista, XP For any updates, please check the TRENDnet website www.trendnet.com. 1. Insert the included CD-ROM into your computer’s CD-ROM drive. Note: If you do not have the included CD-ROM, you can download the drivers from http://www.trendnet.com/support/. - Page 5 6. Wait for the driver installation to complete. This may take a few minutes. Note: If you do not receive a security prompt, continue to the next step. If prompted, click Install this driver software anyway. © Copyright 2017 TRENDnet. All Rights Reserved.
- Page 6 9. Click on the wireless icon in the taskbar located in the bottom right corner. After the computer is rebooted, plug the Wireless N USB Adapter into an available USB slot on your computer. © Copyright 2017 TRENDnet. All Rights Reserved.
- Page 7 11. Enter the WiFi Key (password) and click Next. 12. The status will display “Connected” to indicate a successful connection. Note: If the connected message does not display, double check your WiFi key (password) and re-enter it. © Copyright 2017 TRENDnet. All Rights Reserved.
-
Page 8: Mac® Os Installation
10.12, the folder will be named “Mac OS 10.7-10.12”. Supported operating systems: Mac® OS 10.7-10.12 For any updates, please check the TRENDnet website www.trendnet.com. 1. Insert the included CD-ROM into your computer’s CD-ROM drive. Note: If you do not have the included CD-ROM, you can download the utility and drivers from http://www.trendnet.com/support/... - Page 9 TEW-648UBM TRENDnet User’s Guide 5. At the Introduction window, click Continue. 6. At the Read Me window, click Continue. © Copyright 2017 TRENDnet. All Rights Reserved.
- Page 10 TEW-648UBM TRENDnet User’s Guide 7.At the License Agreement window, click Continue. 9.At the Install window, click Install. 8. When prompted, click Agree. © Copyright 2017 TRENDnet. All Rights Reserved.
- Page 11 10. When prompted, enter your Mac® user account password to authorize the install, 12. Once the installation is complete, you will be prompted to restart the computer. click Install Software. Click Restart to restart your computer. 11. When prompted, click Continue Installation. © Copyright 2017 TRENDnet. All Rights Reserved.
- Page 12 Note: If the connected message does not display, double check your WiFi key (password) and re-enter it. 16. A list of available wireless network will appear. Click on the wireless network you would like to connect. © Copyright 2017 TRENDnet. All Rights Reserved.
-
Page 13: Connect To Your Wireless Network Using Wps
1. Click the WiFi icon in the system tray to scan for available wireless networks. 3. On your wireless router/access point, push the WPS button. Note: Typically, the WPS button hold time is 3-5 sec., then release. For TRENDnet routers/access points, the WPS hardware push button hold time is 3 seconds. If you are using another brand device, you may need to refer to your device documentation for WPS operation. -
Page 14: Mac® Os
WPS connection using the built in utility (Virtual Push Button) 1 On your wireless router/access point, push the WPS button. Note: Typically, the WPS button hold time is 3-5 sec., then release. For TRENDnet routers/access points, the WPS hardware push button hold time is 3 seconds. If you are using another brand device, you may need to refer to your device documentation for WPS operation. - Page 15 Note: If the WPS process fails, you will receive not receive a message “Connected”. You may need to attempt the WPS process again. Please refer to your wireless router/access point documentation regarding the operation of WPS. © Copyright 2017 TRENDnet. All Rights Reserved.
-
Page 16: Technical Specifications
802.11b: up to 11Mbps Warranty 802.11g: up to 54Mbps 3 year limited 802.11n: up to 150Mbps Output Power 802.11b: 17 ± 1.5dBm 802.11g: 15 ± 1.5dBm 802.11n: 14 ± 1.5dBm © Copyright 2017 TRENDnet. All Rights Reserved. -
Page 17: Troubleshooting
3. Check your TCP/IP properties to ensure that Obtain an IP address automatically is selected. 4. Double-click the Wireless Configuration Utility icon, click Available Networks and then click Refresh to check and see if there are any available wireless networks listed. © Copyright 2017 TRENDnet. All Rights Reserved. -
Page 18: Appendix
Setting up wireless security is very important. Leaving your wireless network open and speeds under this encryption type however are limited to 54Mbps. unsecure could expose your entire network and personal files to outsiders. TRENDnet WPA-Auto: This setting provides the router with the ability to detect wireless recommends reading through this entire section and setting up wireless security on your devices using either WPA or WPA2 encryption. - Page 19 Go into the Control Panel, click Network and Internet. Configuration 13 characters 8-63 characters 8-63 characters b. Click Manage Network Connections, right-click the Local Area Connection icon and click Properties. c. Click Internet Protocol Version (TCP/IPv4) and then click Properties. © Copyright 2017 TRENDnet. All Rights Reserved.
- Page 20 Connect. 4. You may be prompted to enter a security key in order to connect to the network. 5. Enter in the security key corresponding to the wireless network, and click OK. © Copyright 2017 TRENDnet. All Rights Reserved.
- Page 21 Europe – EU Declaration of Conformity one of the following measures: TRENDnet hereby declare that the product is in compliance with the essential requirements Reorient or relocate the receiving antenna. and other relevant provisions under our sole responsibility.
- Page 22 Upon receiving the RMA unit, TRENDnet may repair the unit using refurbished parts. In for all TRENDnet products. Products that are sent to TRENDnet for RMA service must the event that the RMA unit needs to be replaced, TRENDnet may replace it with a refurbished product of the same or comparable model.
- Page 23 TRENDnet User’s Guide shipping from outside of the USA and Canada are responsible for any return shipping LIMITATION OF LIABILITY: TO THE FULL EXTENT ALLOWED BY LAW, TRENDNET ALSO and/or customs charges, including but not limited to, duty, tax, and other fees.
Need help?
Do you have a question about the TEW-648UBM and is the answer not in the manual?
Questions and answers