Table of Contents
Advertisement
Quick Links
Advertisement
Table of Contents

Related Manuals for TRENDnet TEW-646UBH


Summary of Contents for TRENDnet TEW-646UBH
-
Page 2: Table Of Contents
Table of Content Introduction ......................3 Package Contents ....................3 Unpacking ......................3 System Requirements ................... 3 Wireless Performance Considerations ..............4 Software Installation....................5 Wireless Utility ......................6 Mode ........................6 Refresh ........................7 About ........................7 Station Mode ......................7 General ........................ -
Page 3: Introduction
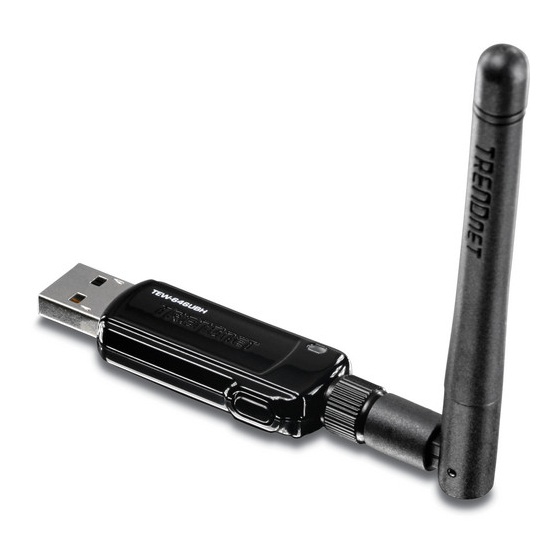
INTRODUCTION The High Power 150Mbps Wireless N USB Adapter (model TEW-646UBH) connects a laptop or desktop computer to a high speed wireless n network. An adjustable external antenna and a 200% increase** in power output maximizes wireless throughput and coverage. -
Page 4: Wireless Performance Considerations
WIRELESS PERFORMANCE CONSIDERATIONS There are a number of factors that can impact the range of wireless devices. 1. Adjust your wireless devices so that the signal is traveling in a straight path, rather than at an angle. The more material the signal has to pass through the more signal you will lose. 2. -
Page 5: Software Installation
SOFTWARE INSTALLATION This section describes how to install the driver and utility for the High Power 150Mbps Wireless N USB Adapter. 1) Insert the Utility and Driver CD-ROM into your computer’s CD-ROM drive and then click Install Utility. 2) Follow the InstallShield Wizard Instructions... -
Page 6: Wireless Utility
3) Click Finish to restart the computer. 4) After the computer is rebooted, plug the High Power 150Mbps Wireless N USB Adapter into an available USB slot on your computer. WIRELESS UTILITY The user can configure the wireless settings using the Wireless Adapter Configuration Utility. Double-click the utility icon that appears in the taskbar. -
Page 7: Refresh
Refresh Click this option to refresh the utility for any changes. About This screen displays information about the Micro Wireless N USB Adapter, such as the Driver and Utility version. When a new version of the utility becomes available for upgrade, users will be able to identify by version numbers. -
Page 8: Profile
Speed: Shows the current connection speed. Type: Shows the connection type of Infrastructure of Ad-Hoc. Encryption: Shows the current encryption mode used. SSID: Shows the SSID the adapter is associated with. Signal Strength: Shows the wireless signal strength of the connection between the adapter with the Access Point. - Page 9 Edit: Edit an exist profile. The screen will back to profile. Edit the SSID and select the Wireless Mode, Authentication and Encryption then click Apply to save the profile. When the Profile name was changed, a new profile will be added in the list. Duplicate: Duplicate the settings of the selected profile.
-
Page 10: Available Network
Open or Shared Key Open System and Shared Key require the user to set a WEP key to exchange data with other wireless clients that have the same WEP key. WEP is considered basic level of wireless encryption, if you would like higher security connection, WPA2 encryption is recommended. •... -
Page 11: Status
Select any one of the wireless networks by double-clicking on it or select the SSID then click the “Add to Profile” button. Click the “Refresh” button to scan for available networks. Status The status tab shows user the current status of the wireless adapter. Statistics The statistics tab shows the current packet statistics of the wireless adapter. -
Page 12: Wi-Fi Protected Setup (Wps)
Wi-Fi Protected Setup (WPS) Wi-Fi Protected Setup (WPS) is designed to ease the task of setting up and configuring security on a wireless network. There are two methods used in the WPS as below instruction. Push Button Config (PBC) There are 2 ways on how to initialize WPS Push Button Config (PBC), follow the steps below : Wireless utility: -Open the utility and select “Wi-Fi Protected Setup”... - Page 13 -Log into your wireless access point’s user interface and start the access point’s WPS push button configuration. Please refer to the wireless access point’s manual on how to initialize WPS Push Button Config. The LED will begin to blink during authentication. Once the connection has been successfully establish the LED will remain solid.
-
Page 14: Access Point Mode
ACCESS POINT MODE Select this mode when to have the wireless adapter function as a wireless access point. This feature is similar to “tethering” and will allow you to share an Internet connection to other wireless clients. Please note that to share internet connection the computer with the Micro Wireless N USB Adapter must have a valid Internet connection using a wired connection. - Page 15 Network Name (SSID): Enter the SSID or wireless network name of the access point Channel: Set the channel that you want the access point to operate on. BSSID: Shows the MAC information of the wireless adapter. Wireless Network Security Authentication: The following options are available: Open System, Shared Key, WPA-PSK, WPA2-PSK, WPA EAP-TLS, WPA2 EPA-TLS .
-
Page 16: Advance
WPA EAP-TLS If using the WPA/WPA2 EAP-TLS authentication method, please select the Encryption type for TKIP or AES then select the WPA/WPA2 Certificate from drop down list. Advance This section allows user to configure access point mode’s advance settings. Statistics The statistics tab shows the current packet statistics of the wireless adapter. -
Page 17: Ics
The section shows user the status of the computer’s network adapters. -
Page 18: Mac Os X Software Installation
Wireless N USB Adapter with MAC OS X operating system Insert the Utility and Driver CD-ROM into your computer’s CD-ROM. Browse the TEW-646UBH CD-ROM and go to MAC OS X folder Select the correct Mac OS X version drivers to install and click “Installer.mpkg”... - Page 19 7) Click “Install” or “Upgrade to continue. 8) Input your password then click “OK” password. 9) Click “Continue Installation”...
- Page 20 10) When installation is complete click on “Restart” 11) Once restart is completed insert the TEW-646UBH on your Mac. The wireless utility will automatically appear. IF the utility does not appear you will find the utility icon in the Dock menu. Click on the icong to start the...
-
Page 21: Mac Os X Utility
MAC OS X UTILITY This section describes how to install the driver and utility for the High Power 150Mbps Wireless N USB Adapter with MAC OS X operating system Link Status MAC Address: Shows the MAC address of the wireless USB adapter SSID/BSSID: Shows the SSID that USB wireless adapter is connected to Security: Shows the type of security used Connection: Shows the connection status of the wireless USB adapter... -
Page 22: Profiles
Profiles Add: Select this option to add a new profile, user can enter the necessary information required for access the access point or wireless router Edit: View and edit the selected profile Remove: Select this option to delete the selected profile Duplicate: Select this option to copy the selected profile Apply: Click this option to apply/activate the selected profile Available Network... -
Page 23: Advance Setting
Add to Profile: Select an available network and click this option to save the network as a profile. Advance Setting 802.11b preamble mode: To set the preamble mode QOS Mode: This option allows users to enable or disable QoS feature PSP Xlink Mode: This option allows users to enable or disable PSP mode Fragment Threshold: This option allows users to set the fragment threshold of the wireless adapter:... -
Page 24: Specifications
SPECIFICATIONS Hardware Interface USB 2.0 Standards IEEE 802.11b, IEEE 802.11g, based on IEEE 802.11n draft 2.0 technology LED Indicator Power, Link WPS Button Enables WPS connection Power Consumption 2.5 W Antenna Connector Supported OS Windows: 7 (32/64-bit), Vista (32/64-bit), XP(32/64-bit) Mac: OS 10.4-10.6 Dimensions (LxWxH) 60 x 16 x 8 mm (2.3 x 0.6 x 0.3 in.) -
Page 25: Limited Warranty
TRENDnet products. Products that are sent to TRENDnet for RMA service must have the RMA number marked on the outside of return packages and sent to TRENDnet prepaid, insured and packaged appropriately for safe shipment. Customers shipping from outside of the USA and Canada are responsible for return shipping fees. - Page 26 Download section and look for the desired TRENDnet product to access to the GPL Code or LGPL Code. These codes are distributed WITHOUT WARRANTY and are subject to the copyrights of the developers. TRENDnet does not provide technical support for these codes.
Need help?
Do you have a question about the TEW-646UBH and is the answer not in the manual?
Questions and answers