Table of Contents
Advertisement
Quick Links
Advertisement
Table of Contents

Related Manuals for Asko WCN311942G


Summary of Contents for Asko WCN311942G
- Page 1 INSTRUCTIONS FOR USE WCN311942G WINE CLIMATE CABINET...
-
Page 2: Table Of Contents
Contents Introduction ..........Zone C ............Welcome to our growing ASKO family! ..Appliance capacity ........Safety instructions ........Accessory set ..........Safety of children and vulnerable people ..Operation ............ General safety ..........Control panel ..........FCC (Federal Communications Commission) Initial use ............ -
Page 3: Introduction
Introduction Welcome to our growing ASKO family! We are proud of our appliances. We hope that this appliance will be an appreciated and dependable aid for many years to come. Please read the operating instructions before use. They include general tips, information about the settings and adjustments you can make, and the best way to take care of your appliance. -
Page 4: Safety Instructions
Safety instructions Before the installation and use of the appliance, carefully read the supplied instructions. The manufacturer is not responsible if an incorrect installation and use causes injuries and damages. Always keep the instructions with the appliance for future reference. WARNING! If the appliance is installed at an altitude of over 3280 ft (1000 m) above sea level, there is a danger of glass cracking due to air... -
Page 5: General Safety
Safety instructions General safety • Illumination in the appliance is only suitable for illumination of this appliance and not for household room illumination. • WARNING! This appliance is intended to be used in household and similar applications such as: - staff kitchen areas in shops, offices and other working environments;... -
Page 6: Fcc (Federal Communications Commission) Informations
Safety instructions FCC (Federal Communications Commission) Informations: • This device complies with part 15 of the FCC Rules. Operation is subject to the following two conditions: (1) This device may not cause harmful interference, and (2) this device must accept any interference received, including interference that may cause undesired... -
Page 7: Installation
Safety instructions • This equipment should be installed and operated with a minimum distance of 20 cm between the radiator and your body. Installation • Remove all the packaging. • Do not install or use a damaged appliance. • Obey the installation instruction supplied with the appliance. •... -
Page 8: Electrical Connection
Safety instructions Electrical connection ELECTRIC SHOCK! WARNING! Risk of fire and electrical shock. • The appliance must be earthed. • All electrical connections should be made by a qualified electrician. • Make sure that the electrical information on the rating plate agrees with the power supply. -
Page 9: Care And Cleaning
Safety instructions • Be careful not to cause damage to the refrigerant circuit. It contains isobutene (R600a), a natural gas with a high level of environmental compatibility. This gas is flammable. • If damage occurs to the refrigerant circuit, make sure that there are no flames and sources of ignition in the room. -
Page 10: Disposal
Safety instructions Disposal WARNING! Risk of injury or suffocation. • Disconnect the appliance from the mains supply. • Cut off the mains cable and discard it. • Remove the door to prevent children and pets to be closed inside of the appliance. •... -
Page 11: Installation And Connection
Installation and connection Selecting the location Place the appliance in a dry and well aired room. The permitted ambient temperature range for the appliance depends on the appliance’s climate class, which is shown on the type plate. WARNING! Do not place the appliance in a room where the temperature can fall below 41°F (5°C): the appliance may not work properly or become defective! Description Class... -
Page 12: Appliance Placement
Installation and connection Appliance placement Appliance installation should be carried out by at least two persons, in order to avoid damage to the appliance and physical injury of anyone involved. When moving the appliance, be careful not to push it on the floor because of potential damages. - Page 13 Installation and connection When the appliance is placed on the intended surface, it should be completely level in order to decrease vibration. To level the appliance, use the adjustable feet at the front of the appliance. An open wrench size 17 is required for adjusting and fastening the feet.
- Page 14 Installation and connection • To allow for adequate ventilation and cooling of the appliance, there has to be sufficient clearence behind the appliance and on both sides as well (at least 1 15/16" (50 mm)). Please, also observe the clearance required to fully open the door in order to allow pulling out the drawers and shelves (see installation diagram).
- Page 15 Installation and connection • Appliance dimensions are shown on the drawing. • If the appliance is placed in a way that does not allow the door to be opened to the 115° angle, the opening angle can also be restricted to 90°. In this case, use the door restrictors (A) supplied in the bag containing the instruction manual.
-
Page 16: Connecting The Appliance
Installation and connection Connecting the appliance • Connect the appliance to the power supply with a plug. The socket must be earthed. The nominal voltage and frequency required for the appliance are shown on the appliance’s type plate/label with basic information. •... -
Page 17: Before Using The Appliance For The First Time
Before using the appliance for the first time Before you use the appliance for the first time Do not connect the appliance to the mains until you have carefully read the instructions for the correct and safe use of the appliance. We recommend that you keep these instructions for future use. If you sell the appliance, enclose them with the appliance. -
Page 18: Storing Wine
The humidity should be between 50% and 80%. Too low humidity over a longer period will result in a dry cork. Too high humidity over a longer period will cause mold. The ASKO Wine Climate Cabinet provides excellent ventilation with clean air which helps preventing damage to labels and corks during storage. -
Page 19: Storing Bottles
Storing wine Storing bottles • Moving the bottles or excessive vibration can have a negative effect on the ageing process and thus on the wine’s flavour. The appliance is fitted with a special sensor that continuously measures vibration. In case of excessive vibration, e.g. when the appliance door is slammed shut, a warning will appear on the appliance display unit. -
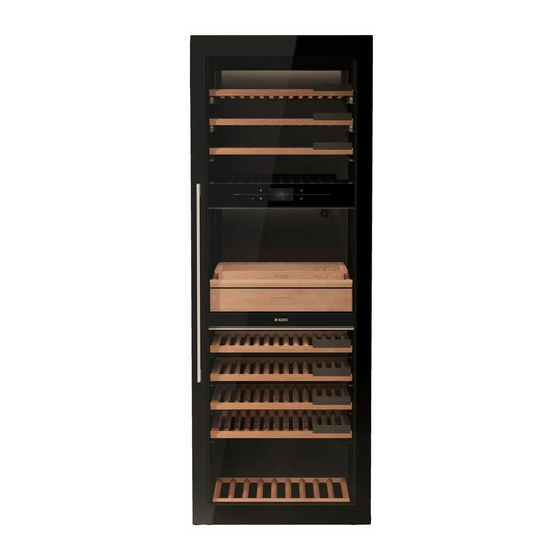
Page 20: Description Of The Appliance
Description of the appliance This product contains a light source of energy efficiency class <G>. 1. LED shelf illumination (in all three temperature zones) 2. Standard wooden bottle shelf 3. Chalkboard name tag 4. Wooden bottle shelf with moon shaped recesses 5. - Page 21 Description of the appliance INFORMATION! Make sure the door is fully open before removing the shelves. This will prevent any damage to the door gasket. INFORMATION! Be careful when pulling out the wooden shelves. Carefully pull out and push back the wooden shelves in order not to expose the wine bottles to vibration.
- Page 22 Description of the appliance Wooden bottle shelf with moon shaped recesses (4) The wooden bottle shelf with moon shaped recesses allows you to load the bottles onto the shelf cross-wise. This is particularly convenient for storing larger bottles. In some cases, during opening/closing of the shelf, bottles are not properly positioned or stopped and they can move.
- Page 23 Description of the appliance Up to 10 bottles can be stored on a shelf cross-wise. Normal positioning of the bottles is also possible. The wooden bottle shelf with moon shaped recesses can be removed from the appliance in the same way as the standard wooden bottle shelf.
-
Page 24: Zone B - Serving Area
Description of the appliance Zone B - serving area The serving area (zone B) is a temperature zone between the top (5) and bottom (15) insulation barrier. It allows you to bring the wine on ideal consumption temperature, and to prepare in advance everything you need for quick and top-notch wine serving: chilled wine glasses, space for already open bottles, decanter, and other accessories (bottle... - Page 25 Description of the appliance Inclination serving bottle shelf (13) is installed on the full-extension telescopic rails with soft close and it is secured against tipping over. A serving tray is placed on the front part of the serving shelf, and the vertical bottle holder is inserted into the shelf’s rear part.
- Page 26 Description of the appliance An accessory drawer with wooden dividers (14) is installed on extendible rails underneath the serving shelf. Inclination serving bottle shelf can be removed from the appliance along with the accessory drawer. Take care not to damage the door gasket.
- Page 27 Description of the appliance Accessory drawer (14) is installed on the full-extension telescopic rails. It uses the push-to-open mechanism for opening. Press on the closed drawer to fully open it. To close the drawer, press again on its front side. Wooden dividers in the drawer can be inserted into the grooves to fit the accessories you are storing (bottle opener, pourer/spout, wine...
- Page 28 Description of the appliance If the shelf (13) and drawer (14) are not aligned at the front (d≠0), first completely pull out the drawer to access the drawer opening mechanism on the back wall. Press on the spacer (A) to release the mechanism. Rotate the spacer to adjust the length.
- Page 29 Description of the appliance INFORMATION! Charcoal air filter can be ordered as accessory. For more informations refer to the local Asko dealer or to the Asko website of your country. Humidity box One HumidityBox is supplied with the wine climate cabinet.
- Page 30 Because of the relatively thin walls, the box is fragile and should be handled carefully. Occasionally, shower the inside of the box with tap water. INFORMATION! For more informations refer to the local Asko dealer or to the Asko website of your country.
-
Page 31: Zone C
Description of the appliance Zone C Bottom insulation barrier (15) The bottom insulation barrier separates zones B and C and allows individual temperature settings for these two zones. Functional LED illumination is installed on the bottom side of the barrier. Wooden bottom bottle rack (16) The wooden bottom bottle rack is intended for storing the bottles in the compressor area. - Page 32 Description of the appliance Changing the basic appliance configuration The basic appliance configuration can be adjusted to suit your preferences. This can be done without using any tools. WARNING! Disconnect the appliance from the power mains before changing the appliance configuration! In order to avoid damaging the floor, use a floor mat or other suitable protection on the floor in front of the appliance.
-
Page 33: Accessory Set
Description of the appliance Accessory set There is a possibility to buy additional equipment, shelves set, that contains the following components: • 2 standard wooden bottle shelves, • 1 bottle shelf with moon shaped recesses, • two pairs of full-extension telescopic rails, •... -
Page 34: Operation
Operation Control panel On/Off button; use to: • turn on the appliance if button is blinking slowly; keep pressing until the appliance switches on. • turn on the user interface if button is blinking quickly (power failure has occured); keep pressing until the display switches on. •... - Page 35 Operation Touch screen • Operate your Wine Climate Cabinet’s touch screen by tapping or swiping it. INFORMATION! For the best response, touch the buttons with the main part of your fingertip. Every time you tap a button during use, a short tone will sound (unless this is adjusted in the settings). Opening the keyboard A keyboard can be opened for fast entry of notes, wine data fields, passwords and search.
-
Page 36: Initial Use
Operation When the input field requires only numbers a numeric keyboard appears. After entering the desired content press on the confirm key to confirm the entry. Initial use INFORMATION! When the appliance is moved or transported, it is mandatory to wait for four hours until the appliance can be connected to the mains. - Page 37 Operation With your smart device scan the QR code to download the app. Network connection Connect your appliance to your home router to be able to pair your Wine Climate Cabinet with your mobile app to remote control it and to pair more appliances for monitoring. 1.
- Page 38 Operation Camera When the camera functionality is enabled, the camera will only be activated when a "scan" action is taking place. When the camera functionality is disabled, wine data can only be added manually. 1. Tap on the toggle switch to turn On’ to enable the camera.
- Page 39 Operation Temperature unit Choose Temperature units (C/F) with which to control and monitor Wine Climate Cabinet. Temperature Settings The factory default setting for each of three zones is 54°F (12°C). This temperature can be changed instantly. Use the temperature settings to set the temperature on each zone individually. Please refer to chapter "Status display"...
-
Page 40: Main Displays
Operation Main displays Standby display Time, in digital format. Date Time, hour hand of the analog clock. Time, minute hand of the analog clock. Wi-Fi status. Charcoal filter icon. Visible only when charcoal filter needs to be replaced. Humidity box refill icon. Visible only when humidity in a zone is low. - Page 41 Operation Status display Temperature value of each zone; • Top value is for zone A, middle for zone B, bottom for zone C. • Tap any value to open the temperature settings (see chapter "Temperature Settings"). Relative humidity; • Tap the value to show the humidity percentage in each zone. Light switch;...
- Page 42 Operation Status Icons Wi-Fi status No icon Wi-Fi turned off. Wi-Fi connection. Remote control enabled. Charcoal filter No icon Filter is operating correctly. Filter countdown close to expiration (Blinking icon) - filter countdown is expired, charcoal filters must be replaced and countdown reset.
-
Page 43: Using The Plus' Menu
Operation Using the Plus’ menu The Plus’ menu comprises a number of functions or settings. Please refer to chapter "Status display" to see how to open this menu. When only the Plus’ icon is visible you can tap on it or slide it from left to right to open the menu. - Page 44 Operation This menu offers the following choices: • GENERAL • SOUNDS • DISPLAY • LIGHTS • PROXIMITY AND DOOR SENSOR • NIGHT MODE • NETWORK CONNECTION • SYSTEM Tap on the desired category and the setting to be adjusted. • tap on the desired choice from a list.
- Page 45 Operation GENERAL: You can set the following from this menu: • Language (language of the touch screen) • Location (Select appliance location) • Temperature unit (°C or °F) • Time and date (Select time zone and enable automatic time and date) •...
- Page 46 Operation • Functional mode; Shelf lights (temperature and intensity sliding percentage from 0 to 100) RGB lights (colour and intensity sliding percentage from 0 to 100) On for (how long for the cabinet to be lit in this mode) PROXIMITY AND DOOR SENSOR: You can set the following from this menu: •...
-
Page 47: Software Update
Operation • Camera (switch On’ or Off’) • Key lock automatic (how long to automatically activate the key lock) • Use of Zone B (serving area or shelves) • Humidity (it is possible to stop monitoring humidity and the humidity box refill notifications) •... -
Page 48: Inventory
Operation In case the process failed, Wine Climate Cabinet remains on the previous software version and should operate normal. Please wait for some time before you try again. If the process continues to fail, contact the service department for further support. If the appliance is not responding after the update process, please wait for some time. - Page 49 Operation INFORMATION! It is possible to change your INVENTORY MANAGEMENT once it has been used. However it is important to know that: • When you change to the EXACT management system, all current positioned bottles will get an UNPLACED state. Do you really want to change the INVENTORY MANAGEMENT system to EXACT? •...
- Page 50 Operation When the wine label has been recognized you will see its Wine Data tab. If not, you may take another picture and scan again the label or you can manually input the wine data if you believe the wine is unlikely to be in the Vivino database (for example, if it is from a domestic wine maker).
- Page 51 Operation • Name: A – Z • Name: Z – A Scan a wine. Direct access to the camera scanner. Total number of bottles stored in the Inventory. Bottle overview Generic management system • Tap on the arrows (above/below) to navigate through the shelfs of the cabinet.
- Page 52 Operation Favorite wine (theme color outline circle). Selecting a wine To view a wine card, position and notes of a wine first select a wine, because these are all grouped in the same screen and divided by tabs. • List view: tap on any space inside the wine row.
- Page 53 Operation Notes Tab. INFORMATION! From tabs to tabs changes are not saved. Press confirmation key to save the changes and return to the Inventory. Press X button to exit without saving changes. Unplaced icon This icon represents the Unplaced’ shelf, therefore, displays all bottles which have not been given a position.
- Page 54 Operation Wine Card Tab The Wine Card tab will show the wine data. Generic Management System Exact Management System Favorite. To mark wine as a favorite. Delete. To remove wine from the Inventory (positioning and notes will also be removed). Image.
- Page 55 Operation Positioning Tab The Positioning tab will allow you to save the position of bottles from the selected wine in your cabinet. You can also change here the number of bottles you have. Generic Management System Shelf. Tap on the arrows (above/below) to move up and down the shelfs where you want to store the wine.
- Page 56 Operation Exact Management System Shelf. Tap on the arrows (above/below) to move up and down the shelfs where you want to store the wine. Exact position. Every circle is a reference to an exact position inside a shelf; Unplaced bottles. Tap on the plus’ and minus’...
- Page 57 Operation Notes Tab The Notes tab allows you to take personal notes and set a best to serve alarm if it is a wine which is going to be preserved. Generic Management System In this mode you can save notes for the wine. Added to inventory date.
- Page 58 Operation • Notes. Enter special information about this wine… • Best to drink date. Input the date which is best to drink the wine. • Set reminder toggle switch. Turn it on and a date can be set for when you want the "Best to Drink"...
-
Page 59: Maintenance
Maintenance Defrosting the appliance • The wine climate cabinet is defrosted automatically. Drops of water will flow through an opening in the rear wall into a tray fitted above the compressor, from where they will evaporate. Cleaning the appliance WARNING! Switch off the appliance and remove the plug from the socket before you start cleaning it. -
Page 60: Reversing The Door Opening Direction
Reversing the door opening direction The direction in which the appliance door opens can be reversed. In order to safely reverse the door opening direction, at least three people should carry out the procedure described below. The door weighs about 88 lb (40 kg). WARNING! In order to avoid damaging the floor, use a floor mat or other suitable protection on the floor in front of the appliance. - Page 61 Reversing the door opening direction To reverse the door opening direction, proceed as follows: Open the appliance door. Remove the two hinge caps (1) at the top and bottom. Set them aside, as you will need them later on. Partly (by no more than 5 mm) undo the hinge screws (2) at the top and bottom.
- Page 62 Reversing the door opening direction Remove the door, complete with the hinges, by moving it in the direction indicated by the arrow. Carefully place the door on the surface prepared for this purpose. Remove the cap (3). Save it (e.g. in the bag with the instruction manual) if you ever decide to reverse the door opening direction back to the original setting.
- Page 63 Reversing the door opening direction Remove the cap (6) and discard into the bin for plastic waste. Completely undo the screws (2). Then, partly screw them into the holes at the top and bottom on the opposite side of the housing. Carefully rotate the door by 180 degrees.
- Page 64 Reversing the door opening direction Hang the door onto the screws (2) at the top and bottom and slide it in the direction indicated by the arrow (a). Tighten the screws. The screws should be tightened to a torque of 4.5 lb/ft (6.2 Nm).
- Page 65 Reversing the door opening direction On the opposite side from the top hinge, attach the cap (5) using the screw (4). Take the caps (7 and 8) from the bag with the instruction manual and install them on the side opposite from the hinges.
- Page 66 Reversing the door opening direction If the door is not aligned with the housing (the angle α is not 0°), then proceed as follows: Open the door and detach the gasket from its groove in the corners at the top and bottom hinge.
- Page 67 Reversing the door opening direction Adjust the door position until the edge of the door is parallel to the side of the housing. When the door edge is parallel to the housing side, open the door again and tighten the screws (1) you released at the start of the door adjustment process.
-
Page 68: Solving Problems
Solving problems If you have any doubts about whether your appliance is working properly, we recommend to first read suggestions below. Tips & Tricks When temperature or humidity in the appliance is out of range an alarm will be triggered. This is an alarm sound and notification pop-up. -
Page 69: Error Notifications
Solving problems Humidity out of range Possible cause Countermeasures Frequent and/or long door Try to minimize opening the door of the wine climate cabinet openings. appliance. Prepare loading plan of large quantities of bottles in advance to minimize the required time for loading. Try to use the ConnectLife mobile application as much as possible to change appliance settings. - Page 70 Solving problems Error Description Code Door sensor error. Zone A fan error. Condenser fan error. Zone B fan error. Zone C fan error. Humidity sensor error for zone A. Humidity sensor error for zone B. Humidity sensor error for zone C. Humidity sensor error for outside environment.
-
Page 71: Other Display Warnings
Solving problems Other display warnings Warning Cause/Solution Wi-Fi icon is displayed on the The device is connected to the cloud service. screen. Wi-Fi icon with additional The device is connected to the cloud service and remote control is check mark is displayed on enabled. - Page 72 Solving problems Warning Cause/Solution The temperature or humidity The temperature in an individual room is outside the permitted limits. of a zone is out of range. • Zone »X« Temperature You can find more information regarding possible causes and is out of range. potential solutions for this notification in section »Tips &...
-
Page 73: General Problems
Solving problems General problems Problem Cause/Solution • The ambient temperature is too high. Appliance cools continuously for a long time. • The door has been opened for too long or too frequently. • The door does not seal properly (the seal is dirty, the door is misaligned or the seal is damaged, etc.). -
Page 74: Environmental Aspects
Environmental aspects Disposal of packaging and appliance This appliance is made from sustainable materials. This appliance must be disposed of in a responsible manner at the end of its service life. Contact the local authorities for information about the method. INFORMATION! See also the chapter Disposal’... -
Page 75: Service And Warranty
REMEDYUNDER THIS LIMITED WARRANTY SHALL BE PRODUCT REPAIR AS PROVIDED HEREIN. This Limited Warranty is valid only when the ASKO Product is used in the country in which it was purchased. Proof of originalpurchase date is required to obtain serviceunder this Limited Warranty. -
Page 76: Asko Customer Care
THAN ACTUAL DAMAGESAND IN NO EVENT FOR DAMAGES IN EXCESS OF THE PRICE PAID FOR THE ASKO PRODUCT AS TO WHICH A CLAIMIS MADE. Some jurisdictions do not allowthe exclusion or limitation of incidental, consequential or other damages, so these limitations and exclusions may not apply to you. - Page 77 US.ASKO.COM • CA.ASKO.COM • ASKO.COM/MX 875287 -a9DRAFT...
Need help?
Do you have a question about the WCN311942G and is the answer not in the manual?
Questions and answers