
Related Manuals for Hisense RC43C2GSE


Summary of Contents for Hisense RC43C2GSE
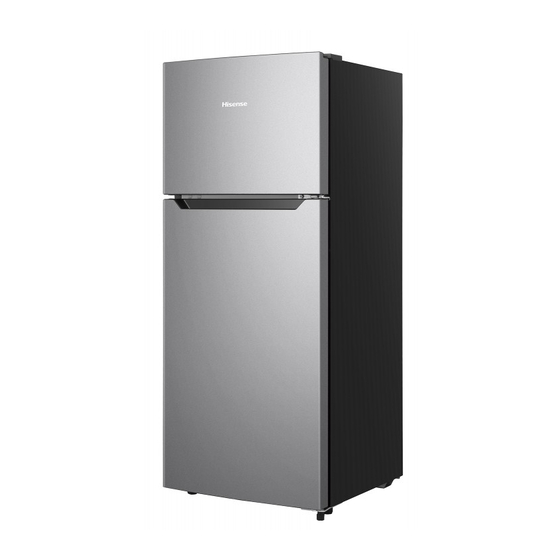
- Page 1 Model: RC43C2GSE For questions about features, operation/performance, parts or service,call: 1-855-344-7367...
- Page 3 CONTENTS 1. Important Safety Instructions....1 3. Location of Controls........4 2. Grounding Instructions......3 4. Operation............6 2.1 Installation..........3 IMPORTANT SAFETY INSTRUCTIONS This appliance is not intended for use by persons (including children) with reduced physical, sensory or mental capabilities, or lack of experience and knowledge,unless they have been given supervision or instruction concerning use of the appliance by a person responsible for their safety.
- Page 4 IMPORTANT SAFETY INSTRUCTIONS WARNING: Do not use electrical appliances inside the food storage compartments of the appliance, unless they are of the type recommended by the manufacturer. WARNING: Food needs to be packed in bags before putting into the refrigerator, and liquids need to be packed in bottles or capped containers to avoid the problem that the product design structure is not easy to clean.
- Page 5 GROUNDING INSTRUCTIONS This appliance must be grounded. In the event of an electrical short circuit, grounding reduces the risk of electric shock by providing an escape wire for the electric current. This appliance is equipped with a cord having a grounding wire with a grounding plug. The plug must be inserted into an outlet that is properly installed and grounded.
- Page 6 LOCATION OF CONTROLS DOOR CLOSED 1. Freezer Door 2. The Handle 3. Refrigerator Door 4. Leveling Feet...
- Page 7 LOCATION OF CONTROLS (CONTINUED) LOCATION OF CONTROLS (CONTINUED) DOOR OPEN 1. Freezer Compartment 8. Freezer Door Gasket 2. Freezer Shelf 9. Refrigerator Door Gasket 3. LED light (Behind 10. Upper Shelf Thermostat) 11. Middle Shelf 4. Thermostat 12. Down Shelf 5.
- Page 8 OPERATION USING THE THERMOSTAT The thermostat control knob for the refrigerator and freezer is located at Temp Control the upper right hand corner of the refrigerator compartment. The first time you turn the unit on, adjust the thermostat control knob to “4”...
- Page 9 OPERATION (CONTINUED) REPLACING THE LED light Warning: The LED light must not be replaced by the user! If the LED light is damaged, contact the customer helpline for assistance. To replace the LED light, the below steps can be followed: Unplug your appliance.
- Page 10 OPERATION (CONTINUED) Changing the door from the right side to the left. The side at which the door opens can be changed from the right side (as supplied) to the left side, if the installation site requires. Tools you will need (Not provided by seller): 8mm socket driver §...
- Page 11 OPERATION (CONTINUED) 10. Change lower hinge part to left and front foot fixed board to right and fix them with screws. Then install adjustable bottom feet parts. Lower hinge part (left) 11.Remove the door stop (right) and door stopper (right) with Phillips screwdrivers, Install the door stopper(left) and door stop 13.
- Page 12 To avoid contamination of food, please respect the following instructions: - Opening the door for long periods can cause a significant increase of the temperature in the compartments of the appliance. - Clean regularly surfaces that can come in contact with food and accessible drainage systems.
- Page 13 Fresh/frozen pork, beef, chicken, freshwater aquatic products, etc.(7 days below 0 °C above 0 is recommended for consumption °C Chill -2~ 3 within that day, preferably no more than 2 days). Seafood (less than 0 for 15 days, it is not °C recommended to store above 0 °C...
- Page 14 Avant de faire fonctionner cette unité, veuillez lire attentivement ce manuel, et le conserver pour référence ultérieure Modèle : RC43C2GSE Français Pour toute question concernant les fonctionnalités, le fonctionnement/la performance du système, les pièces ou le service, veuillez appeler :...
-
Page 16: Table Of Contents
CONTENU 1. Instructions de sécurité 3. Emplacement des importantes..........1 commandes..........4 4. Fonctionnement........6 2. Instructions de mise a la terre..............3 2.1 Installation..........3 INSTRUCTIONS DE SÉCURITÉ IMPORTANTES Cet appareil n'est pas prévu pour être utilisé par des personnes (y compris des enfants) avec des capacités physiques, sensorielles ou mentales réduites, ou un manque d'expérience et de connaissance, à... -
Page 17: Instructions De Sécurité
INSTRUCTIONS DE SÉCURITÉ IMPORTANTES AVERTISSEMENT : N'utilisez pas d'appareils électriques à l'intérieur des compartiments de stockage des aliments de l'appareil sauf s'ils sont recommandés par le fabricant. AVERTISSEMENT : Les aliments doivent être emballés dans des sacs avant d'être stockés dans le réfrigérateur, et les liquides doivent être emballés dans des bouteilles ou des ricipients fermés pour éviter que la structure de conception du produit ne soit pas facile à... -
Page 18: Instructions De Mise A La
INSTRUCTIONS DE MISE A LA TERRE Cet appareil doit être mis à la terre. En cas de court-circuit électrique, la mise à terre réduit le risque de choc électrique en fournissant un fil de fuite pour le courant électrique. Cet appareil est équipé... -
Page 19: Emplacement Des Commandes
EMPLACEMENT DES COMMANDES PORTE FERMÉE 1. Porte du congélateur 2. Poignée 3. Porte du réfrigérateur 4. Pieds de mise à niveau... - Page 20 EMPLACEMENT DES COMMANDES (SUITE) PORTE OUVERTE 1. Compartiment congélateur 8. Joint de porte du congélateur Étagère de congélateur Joint de porte du réfrigérateur Lampe DEL (Derrière le Étagère supérieure Étagère intermédiaire thermostat) Thermostat Étagère inférieure Bouton de commande du réfrigérateur Étagère de réfrigérateur Bacs à...
-
Page 21: Fonctionnement
FONCTIONNEMENT UTILISATION DU THERMOSTAT Le bouton de commande du thermostat pour le réfrigérateur et le congélateur est situé dans le coin supérieur droit du compartiment réfrigérateur. Contrôle de la température La première fois que vous allumez l'appareil, réglez le bouton de commande du thermostat sur «... - Page 22 FONCTIONNEMENT (SUITE) Remplacement de la lampe DEL Avertissement : La lampe DEL ne doit pas être remplacée par l'utilisateur! Si la lampe DEL est endommagée, contactez le service d'assistance à la clientèle pour obtenir de l'aide. Pour remplacer la lampe DEL, suivez les étapes ci- dessous : Débranchez l'appareil.
- Page 23 FONCTIONNEMENT (SUITE) Changement de la porte du côté droit au côté gauche. Le côté d'ouverture de la porte peut être modifié du côté droit (tel que fourni) au côté gauche, si le site d'installation l'exige. Les outils dont vous aurez besoin (fourni par l'acheteur) : Tournevis à...
- Page 24 FONCTIONNEMENT (SUITE) 10. Changez la partie de charnièha inférieure gauche et le panneau fixe du pied avant à droite et fixez-les à l'aide des vis. Installez ensuite les pirces de pied inférieur reglable. Partie de charnière inférieure (gauche) 11. Retirez la butée de porte (droite) et le butoir de porte (droite) à...
- Page 25 Pour éviter la contamination des aliments, veuillez respecter les instructions suivantes : - L'ouverture de la porte pendant de longues périodes peut provoquer une augmentation significative de la température dans les compartiments de l'appareil. - Nettoyez régulièrement les surfaces qui peuvent entrer en contact avec les aliments et les systèmes de drainage accessibles.
- Page 26 Porc frais/congelé, bœuf, poulet, produits aquatiques d'eau douce, etc. (au-dessous de 0 °C pendant 7 jours ; au-dessus de 0 °C recommandé pour les consommer dans la Refroidisseme -2~+3 même journée, de préférence pas plus de 2 jours). Fruits de mer (au-dessous de 0 °C pendant 15 jours, il n'est pas recommandé...
Need help?
Do you have a question about the RC43C2GSE and is the answer not in the manual?
Questions and answers