
Related Manuals for UV Pure Technologies Hallett 15xs


Summary of Contents for UV Pure Technologies Hallett 15xs
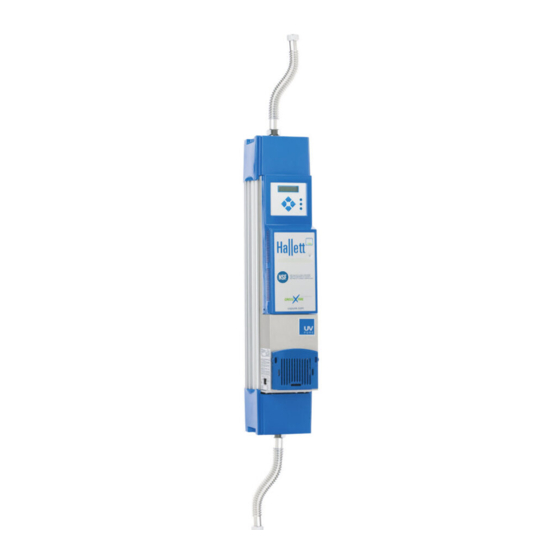
- Page 1 UV Pure Technologies Inc. ULT RAVI O L ET WAT ER PURI F I CAT IO N SYST EM INSTRUCTION MANUAL MODEL: Hallett 15xs VOLTAGE: SERIAL #: NSF/ANSI 55 CLASS A CERTIFIED Certified to PUBLICATION 60335.1 ...
- Page 2 giardia The Hallett 15xs is NSF/ANSI Standard 55 Class A certified. The Hallett 15xsi refers to 100-240V version. For the Hallett units, the EPA Establishment number is 075213-CAN-001 Please read the complete instruction manual before installing or operating the Hallett 15xs.
-
Page 3: About The Hallett
Hallett 15xs Instruction Manual 1. A BOUT THE ALLETT The Upstream and the Hallett systems, manufactured by UV Pure Technologies, are the world’s only ultraviolet water purification device with patented Crossfire Technology. Patented in US 6,707,048, Canada 2,463,503, Australia 2,002,333,084, Mexico 248805 Patent Pending in Japan, UK, Europe, &... - Page 4 UV intensity display. The Hallett 15xs can show remote status: Be alerted to any change in system status immediately in any room with the optional Remote Monitor. The monitor is a handheld wireless device that can be placed in a convenient location to provide operational information about the Hallett.
-
Page 5: Table Of Contents
Draining the Unit ................32 Cleaning the Unit ................33 Determining the Need for Cleaning ............. 33 In-place cleaning ................34 Hallett 15xs Spare Parts List ............... 36 Disassembling the Unit ............... 37 Cleaning/Removing the Quartz Sleeve ..........38 Reassembling the Unit................ 39 6. -
Page 6: Installation Instructions
Water Capacity: Hallett 15xs The water treatment range for the Hallett 15xs is 0–55 liters per minute (or 0– 14.6 U.S. gallons per minute) max, with a working pressure of 69–690 kPa (or 10–100 psig). The nominal flow rate of the unit is 50 liters per minute (13.2 U.S. -
Page 7: Safety Information
Thermal Abatement Kit R400074 may be necessary. Energy Requirements: There are two standard operating voltages for the Hallett 15xs unit. The unit may be 115Vac or 100-240 Vac and draws 175W. Please refer to the power input label located near the power cord entry of the unit. See Figure 1B. For convenience the front cover of the manual should also contain model number and operating voltage. -
Page 8: Other Materials Needed
(electrical shock) and will void warranty. Location The unit must be positioned vertically on a wall (the performance of the system will be adversely affected if mounted horizontally) See Figure 1A for Released on 11-Jul-13 – H800003Q Page 8 UV Pure Technologies Inc. © 2013... -
Page 9: Time Required
Upstream. Make sure that the sealing washer is inside the hose end before making the connection. Hold the stainless manifold with a wrench then tighten the hose securely. Wrap the top hose with pipe insulation. (Not provided) Released on 11-Jul-13 – H800003Q Page 9 UV Pure Technologies Inc. © 2013... - Page 10 N SF/ A N SI 5 5 C L ASSE A CERTIF ICADO [718mm] [908mm] uvpure.com TO MOUNT USE #12 OR 3.5" " DIA. SCREW [89] WATER IN (4-PLACES) 1" MNPT 12.0" [305] Figure 1A Released on 11-Jul-13 – H800003Q Page 10 UV Pure Technologies Inc. © 2013...
-
Page 11: Connecting The Pipes
PEX, should be used after the flexible hose. Make sure the sealing washer is inside the end of the hose before making the connection. Do not bend the flexible hose excessively. Tighten securely. Released on 11-Jul-13 – H800003Q Page 11 UV Pure Technologies Inc. © 2013... - Page 12 Close any faucets you opened in Step 1 and then slowly turn on the water supply to check for leaks. If leaks exist, investigate the cause and repair. Released on 11-Jul-13 – H800003Q Page 12 UV Pure Technologies Inc. © 2013...
- Page 13 LEV ER FO R OVERRIDE FOR NON REGULATED SITES ONLY SO LENOID VALVE (ACTS AS CHECK V ALVE) AUTOM ATIC M ANUAL POSITION POSITIO N (FORCE OPEN) Figure 1D Released on 11-Jul-13 – H800003Q Page 13 UV Pure Technologies Inc. © 2013...
-
Page 14: Parallel Installation
(Note: You should not open the front panel unless the unit has been unplugged). Caution: Do not operate unit dry. There must be water in the treatment Released on 11-Jul-13 – H800003Q Page 14 UV Pure Technologies Inc. © 2013... - Page 15 See Figure 1B or 1C. Plug the male end of the power cord into the Transient Voltage Surge Suppressor. Plug the Transient Released on 11-Jul-13 – H800003Q Page 15 UV Pure Technologies Inc. © 2013...
-
Page 16: Flushing Instructions
Step 1: Using the Setup Menu on the main UV Pure unit, select “Bind Remote Device” and choose a bind number (This is a number from 0 to 40 to differentiate Released on 11-Jul-13 – H800003Q Page 16 UV Pure Technologies Inc. © 2013... -
Page 17: External Alarm Contacts
There is a plastic knockout provided at the base plate of the unit for cable entry. See Figure 1G & 1H. Caution: Unplug the unit before gaining access to do any wiring or accessing ballast enclosure. Released on 11-Jul-13 – H800003Q Page 17 UV Pure Technologies Inc. © 2013... - Page 18 FUSE IF IT BLOWS. A BLOWN FUSE IMPLIES MAJOR PCB FAULT. REPLACE ENTIRE PCB. SHUTOFF VALVE SHUTOFF V ALVE TB 1 J6 J14 J7 (SEE FIGURE 1H) Figure 1G Released on 11-Jul-13 – H800003Q Page 18 UV Pure Technologies Inc. © 2013...
- Page 19 AIR FILTER BLOWER HOUSING PANEL KNOCKOUT FLIPS DOWNWARD LOCATED HERE Figure 1H BLOWER HOUSING PANEL PLUG TO J6 BLOWER CLIPS TO LATCH TO METAL HOUSING Figure 1I Released on 11-Jul-13 – H800003Q Page 19 UV Pure Technologies Inc. © 2013...
-
Page 20: Operating Instructions
Green Light – situated at the bottom, an illuminated green light indicates the Hallett is treating normally. A flashing green light means the lamps are not yet at Released on 11-Jul-13 – H800003Q Page 20 UV Pure Technologies Inc. © 2013... -
Page 21: Starting The Unit
This verifies that the lights and the audible alarm are functioning. The unit then performs a self-test. When Released on 11-Jul-13 – H800003Q Page 21 UV Pure Technologies Inc. © 2013... -
Page 22: Remote Wireless Monitor (Optional)
UL1449 standard or equivalent that includes integral Over/Under Voltage shutoff protection) with its Hallett and Upstream models in North America to help protect against damage from power fluctuation. Those models must be plugged into the Released on 11-Jul-13 – H800003Q Page 22 UV Pure Technologies Inc. © 2013... -
Page 23: Shutting Down Of Unit And Seasonal Use
North America, and into equivalent protectors outside North America (not supplied with systems in those markets). UV Pure Technologies’ UV water purification system models are designed to operate within normal power grid specifications (voltages and frequencies), worldwide. However power spikes, surges and brownouts are a common occurrence in all countries. -
Page 24: Menu And Troubleshooting
4. M ENU AND ROUBLESHOOTING The Hallett will run unattended until an alarm, or fault, arises. If an alarm does Released on 11-Jul-13 – H800003Q Page 24 UV Pure Technologies Inc. © 2013... - Page 25 Troubleshooting section. Navigating the Menu See the following pages to review system information including status, Treatment performance and Troubleshooting. Released on 11-Jul-13 – H800003Q Page 25 UV Pure Technologies Inc. © 2013...
- Page 26 Use Right Arrow to silence audio alarm Alarms and See Following Use Left Arrow to Escape to Main Menu Troubleshooting Sections Message History See Following Sections MAIN MENU Released on 11-Jul-13 – H800003Q Page 26 UV Pure Technologies Inc. © 2013...
- Page 27 Serial Number ###### Lifetime Counter ###### Program Version ###### Service Codes List values Force Outputs Force Outputs AUTO AUTO/ON/OFF Lamp Water L Sen V W Sen V Released on 11-Jul-13 – H800003Q Page 27 UV Pure Technologies Inc. © 2013...
- Page 28 Lamps require Install 2 lamps exceeded replacement & reset counter ALARM End of Lamp Life Approaching WARNING Lamp cycling Reduce the # of too often lamp starts/day WARNING Released on 11-Jul-13 – H800003Q Page 28 UV Pure Technologies Inc. © 2013...
- Page 29 Unplug unit and Microprocessor recheck. failure ALARM UV Sensor Check connection Failure ALARM Power interrup- Power reset tion occured Confirm valve Test Shutoff closes and opens valve Released on 11-Jul-13 – H800003Q Page 29 UV Pure Technologies Inc. © 2013...
-
Page 30: Maintenance
The lamps are fragile and must be handled with care. Tools Needed Slotted screwdriver Released on 11-Jul-13 – H800003Q Page 30 UV Pure Technologies Inc. © 2013... - Page 31 Step 1: From the Main Menu, scroll down (push bottom arrow) to Lamp life remaining screen. Press Enter to move to next screen to reset counter. Press Released on 11-Jul-13 – H800003Q Page 31 UV Pure Technologies Inc. © 2013...
-
Page 32: Draining The Unit
Draining is necessary to disassemble the system, to protect against freezing, or to remove poor-quality water. Step 1: Shut off the water supply. Step 2: Shutdown and unplug the unit from the electrical outlet. Released on 11-Jul-13 – H800003Q Page 32 UV Pure Technologies Inc. © 2013... -
Page 33: Cleaning The Unit
Do not strike the quartz sleeve with any tool, since even the smallest chip can cause it to break under pressure. Released on 11-Jul-13 – H800003Q Page 33 UV Pure Technologies Inc. © 2013... -
Page 34: In-Place Cleaning
Step 3: Place another bucket under the unit and drain the unit until there is about 1” (3cm) of water left in the quartz sleeve (see Draining the Unit). Released on 11-Jul-13 – H800003Q Page 34 UV Pure Technologies Inc. © 2013... - Page 35 Hallett 15xs Instruction Manual Flow Restrictor Figure 4B – Hallett Released on 11-Jul-13 – H800003Q Page 35 UV Pure Technologies Inc. © 2013...
-
Page 36: Hallett 15Xs Spare Parts List
Hallett 15xs Instruction Manual Hallett 15xs Spare Parts List Item Hallett Part Name 15xs E300210 Lamps (shipped in pairs- Single lamp p/n E300209) H400000 Purge Valve Repair Kit H400001 / 115V Circuit Board / 100-240V Circuit Board* H400006 H400002 UV Sensor Array Replacement Kit... -
Page 37: Disassembling The Unit
Step 4: Disconnect the Stainless flexible hose (8) from the top of the unit and remove the top quartz seal assembly. Caution: Do not damage the sealing surfaces of the end caps (5 and 19) or the Released on 11-Jul-13 – H800003Q Page 37 UV Pure Technologies Inc. © 2013... -
Page 38: Cleaning/Removing The Quartz Sleeve
Rotating it as you lift will help. Caution: the wiper blades are sharp, handle them with care. Cleaning/Removing the Quartz Sleeve Note that numbers in parentheses refer to Figure 4B. Released on 11-Jul-13 – H800003Q Page 38 UV Pure Technologies Inc. © 2013... -
Page 39: Reassembling The Unit
(see Figure 4E). Rotate wiper shaft to suit. Step 3: Tighten the nuts in an alternating pattern. Bundle the wires if necessary. Released on 11-Jul-13 – H800003Q Page 39 UV Pure Technologies Inc. © 2013... - Page 40 WIPER SHAFT Figure 4E Replacement Parts Use only genuine UV Pure Technologies’ parts when servicing your Hallett disinfection system. Failure to use genuine UV Pure Technologies’ replacement parts will void the factory warranty, and any laboratory validation and/or certification for water safety and system operating performance. Figure 4B shows a complete list of original factory parts.
-
Page 41: Service Record Sheet
What this warranty covers: Defects in materials and workmanship in Products and Parts manufactured, sold or certified by UV Pure Technologies Inc. (UV Pure) including Hallett® systems, Upstream® systems, Cactus™ systems and parts such as replacement UV lamps, solenoid valves and other components sold or certified by UV Pure Technologies Inc. - Page 42 Product or Part from, and serial number. USE OF REPLACEMENT UV LAMPS THAT ARE NOT ORIGINAL UV PURE EQUIPMENT WILL VOID THIS WARRANTY. Released on 11-Jul-13 – H800003Q Page 42 UV Pure Technologies Inc. © 2013...
- Page 43 Product or Part. UV Pure is not liable for special, incidental, indirect or consequential damages. UV Pure’s liability is Released on 11-Jul-13 – H800003Q Page 43 UV Pure Technologies Inc. © 2013...
-
Page 44: Nsf Statement
The information contained in this document is subject to change without notice. UV Pure Technologies Inc. shall not be liable for errors contained herein or for consequential damages from improper installation or operation of this unit.
Need help?
Do you have a question about the Hallett 15xs and is the answer not in the manual?
Questions and answers
How do you reset the lamp life on a 15 XS
To reset the lamp life on a UV Pure Technologies 15 XS:
1. From the Main Menu, scroll down using the bottom arrow to the "Lamp life remaining" screen.
2. Press Enter to go to the next screen to reset the counter.
3. Press Enter again, then use the Up or Down arrow to select "YES".
4. Press Enter to confirm. The lamp hours will reset to 9000.
5. The unit will automatically turn off the lamps, close the solenoid valve, and temporarily shut off the water supply.
6. Unplug the power cord from the left-hand side of the unit.
This answer is automatically generated