Table of Contents
Advertisement
Quick Links
User Instructions
Dual Channel Rack-Mount HD Video Encoder
Z3-MVE-250
Model Name:
The Power of ZEUS™
DOC-USR-0109-03
Manual Version 2.68
Software Version 2.68
June 26,2019
Before attempting to connect or operate this product, please read these instructions carefully and save this manual for future use.
© 2019 Z3 Technology, LLC. All rights reserved. ZEUS is a registered trademark of Z3 Technology, LLC.
This document contains proprietary and confidential information of Z3 Technology, LLC ("Z3"). This document may not be used, reproduced,
disclosed, or disseminated to anyone without the prior written approval of an authorized representative of Z3. Z3 reserves the right to change this
product at any time and without notice. All product names, trademarks, trade names, service marks, or service names mentioned in this document
are the property of their respective owners.
Z3 Technology, LLC incorporates HDMI® technology. The terms of HDMI and HDMI High-Definition Multimedia Interface, and
the HDMI Logo are trademarks or registered trademarks of HDMI Licensing LLC in the United States and other countries.
Advertisement
Table of Contents

Related Manuals for Z3 Technology Z3-MVE-250


Summary of Contents for Z3 Technology Z3-MVE-250
- Page 1 © 2019 Z3 Technology, LLC. All rights reserved. ZEUS is a registered trademark of Z3 Technology, LLC. This document contains proprietary and confidential information of Z3 Technology, LLC ("Z3"). This document may not be used, reproduced, disclosed, or disseminated to anyone without the prior written approval of an authorized representative of Z3. Z3 reserves the right to change this product at any time and without notice.
- Page 2 Initial Document 2.35.2a 10/25/2016 Updated Product Photos. Updated 3G-SDI input/output to 3G-SDI/ASI input/output. Added RTSP, and 2.68 06/26/2019 RTMPS to features section ___________________________________________________________________________________________ Z3 Technology, LLC ♦ 100 N 8 ST, STE 250 ♦ Lincoln, NE 68508-1369 USA ♦ +1.402.323.0702...
-
Page 3: Table Of Contents
6.0 GETTING STARTED WITH THE MVE-250 ................12 6.1 Set up the SDI Video Source ..................12 6.2 Connect and Power up the Z3-MVE-250 ................12 6.3 Find the Encoder Using ZFinder ................... 13 6.4 Configure Channel 1 and Encode .................. 14 6.5 Run VLC to View Stream .................... - Page 4 10.7 The CH1 Tab (Decode) ..................... 56 10.8 Values Appearing at the Bottom of All Tabs ..............57 APPENDIX A: Installing Ear Racks on the Z3-MVE-250 ..............58 APPENDIX B: Configuring the Wowza Server for RTMP ..............59 APPENDIX C: Troubleshooting ....................61 ___________________________________________________________________________________________ Z3 Technology, LLC ♦...
- Page 5 DOC-USR-0109-03 LIST OF FIGURES Figure 1 Package Contents for the Z3-MVE-250 ................. 9 Figure 2 Front and Rear Views of the Z3-MVE-250 ..............11 Figure 3 Z3-MVE-250 Rear Panel Example Encode Connections ............12 Figure 4 Z3-MVE-150 Power Switch..................13 Figure 5 Example ZFinder Window with a Z3 Product Selected............
- Page 6 Figure 46 Z3-MVE-150 with Ear Racks ................... 58 Figure 47 Wowza Performance Settings ................. 59 Figure 48 Wowza Security Settings ..................60 ___________________________________________________________________________________________ Z3 Technology, LLC ♦ 100 N 8 ST, STE 250 ♦ Lincoln, NE 68508-1369 USA ♦ +1.402.323.0702...
-
Page 7: General Description
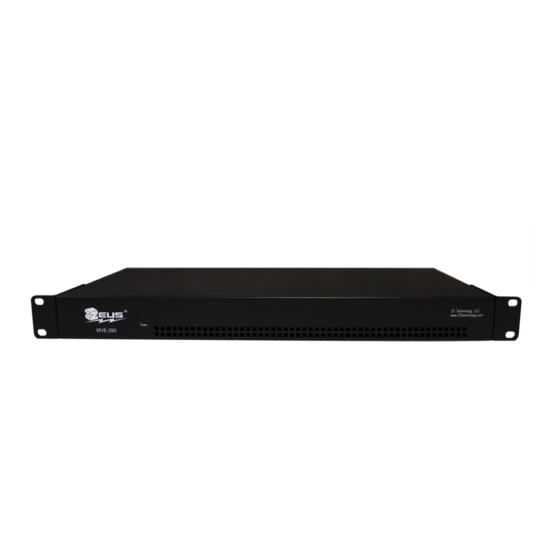
Z3-MVE-250 Multi-Format Video Encoder is a 1RU rack-mount system capable of processing multi- format H.264 High Profile video up to 1080p at 60 frames per second. The Z3-MVE-250 features two independent encoders/decoders giving the user the flexibility to configure the system as two encoders, two decoders or one channel of each. -
Page 8: Quick Start Guide
9.3: “Making a Firmware Update”, on page 38. *Note: Actual version numbers for your Z3 product may differ from those pictured in this document. ___________________________________________________________________________________________ Z3 Technology, LLC ♦ 100 N 8 ST, STE 250 ♦ Lincoln, NE 68508-1369 USA ♦ +1.402.323.0702... -
Page 9: Package Contents
Ear Rack Bracket x 2 4 mm (L) x 3 mm (D) Screw x 6 Figure 1 Package Contents for the Z3-MVE-250 *Note: The serial cable is included for advanced troubleshooting purposes only and is not needed by the typical user. -
Page 10: Features
1080p60, 1080p50, 1080i30, 1080i29.97, 1080i25, 720p60, 720p59.94, 720p50, 576p50, 576i25, 480p60, 480i30, and 480i29.97 4.2 Supported Output Resolutions HDMI: 1080p60, 1080p59.94, 1080p50, 1080i30, 1080i29.97, 1080i25, 720p60, 720p59.94, 720p50 ___________________________________________________________________________________________ Z3 Technology, LLC ♦ 100 N 8 ST, STE 250 ♦ Lincoln, NE 68508-1369 USA ♦ +1.402.323.0702... -
Page 11: Operating Controls
6: GigE 12: GigE 13: 100-240 VAC Power Figure 2 Front and Rear Views of the Z3-MVE-250 For advanced troubleshooting purposes only. Not needed by typical users. For advanced troubleshooting purposes only. Not needed by typical users. Supports Non-HDCP content only. For example, a Blu-Ray player cannot be used as a video source. -
Page 12: Getting Started With The Mve-250
This section gives step-by-step instructions on using one channel of the Z3-MVE-250 to stream 1080p or 1080i video to the VLC media player running on your PC. In addition to the Z3-MVE-250, you will need a computer with VLC media player downloaded, a 1080p60/1080i video source with SDI output, a BNC to BNC cable and at least one Ethernet cable. -
Page 13: Find The Encoder Using Zfinder
6.3 Find the Encoder Using ZFinder ZFinder is a PC Utility that allows you to find any Z3 Technology product on your network. If you have not downloaded this to your computer, you can find it on the USB drive provided with your system. -
Page 14: Configure Channel 1 And Encode
“Start All” or “Stop All” buttons found on the bottom of all screens. *Note: HD-SDI selection in the “CH2” tab supports HD-SDI resolutions and 3G-SDI resolutions. ___________________________________________________________________________________________ Z3 Technology, LLC ♦ 100 N 8 ST, STE 250 ♦ Lincoln, NE 68508-1369 USA ♦ +1.402.323.0702... - Page 15 Address of your PC (3) Confirm “Dest Port” is 5004 (4) If necessary, click “stop” (6) Click “start” (5) Status changes to “STOPPED” ___________________________________________________________________________________________ Z3 Technology, LLC ♦ 100 N 8 ST, STE 250 ♦ Lincoln, NE 68508-1369 USA ♦ +1.402.323.0702...
-
Page 16: Figure 7 Z3-Mve-250 Configuration Screen - Udp
DOC-USR-0109-03 Figure 7 Z3-MVE-250 Configuration Screen - UDP (15) After 20 seconds, the encoder will automatically try to start. If it has done so, click on “stop” in the “Channel Controls” section near the bottom of the screen. The status should then change to “STOPPED.”... -
Page 17: Run Vlc To View Stream
(18) Press “Enter.” (19) You will now see video streaming to VLC. Figure 9 Example of Z3 Video Streaming to VLC (UDP) ___________________________________________________________________________________________ Z3 Technology, LLC ♦ 100 N 8 ST, STE 250 ♦ Lincoln, NE 68508-1369 USA ♦ +1.402.323.0702... -
Page 18: Streaming Rtp
(21) Change “Output Format” from “UDP” to “RTP.” (22) Click on “start” to start the RTP encoding session. Change to “RTP” Figure 10 Configuration Screen - RTP ___________________________________________________________________________________________ Z3 Technology, LLC ♦ 100 N 8 ST, STE 250 ♦ Lincoln, NE 68508-1369 USA ♦ +1.402.323.0702... -
Page 19: Figure 11 Vlc Open Network Stream Screen For Rtp
(24) In the “Open Media” box, type “rtsp://{IP Address}/z3-{ch #}{m}.mp4”, where {IP Address} is the IP address of the Z3-MVE-250, {ch #} is 1 for CH1 or 2 for CH2, and {m} is added if a multicast address is being streamed. For example, if the IP address of the Z3-MVE-250 is 192.168.81.68, encode is being done from CH1, and unicast streaming is being done, the user would type in “rtsp://192.168.81.6/z3-1.mp4”:... -
Page 20: Changing The Bitrate And Frame Rate Dynamically
DOC-USR-0109-03 6.7 Changing the Bitrate and Frame Rate Dynamically The Z3-MVE-250 includes an “update” button which allows you to change the bitrate or frame rate without stopping and restarting the encoder. To use this feature, complete the following steps: (26) In VLC, click on “Tools” and select “Codec Information”. This brings up a window with four tabs. -
Page 21: Figure 15 Drop In Bitrate After Dynamic Bitrate Change
Lower bitrate Figure 16 Status Page Output Showing Lower Bitrate You can also use the “update” button to modify the Frame Rate Divider. ___________________________________________________________________________________________ Z3 Technology, LLC ♦ 100 N 8 ST, STE 250 ♦ Lincoln, NE 68508-1369 USA ♦ +1.402.323.0702... -
Page 22: Adjusting The Udp Ts Rate
DOC-USR-0109-03 6.8 Adjusting the UDP TS Rate The Z3-MVE-250 includes a parameter to adjust the TS rate independent of the video bitrate. This can be found just below “PMT PID” when “UDP” is selected as the output format. Normally, this value is set to 25% to 33% above the sum of the video and audio bitrate. For example, the default value out of the factory is a value of 10Mbps, corresponding to 8Mbps for the video. -
Page 23: Figure 18 Ts Rate And Lower Bitrate Reflected In Vlc
The value of TS Rate must be higher than (video bitrate + audio bitrate) * 1.25. If an attempt is made to input a value less than this, the error message “TS rate too small to carry elementary streams” will appear. ___________________________________________________________________________________________ Z3 Technology, LLC ♦ 100 N 8 ST, STE 250 ♦ Lincoln, NE 68508-1369 USA ♦ +1.402.323.0702... -
Page 24: Tuning For Latency
By default, this is set to 1000ms. You can lower this to as low as 200ms. To do this, go to the following: VLC → Tools → Preferences → Show Settings (ALL) → Input / Codecs → Network caching (ms) ___________________________________________________________________________________________ Z3 Technology, LLC ♦ 100 N 8 ST, STE 250 ♦ Lincoln, NE 68508-1369 USA ♦ +1.402.323.0702... -
Page 25: Using The "Aux Ts File" Option
After clicking “stop”, the user should wait at least 10 seconds before removing the USB drive from the Z3-MVE-250. This will ensure all buffered data finishes transferring to the USB drive. Figure 20 Using the Aux TS File Enable Option ___________________________________________________________________________________________ Z3 Technology, LLC ♦... -
Page 26: Encoding Closed Captioning
DOC-USR-0109-03 6.11 Encoding Closed Captioning The Z3-MVE-250 supports extraction of closed caption data from SDI input. This automatically occurs any time SDI input with closed caption data included is used. To utilize this feature, complete the following: (33) Connect an SDI signal with closed caption data to the SDI Input. -
Page 27: Stream Multiple Resolutions
DOC-USR-0109-03 6.13 Stream Multiple Resolutions The Z3-MVE-250 supports simultaneous encoding and streaming into up to three different resolutions and bitrates from one video source input. Each output stream can be set using a separate channel tab. (1) Verify the unit is connected to a video source. -
Page 28: Using The Z3-Mve-250 To Encode Rtmp
DOC-USR-0109-03 7.0 USING THE Z3-MVE-250 TO ENCODE RTMP This section shows how to use the Z3-MVE-250 to stream video over RTMP . Z3 has used the Wowza Streaming Engine as an example server for RTMP streaming. *Note: VLC does not support RTMP. The test player within Wowza Streaming Engine is recommended. -
Page 29: Set Up The Wowza Server
(1) Use IP address of Wowza server + “:8088” (2) Select “Applications” (3) Select “live” (4) Select “Test Players” Figure 25 Getting to the Wowza Test Player ___________________________________________________________________________________________ Z3 Technology, LLC ♦ 100 N 8 ST, STE 250 ♦ Lincoln, NE 68508-1369 USA ♦ +1.402.323.0702... -
Page 30: Figure 26 Viewing Z3-Mve-150 Content On Wowza
(11) You should see the “Test Players” popup screen. Select the “Adobe RTMP” tab, change the Stream name to “1080” (should match the directory you are streaming to in the Z3-MVE-250) and click “Start”. You will then see the content streamed from the Z3-MVE-250. -
Page 31: Running The Decoder
HDMI Figure 27 Connecting the Z3-MVE-150 for Decode (3) Connect an HDMI cable from to “HDMI Out” of the Z3-MVE-250 to an HD TV or monitor. 8.3 Set Decoder Mode (4) Change “Operating Mode” in the lower right corner of any tab to “Decoder”. -
Page 32: Figure 29 System Setup In Decoder Mode
New Settings for Display Appear Figure 29 System Setup in Decoder Mode (6) Leave these settings as is and click the “Set Display” button. ___________________________________________________________________________________________ Z3 Technology, LLC ♦ 100 N 8 ST, STE 250 ♦ Lincoln, NE 68508-1369 USA ♦ +1.402.323.0702... -
Page 33: Configure And Run Decoder
Figure 30 Decoder Configuration Settings for Decode Example (8) About 5-10 seconds later, decode will start and you will see video on the TV/monitor. ___________________________________________________________________________________________ Z3 Technology, LLC ♦ 100 N 8 ST, STE 250 ♦ Lincoln, NE 68508-1369 USA ♦ +1.402.323.0702... -
Page 34: Performing Other Operations With The Z3-Mve-250
9.0 PERFORMING OTHER OPERATIONS WITH THE Z3-MVE-250 Saving Current Settings If you have a specific configuration you’d like to preserve, you can save it so that when the Z3-MVE-250 is powered off and back on, it automatically uses those settings. -
Page 35: Using A Static Ip Address
(5) Enter in your desired network settings including “Local IP Address”, “Local Netmask”, “Default Gateway”, “DNS Server IP 1”, and “DNS Server IP 2”. ___________________________________________________________________________________________ Z3 Technology, LLC ♦ 100 N 8 ST, STE 250 ♦ Lincoln, NE 68508-1369 USA ♦ +1.402.323.0702... -
Page 36: Figure 34 Setting Dhcp Within Z3_Config1
The very first time settings are saved may take up to 30 seconds. This is due to some flash initialization which occurs on the very first configuration save. ___________________________________________________________________________________________ Z3 Technology, LLC ♦ 100 N 8 ST, STE 250 ♦ Lincoln, NE 68508-1369 USA ♦ +1.402.323.0702... -
Page 37: Open The User Interface Using Zfinder
If the unit appears in red, your computer’s IP address or Network Mask may not be compatible with the encoder and changes may be required before you can access the user interface. (10) A web browser will then open at the IP address of the Z3-MVE-250 and you will see the user interface. -
Page 38: Making A Firmware Update
(12) Open the HTTP-based Interface (Section 6.3 or Error! Reference source not found.). (13) Select “update device firmware” from the main screen: Click here Figure 38 Updating the Device Firmware from the Web Interface ___________________________________________________________________________________________ Z3 Technology, LLC ♦ 100 N 8 ST, STE 250 ♦ Lincoln, NE 68508-1369 USA ♦ +1.402.323.0702... -
Page 39: Figure 39 Updater Screen
(17) You will see screens stating that the image is being uploaded and that the flash is being updated. After about one minute, you should see the main menu again. (18) Your Z3-MVE-250 is now updated. ___________________________________________________________________________________________ Z3 Technology, LLC ♦ 100 N 8... -
Page 40: Using The Password Feature
DOC-USR-0109-03 9.4 Using the Password Feature The Z3-MVE-250 supports the assignment of a password to restrict access to the user interface. Please note, once a password has been set, this cannot be undone. (19) In the System Setup tab, click on “go” next to “Set Password”: Click here Figure 41 Selecting “Set Password”... -
Page 41: Figure 43 Password Entry Screen
You should now be able to access the web GUI. (23) To preserve the password, you should save this password configuration in either “serial_menu” or a user-defined preset. ___________________________________________________________________________________________ Z3 Technology, LLC ♦ 100 N 8 ST, STE 250 ♦ Lincoln, NE 68508-1369 USA ♦ +1.402.323.0702... -
Page 42: Enabling Forward Error Correction
DOC-USR-0109-03 9.5 Enabling Forward Error Correction The Z3-MVE-250 supports encode and decode of TSRTP streams with Pro-MPEG Forward Error Correction (FEC). 9.5.1 Encoding with Forward Error Correction (1) Verify the unit is in encoder mode and connected to a video source. -
Page 43: Decoding With Forward Error Correction
Select “AUTO” Figure 45 Enabling Pro-MPEG FEC Decode For more information on testing and verifying FEC using a Z3 Technology encoder and decoder with Pro- MPEG FEC support, please contact your Z3 sales account manager for additional user instructions. ___________________________________________________________________________________________ Z3 Technology, LLC ♦... -
Page 44: Summary Of Options
Notes Local IP Address 192.168.x.y (192.168.81.68) Sets the IP address of the Z3-MVE-250. Note that a “save” of these settings and a reboot is needed for changes to this value to take effect. When in DHCP mode, this field is not applicable. - Page 45 DOC-USR-0109-03 download device logs Clicking this causes the Z3-MVE-250 to extract a set of diagnostic logs that can be sent to Z3 in the event of an issue to be reported. This file is saved on the PC which the GUI is being run from.
-
Page 46: The User Presets Tab
These can be subsequently reloaded with the “import” command. import Load settings from a previously exported file. reset All existing user presets will be erased. ___________________________________________________________________________________________ Z3 Technology, LLC ♦ 100 N 8 ST, STE 250 ♦ Lincoln, NE 68508-1369 USA ♦ +1.402.323.0702... -
Page 47: The Status Tab
Refresh the current status values Auto Refresh If checked, causes the values in the status tab to be refreshed automatically once every five seconds. ___________________________________________________________________________________________ Z3 Technology, LLC ♦ 100 N 8 ST, STE 250 ♦ Lincoln, NE 68508-1369 USA ♦ +1.402.323.0702... -
Page 48: The Mpts Tab
The MPTS can be used to encode one more streams to DVB-ASI out. This is not supported by the Z3-MVE- 250 standard release, but can be made available as an optional upgrade. Contact your Z3 sales account manager for more information. ___________________________________________________________________________________________ Z3 Technology, LLC ♦ 100 N 8 ST, STE 250 ♦ Lincoln, NE 68508-1369 USA ♦ +1.402.323.0702... -
Page 49: The Ch1 Tab (Hdmi Source Only - Encode)
(see Note Number of B-frames 0 – 2 (0) The number of B-frames. A value of “0” means B-frames are disabled. ___________________________________________________________________________________________ Z3 Technology, LLC ♦ 100 N 8 ST, STE 250 ♦ Lincoln, NE 68508-1369 USA ♦ +1.402.323.0702... - Page 50 64Kbps is recommended for ARM AACLC best results). The bitrate range for AACHE ARM AACLC MPEG-2 and AACHE V2 is 32Kbps – 64Kbps. ___________________________________________________________________________________________ Z3 Technology, LLC ♦ 100 N 8 ST, STE 250 ♦ Lincoln, NE 68508-1369 USA ♦ +1.402.323.0702...
- Page 51 Access 1 AUs Units (AU) per transport stream Packetized 2 AUs Elementary Stream (PES) packet 3 AUs 4 AUs ___________________________________________________________________________________________ Z3 Technology, LLC ♦ 100 N 8 ST, STE 250 ♦ Lincoln, NE 68508-1369 USA ♦ +1.402.323.0702...
- Page 52 “/media/sda1/example.ts” could be specified. Video PID (UDP Only) 0 – 999 (220) PID assigned to video in the TS stream. ___________________________________________________________________________________________ Z3 Technology, LLC ♦ 100 N 8 ST, STE 250 ♦ Lincoln, NE 68508-1369 USA ♦ +1.402.323.0702...
- Page 53 User name to enter when “Authentication” enabled. Password (RTMP Password to enter when “Authentication” is Only) enabled. stop Stop current encode session. start Start encode session. ___________________________________________________________________________________________ Z3 Technology, LLC ♦ 100 N 8 ST, STE 250 ♦ Lincoln, NE 68508-1369 USA ♦ +1.402.323.0702...
- Page 54 1080i 1080p 1080p 1080p Note 3: GOP Sizes Supported: 10, 12, 15, 25, 30, 50, 60, 100, 120, 200, 240 frames ___________________________________________________________________________________________ Z3 Technology, LLC ♦ 100 N 8 ST, STE 250 ♦ Lincoln, NE 68508-1369 USA ♦ +1.402.323.0702...
-
Page 55: The Ch2 Tab (Sdi Source Only - Encode)
121-123 125-127 Audio RTP Ports 8892 - 8898 8900 - 8906 Video RTP Port 5004 5006 Video PID PCR PID PMT PID ___________________________________________________________________________________________ Z3 Technology, LLC ♦ 100 N 8 ST, STE 250 ♦ Lincoln, NE 68508-1369 USA ♦ +1.402.323.0702... -
Page 56: The Ch1 Tab (Decode)
Set to “Off” for video only streams. Output Port AUTO Where to output video. AUTO picks up from which port is being utilized. HDMI and SDI HDMI supported. ___________________________________________________________________________________________ Z3 Technology, LLC ♦ 100 N 8 ST, STE 250 ♦ Lincoln, NE 68508-1369 USA ♦ +1.402.323.0702... -
Page 57: Values Appearing At The Bottom Of All Tabs
“Decoder” is used to select decode mode. Stop All Stop encode on all channels. Start All Start encode on all channels. ___________________________________________________________________________________________ Z3 Technology, LLC ♦ 100 N 8 ST, STE 250 ♦ Lincoln, NE 68508-1369 USA ♦ +1.402.323.0702... -
Page 58: Appendix A: Installing Ear Racks On The Z3-Mve-250
(1) Place the Z3-MVE-250 face-up on a dry, flat surface. (2) Place one of the ear rack brackets on the left and one on the right of the Z3-MVE-250 so that the holes on the unit align with the brackets. The brackets are identical so it does not matter which bracket goes on which side. -
Page 59: Appendix B: Configuring The Wowza Server For Rtmp
“Java Garbage Collection Settings” to “Concurrent collector”. Click on “Save.”: Figure 47 Wowza Performance Settings All registered trademarks are property of their respective owners. ___________________________________________________________________________________________ Z3 Technology, LLC ♦ 100 N 8 ST, STE 250 ♦ Lincoln, NE 68508-1369 USA ♦ +1.402.323.0702... -
Page 60: Figure 48 Wowza Security Settings
Wowza. If you still run into issues, verify the Firewall on your PC with the Wowza server is turned off. ___________________________________________________________________________________________ Z3 Technology, LLC ♦ 100 N 8 ST, STE 250 ♦ Lincoln, NE 68508-1369 USA ♦ +1.402.323.0702... -
Page 61: Appendix C: Troubleshooting
.gz file, along with screenshots of the CH1/CH2/Status tabs to Z3 Technology. Z3 Technology’s Express Limited Warranty will be void if the label on the hardware bearing the Serial Number is removed, tampered with or defaced. You can view Z3 Technology’s full hardware warranty at http://z3technology.com/Support/ZEUS-HW-Warranty.html.
Need help?
Do you have a question about the Z3-MVE-250 and is the answer not in the manual?
Questions and answers