Table of Contents
Advertisement
Quick Links
User Instructions
Dual Channel H.264 HD Encoder
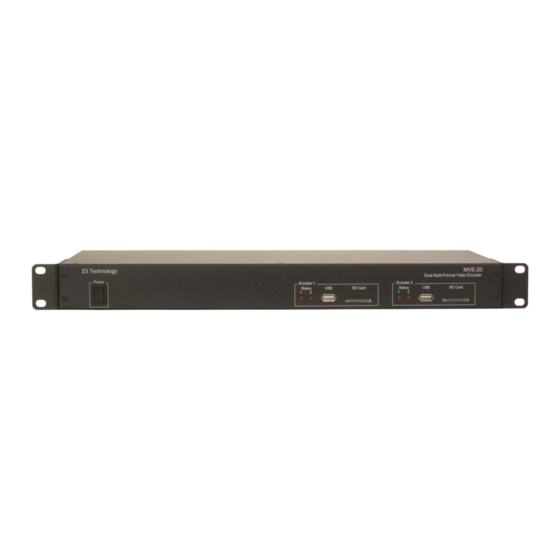
Z3-MVE-20 Multiformat Video Encoder
Z3-MVE-20
Model Name:
DOC-USR-0034-03
Manual Version 1.06.09
Software Version 1.06.09
April 18, 2014
Before attempting to connect or operate this product, please read these
instructions carefully and save the manual for future use.
Advertisement
Table of Contents

Related Manuals for Z3 Technology Z3-MVE-20


Summary of Contents for Z3 Technology Z3-MVE-20
- Page 1 User Instructions Dual Channel H.264 HD Encoder Z3-MVE-20 Multiformat Video Encoder Z3-MVE-20 Model Name: DOC-USR-0034-03 Manual Version 1.06.09 Software Version 1.06.09 April 18, 2014 Before attempting to connect or operate this product, please read these instructions carefully and save the manual for future use.
- Page 2 ______________________________________________________________________________________________________ Z3 Technology, LLC ♦ 100 N. 8th St. STE 250 ♦ Lincoln, NE 68508-1369 USA ♦ +1.402.323.0702...
-
Page 3: Table Of Contents
Updating Firmware from an SD Card ............... 32 APPENDIX A: CONFIGURING THE WOWZA SERVER FOR RTMP ............34 APPENDIX B: TROUBLESHOOTING ..................36 ______________________________________________________________________________________________________ Z3 Technology, LLC ♦ 100 N. 8th St. STE 250 ♦ Lincoln, NE 68508-1369 USA ♦ +1.402.323.0702... - Page 4 Figure 29 The Update Image Screen ................... 32 Figure 30 Wowza Performance Settings ................34 Figure 31 Wowza Security Settings ..................35 ______________________________________________________________________________________________________ Z3 Technology, LLC ♦ 100 N. 8th St. STE 250 ♦ Lincoln, NE 68508-1369 USA ♦ +1.402.323.0702...
-
Page 5: General Information
The Z3-MVE-20 Multi-Format Video Encoder is a 1 RU rack-mount system capable of processing two channels of multi-format HD video. The Z3-MVE-20 can encode two channels of H.264 High Profile at up to 1080p at 30 frames per second. It can be configured as a single-channel or dual-channel encoder, offering an advantage of low power consumption and lower cost per channel compared to a PC system. -
Page 6: Included Parts List
BNC to BNC Cable x 3 DB9 Serial Cable x 2 RCA to RCA Cable x 2 Figure 1 Parts Included with the Z3-MVE-20 ______________________________________________________________________________________________________ Z3 Technology, LLC ♦ 100 N. 8th St. STE 250 ♦ Lincoln, NE 68508-1369 USA ♦ +1.402.323.0702... -
Page 7: Features
Storage: -40 to 70 degrees C at 20-80% relative humidity (non-condensing) Measurements: 483mm x 200mm x 44mm Weight: 2,718g ______________________________________________________________________________________________________ Z3 Technology, LLC ♦ 100 N. 8th St. STE 250 ♦ Lincoln, NE 68508-1369 USA ♦ +1.402.323.0702... -
Page 8: Operating Controls
23 VGA In 24 Ethernet 12 Ethernet 18 Component In Pb 6 Component In Pb 25 Power In Figure 3 Z3-MVE-20 Rear View ______________________________________________________________________________________________________ Z3 Technology, LLC ♦ 100 N. 8th St. STE 250 ♦ Lincoln, NE 68508-1369 USA ♦ +1.402.323.0702... -
Page 9: Getting Started And Running The Z3-Mve-20
(3) Connect an Ethernet cable to “Ethernet” on the Z3-MVE-20 (see Figure 4). Connect the other end of the Ethernet cable directly to a PC. You will use this PC to control the Z3-MVE-20 and to decode the output stream. -
Page 10: Finding The Z3-Mve-20 On The Network Using Zfinder
Finding the Z3-MVE-20 on the Network using ZFinder (7) Make sure your Windows PC is connected to the same network in which the Z3-MVE-20 is connected to. (8) Run the “ZFinder” PC Utility on your Windows PC. The ZFinder window appears. ZFinder does a scan of the network and lists the location of all Z3 systems connected to the network. -
Page 11: Figure 7 Zfinder With Z3-Mve-20 Selected
DOC-USR-0034-03 (9) Click on the Z3-MVE-20 entry in the window to select it. This will cause the “Edit Device”, “Open Device” and “Flash Leds” boxes to activate: Figure 7 ZFinder with Z3-MVE-20 Selected (10) By clicking “Edit Device”, you can change the Name, IP Address, Netmask, and Gateway address of the Z3-MVE-20. -
Page 12: Figure 9 Changes To Encoding Parameters
Format” to “MPEG-2 TS” (4) Set “Dest IP Address” to 225.1.2.3 (5) Set “Dest Port” to 8888 Figure 9 Changes to Encoding Parameters ______________________________________________________________________________________________________ Z3 Technology, LLC ♦ 100 N. 8th St. STE 250 ♦ Lincoln, NE 68508-1369 USA ♦ +1.402.323.0702... -
Page 13: Figure 10 Z3-Mve-20 Web Menu - Start/Stop/Status Section
(1) If necessary, click “Stop Encoder” (3) Click “Start Encoder” (2) Status changes to “Stopped” Figure 10 Z3-MVE-20 Web Menu – Start/Stop/Status Section ______________________________________________________________________________________________________ Z3 Technology, LLC ♦ 100 N. 8th St. STE 250 ♦ Lincoln, NE 68508-1369 USA ♦ +1.402.323.0702... -
Page 14: Opening A Vlc Client To Receive The Encoded Stream
(15) Press “Enter”. (16) You should now see video streaming from VLC. Figure 12 Example of Z3 Video Streaming to VLC (UDP/TS) ______________________________________________________________________________________________________ Z3 Technology, LLC ♦ 100 N. 8th St. STE 250 ♦ Lincoln, NE 68508-1369 USA ♦ +1.402.323.0702... -
Page 15: Streaming Rtp
(23) Open VLC. Select “Media – Open File” and select the “z3-dm368.sdp” file you just copied. (24) You should then see RTP video streaming on VLC: Figure 13 Example of Z3 Video Streaming to VLC (RTP) ______________________________________________________________________________________________________ Z3 Technology, LLC ♦ 100 N. 8th St. STE 250 ♦ Lincoln, NE 68508-1369 USA ♦ +1.402.323.0702... -
Page 16: Using Dhcp
(1) Click “Save User” (2) Wait for “Saved all to User” to appear in status Figure 15 Saving “Use DHCP” (27) Power off the Z3-MVE-20. ______________________________________________________________________________________________________ Z3 Technology, LLC ♦ 100 N. 8th St. STE 250 ♦ Lincoln, NE 68508-1369 USA ♦ +1.402.323.0702... -
Page 17: Figure 16 New Ip Address In Zfinder
DOC-USR-0034-03 (28) Power back on the Z3-MVE-20. Wait about one minute for the “ready” LED to turn on. (29) Click “Refresh” on ZFinder. The Z3-MVE-20 should appear with a new IP address based on what it received through DHCP: (1) Click “Refresh”... -
Page 18: Dynamically Changing Bit Rate / Frame Rate
(1) Change bit rate (2) Click “Start Encoder” (3) “Changed rate” appears in Status area Figure 18 Changing Bit Rate on the fly ______________________________________________________________________________________________________ Z3 Technology, LLC ♦ 100 N. 8th St. STE 250 ♦ Lincoln, NE 68508-1369 USA ♦ +1.402.323.0702... -
Page 19: Streaming Rtmp
The Z3-MVE-20 also supports streaming RTMP to servers such as Wowza and ustream. The steps for doing so are as follows [Wowza shown here]: (1) Follow steps (1)-(10) earlier in this section to connect the Z3-MVE-20 for encode and bring up the Web GUI. -
Page 20: Figure 19 Settings To Stream Rtmp To Wowza
(3) Set to IP Address of Wowza Server (4) Set to “/live/1080” (5) Set to “1080i” or “Follow input” Figure 19 Settings to Stream RTMP to Wowza ______________________________________________________________________________________________________ Z3 Technology, LLC ♦ 100 N. 8th St. STE 250 ♦ Lincoln, NE 68508-1369 USA ♦ +1.402.323.0702... -
Page 21: Figure 20 Getting To The Wowza Test Player
Figure 20 Getting to the Wowza Test Player (11) You should see the “Test Players” popup screen. Select the “Adobe RTMP” tab, change the Stream ______________________________________________________________________________________________________ Z3 Technology, LLC ♦ 100 N. 8th St. STE 250 ♦ Lincoln, NE 68508-1369 USA ♦ +1.402.323.0702... -
Page 22: Running Decode On The Z3-Mve-20
DOC-USR-0034-03 name to “1080” (should match the directory you are streaming to in the Z3-MVE-20), and click “Start”. You should then see the content streamed from the Z3-MVE-20: (1) Select “Adobe RTMP” tab (3) Click “Start” (2) Type “1080” for Stream name... -
Page 23: Figure 22 Z3-Mve-20 Connections For Decode
(5) Connect “HDMI Out” of the SDI to HDMI converter with an HDMI cable to “HDMI In” of a monitor. (6) The control PC should still have the Web GUI of the Z3-MVE-20. If the encoder is still running from the previous demo, click “Stop Encoder”... -
Page 24: Figure 23 Z3-Mve-20 Example Encoder Settings For End-To-End Streaming
(7) In the encoder GUI, make sure the settings are set for streaming TS to 225.1.2.3:8888: Figure 23 Z3-MVE-20 Example Encoder Settings for End-to-End Streaming ______________________________________________________________________________________________________ Z3 Technology, LLC ♦ 100 N. 8th St. STE 250 ♦ Lincoln, NE 68508-1369 USA ♦ +1.402.323.0702... -
Page 25: Figure 24 Zfinder With Both Encoder And Decoder
(9) Open a Browser window to the IP address found in (8). You should then see the GUI for “Encoder 2.” In the top right corner is an “Operating Mode” selector. Select “Decoder” Select “Decoder” Figure 25 Z3-MVE-20 Changing to “Decoder” Mode ______________________________________________________________________________________________________ Z3 Technology, LLC ♦ 100 N. 8th St. STE 250 ♦ Lincoln, NE 68508-1369 USA ♦ +1.402.323.0702... -
Page 26: Figure 26 Z3-Mve-20 Example Decoder Settings For End-To-End Streaming
(15) Make sure “Output Interface” is set to “SDI”. (16) Click “Start Decoder”. (17) After a few moments, you should see video on the monitor. ______________________________________________________________________________________________________ Z3 Technology, LLC ♦ 100 N. 8th St. STE 250 ♦ Lincoln, NE 68508-1369 USA ♦ +1.402.323.0702... -
Page 27: Summary Of Gui Options
The H264 profile of the bit stream. Generally High is used for > D1, Main for Main D1, and Baseline for < D1. High ______________________________________________________________________________________________________ Z3 Technology, LLC ♦ 100 N. 8th St. STE 250 ♦ Lincoln, NE 68508-1369 USA ♦ +1.402.323.0702... - Page 28 On -> Use DHCP to get IP address at boot- Use DHCP up (see “Using DHCP”). [Checkbox] ----- Stop current encode session. Stop Encoder [Button] ______________________________________________________________________________________________________ Z3 Technology, LLC ♦ 100 N. 8th St. STE 250 ♦ Lincoln, NE 68508-1369 USA ♦ +1.402.323.0702...
-
Page 29: Decoder Options
None Set this flag if the streaming source is MVE Flag another Z3-MVE-20, or an encoder from Z3’s DM368 family of products. ______________________________________________________________________________________________________ Z3 Technology, LLC ♦ 100 N. 8th St. STE 250 ♦ Lincoln, NE 68508-1369 USA ♦ +1.402.323.0702... - Page 30 Load settings installed at the factory. Settings [Button] Load User Settings ----- Load user settings previously saved. Save User Settings ----- Save current settings for later use. ______________________________________________________________________________________________________ Z3 Technology, LLC ♦ 100 N. 8th St. STE 250 ♦ Lincoln, NE 68508-1369 USA ♦ +1.402.323.0702...
-
Page 31: Performing Other Operations With The Z3-Mve-20
Saving Current Settings If you have a specific configuration you’d like to preserve, you can save it so that when the Z3-MVE-20 is powered off and back on, it automatically uses those settings. This can be done with the following steps: (1) Once you make a change you want to save, click on “Save User”... -
Page 32: Updating Firmware From Web Gui
(7) Your Z3-MVE-20 is now updated! 8.2.2 Updating Firmware from an SD Card (1) Locate the .img update file from Z3 and copy it to your computer. ______________________________________________________________________________________________________ Z3 Technology, LLC ♦ 100 N. 8th St. STE 250 ♦ Lincoln, NE 68508-1369 USA ♦ +1.402.323.0702... - Page 33 (This is important – otherwise another update will occur next time you reboot …) (12) Turn the system back on. The update should then be finished. ______________________________________________________________________________________________________ Z3 Technology, LLC ♦ 100 N. 8th St. STE 250 ♦ Lincoln, NE 68508-1369 USA ♦ +1.402.323.0702...
-
Page 34: Appendix A: Configuring The Wowza Server For Rtmp
“Java Settings”. Click “Edit” and then change “Java Heap Size” to “Production Level” and “Java Garbage Collection Settings” to “Concurrent collector”. Click on “Save.”: Figure 30 Wowza Performance Settings ______________________________________________________________________________________________________ Z3 Technology, LLC ♦ 100 N. 8th St. STE 250 ♦ Lincoln, NE 68508-1369 USA ♦ +1.402.323.0702... -
Page 35: Figure 31 Wowza Security Settings
“Open” and “Client Restrictions” are set to “No client restrictions.” Then click “Save”: Figure 31 Wowza Security Settings The Wowza server is now configured to work with the Z3-MVE-20. ______________________________________________________________________________________________________ Z3 Technology, LLC ♦ 100 N. 8th St. STE 250 ♦ Lincoln, NE 68508-1369 USA ♦ +1.402.323.0702... -
Page 36: Appendix B: Troubleshooting
-Is the Ethernet cable plugged into the Z3-MVE-20 solidly (do you see the link light on the Ethernet cable which indicates data is being transmitted)? -Does the Z3-MVE-20 IP address and PC IP address have the same first two values (or, if netmask is set to 255.255.255.0, the same first three values)? -Do the Z3-MVE-20 and the PC running the web browser have the same netmask? (Default value in the Z3-MVE-20 is 255.255.0.0)
Need help?
Do you have a question about the Z3-MVE-20 and is the answer not in the manual?
Questions and answers