Table of Contents

Subscribe to Our Youtube Channel
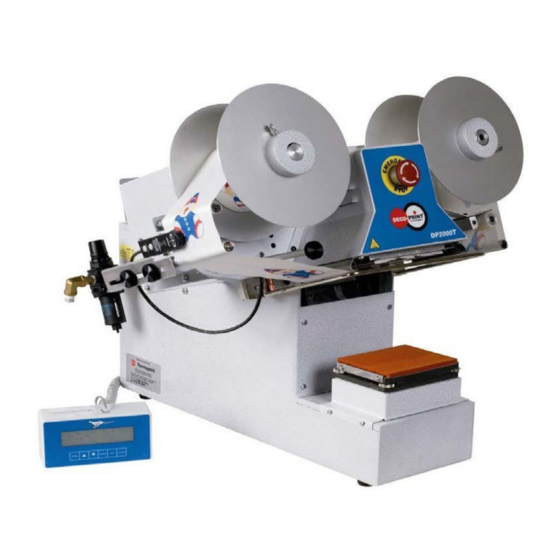
Related Manuals for Thermopatch DP-2000-T


Summary of Contents for Thermopatch DP-2000-T
- Page 1 DP-2000-T ATTENTION! All persons involved in installation, commissioning, operation, maintenance and re- pair of this product should be made available to these instructions. ENG V1.0 original version June 2022 based on TP Corp REV1215...
-
Page 2: Copyright
This user manual is intended not only for all users of the machine, but also for those who install and maintain the DP-2000-T. The goal is to familiarize you with the operation, to provide for safe working instructions and guidelines for periodical maintenance. -
Page 3: Table Of Contents
Introduction Contents 1. General description 1.1 Delivery 1.2 Conditions of warranty 2. Intended use 3. Specifications 3.1 Specifications of the DP-2000-T 4. Safety measures and warnings 4.1 Safety 5.0 Transport and storage 5.1 Transport 5.2 Storage 6.0 Operating instructions 6.1 Setting up the DP-2000-T 6.2 DP2000T Transfer Setup... -
Page 4: General Description
• 47309 — 1.5 M of 6 mm tubing (after May 2015) • 47310 — 6 mm OD Connection (after May 2015) If one of these articles should be missing or faulty, please contact your Thermopatch sup- plier. 1.2 CONDITIONS OF WARRANTY Thermopatch points to its warranty and product liability conditions as laid down in our general conditions. -
Page 5: Intended Use
The machine is an air operated machine that uses a foot pedal, (in- cluded), to initiate the printing cycle. WARNING! Any use other than described above can be dangerous and cause damage and thus qualifies as ‘misuse’ which excludes Thermopatch bv from any liability. -
Page 6: Specifications
3. Specifications 3.1 SPECIFICATIONS OF THE DP-2000-T Electrical Requirements: 5 Amps @ 110 VAC 50/60 HZ Or 2,5 Amps @ 220 VAC, 50/60 HZ Operating Air Pressure: 25 PSI (1,8 BAR) Minimum to 70 PSI (4,8 BAR) Maxi- mum 1,3 CFM (0,6 Liters/... -
Page 7: Safety Measures And Warnings
4. Safety measures and warnings 4.1 SAFETY Each DECO-PRINT machine is equipped with a Safety Guard feature for the protection of the operator. The Safety Guard is activated in two ways: 1. The metal bar senses the touch of your hand. 2. - Page 8 ATTENTION! Make sure you are informed about the contents of this manual before starting to work with the DP-2000-T. This ensures an optimal and safe use of the machine. ATTENTION! Always turn the power off (unplug it) when you need to carry out maintenance work or when cleaning the machine.
-
Page 9: Transport And Storage
5.0 Transport and storage 5.1 Transport When the machine needs to be moved, Thermopatch advises to use the original packaging. The machine has to be lifted by the screw that is fixing the swiveling arm and the handle on the front of the machine. -
Page 10: Operating Instructions
6.0 Operating instructions 6.1 Setting up the DP-2000-T Step 1 Refer to Figure 1 Loosen the two screws on the top of the case in the back and install the control box bracket, Item 4. Plug one side of the display cable, Item A, into the control box, Item B, connector. - Page 11 Plug the other end of the display cable, Item C, into the connector on the side of the ma- chine. Step 2 Turn the “Emergency Stop” switch, Item A, in the direction of the arrow to make sure it is out.
- Page 12 Step 3 Refer to Figure 5 Attach the air filter/regulator, with fittings to the bulkhead fitting, Item A, on the back of the machine. Orient as shown with the gauge facing forward. Connect the air supply to the male hose adaptor, Item C. Step 4 Refer to Figure 6.
- Page 13 Step 5 Refer to below: Place flange assemblies, Item A, on supply and take-up shafts, Item B.
-
Page 16: Dp2000T Transfer Setup
6.2 DP2000T TRANSFER SETUP 1. Select the transfer for use and measure the distance from the leading edge of one image to the leading edge of the next transfer as shown. A special platen is required if this measurement is less than 2-1/2 inches ( 64 mm ) 2. - Page 17 7. Press the ENTER button until the display reads “PATTERN MARKER: “. Use the UP or DOWN ARROW button to select YES. 8. Press the MENU button to exit the menu. 9. Loosen the clamp screw, move the transfer sensor onto the space between the transfer images and tighten the clamp screw.
- Page 18 11. Loosen the clamp screw and move the transfer sensor towards the leading edge of the transfer image closest to the sealing iron. When the edge of the image is detected by the transfer sensor, an asterisk ( * ) will appear on the display next to the feed length. When you see the asterisk ( * ), on the display, tighten the clamp screw.
-
Page 19: Adjusting The Printing Pressure And Platen Height Printing Pressure
6.3 ADJUSTING THE PRINTING PRESSURE AND PLATEN HEIGHT PRINTING PRESSURE Printing pressure is preset at the factory to 50 PSI. The printing pressure range is from 25 PSI (1.8 BAR) minimum to 70 PSI (4.8 BAR) maximum. NEVER EXCEED 70 PSI. In general, the larger the printing area, the higher the pressure required. - Page 20 INSERTING THE PRINTING PLATE The above drawing shows a DP2000T Printing Plate (Item 1) (CUSTOM PART) and a Printing Plate Holder (Item2) P/N (46007). The Printing Plate Holder is provided for installation and removal of the Printing Plate. • With the artwork facing down on the Printing Plate, apply a downward force just enough to slide the Printing Plate Holder forward.
- Page 21 Testing The Transfer Roll Feed Set-Up Run the machine through a few cycles holding a scrap cloth in place over the platen. Check to see if the machine is properly feeding the transfer tape, enough to position the next transfer in the correct position. The transfer image target position is controlled by the loca- tion of the sensor when it stops the following transfer.
-
Page 22: Control Box
6.4 CONTROL BOX The Deco-Print machine features a digital control box, with six control buttons, shown be- low: The display on the control box in normal running mode shows: Feed Length * Print Time * (means sensor is sensing stop position on transfer) Temperature Daily Counter Press the UP or DOWN button once to change the Daily Counter (DC) to Continuous Counter... -
Page 23: Machine Setup
6.5 MACHINE SETUP Press MODE to show choice of JOB SETUP or MACHINE SETUP. Press UP or DOWN button to select MACHINE SETUP. Press ENTER and select language. Press UP or DOWN button to select ENGLISH. Press ENTER and choose the temperature scale. Press UP or DOWN button to select FAHRENHEIT. -
Page 24: Troubleshooting
7. Troubleshooting Before referring to the information below, check for proper set-up and operation as outlined in “DP2000T Setup”. Solutions are listed with the most probable ones listed first. Some procedures may require completion by a person with some mechanical and electrical skill. - Page 25 Print head will not descend Touch guard activated Press Clear Temperature not ready Wait Solenoid air valve not shift- Replace Air supply not connected Check Foot switch is unplugged or Check/Replace Leak or restriction in air line Check/Repair or connections Print head too slow or fast Flow control(s) adjustment is See pg.39 item 14...
-
Page 26: Operational Messages
Heater Failure Relay is bad or shorted; temperature sensor High temperature is bad or shorted; or bad connections Heater failure Contact Thermopatch Unknown Seal Switch ERR This indicates the seal down switch was not Display when touch guard is activated. activated... -
Page 27: Parts Indentification And Location
8. parts indentification and location Drawing 01 DP-2000-T Machine Assembly ITEM NO. PART NUMBER DESCRIPTION QTY. 46876 CASE WELDMENT PLATEN ASSEMBLY SEE PAGE 33 46882 COVER, TOP REAR 46788 BRACKET, CONTROL BOX 21021-06-C NO. 8 SPLIT LOCKWASHER 21028-36 HEX STANDOFF #8-32... -
Page 28: Drawing 02 Platen Assembly
Drawing 02 Platen Assembly ITEM NO. PART NUMBER DESCRIPTION QTY. 45587 PLATEN BLOCK 45619 RETAINER, PLATEN HOLDER 45582 PLATEN HOLDER GUIDE WELDMENT 45621 PLATEN HOLDER 45642 SCREW ASSY 21029-32 THUMB SCREW 1/4-20 X 3/4 LG X 3/4 HD 21062-03-D FLAT SOC HD SCR 8-32 X 1/2 24075-26 SPRING - COMPRESSION 46833... -
Page 29: Drawing 03 Press Arm Assembly
Drawing 03 Press Arm Assembly ITEM NO. PART NUMBER DESCRIPTION QTY. 45591 ARM SUPPORT ASSY 22010-57 PIVOT MOUNT BRKTS (BIMBA) 22010-56 AIR CYLINDER, 2 1/2 BORE 3 1/2 STROKE 45578 UPPER LINK ASSY 46055 LOWER LINK ASSY 45589 CLEVIS, SEALING CYLINDER 21051-20-C NUT, HEX JAM 1/2-20 45593... -
Page 30: Drawing 04 Heater Assembly
Drawing 04 Heater Assembly ITEM NO. PART NUMBER DESCRIPTION QTY. 45585 SEALING IRON MACHINING 110V 45579 ISOLATOR BLOCK 45849 GUIDE WELDMENT, 45643 STOP, PRINTING PLATE 21021-10-C LOCKWASHER #5/16 SPLIT 21050-192 SHCS 5/16-18 X 2.0 LG S.S. 21021-06-C NO. 8 SPLIT LOCKWASHER 21069-05-E PHS 6-32 X 3/8 LG SS 21069-03-E... -
Page 31: Drawing 05 Support And Switch Assembly
Drawing 05 Support and Switch Assembly ITEM NO. PART NUMBER DESCRIPTION QTY. 45576 STUD, PIVOT 21062-05-G FHSCS 1/4 - 20 X 3/4 LG 21021-09-C LOCKWASHER - SPLIT 1/4 21061-03-F BUT HD SCR 1/4 X 20 X 1/2 45613 BRACKET, SEAL SWITCH 45712 NUT PLATE, SEAL SWITCH 20055-73... -
Page 32: Drawing 06 Head Assembly
Drawing 06 Head Assembly ITEM NO. PART NUMBER DESCRIPTION QTY. 46893 FLANGE ASSY 46916 DRIVE ROLL ASSY TOUCH GUARD ASSY SEE PAGE 42 COVER ASSY, HEATER SEE PAGE 43 REAR PLATE ASSY SEE PAGE 39 21011-04-K SET SCREW 10-32 X 3/16 LG COVER ASSY, HEAD SEE PAGE 5-13 21063-05-K... -
Page 33: Drawing 07 Front Plate Assembly
Drawing 07 Front Plate Assembly ITEM NO. PART NUMBER DESCRIPTION QTY. 46899 BRACKET, SENSOR 46900 SHAFT, SENSOR ROLL 46901 PLATE, SENSOR BRACKET SPACER 46902 SPACER, CLAMP SCREW 21023-02 WASHER, FLAT 1/4 21006-01-B SHOULDER SCREW 5/16 X 3/8 LG 21050-232 BELLEVILLE DISC SPRING .317 X .625 X .042 D-9702 E-RING 1/4 20055-73... -
Page 34: Drawing 08 Rear Plate Assembly
Drawing 08 Rear Plate Assembly ITEM NO. PART NUMBER DESCRIPTION QTY. 46886 PLATE, REAR 46778 SHAFT, UNWIND D-9705 E-RING 3/8 46936 BRACKET, LASER SPRING 46915 SHAFT, DRIVE ROLL 46919 PIN, DRIVE ROLL SPRING DF-7180 SPRING - EXT LE-029C-4 D-9701 E-RING 3/16 D-9702 E-RING 1/4 24080-36... -
Page 35: Drawing 09 Laser Assembly
Drawing 09 Laser Assembly ITEM NO. PART NUMBER DESCRIPTION QTY. 46922 YOKE, LASER 46934 PIVOT BLOCK, LASER 46933 PIN, LASER BLOCK 46935 BRACKET, LASER BLOCK D-9701 E-RING 3/16 21058-03-F PHS 8 - 32 X 1/4 LG 21021-06-C NO. 8 SPLIT LOCKWASHER 21011-04-H SET SCREW 8-32 X 3/16 LG 46896... -
Page 36: Drawing 10 Dancer Roller Assembly
Drawing 10 Dancer Roller Assembly ITEM NO. PART NUMBER DESCRIPTION QTY. 46912 BLOCK, LEAF SPRING 46914 LEAF SPRING 46913 HANDLE, SPRING 46909 SHAFT, PIVOT 46905 DANCER ROLL ARM 46910 ARM ASSY, SPRING 21011-04-K SET SCREW 10-32 X 3/16 LG D-9702 E-RING 1/4 21021-07-C NO. -
Page 37: Drawing 11 Touch Guard Assembly
Drawing 11 Touch Guard Assembly ITEM NO. PART NUMBER DESCRIPTION QTY. 46053 SPRING BRKT, R.H. 46054 SPRING BRKT, L.H. 21022-12 THRUST WASHER 3/8 I.D.X3/4O.D.X.06TK 46056 PIN, SHOULDER 21050-111 COTTER PIN 1/16 X 1/2 LG 45612 SPRING RETAINER 24075-39 SPRING, COMPRESSION 21060-04-C BHS 4-40 X 5/16 LG 21021-03-C... -
Page 38: Drawing 12 Heater Cover Assembly
Drawing 12 Heater Cover Assembly ITEM NO. PART NUMBER DESCRIPTION QTY. 46884 COVER, HEATER 45597 TAPE GUIDE 46938 LABEL, DP2000T FRONT 20055-75 STOP SWITCH ACTUATOR 20056-28 CONTACT BLOCK, E-STOP 21021-06-C NO. 8 SPLIT LOCKWASHER 21069-03-F PHS 8-32 X 1/4 LG SS 46880 SCALE, 4"... -
Page 39: Drawing 13 Pneumatic Diagram
Drawing 13 Pneumatic Diagram ITEM NO. PART NUMBER DESCRIPTION QTY. DH-6786 NIPPLE - HEX 1/4 NPT DH-6761 ELBOW - 90 DEG 1/4 NPT DH-6797 ADAPTER - MALE HOSE 1/4 MNPT 22030-38 FITTING - BULKHEAD 1/4 NPT 22046-09 AIR FLOW CONTROL RT ANGLE 1/4 NPT 22015-34 ELBOW - 1/4 MPT X 3/8 TUBE 22005-45... -
Page 40: Drawing 14 Valve And Regulator Assembly
Drawing 14 Valve and Regulator Assembly ITEM NO. PART NUMBER DESCRIPTION QTY. 22045-91 AIR REGULATOR/FILTER/GAUGE 0-150 PSI DH-6786 NIPPLE - HEX 1/4 NPT DH-6761 ELBOW - 90 DEG 1/4 NPT DH-6797 ADAPTER - MALE HOSE 1/4 MNPT 22030-38 FITTING - BULKHEAD 1/4 22045-89 VALVE - IN LINE CHECK 1/4 NPT 22046-09... -
Page 41: Drawing 15 Electronics Module
Drawing 15 Electronics Module Drawing 16 Main Electronics Module... -
Page 42: Drawing 17 Ac Harness
Drawing 17 AC Harness... -
Page 43: Drawing 18 Dc Harness
Drawing 18 DC Harness... -
Page 44: Drawing 19 Head Cover Assembly
Drawing 19 Head Cover Assembly ITEM NO. PART NUMBER DESCRIPTION QTY. 46883 COVER, HEAD 21029-60 THUMB SCREW, 1" DIA KN'D HD, 1/4x20x1-1/4 LG D-7212 ACORN HEX NUT 1/4-20 45426 LABEL, HIGH VOLTAGE 46945 LABEL, LASER TARGET... -
Page 45: Maintenance
9. Maintenance Rubber Print Platen Clean often by wiping with a soft, clean rag. Replace the pad when it becomes worn. To re- place pad, slide old pad assembly out of the lower platen, and install a new assembly. Compressed Air Supply Maintain a filtered air supply. -
Page 46: Declarations Of Conformity
The Netherlands declare that the DoC is issued under our sole responsibility and belongs to the following product: Thermopatch DP-2000-T Deco-Print, which this declaration re- fers to, is in accordance with the conditions of the following guidelines: • Electromagnetic Compatibility Regulations (EMC) 2016 •... -
Page 47: End Of Lifecycle
Using sealing pads of any format other than the standard supplied with the machine may render the CE declaration invalid. Thermopatch accepts no responsibility for any damage or injury that may result from pos- sible non-conformity. Choosing an alternative configuration other than the standard is at the customer’s own re-... - Page 48 Thermopatch European Headquarters The Netherlands T +31 36 549 11 11 F +31 36 532 03 98 sales@thermopatch.nl Thermopatch Australia Pty Ltd Australia T +61 395325722 F +386 2 80 55 232 marktpatchaust@bigpond.com.au Thermopatch Canada Inc Canada T +1 519 748-5027 F +1 519 748-1543 broussel@thermopatch.com...
Need help?
Do you have a question about the DP-2000-T and is the answer not in the manual?
Questions and answers