
Related Manuals for Siemens RDS120


Summary of Contents for Siemens RDS120
- Page 1 RDS120, RDS120.B Smart Thermostat User Guide A6V10733807_enUS_c Smart Infrastructure 12/28/2021...
-
Page 2: Table Of Contents
4.4.1 Locking the home screen ............... 18 4.4.2 Creating an administrator password ..........19 BACnet HMI access (RDS120.B only) ............19 Controlling humidifier/dehumidifier ..............20 Fan control ....................20 Turning on/off the touch sound ..............21 Changing the display language ..............21 4.10 Naming a room .................... - Page 3 7.5.1 Turning on/off universal contact monitoring ........29 7.5.2 Turning on/off condensation monitoring ........30 7.5.3 Turning on/off air filter reminder............. 30 Device setup ....................31 7.6.1 Configuring device locations ............31 7.6.2 Multiple user management ............31 7.6.3 Restarting devices ................. 32 7.6.4 Revoking devices ................
-
Page 5: About This User Guide
About this User guide Revision history 1 About this User guide 1.1 Revision history Edition Date Changes December 2021 Updated operation information about the mobile application. ● June 2021 Changed temporary temperature setpoint description per function change. ● Added another lock schema information ●... - Page 6 Please direct any comments regarding this document to sbt_technical.editor.us.sbt@siemens.com. Siemens assumes no liability to the extent allowed under the law for any losses resulting from a failure to comply with the aforementioned points or for the improper compliance of the same.
-
Page 7: Getting Started With The Thermostat
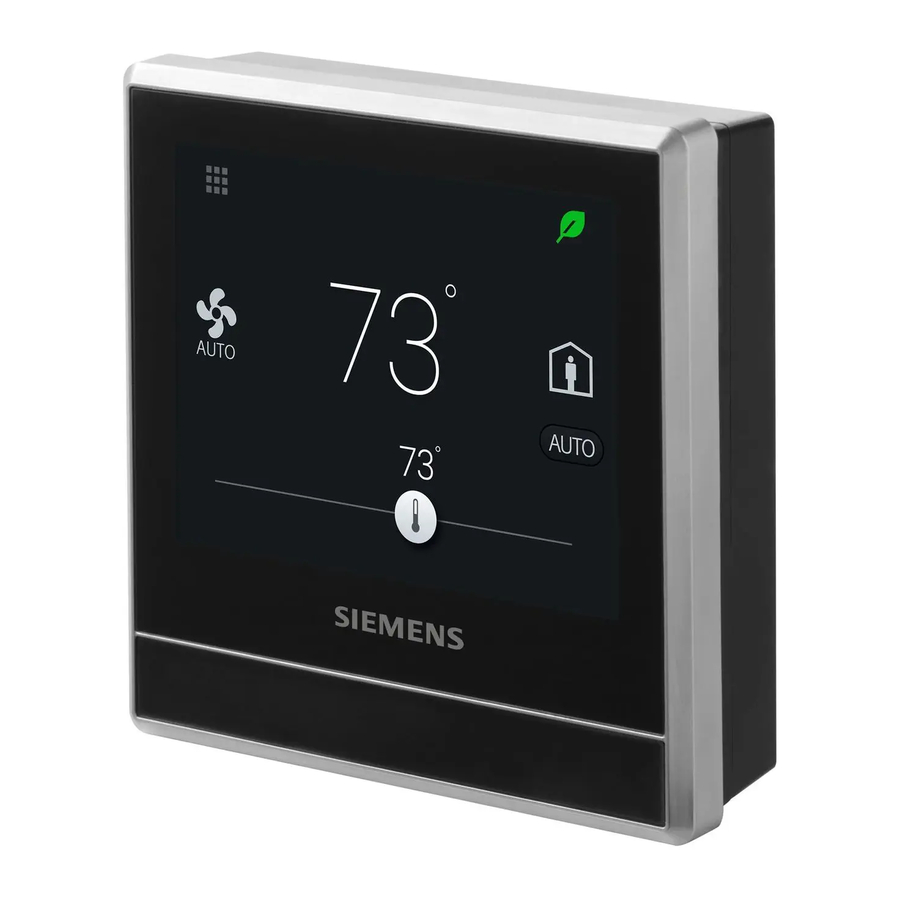
Getting started with the thermostat Thermostat display overview 2 Getting started with the thermostat 2.1 Thermostat display overview Normal display Icon Description Tap to display detailed information and additional settings. Displays whether the system is in an energy-optimized mode. If the leaf is red, predefined settings were changed. - Page 8 Getting started with the thermostat Thermostat display overview Icon Description Tap to toggle between At home and AWAY. Displays whether the thermostat is following a schedule ( ) or following the setpoint changes permanently ( ). Following a schedule can mean the following: ●...
-
Page 9: Home Screen Icon Overview
Getting started with the thermostat Home screen icon overview Icon Description Measured relative humidity Shows room air quality: ● If the icon is green, the air quality is good. ● If the icon is orange, the air quality is average. ●... - Page 10 Getting started with the thermostat Home screen icon overview Icon Description When this icon is toggled on, temporary change of fan settings only takes effect during the current scheduled mode and will be overridden to the scheduled settings when the next scheduled mode starts, however, temporary temperature setpoint changes may be effective across scheduled modes.
-
Page 11: Presence Detection
Presence detection Presence detection using the built-in PIR sensor 3 Presence detection 3.1 Presence detection using the built-in PIR sensor By using a built-in presence detection sensor (also called PIR (Passive infrared detector) sensor), the thermostat detects occupancy and then does the following: ●... - Page 12 Presence detection Presence detection using the built-in PIR sensor The width of each cell. It is 80 cm (31 in). The thermostat. The height of each cell. It is 80 cm (31 in). The area that the PIR sensor can detect. Change from Unoccupied to Comfort when an unoccupied room becomes occupied 1.
-
Page 13: Approach Detection
Presence detection Approach detection 3.2 Approach detection The thermostat has a built-in approach sensor. It can detect someone approaching the thermostat. If activity is sensed within 10 cm, it will switch from its idle screen to the main home screen with full temperature and setpoint display. Sensor position The location of the approach sensor. -
Page 14: Operating The Thermostat From The Thermostat Main Unit
Operating the thermostat from the thermostat main unit Temperature control 4 Operating the thermostat from the thermostat main unit 4.1 Temperature control The thermostat acquires the room temperature using the built-in sensor and/or the external room temperature sensor, and maintains the setpoint by delivering control commands to heating and/or cooling equipment. -
Page 15: Operating Modes
Operating the thermostat from the thermostat main unit Operating modes 4.2 Operating modes 4.2.1 Operating modes overview Operating Description mode At home This mode lets the thermostat know the space is now occupied. Within this mode, you can choose where the thermostat follows a schedule, or toggle to and have the thermostat operate at a specified setpoint indefinitely. -
Page 16: Operating Modes In A Schedule
Operating the thermostat from the thermostat main unit WLAN connection NOTE: To modify advanced settings on the heating or cooling mode, see Commissioning. 4.2.2 Operating modes in a schedule Operating mode overview Operating mode Description Maintains comfortable settings in controlled space during Comfort occupancy and activities. - Page 17 Operating the thermostat from the thermostat main unit WLAN connection – From the Home screen, tap , and then tap until the Settings page displays. – , and then tap . Wait for the thermostat to discover the networks nearby. 3.
-
Page 18: Screen Lock Protection
Operating the thermostat from the thermostat main unit Screen lock protection 3. Tap Push Button Setup, and then press the WPS button on the WPS- supported router to start the discovery of the thermostat. 4. On the thermostat, tap and then tap Connect. 5. -
Page 19: Creating An Administrator Password
2. Modify or deactivate the administrator password. 4.5 BACnet HMI access (RDS120.B only) The RDS120.B thermostat supports the BACnet IP communication protocol and is listed as a BTL device. The BTL certificate of the thermostat can be found at https://www.bacnetlabs.org/. -
Page 20: Controlling Humidifier/Dehumidifier
Operating the thermostat from the thermostat main unit Controlling humidifier/dehumidifier Access BACnet settings 1. If the thermostat is selected for commercial application (common wireless infrastructure), do the following: – From the Home screen, tap , and then tap . The Advanced Settings page displays. -
Page 21: Turning On/Off The Touch Sound
Operating the thermostat from the thermostat main unit Turning on/off the touch sound 4.8 Turning on/off the touch sound Turn on/off the touch sound 1. From the Home screen, tap , then tap until the Settings page displays. 2. Tap , and then tap to turn on or off the touch sound. -
Page 22: Software Updates
Operating the thermostat from the thermostat main unit Software updates Check basic information about the thermostat 1. From the Home screen, tap , tap and then tap . 2. When prompted, enter the administrator password. 3. Tap and then tap . -
Page 23: Green Leaf
Green leaf 5 Green leaf The Green leaf indicates that the system has an energy-optimized operation: ● Use Green Leaf default setpoints for heating and cooling. ● Run system automatically based on a schedule. ● Operate fan in Auto mode if the thermostat controls external fan equipment. ●... -
Page 24: Air Quality Control
Air quality control 6 Air quality control With its built-in and/or external VOC (Volatile Organic Compounds) sensor, the thermostat measures the room air quality and shows the air quality status symbol on the local idle screen. In the mobile app, the status is indicated by text. If no external VOC sensor is connected or if the input value of the external sensor is invalid, only the built-in sensor is used to provide values for the thermostat. -
Page 25: Operating The Thermostat From The Mobile Application
7 Operating the thermostat from the mobile application 7.1 Downloading the application You can download the Siemens Smart Thermostat RDS application from Google Play or App Store. 7.2 Account creation and pairing Create an account and associate it with thermostat(s) for wireless control. -
Page 26: Exploring The App Using Demo Mode
Operating the thermostat from the mobile application Exploring the app using demo mode ● Change background color ● Change time format Manage account information in the application 1. In the application, tap > 2. Manage your account information as needed. 7.3 Exploring the app using demo mode Before controlling the thermostat in the downloaded mobile application, check the demo mode of the mobile application to check out the application. -
Page 27: Widgets
Operating the thermostat from the mobile application Viewing and controlling devices in different locations Device connection state Online The thermostat is connected to the cloud server. Offline The thermostat is not connected to the cloud server. Several reasons may result in disconnection: ●... -
Page 28: Switching Between Away And At Home
Operating the thermostat from the mobile application Viewing and controlling devices in different locations Operating hours widget View heating and/or cooling operating hours of the current week, month or year. The widget can be viewed vertically (portrait) and horizontally (landscape, auto- rotation function of the phone/tablet is enabled). -
Page 29: Switching Between Heating And Cooling
Operating the thermostat from the mobile application Checking device notifications 5. Repeat steps 3 and 4 to set other switching points. 6. Tap Save. 7. To copy the current day's schedule to other days, tap Copy and follow the on- screen instructions. -
Page 30: Turning On/Off Condensation Monitoring
Operating the thermostat from the mobile application Checking device notifications Turn on/off universal contact monitoring 1. Tap > Setup. 2. Select the device for which you want to turn on or off universal contact monitoring. 3. Drag the slider next to Universal contact monitor to the right or left to turn it on or off. -
Page 31: Device Setup
Operating the thermostat from the mobile application Device setup 7.6 Device setup 7.6.1 Configuring device locations If multiple devices are added to an account, all devices are grouped in the default location. Move some of them to a different location for better device management. Move newly added devices to a different location 1. -
Page 32: Restarting Devices
Operating the thermostat from the mobile application Viewing mobile app info Activate account Users are invited and an account activation email is sent with a code within an hour. The mobile app is downloaded and installed. 1. In the login page, tap Activate account. 2. - Page 33 Operating the thermostat from the mobile application Viewing mobile app info Access Support ◈ > Info > Support. A6V10733807_enUS_c 33 | 40...
-
Page 34: Appendices
Appendices Frequently asked questions 8 Appendices 8.1 Frequently asked questions 8.1.1 What should I do if I forget the screen lock code? Try using the administrator password to unlock the screen. To unlock the screen using the administrator password 1. On the thermostat screen indicating that the screen lock code is incorrect, tap the question mark and then tap Log in. -
Page 35: What Is The Difference Between Administrated Wlan And Private Wlan
Appendices Frequently asked questions 8.1.5 What is the difference between Administrated WLAN and Private WLAN? Administrated WLAN * is supposed to connect to an infrastructure network managed by facility managers; Private WLAN fits for owner cases and is supposed to connect to a home network. Selecting the WLAN connection type differently only affects the entry to WLAN management: ●... -
Page 36: Can The Thermostat Display The Time Correctly If There Is No Wlan Connection
Appendices Frequently asked questions 8.1.10 Can the thermostat display the time correctly if there is no WLAN connection? If there is no WLAN connection, the thermostat displays the time correctly only when: ● The thermostat connected to a WLAN network once and could display time correctly. -
Page 37: How Long Are Settings Saved In The Thermostat If Power Fails
Appendices Technical specifications time is displayed only after synchronization is completed. The date is displayed as normal. The date and time will be synchronized automatically once power is resumed and internet is connected. 8.1.19 How long are settings saved in the thermostat if power fails? User settings on the thermostat are not affected by power failure and remain until users change the original settings. -
Page 38: Fcc Regulations (Usa)
(2) this device must accept any interference received, including interference that may cause undesired operation. 8.4 EULA The software included in this product is licensed for use subject to the Siemens end-user license agreement (EULA) posted at www.siemens.com/smart-thermostat or this software identified by product model or part number on the website. The open source software (OSS) information about the software can also be found from the same website. -
Page 39: Index
Index Index account creation .............. 25 management ............25 administrator passwords ........19 create ..............19 manage .............. 19 Green Leaf ............. 23 network add ..............17 configuration ............17 connect .............. 16 push button ............17 screen lock create ..............18 modify .............. - Page 40 Issued by Siemens Industry, Inc. Smart Infrastructure 1000 Deerfield Pkwy Buffalo Grove IL 60089 +1 847-215-1000 © Siemens Industry, Inc., 2021 Technical specifications and availability subject to change without notice. A6V10733807_enUS_c...
Need help?
Do you have a question about the RDS120 and is the answer not in the manual?
Questions and answers