
Related Manuals for Siemens RDS120-B


Summary of Contents for Siemens RDS120-B
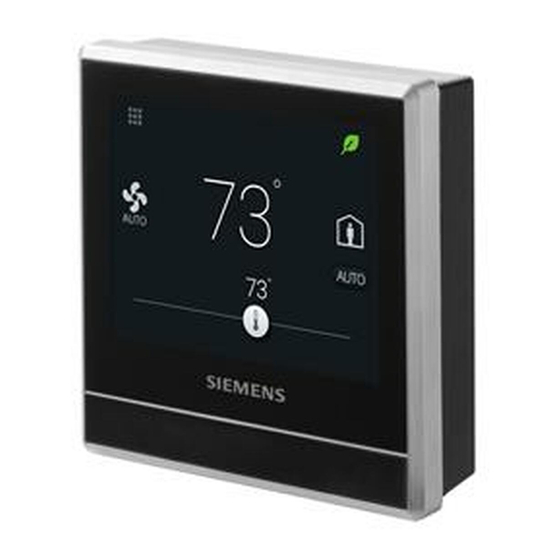
- Page 1 Smart Thermostat RDS120-B Commissioning Guide A6V11727391 06/20/19 Smart Infrastructure...
-
Page 2: Table Of Contents
Disassembly ....................27 Appendices ....................28 Technical specifications ....................28 Cyber security disclaimer ..................... 28 Regulatory information ....................28 8.3.1 ISED Regulations (Canada) ................ 28 8.3.2 FCC Regulations (USA) ................29 EULA ............................ 29 Siemens Industry, Inc. A6V11727391 Smart Infrastructure 06/20/19... -
Page 3: Summary
Ohm Pt Thermistor Ni R Room Temperature Sensors - Wall- 149-714 QAA2220.EWSN mount 149-714 QAA2212.EWSN 149-714 QAA2230.EWSN 149-714 QAA22SS.EWSN - Flush- 540-984 149-956 mount (Metal) 536-994A 149-956 (Beige) 536-994B 149-956 (White) 3 | 30 A6V11727391 Siemens Industry, Inc. Smart Infrastructure 06/20/2019... - Page 4 +T) 149-909 mount CO with temperature * The documents can be downloaded from Siemens US Download Center by specifying the product number as shown in the above table. 1) With digital display 4 | 30 Siemens Industry, Inc. A6V11727391...
- Page 5 Summary Associated Equipment Replacement Part Description Model Orderable Part Number Number Plastic trim plate and metal ARG100.01 S55772-T102 mounting plate for 2" × 4" box (1 set) 5 | 30 A6V11727391 Siemens Industry, Inc. Smart Infrastructure 06/20/2019...
-
Page 6: Installation
2. Remove the old thermostat from the wall with wires still connected. 3. Using the provided wire decals , label the existing wire connections. It is also helpful to take a picture of the current wire connections for subsequent reference. 6 | 30 Siemens Industry, Inc. A6V11727391 Smart Infrastructure 06/20/2019... - Page 7 (making sure that the upward arrow part is placed on the top), attach the plastic trim plate to the mounting plate, and secure by screws. 7 | 30 A6V11727391 Siemens Industry, Inc. Smart Infrastructure 06/20/2019...
- Page 8 For example, touching the wall could help on Electro-Static discharge (ESD). 9. Switch on power to the heating/cooling system. The thermostat should be powered up as well. Wiring Mounting instructions for more information. 8 | 30 Siemens Industry, Inc. A6V11727391 Smart Infrastructure 06/20/2019...
- Page 9 4 A. The total current rating should not exceed 3.3 A. For 24 Vac US installations, use Class 2 transformers. ● Disconnect from power supply before removing the front module and the mounting plate. 9 | 30 A6V11727391 Siemens Industry, Inc. Smart Infrastructure 06/20/2019...
-
Page 10: Setup Wizard
Selecting an equipment type and setting up the details ● Configuring date ● Specifying a name to the location where the thermostat is installed For more details, see the Quick guide. 10 | 30 Siemens Industry, Inc. A6V11727391 Smart Infrastructure 06/20/2019... -
Page 11: Presence Detection
For more information about operating modes, see the User guide. Sensor position The location of the PIR sensor. It is a black area if seen from the front of the front module. 11 | 30 A6V11727391 Siemens Industry, Inc. Smart Infrastructure 06/20/2019... -
Page 12: Approach Detection
The thermostat has a built-in approach sensor. It can detect someone approaching the thermostat. If activity is sensed within 10 cm, it will switch from its idle screen to the main home screen with full temperature and setpoint display. 12 | 30 Siemens Industry, Inc. A6V11727391 Smart Infrastructure 06/20/2019... - Page 13 Presence detection Approach detection Sensor position The location of the approach sensor. 13 | 30 A6V11727391 Siemens Industry, Inc. Smart Infrastructure 06/20/2019...
-
Page 14: Changing System Setup
OFF mode in the end and refuse to function normally unless you change to another input. – Universal contact 14 | 30 Siemens Industry, Inc. A6V11727391 Smart Infrastructure 06/20/2019... - Page 15 Activate or deactivate ventilation. Only when the output is configured as an outside air damper can the ventilation function be activated. The ventilation function is mainly used to improve the room air quality when the room is 15 | 30 A6V11727391 Siemens Industry, Inc. Smart Infrastructure 06/20/2019...
- Page 16 6. Tap Reset. The thermostat is reset and restarted. NOTE: After the thermostat is restarted, the setup wizard appears for easy commissioning. Refer to the Quick guide for the detailed setup information. 16 | 30 Siemens Industry, Inc. A6V11727391 Smart Infrastructure 06/20/2019...
-
Page 17: Managing Application Settings
0V = -58°F) sensor must be connected. Outside Calibrates thermostat 176°F -58…176°F temp. ref. at to high end of (80℃) (-50…80°C) temperature sensor signal (for example, 10V = 176°F) 17 | 30 A6V11727391 Siemens Industry, Inc. Smart Infrastructure 06/20/2019... - Page 18 (0…50℃) setpoint is OFF and the default Protection is Protection enabled. option is selected for Application setting No. 57. Max. Maximum allowable 95°F 32…122°F heating heating setpoint. (35℃) (0…50℃) setpoint 18 | 30 Siemens Industry, Inc. A6V11727391 Smart Infrastructure 06/20/2019...
- Page 19 45°F 32…122 F The cooling cooling cooling setpoint. protection (7 ℃) (0…50℃) setpoint setpoint is cool. valid only if the default Protection option is selected for Application setting No. 57. 19 | 30 A6V11727391 Siemens Industry, Inc. Smart Infrastructure 06/20/2019...
- Page 20 ON and OFF automatically to keep the humidity above the setpoint. It is not possible to switch the humidifier ON and OFF manually. Changing the setpoint will affect the humidification control to verify the functionality. 20 | 30 Siemens Industry, Inc. A6V11727391 Smart Infrastructure 06/20/2019...
- Page 21 ON and OFF automatically to keep the room humidity below the setpoint. It is not possible to switch the dehumidifier ON and OFF 21 | 30 A6V11727391 Siemens Industry, Inc. Smart Infrastructure 06/20/2019...
- Page 22 The output by opening the must be outside air damper. configured as an outside air damper. Room The thermostat Active presence switches from detector Unoccupied to Comfort when occupancy is detected. 22 | 30 Siemens Industry, Inc. A6V11727391 Smart Infrastructure 06/20/2019...
- Page 23 Fan min. Minimum off time 3 min 0…60 min equipment OFF time for fan when type selection. controlled by thermostat. 23 | 30 A6V11727391 Siemens Industry, Inc. Smart Infrastructure 06/20/2019...
- Page 24 (fan) min. time for the must have ON time dehumidifier been configured as Dehum. The minimum off 3 min 0…60 min a dehumidifier. (fan) min. time for the OFF time dehumidifier 24 | 30 Siemens Industry, Inc. A6V11727391 Smart Infrastructure 06/20/2019...
- Page 25 Dehum. (no The minimum OFF 3 min 0…60 min [➙ 14]. fan) min. time of a standalone dehumidifier. This OFF time minimum limitation protects the dehumidifier from short cycling. 25 | 30 A6V11727391 Siemens Industry, Inc. Smart Infrastructure 06/20/2019...
- Page 26 3. Tap > , and then scroll to the specific setting that you want to turn on/off or change to a desired value. 4. Tap to change the setting as desired. 26 | 30 Siemens Industry, Inc. A6V11727391 Smart Infrastructure 06/20/2019...
-
Page 27: Disassembly
The thermostat is designed for maintenance-free operations. Disassembling should only be done after the power supply is off and is only limited to the licensed installers only for disposal purpose. Siemens doesn’t guarantee the user’s safety if the disassembly process is managed by any unlicensed installers. -
Page 28: Appendices
Siemens’ portfolio undergoes continuous development to make it more secure. Siemens strongly recommends that updates are applied as soon as they are available and that the latest versions are used. Use of versions that are no longer supported, and failure to apply the latest updates may increase your exposure to cyber threats. -
Page 29: Fcc Regulations (Usa)
(2) this device must accept any interference received, including interference that may cause undesired operation. 8.4 EULA The software included in this product is licensed for use subject to the Siemens end-user license agreement (EULA) posted at www.siemens.com/smart- thermostat or this software identified by product model or part number on the website. - Page 30 Issued by © Siemens Industry, Inc., 2019 Siemens Industry, Inc. Technical specifications and availability subject to change without notice. Smart Infrastructure 1000 Deerfield Pkwy Buffalo Grove IL 60089 +1 847-215-1000 Document ID: A6V11727391 Edition: 06/20/2019...
Need help?
Do you have a question about the RDS120-B and is the answer not in the manual?
Questions and answers