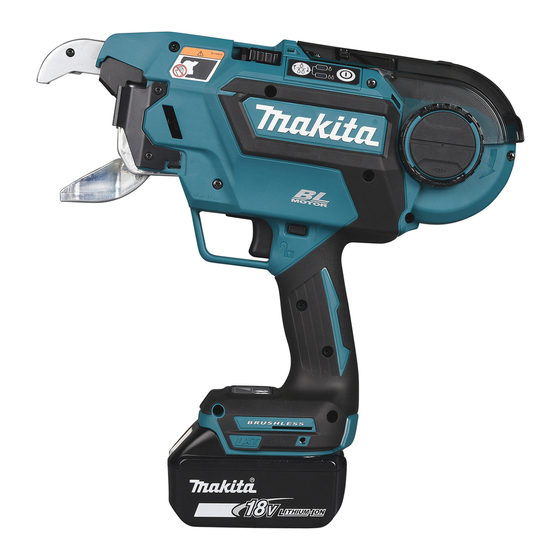
Makita DTR181 Instruction Manual
Cordless rebar tying tool
Hide thumbs
Also See for DTR181:
- Instruction manual (135 pages) ,
- Instruction manual (104 pages) ,
- Instruction manual (22 pages)
Table of Contents
Advertisement
Quick Links
Advertisement
Table of Contents

Related Manuals for Makita DTR181


Summary of Contents for Makita DTR181
- Page 1 INSTRUCTION MANUAL Cordless Rebar Tying Tool DTR181 Read before use.
-
Page 2: Specifications
SPECIFICATIONS Model: DTR181 Tie wire (Optional accessory) Annealing iron tie wire ø0.8 mm Poly coated tie wire ø0.9 mm Galvanized tie wire ø0.8 mm Approximate number of ties Annealing iron tie wire Approximately 75 ties per reel Poly coated tie wire... -
Page 3: Intended Use
Combination of 3 rebars #3 x #3 #4 x #4 #5 x #5 (10 mm x 10 mm) (13 mm x 13 mm) (16 mm x 16 mm) #3 (10 mm) #4 (13 mm) #5 (16 mm) #6 (19 mm) #7 (22 mm) #8 (25 mm) The combination is not designed for high tying strength. -
Page 4: Ec Declaration Of Conformity
Work area safety WARNING: Wear ear protection. Keep work area clean and well lit. Cluttered or WARNING: dark areas invite accidents. The noise emission during actual use of the power tool can differ from the declared Do not operate power tools in explosive atmo- value(s) depending on the ways in which the spheres, such as in the presence of flammable tool is used especially what kind of workpiece is... - Page 5 Do not overreach. Keep proper footing and Keep cutting tools sharp and clean. Properly balance at all times. This enables better control maintained cutting tools with sharp cutting edges of the power tool in unexpected situations. are less likely to bind and are easier to control. Dress properly.
- Page 6 Otherwise, an accident may occur. When tying rebars, exercise care not to move them. 23. Always use Makita's genuine wires. If wires are If rebars move due to tying, you may be injured. not used for a long period of time, they may 10. Do not touch the wires during the wire tying rust.
-
Page 7: Functional Description
Do not short the battery cartridge: causing fires, personal injury and damage. It will Do not touch the terminals with any con- also void the Makita warranty for the Makita tool and ductive material. charger. Avoid storing battery cartridge in a con-... -
Page 8: Overload Protection
To install the battery cartridge, align the tongue on the Tool / battery protection system battery cartridge with the groove in the housing and slip it into place. Insert it all the way until it locks in place The tool is equipped with a tool/battery protection sys- with a little click. - Page 9 When you press the power button, the power turns Switch action on and the tying mode lamp lights up. In order for the tool to adjust its initial position, it operates temporarily. WARNING: When adjustment has completed, the tool stops auto- Before installing the battery car- matically. When you press the power button again, the tridge into the tool, always check to see that the power turns off and the tying mode lamp goes out.
- Page 10 You can set the tying strength by adjusting the tying NOTICE: Using wires other than Makita's genu- strength adjusting button. Tying strength is shown on ine tie wires may cause the tool to malfunction. the display panel. Push the release lever, and lock it with the lock lever. Fig.9 ► 1 . Release lever 2. Lock lever When you push the release lever, a gap is created between the left and right feed gears.
- Page 11 Mount the wire reel on the tool in the orientation Pull the wire out approximately 10 mm from the tip shown in the figure. of the arm. Fig.12 ► 1 . Wire reel NOTICE: Be sure to mount the wire reel in the orientation shown in the figure.
- Page 12 Release the lock lever. The release lever returns, NOTICE: When the lock lever is released and and the wire is held by the left and right gears. when the left and right gears mesh with each other, the grooves in the gears form a space. This space becomes the path for the wire.
- Page 13 Remove bolt A, and remove the standard equipped wire guide B (silver). Fig.21 ► 1 . Bolt A 2. Bolt B 3. Contact plate cover 4. Standard equipped wire guide B (silver) NOTICE: Do not forcibly remove any bolts that cannot be removed using the hex wrench.
- Page 14 Fix the optional wire guide B (EG) (black) by tem- After assembling, confirm that the contact plate porarily tightening bolt A. can move as shown in the figure. Fig.26 ► 1 . Bolt A 2. Optional wire guide B (EG) (black). Install the contact plate cover in the direction of the arrow. Fig.29 ► 1 .
-
Page 15: Operation
If the tool operates and if no error is shown on the dis- diately. Ask your local Makita Service Center for repairs. play panel, the state of the tool is abnormal. Stop using... -
Page 16: Preparation Before Work
Release the trigger lock. Tying work CAUTION: Before inserting the battery car- tridge, be sure to release your fingers from the switch trigger and lock the trigger. If you insert the battery cartridge while the switch trigger is being pulled, it may cause an accident if the wire tying process is accidentally carried out. - Page 17 Continuous actuation mode After tying, be careful not to hook the arm on the rebars, and then pull the tool up. Switch the tool mode from the single actuation mode to the continuous actuation mode using the mode switching button. Fig.36 Fig.38 ► 1 .
- Page 18 After tying, be careful not to hook the arm on the • Tie the wire onto the flat (with no unevenness) rebars, and then pull the tool up. sections of crossed rebars. Fig.42 • If tying strength is insufficient, change the tying Fig.40 orientation and perform tying twice so that tying strength increases. Cautions on working •...
-
Page 19: Maintenance
When inserting the wire brush, hold it short and push it into the guide little by little. To maintain product SAFETY and RELIABILITY, repairs, any other maintenance or adjustment should be performed by Makita Authorized or Factory Service Centers, always using Makita replacement parts. Fig.47 ► 1 . Wire brush... -
Page 20: Disassembling And Cleaning
Using the air duster gun Open the reel cover, push the release lever, and lock it with the lock lever. Then bring the air duster gun close to the guide and blow the air. Make sure the air comes from the tip of the arm. Fig.48 ► 1 . - Page 21 Turn wire guide B over and clean its inside. Fig.53 ► 1. Bolt A 2. Bolt B 3. Contact plate cover 4. Wire guide B Fig.56 Remove top plate, cutter B, link arm A and cutter A NOTICE: Do not forcibly remove any bolts that from arm plate A.
- Page 22 Install cutter B and the top plate onto arm plate A. Install the contact plate cover in the direction of (Install cutter B on cutter A and link arm A.) the arrow. Fig.59 Fig.62 ► 1 . Cutter B 2. Top plate 3. Arm plate A 4. Cutter A ► 1 .
- Page 23 If an error occurs, an error tone will sound, and an error number will be shown on the display panel. Refer to the following table and take appropriate actions. If the error persists, ask Makita Authorized Service Centers for repairs.
-
Page 24: Optional Accessories
OPTIONAL ACCESSORIES CAUTION: These accessories or attachments are recommended for use with your Makita tool specified in this manual. The use of any other accessories or attachments might present a risk of injury to persons. Only use accessory or attachment for its stated purpose. If you need any assistance for more details regard- ing these accessories, ask your local Makita Service Center.