Toshiba TDP-P9 Service Manual
Hide thumbs
Also See for TDP-P9:
- Owner's manual (52 pages) ,
- Specifications (2 pages) ,
- Owner's manual (52 pages)
Table of Contents
Advertisement
Quick Links
FILE NO. 330-200729GR
Rev.02
SERVICE MANUAL
DLP PROJECTOR
TDP-P9,TDP-PX10
The above models are classified as green product (s) (*1), as indicated by the underlined serial number (s).
This Service Manual describes replacement parts for green product (s). When repairing any green product (s), use
the parts described in this manual and lead-free solder (*2).
For (*1) and (*2) , see the next page.
© TOSHIBA CORPORATION
Published in Japan, November 2007 GREEN
Advertisement
Table of Contents

Related Manuals for Toshiba TDP-P9


Summary of Contents for Toshiba TDP-P9
- Page 1 This Service Manual describes replacement parts for green product (s). When repairing any green product (s), use the parts described in this manual and lead-free solder (*2). For (*1) and (*2) , see the next page. © TOSHIBA CORPORATION Published in Japan, November 2007 GREEN...
- Page 2 Hazardous Substances. From July 1, 2006, the RoHS Directive will prohibit any marketing of new products containing the restricted substances. Increasing attention is given to issues related to the global environmental. Toshiba Corporation recognizes environmental protection as a key management tasks, and is doing its utmost to enhance and improve the quality and scope of its environmental activities.
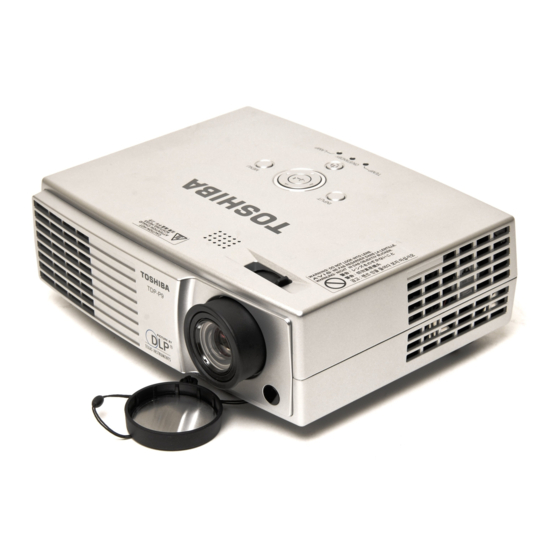
- Page 3 TDP-P9...
- Page 4 Alert you any damage that might result form doing or Warning not doing specific actions. Give precautionary measures to avoid possible Caution hardware or software problems. Remind you doing specific actions relevant to the Important accomplishment of procedures. TDP-P9...
-
Page 5: Table Of Contents
Table of Contents System Introduction ......……………………………………………… 1 1.1 Technical Specification……………………….………………………………………… 1.2 Lamp Specification ………………………………………………………………… 1.3 TDP-P9 System Block Diagram ....………………………………………… Firmware Upgraded Flow .......…………………………………………… 2.1 Setup Tool/Equipment ......…………………………………………… 2.2 Upgrading Procedure …………………….…………………………………………… Machine Disassembly and Replacement …………………………………………… 10 3.1 Tools …………………………………….……………………………………………... -
Page 6: System Introduction
1 System Introduction 1.1 Technical Specification TDP-P9 Display Type 0.55" DMD/ 12 ˚/ LVDS-Type X Resolution(Pixels) XGA ( 1024 x 768 ) Lens Manual Zoom (1.17X) F=2.5~2.74 f=22~25.5mm Screen Size 34 – 307 inches Contrast Ratio 2000:1 Uniformity > 54%... -
Page 7: Lamp Specification
Lamp Specification Product Type: Short arc mercury lamp with reflector. Initial Characteristics Note: More information about lamp replacement procedure, resetting lamp timer and lamp part number, please check the page 17. TDP-P9... - Page 8 Use the lead below 200 C to prevent a deterioration of cladding clad of the fluorocarbon resin. The lead wire insulation clad shouldn’t touch the reflector. Exchange the lamp that has already passed the life time immediately. TDP-P9...
-
Page 10: Firmware Upgraded Flow
License Agreement], and click Next to continue the installation process. 4. On the Select [Installation Type] screen, select [ALL] and click [Next] to continue the installation process. TDP-P9... - Page 11 5. When the installation is finished, click [Finish] and reboot the PC. (A shortcut to DLP Composer (TM) Lite is created on the desktop.) And copy the file “FlashDeviceParameters.txt” into the C:\ Program Files\ DLP Composer Lite TDP-P9...
- Page 12 Follow the instruction on the screen to press any key and wait for the installation done. Operating procedure 1. Connect the Projector and PC via USB cable. 2. Double-click [DLP Composer (TM) Lite]. The following screen will appear. 3. Select [Edit]/[Preferences]/[Communications] to check USB in [Projector Interface]. TDP-P9...
- Page 13 10. Press Menu and Power buttons constantly and then give power supply (switch power on). Power LED and Lamp LED will become amber. That indicates the projector is in the download mode. At this moment, you can release these two buttons. 11. Click [Start Download]. When the dialog box is displayed, click [Yes]. TDP-P9...
- Page 14 12. Wait for the Completion of Burning and then remove Power Cord and Burning Cord Note: In case, the device manager can’t recognize the DDP2230 as blow, please disable this device. This will not affect upgrade procedure. TDP-P9...
-
Page 15: Machine Disassembly And Replacement
3 Machine Disassembly and Replacement 3.1 Tools Item Photo Long Nose Nipper Hex Sleeves 5mm Screw Bit(+):107 Screw Bit(+):101 Screw Bit(+):102 Anti-static wrist strap Anti-static wrist gloves TDP-P9... -
Page 16: Disassembly Procedure
Never touch or hit the lamp module when replacing the lamp. When you replace the projector lamp, never touch the new lamp with your bare hands. The invisible residue left by the oil on your hands may shorten the lamp life. Use lint-free gloves or finger cots are recommended. TDP-P9... - Page 17 If the lamp is hot, please do not start any procedure until the projector lamp cools down. Flip the projector and remove the lens cover. Lens Cover Flip the projector on the table. Loosen the screws as Screw shown. TDP-P9...
- Page 18 There is a photo showing DC power in Right Fan Front IR O/E Fan you what the connector should be. Color wheel CW sensor 5 pin for Ballast Left Fan TDP-P9...
- Page 19 Then you can get the main board off. Note: the leftest screws are different. Spire off the lens ring and remove the screws on optical engine body, take off the engine and front cover. Then take the fans out. Screw TDP-P9...
- Page 20 Step Figure Description Loosen the screws of the DC-DC module and take it out. Remove the screws as shown and be careful to disconnect two wires under the ballast. Take BALLAST the ballast off. TDP-P9...
- Page 21 Step Figure Description Remove the mylar and you age the bottom cover assembly. Remove other assembly parts as photo showing. TDP-P9...
-
Page 22: Disassembly Lamp Module
Insert the new lamp module into the projector and tighten the screws. Replace the lamp cover and tighten the screws. Note: Turn on the projector. If the lamp does not turn on after the warm-up period, please reinstall the lamp. TDP-P9... -
Page 23: Disassembly The Speaker And Keypad
Description Disassembly the speaker Disconnect the speaker wire with keypad Remove the screws S7 x 2 Take the speaker M1 off. Disassembly the keypad Disconnect the speaker wire and Remove the screws as shown Take the keypad B4 off. TDP-P9... -
Page 24: Troubleshooting And Verifying The Repair
A failure symptom is rarely caused by more than one module, so you will not usually need to replace more than one to correct a particular failure. Whatever main board, ballast, IR board, power board, lamp module or optical engine are all suitable to check by swapping modules. TDP-P9... - Page 25 Check 4 pin Fuse Power output Replace main Replace power Replace fuse board board How to check the power board? Fuse - check the 380v output on connector 1(see ballast board page 33) - check the fuse on the power board TDP-P9...
- Page 26 Replace Replace Check Check Lamp Module Speaker Lamp life Speaker Replace Replace Check Check Power board Power board Mainboard Mainboard 380V output Replace Check Ballast Ballast Replace Check Mainboard Mainboard Check CW Replace Rotation while Optical Engine power on TDP-P9...
- Page 27 No Signal No Signal Turn on Turn on Check Check Source Source Source Source Replace Replace Check Check Cable Cable Cable Cable Replace Replace Optical Check monitor Check Mainboard Engine without signal Optical Engine Replace Check Optical Engine Optical Engine TDP-P9...
- Page 28 Check Adjust Adjust Color Check Color input cable and Input signal Wheel Index Wheel Index signal setting Replace Replace Check Check Mainboard Mainboard Mainboard Mainboard Replace Replace Check Check Optical Engine Optical Engine Optical Engine Optical Engine TDP-P9...
- Page 29 Operation Function Troubleshooting Remote Control Button Failure Failure Replace Replace Check Check Keypad and FPC Battery Keypad and FPC Battery Level Replace Replace Check Check Remote Control Mainboard Remote Control Mainboard Replace Check Replace Check Mainboard Mainboard TDP-P9...
-
Page 30: Verifying The Repair
2. Connect projector USB to PC. Press remote controller page up/down to scroll presentation file up and down (ex Microsoft office series) I/O port Audio input Test Equipment Connect audio input to audio output of DVD player Signal format 480i TDP-P9... - Page 31 Mechanical motion of rotating Zoom ring to the end of right and left by Zoom ring hand should be free from getting stuck. The feeling of rotating Focus ring to the end of right and left by hand Focus ring should free from seizing TDP-P9...
- Page 32 -- For each RGB 256 levels, Noise or color deviation in R, G, and B single level respectively are acceptable. 16 gray level --16 level of gray level color should be distinguishable --When Gamma selected to “RGB” Not distinguishable of 2 brightest levels /2 darkest levels are acceptable. TDP-P9...
- Page 33 Standard Pattern generator (Ex. Quantum data)&DVD player 480i Signal format Criteria No apparent color deviation on the projected image Video Video I/O port Test Equipment Standard Pattern generator (Ex. Quantum data)&DVD player Criteria No apparent color deviation on the projected image TDP-P9...
- Page 34 2. Cover rear sensor and operate remote controller to test front sensor (6) Brightness measurements Test items Brightness measurements Test Equipment Chroma automatic system (The alternative is CL-200) Measure 9 points Test method Criteria Marketing spec 20% off TDP-P9...
- Page 35 1. Clamp the metal shell of VGA connector 2. Plug the power cord to socket CASE CLAMP POWER CORD Test criteria GND 30A 3sec 100m DCW 2506V 1sec 250uA Single Step OFF (8) Cosmetic standard for repaired projector Follow cosmetic standard of repair center. TDP-P9...
-
Page 36: Connector Information
Description No 1 Left FAN No 2 Front IR No 3 O/E FAN No 4 Power supply No 5 Color Wheel control No 6 Color Wheel Sensor No 7 Keypad control No 8 Right FAN No 9 Ballast control TDP-P9... -
Page 37: Ballast Board
Connect to DC-DC board No 3 AC Power Input 5.3 DC-DC Power board No 4 No 3 No 1 No 2 Connector Description No 1 Connect to main board No 2 Thermal feedback No 3 Safety switch No 4 DC power in TDP-P9... -
Page 38: Fru (Field Replaceable Unit) List
FRUs in the projector. When working on the projector, use appropriate anti-static precautions such as anti-static mats, wrist straps and grounded work surfaces. Failure to do this can destroy static-sensitive components and make the product inoperable. TDP-P9... -
Page 39: Mechanical Drawing
6.1 Mechanical Drawing S1*3 S1*3 TOP COVER S1*3 S2*2 S2*2 S3*2 S2*2 S2*2 S4*2 MAIN BOARD S4*2 FRONT COVER DMD BOARD OPTICAL ENGINE LENS COVER TDP-P9... - Page 40 S2*2 S5*1 DC-DC POWER MODULE FAN1 S2*2 M4*2 FAN2 S6*1 BALLAST BOARD S2*2 M3*2 S1*1 S7*2 BOTTOM COVER S8*1 S9*1 LAMP COVER TDP-P9...
-
Page 41: Other Drawing
6.2 Other drawing W2 (FRONT IR WIRE) B1 (MAIN BOARD) S10*1 B5 (FRONT IR BOARD) (FRONT COVER) (FRONT IR COVER) S11*2 M5 (Metal Dome) S7*4 S2*2 B2 BALLAST S7*2 B4 (KEYPAD) C1 (BOTTOM COVER) S2*2 S2*2 S4*2 FAN2 FAN1 OPTICAL ENGINE TDP-P9... - Page 42 Top Cover S2*2 S1*3 S1*3 S1*3 TDP-P9...
-
Page 43: Drawing Of Optical Engine
6.3 Drawings of Optical Engine Lamp Module O3(Color Wheel) O4(DMD) FAN3 B7 DMD TDP-P9... - Page 44 TDP-P9...
-
Page 45: Spare Parts List
6.4 Spare parts list (TDP-P9, TDP-PX10) GREEN Loca- Part No Description tion PX10 75010614 SCREW, M2*4*A1.3 B 75010615 SCREW, M2.5*4*E0.7 NI 75010616 SCREW, M2.5*6*A1.7 NI SCREW, M3*6*A2 NI 75010619 SCREW, M3*26*D2 NI 75010621 75010622 SCREW, M3*23*E1.2 BL 75010656 CASE, SOFT... - Page 46 75010618 SCREW, M2.5*8*A1.9 NI 75010632 WIRE, CON-CON 2PIN BST(BST-LAMP) 75010631 WIRE, CON-CON 4PIN IR WIRE, CON-CON 4PIN MB(CW) 75010635 75010809 WIRE ASSY, CON-SW (SAFETY SWITCH) 75010636 WIRE, CON-CON 5PIN BST 75010630 CABLE, FFC, 0.5P, 28PIN 75010634 WIRE, CON-CON12PIN-10PIN+2PIN P TDP-P9...
-
Page 47: Appendix A : Main Board Function Diagram
Appendix A: Main board IC function diagram 1. Front side 2. Rear side TDP-P9... - Page 48 OSHIBA CORPORA ION - , SHIBAURA -CHOME, MINATO-KU, TOKYO 05-800 , JAPAN...
Need help?
Do you have a question about the TDP-P9 and is the answer not in the manual?
Questions and answers