Table of Contents
Advertisement
Quick Links
FILE NO. 330-200509
SERVICE MANUAL
DLP PROJECTOR
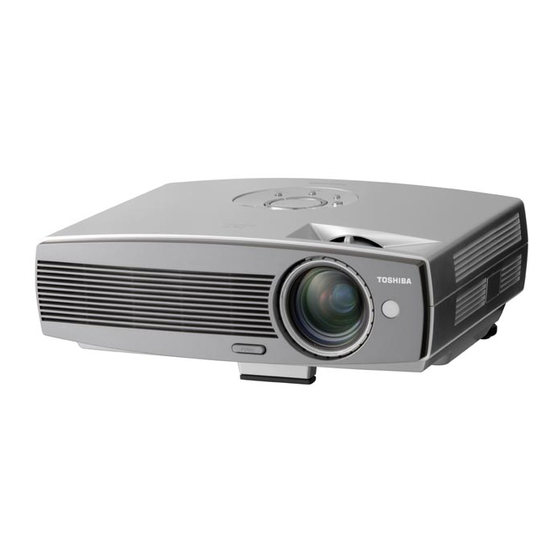
TDP-P75
The above model is classified as a green product (*1), as indicated by the underlined serial number.
This Service Manual describes replacement parts for the green product. When repairing this green
product, use the part(s) described in this manual and lead-free solder (*2).
For (*1) and (*2), see the next page
Document Created in Japan Jun.,2005
Advertisement
Table of Contents

Related Manuals for Toshiba TDP-P75


Summary of Contents for Toshiba TDP-P75
-
Page 1: Service Manual
FILE NO. 330-200509 SERVICE MANUAL DLP PROJECTOR TDP-P75 The above model is classified as a green product (*1), as indicated by the underlined serial number. This Service Manual describes replacement parts for the green product. When repairing this green product, use the part(s) described in this manual and lead-free solder (*2). -
Page 2: Table Of Contents
Restriction of the use of certain Hazardous Substances. From July 1, 2006, the RoHS Directive will prohibit any marketing of new products containing lead. Increasing attention is given to issues related to the global environmental. Toshiba Corporation recognizes environmental protection as a key management tasks, and is doing its utmost to enhance and improve the quality and scope of its environmental activities. -
Page 3: Safety Precautions
TDP-P75 Service Manual 1. Safety Precautions 1. Be sure to read this manual before servicing and save it for future reference. 2. The lamp becomes extremely hot during operation. Allow the projector to cool for approximately 60 minutes prior to removing the lamp assembly for replacement. -
Page 4: Servicing Precautions
TDP-P75 Service Manual 2. Servicing Precautions 1. When replace the lamp, be sure to avoid burns your fingers because the lamp becomes too hot. 2. Never touch the lamp bulb with a finger or anything else. Never drop it or give it a shock. -
Page 5: Specification
TDP-P75 Service Manual 3. Specification Tested under 60” (diagonal) image size with Wide projection lens position, Toshiba meter and “SPOKE mode” unless 1.0 Optical Performance otherwise specified. 1.1 ANSI Brightness Minimum 1760 Lumens (Spoke mode) 1.2 Brightness Uniformity 1.2.1 ANSI Uniformity Minimum 50% (Spoke mode) 1.3 Contrast Ratio... - Page 6 TDP-P75 Service Manual G<=3.5 R<=2.5 B<=3.5 G<=2.5 Slight flare no count B<=2.5 Center of screen (Center of screen is defined as center grid All other area when divide screen in 2.7 Lateral Color to 9 grids) Spectrum 450-600 nm <1/2 <1...
- Page 7 TDP-P75 Service Manual Safety UL Approved (UL 1950, CSA950), TUV-GS, CCC, CB Report, PSE, SJQA, GOST FCC Class B requirements, C-Tick, PSE 7.0 Reliability(TBD) CE Marks Directive 73/23/EEC; Directive 89/336/EEC; 8.0 Reliability 8.1 General Failure Def. 8.2 MTBF 20000 hours except DMD chip, Color wheel, Lamp and Fan 1500 hours (50% brightness maintenance with survival 8.3 Lamp Lifetime (Add continuous...
- Page 8 TDP-P75 Service Manual G(Y): Video amplitude 0.7/1.0 Vp-p : Impedance 75 ・ RB(CbCr): Video amplitude 0.7 Vp-p : Impedance 75 ・ HD/VD/CS: TTL Level RCA jack (Yellow) 12.2 Video Input Video amplitude 1.0 V : Impedance 75Ω 4 pin Mini-Din (Female) 12.3 S-Video Input...
- Page 9 TDP-P75 Service Manual 3.1. Interface Definition 15 pin definition of the mini D-sub male for DDC2B protocol Definition Definition Definition Definition Red Signal Green Signal Blue Signal Color Color Luminance Difference Difference Signal (Y) Signal (Pr) Signal (Pr) GRD (R)
-
Page 10: Circuit Operation
TDP-P75 Service Manual 4. Circuit Operation 4.1. Functional Description 4.1.1. 1.1 Overview The DDP2000 Component set consists of the DDP2000 projector controller ASIC, a Double Data Rate DMD (XGA or SVGA resolution), and the DAD1000 analog ASIC. The DDP2000 reference design includes these components along with peripheral devices which form the electronics portion of a projector design. - Page 11 TDP-P75 Service Manual Figure 1. TI Reference Design 10/60 08/19/05...
-
Page 12: Main Board
TDP-P75 Service Manual Figure 2. Circuit Block Diagram IR & Chip Board Color Wheel Sensor Power Board Keystone Main Board Thermal Input Board Keypad Sensor 、 、 Figure 3. Main Board IR Board Chip Board DDP200 RAMBUS RDRAM MXD2020E Imag... - Page 13 TDP-P75 Service Manual 4.2. Power and Start-up 4.2.1. Power Supply Voltages The DDP2000 TI reference design requires the following voltages and currents to be available: Table 1. Power Requirements Voltage Tolerance Current (min) +12 VDC +/- 0.6 V 1.5 A (includes fan power) +5 VDC +/- 0.25 V 1.5 A...
-
Page 14: Component Video
TDP-P75 Service Manual 4.3. Graphics and DVI Inputs 4.3.1. AD9882 TI has chosen the AD9882 dual interface device from Analog Devices as the analog interface for the first DDP2000 reference design. This choice was based on availability, expected cost, the inclusion of DVI (with HDCP support) and the performance characteristics as stated in the data sheet from Analog Devices. -
Page 15: Video Inputs
TDP-P75 Service Manual 4.4. Video Inputs 4.4.1. VPC3226E TI has chosen the Micronas VPC3226E as the video decoder for the DDP2000 reference design. The device was chosen based on availability, projected costs and the performance characteristics as stated in the data sheet. - Page 16 TDP-P75 Service Manual 4.5. Clock Circuitry 4.5.1. Clocks 4.5.1.1. Reference Clock The DDP2000 is designed to support both DRCG based Rambus™ memory operation and DRCG-Lite Rambus™ memory operation. 4.5.1.2. DRCG In regular DRCG operation, an external DRCG clock IC (CDCR83) aligns the Rambus™...
- Page 17 TDP-P75 Service Manual to reset the DDP2000 electronics, so the LAMPLITZ signal must transition from high to low after the lamp ignition EMI pulse is over to guarantee operation is not affected by the ignition EMI. No DDP2000 electronics configuration should be attempted until LAMPLITZ is low and stable.
- Page 18 TDP-P75 Service Manual designated IR0 and IR1 have the following characteristics: ..Voltage Level: LVTTL (3.3 VDC) ..Maximum Frequency: 1 MHz ..Typical Frequency: 2 KHz ..Noise immunity: See the Software User’s Guide. 4.7.5. Power Monitor and Reset There are 3 inputs to the DDP2000 ASIC used for initialization, reset, and power monitoring.
-
Page 19: Temperature Sensors
TDP-P75 Service Manual the DDP2000 to place specific data on each pin. The recommended operating conditions for these signals are given in section 2 and include the following: Sink current: 4 mA maximum Source Current: 4 mA maximum 4.7.10. Peripherals Used in the Reference Design The list of peripherals that are demonstrated in the reference design is as follows: .. - Page 20 TDP-P75 Service Manual Audio Processor S-Video CVBS Audio Audio BUFFER G768 XTAL 32.768K Power Fan Blower Fan 19/60 08/19/05...
-
Page 21: Alignment Procedure
TDP-P75 Service Manual 5. Alignment Procedure 5.1. DMD Bias Voltage Alignment Watch DMD chip Label (Example: 9477000 0234B) Switch the DIP switch on DMD board according to the red character on the DMD chip BINSEL1 BINSEL0 DMD Bin Direction 6240019001 5.2. - Page 22 TDP-P75 Service Manual Procedure: Gray Level: Connect power, D-sub, into projector. Change Timing and pattern of pattern generator: Timing: 1024*768 @60Hz (XGA) Pattern: As Figure1 {A near white color (240,240,240) and a near black color(16,16,16)} Light on projector Set user OSD values to default.
-
Page 23: Yuv Alignment Procedure
TDP-P75 Service Manual 5.4. YUV Alignment Procedure OSD Default value: Item Value Cal R Offset Cal G Offset Cal B Offset Cal R Gain Cal G Gain Cal B Gain YPbPr R Offset YPbPr B Offset AutoKeystone Cal TiltRatio Flat... - Page 24 TDP-P75 Service Manual 5.5. Auto-keystone Alignment Procedure OSD Default value: Item Value Cal R Offset Cal G Offset Cal B Offset Cal R Gain Cal G Gain Cal B Gain YpbPr R Offset YpbPr B Offset AutoKeystone Cal TiltRatio Flat...
-
Page 25: Functional Tests
Make sure the video player has an S-video Out port and cables. The player should also have a Composite video port (RCA). Toshiba strongly suggests you use a DVD player to test the Video quality. DVD players reproduce colors better and project Sharper images. - Page 26 TDP-P75 Service Manual Before beginning Make sure the work surface where you perform the functional tests is level and clean. Place the projector on a soft surface ( such as an anti-static mat ) when running the tests. Connect the following the I/O panel on the projector.
- Page 27 TDP-P75 Service Manual Software Version / Lamptime Used Verify software version Navigate through the Basic menu to the Verify the keys are not sticky. Setup menu. Verify that the software version is current Navigate to the Service menu. and that the lamp is within its service life.
- Page 28 TDP-P75 Service Manual Test Verification DMD Images Verify that each image synchronizes properly through the computer 1 input. SINGOWS2000 White image (Level 100%) SINGOWS2000 Black image (Level 0%) SINGOWS2000 SMPTE image Verify there are no problems Test Verification System Reset Verify that the image synchronizes after On the keypad, press the Menu key.
-
Page 29: Trouble Shooting Guide
TDP-P75 Service Manual 6. Trouble Shooting Guide 6.1. System LED Message Power Temp Lamp Status Note Stand-by Powering up Normal operation Normal power-down cooling Power Temp Lamp Status Note Lamp can’t be turn on or Lamp-Lit error lamp shunt down... - Page 30 TDP-P75 Service Manual System Trouble Shooting Guide 1. Check power code Keypad LED OK 2. Check lamp door. 3. Check Download SW. 4. Check Keypad board and Keypad wire. 5. Check power board and 12-pin power wire. 6. Check 12-pin Main BD to power board signal wire 7.
- Page 31 TDP-P75 Service Manual 6.2. Engine Assembly Trouble Shooting Guide 1. Check color wheel and Sensor board Image NG? 2. Check DMD Chip and holder (Raindrops) 3. Check Main BD Ram-Bus 4. Check Main BD DDP2000 1.Check Main board Image NG? 2.Check color wheel and sensor board...
- Page 32 TDP-P75 Service Manual Start 1.chk CW 2.chk DMD/b Power On 3.chk Main/b 4.chk TR/b 1.clean DMD chip Image Quality Dust 2.clean TIR(DMD side) 1.chk lens housing / DMD housing Assembly Blue Edge 2.chk light pipe assembly 3.chk TIR assembly 4,change light pipe clip 5.change light pipe...
-
Page 33: Factory Mode Osd
TDP-P75 Service Manual 7. Factory Mode OSD 7.1. How to enter Press [UP] key until the lamp hour information is displayed on the screen, release the buttons. Then press [Input] and [Menu] key simultaneously. The projector enters to the factory mode OSD. - Page 34 Normal burn in hour: Normal burn in time. Burn-in: Switch the burn-in mode. Life time burn-in: Project life time testing. Switch the projector on until it shouts down automatically. Toshiba Version: Display projector model name, firmware version, type. 33/60 08/19/05...
- Page 35 TDP-P75 Service Manual Calibration RGB: Refer to section 5.3. PC Alignment Procedure. Calibration YPbPr: Refer to section 5.4. YUV Alignment Procedure. Auto Keystone Cal: To put the projector flat on the table then press [Left] or [Right] key to adjust keystone.
- Page 36 TDP-P75 Service Manual Lamp fail count: Count for lamp fails to ignite and lamp shoot-down abnormally. Blower fan speed error count: Count for blower stop during normal operation. DMD fan speed error count: Count for DMD fan stop during normal operation.
-
Page 37: Service Adjustment
TDP-P75 Service Manual 7.3. SERVICE ADJUSTMENT When replacing Main Board, adjustment procedure of (1) DMD Bias voltage (2) C/W index delay (3) Calibration RGB (4) Calibration YPbPr should be applied. When replacing ENGINE, adjustment procedure of (1) DMD Bias voltage (2) C/W index delay should be applied. -
Page 38: Parts Exploded View
TDP-P75 Service Manual 8. Parts Exploded View Key pad board Key function 8-1The appearance of projector Key circle Top Cover Front Cover Button Foot adjust IR Board Lens Cap Front Foot Adjust Speaker Lower cover Back Foot Adjust Lamp door... - Page 39 TDP-P75 Service Manual 8-2 Front side of projector Blower Main Board Thermal pad Ballast Power BD Back Fan module DMD Fan 38/60 08/19/05...
- Page 40 TDP-P75 Service Manual 8-3. Rear side of the projector Input board AC Inlet Rear cover 39/60 08/19/05...
- Page 41 TDP-P75 Service Manual 8-4. Optical Unit DMD Housing Assembly Lens (1) DMD Chip Focus Ring (2) DMD Chip board (3) DMD Chip socket (4) Thermal pad Zoom Ring Color wheel 40/60 08/19/05...
- Page 42 TDP-P75 Service Manual 8-5. Packing Materials and Accessory A01, A02 A03~A07 A09~A11, A12 41/60 08/19/05...
-
Page 43: Spare Parts List
TDP-P75 Service Manual 9. Spare Parts List Location No. Part No. Description Picture 23587612 REMOTE CONTROL UNIT 23587613 REMOTE CONTROL RECEIVER 23587614 POWER CORD 23587615 POWER CORD 23587616 POWER CORD 23587617 POWER CORD CHINA 23587618 POWER CORD 23587619 BAG CARRY 23587621 OWNER’S MANUAL... - Page 44 TDP-P75 Service Manual 23587623 23587623 CD-ROM OWNER’S MANUAL CD-ROM OWNER’S MANUAL 23587624 DMD SOCKET 23587625 LAMP 23587626 23587627 SPEAKER 23587628 HOUSING DMD 23587629 PAD THERMAL (MAIN BOARD) 23587630 PAD THERMAL (DMD CHIP) 23587631 BALLAST (LAMP POWER) 23587632 PC BOARD MAIN...
- Page 45 TDP-P75 Service Manual 23587635 PC BOARD KEYPAD 23587636 PC BOARD INPUT 23587637 PC BOARD DMD CHIP 23587638 WIRE ASSY SOCKET 23587639 COLOR WHEEL 23587640 EXHAUST FAN 23587641 DMD CHIP 23587642 KEY FUNCTION 23587643 KEY MAIN 23587644 FOOT ADJUST BUTTON 23587645...
- Page 46 TDP-P75 Service Manual 23587647 FOOT ADJUST FRONT 23587648 FOOT ADJUST REAR 23587649 LAMP DOOR ASSEMBLY 23587650 LENS 23587651 LENS CAP 23587652 TOP COVER 23587653 FRONT COVER 23587654 REAR COVER 23587655 BOTTOM COVER 23587650 CARTON BOX 45/60 08/19/05...
-
Page 47: Parts Disassembly
TDP-P75 Service Manual 10. Parts Disassembly Disassembly Front case Figure Explanation Step Tool Loosen the front case screws*2 screwdriver Pull the front case up according to the arrowhead direction, then take up front case. 46/60 08/19/05... - Page 48 Upcase + Rear cover + Keypad BD Figure Explanation Step Tool Remove the front case then loosen screwdriver the screws*5. Unplug the keyboard wire, and take up the upper case. Pull back the rear case according to the arrowhead direction. Take up the rear case.
- Page 49 Disassembly Rear Fan Figure Explanation Step Tool Unplug the fan wire. Take off the fan rubber(A). Take off the mylar(B) on the fan. Take out sponge Sponge 48/60 08/19/05...
- Page 50 Disassembly Thermal BD Figure Explanation Step Tool Pull up the wire(A) and loosen the Screwdriver screw to take up the thermal board. Disassembly Fan DMD Figure Explanation Step Tool Unplug the wire(A) and take up the fan. Take out the fan from rubber. 49/60 08/19/05...
- Page 51 Disassembly Main BD Figure Explanation Step Tool Unplug all the wires and screw*4 on screwdriver the main board. Remove hexagonal-standoff*4. And hexagonal- then take up the Main BD. screwdriver Lift up the shield and take out the main board. Take off the (A)EMI gasket.
- Page 52 Disassembly Input BD Step Figure Explanation Tool Remove the upper case, main BD, and Eng. module. Hexagonal- Remove the (A)stand-off*2 on the input screwdriver BD module. Take up the input BD module and Screwdriver loosen the screw*2 Remove the input board shield. 51/60 08/19/05...
- Page 53 Disassembly Lamp Step Figure Explanation Tool Loosen the screws*2 and take off the screwdriver lamp door Push back the grip and loosen the screw (A) Lift up the handle and pull up the screwdriver lamp. Lift up the handle and pull up the lamp.
- Page 54 Disassembly Blower Step Figure Explanation Tool Unplug the wire on (A). Take up the blower. Take up the Rubber Take up the mylar 53/60 08/19/05...
- Page 55 Disassembly Ballast BD Figure Explanation Step Tool Cut off the wire tie*2 pliers Loosen the screws*1 , take up the mylar. screwdriver Loosen the screws*2 and take up the front screwdriver Unplug the wire *2 pliers Unplug the wire, and cut off the wire tie(A).
- Page 56 Loosen the stand-off*3 on the Hexagonal- power BD. screwdriver Loosen the screw and unplug screwdriver the wire. Unplug the wire. Take out power BD 55/60 08/19/05...
- Page 57 Disassembly Lamp BOX Step Figure Explanation Tool Loosen the screws*2 and take up the thermal screwdriver BD and thermal BKT. Loosen the screws*3 and take up screwdriver the (A)louver. Take the lamp box out of the groove. 56/60 08/19/05...
- Page 58 Disassembly Sensor BD& C/W Figure Explanation Step Tool Loosen the screws*3 on the optical engine. screwdriver Loosen the screws*3 on C/W bracket. screwdriver Unplug the wires on (A). Loosen the (A)screw*2 on sensor board, (B)screws*3 on C/W bracket. screwdriver Note: Don't touch or press on the C/W glasses when loosening the screws.
- Page 59 Disassembly Chip BD& DMD IC Step Figure Explanation Tool Take up the optical Eng. Loosen the screws*4, and take up the heat-sink. Note: When assembling the heat-sink back to screwdriver the chip board, please fix the screws from (1)~(4) in order. Take up the DMD bracket and chip BD.
- Page 60 Disassembly Lens Step Figure Explanation Tool Take the optical engine and put the lens upward, then loosen the screwdriver screws*3. Take up the lens. Disassembly Lower Case Figure Explanation Step Tool Take up AC socket. 1. Take up the (A)input BD module. 2.
- Page 61 T O S H I B A C O R P O R A T I O N 1- -1, SHIBAURA 1- - CHOME, MINATO - - KU, TOKYO 105 -- 8001, JAPAN...
Need help?
Do you have a question about the TDP-P75 and is the answer not in the manual?
Questions and answers