
Related Manuals for Freewing Twin B-2 Spirit Bomber


Summary of Contents for Freewing Twin B-2 Spirit Bomber
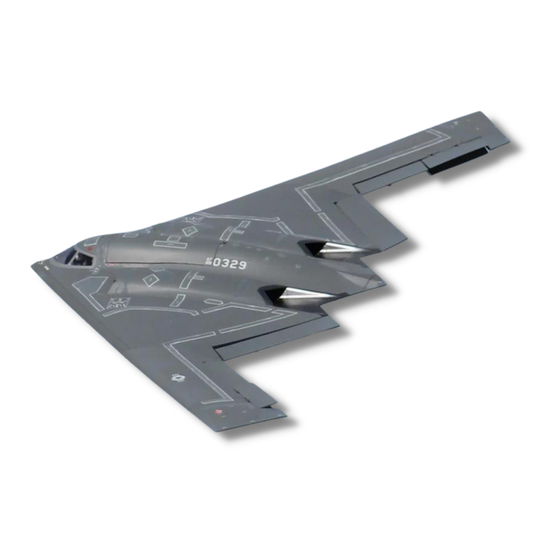
- Page 1 Freewing Twin 70mm B-2 Spirit Bomber User Manual Wingspan: 2200mm Length: 886mm Empty Weight: 3200G [w/o Battery] 1~10 中 11~20...
- Page 2 Safety Notices Basic Product Information Package List PNP Assembly Instructions Install Main Wing Install the "Beaver Tail" Install Vertical Stabilizer Install Battery Pushrod Instructions Center of Gravity PNP Parameter Setting Control Direction Test Dual Rates Pre-installed Component Overview Servo Direction Motor Specification Additional Adjustment Instructions 重要提示...
-
Page 3: Safety Notices
2. Before installation, please read through these instructions carefully and operate strictly under instructions. 3. Due to the nature of RC Aircraft, Freewing and its vendors will not be held responsible for any losses. 4. The minimum recommended age for pilots with intermediate to advanced piloting skills is 16 years old. -
Page 4: Basic Product Information
Basic Product Information Wingload:48.2 g/dm Wing Area: 83 dm 2952-2100KV Motor: I/R Motor Servo: 9g MG digital servo (2pcs) 9g Hybrid digital servo (7pcs) ESC: 60A with 8A UBEC Ducted fan: 70mm 12-blade fan Weight: 3200g (w/o Battery) Other features Material:EPO Aileron: Yes Elevator: Yes... - Page 5 PNP Assembly Instructions Install Main wing As the photo shows 1.Insert the ribbon wire to the main wing control board. 2.Install the main wing on the fuselage and use 4pcs screws to fix. CaptiveScrew(M4X16mm4PCS) Install the Beaver Tail As the photo shows 1.Use EPO-safe glue to attach the Beaver Tail onto the rear fuselage.
-
Page 6: Install Battery
PNP Assembly Instructions 主 翼 组 装 Install Vertical stabilizer (This step is an optional step that can be installed or not) As the photo shows 1.With a hobby knife, score the molded line down to a depth of 10mm. 2.Use EPO-safe glue to fix the clear plastic vertical stabilizer onto the fuselage tail. -
Page 7: Pushrod Instructions
PNP Assembly Instructions Pushrod instructions Nose gear steering pushrod Iength Nose gear steering pushrod mounting hole Ø1 Pushrod diameter 55mm 2-3/16 ″ Nose gear door pushrod Iength Nose gear door pushrod mounting hole Ø1 Pushrod diameter 33mm (1-5/16 ) ″ Rear gear door pushrod Iength Rear gear door pushrod mounting hole Ø1... -
Page 8: Center Of Gravity
PNP Assembly Instructions Center of Gravity Correct Center of Gravity (”CG”) is critical for enabling safe aircraft stability and responsive control. Please refer to the following CG diagram to adjust your aircraft’s Center of Gravity. - Depending on the weight of your chosen flight battery, move the battery forward or backward to adjust the Center of Gravity. - If you cannot obtain the recommended CG by moving the battery to a suitable location, you can also install a counterweight to achieve correct CG. - Page 9 P NP Parameter Setting Control Direction Test After assembling the aircraft, it is critical to verify that all control surfaces move in the correct direction corresponding with the inputs you give from your radio transmitter. Power on your radio and then the model, toggle Throttle Hold, then proceed to verify all control inputs and movements are correct.
- Page 10 Elevator Elevator 3.The Freewing B-2 uses the Freewing E52 Gyro to fly 4.The integrated control box mixes both the delta wing function and the aileron mix. Set your radio to NORMAL WING mode. Do not set your radio to a delta wing mix, which will confuse the onboard control box.
-
Page 11: Motor Specification
Pre-lnstalled Component Overview Servo Direction If you need to purchase another brand’s servo, please refer to the following list to choose a suitable servo. Pos. / Rev. Cable length Position Servo regulation 300mm Nose gear 9g Digital-Hybrid Reverse steering servo 100mm Rear cabin door(L) 9g Digital-Hybrid... - Page 12 Pre-lnstalled Component Overview Jet adjustment instruction 1.The pre-installed integrated control box mixes both the delta wing function and the aileron mix. Set your radio to NORMAL WING mode. Do not set your radio to a delta wing mix, which will confuse the onboard control box. Aileron 2 Elevator 2 Elevator 1...
- Page 13 重 要 提 示 中文版 1.模型飞机不是玩具,操作者需要具备一定的经验;没有经验的初学者,必须在有丰富经验的专业人士指引下,逐步学习! 2.在组装之前,必须认真阅读产品说明书,严格按照说明书指示操作。 3.飞翼模型及其销售商,对于违反说明书的要求操作而造成的损失、将不负任何法律责任! 4.模型飞机的使用年龄必须是14岁以上的儿童或者成人。 5.此模型产品使用EPO材料制成,表面喷涂油漆,不可随意使用化学制剂擦拭,否则会损坏模型产品。 6.不可以在公共场合、高压线密集区、高速公路附近、机场附近或者其它法律法规明确禁止飞行的场合飞行。 7.不可以在雷雨、大风、大雪或者其它恶劣气象环境下飞行。 8.模型飞机的电池产品,不可以随意乱扔,乱放。存放时,必须保证周边2M范围内,无易燃、易爆物体。 9.损坏或者报废处理的模型飞机电池,应妥善回收处理,不准随意抛弃,避免自燃而引发火灾。 10.在飞场飞行时,应做到妥善处理飞行后所产生的垃圾,不可随意抛弃、焚毁模型及其配件。 11.在任何情况下,都必须保证油门杆处于起始位、发射机处于打开状态时,才能连接模型飞机内部的动力电池. 12.无论是模型飞机是在正常飞行过程中,或者是在缓慢降落过程中,都不要尝试用手去回收模型。必须等模型降落停 稳以后,再进行回收! 注意: 模型产品是具一定危险性的产品,请禁止14岁以下的儿童玩耍,14岁以上的儿童,请在有飞行经验的成人指导下使用,无飞行经验的购买者,应当在具有 一定电动涵道飞机飞行经验的成人指导下使用!组装模型前,请仔细阅读说明书,按照说明书的要求进行安装.进行调试和飞行时,请根据说明书指示的参数进行调整。 B-2 Spirit Bomber Item No.:FJ317 Version No.: FJ317-01...
- Page 14 标 准 版 翼载荷:48.2g/dm² 翼面积:83dm² 舵机:9g数字金属齿(2pcs) 9g数字混合齿(7pcs) 电机:2952-2100KV内转无刷电机 涵道风扇:70mm12叶涵道 电调:60A无刷电调UBEC8A 起飞重量:3200g(不含电池) 其 它 说 明 机体材料:EPO,ABS工程塑料 2200mm(86.61 in.) 副翼:有升降舵:有 方向舵:有 起落架:电动收放起落架 舱门:有 飞行员:有 电池范围:6S4000-6000mAh 注意: 此处各项参数,均使用本公司配件测试得出,如果使用副厂配件,会有所差异。使用 副厂配件时所产生的问题,我们将无法给予技术支持! 打开产品包装,核对包装清单。 (不同配置的版本,包含内容不同!) 序号 配件名称 序号 配件名称 AR F Plus AR F Plus 螺丝包 主翼...
- Page 15 PNP组装介绍 主 翼 组 装 如图所示: 把排线插到主翼转接板上; 将主翼安装在机身,然后用4颗螺丝固定。 防松脱螺丝(M4X16mm4PCS) 机 身 尾 部 拆 件 组 装 如图所示: 1.用胶水将尾部拆件安装在机身尾部。 B-2 Spirit Bomber Item No.:FJ317 Version No.: FJ317-01...
- Page 16 PNP组装介绍 垂 尾 组 装 (此步骤为选装步骤可安装可不安装) 如图所示: 1.飞机上面有刻线条,按线条切下去大约10mm深; 2.用胶水将垂尾安装在机身尾部。 电 池 组 装 说 明 电池规格:6S5000mAh 电池重量:750g 电池舱罩 电池 电池扎带 电池舱尺寸: L=220W=90H=50(mm) 将电池与电调连接前,首先请打开发射机电源,确 我们建议使用的电池容量和放电倍率如下: 认油门杆处于低位。 6S 22.2V 4000mAh~6S 22.2V 6000mAh (1pcs) 放电倍率 > 35C 安装电池后,启动油门前,请保证没有任何物体在 螺旋桨转动直径以内,以免造成事故和人身伤害! B-2 Spirit Bomber Item No.:FJ317 Version No.: FJ219-01...
- Page 17 PNP组装介绍 舵 面 控 制 钢 丝 尺 寸 及 安 装 孔 位 前 轮 转 向 控 制 钢 丝 尺 寸 前 轮 转 向 控 制 钢 丝 安 装 孔 位 钢 丝 直 径 : Ø1 55mm 2-3/16 ″...
- Page 18 组 装 介 绍 重 心 示 意 图 正确的重心,直接关系到飞行的成功与否,请参考下面的重心标示图,来调整飞机的重心。 -您可以将电池向前,或者向后移动,来调整飞机的重心; -如果通过电池的移动无法调整到正确的重心位置,您还可以适当 的使用一些其它材料来配重,使飞机的重心处于正确的位置! 如图所示,在机腹表面已经雕刻了重心位置标记. 请根据此标注位置来确认重心。如果标记模糊 不清,那么请根据图示尺寸测量。 可参考机身下表面CG标识线 CG 385mm B-2 Spirit Bomber Item No.:FJ317 Version No.: FJ317-01...
- Page 19 测试及设定 舵 面 测 试 当您按前面的步骤组装好飞机后,连接电池,用遥控器测试每个舵面的工作情况,检查各个 舵面是否处于居中位置,是否正常工作! 副翼 副翼摇杆 副翼摇杆 向左运动 向右运动 方向舵 方向摇杆 方向摇杆 向左运动 向右运动 升降舵 升降摇杆 升降摇杆 向下运动 向上运动 方向舵居中位置图 B-2 Spirit Bomber Item No.:FJ317 Version No.: FJ317-01...
- Page 20 测试及设定 大 、 小 舵 参 数 根据我们的测试经验,我们认为,按以下参数来设置大小舵量,将有助于飞行,舵量越大,模型飞机 的动作响应更快,动作幅度可以更大。我们建议初次飞行使用大舵量起飞,然后根据个人情况调整到适合 您的舵量。 副 翼 升 降 舵 方 向 舵 副翼(内侧) 升降舵(内侧) 方向舵(下端) H1/H219mm/19mm H1/H235mm/35mm 小舵量 舵量比率:100% 舵量比率:100% H1/H219mm/19mm H1/H235mm/35mm H1开口最大尺寸102mm 大舵量 舵量比率:100% 舵量比率:100% 舵量比率:100% 飞行 注意 事项 : 1.高速滑跑不能急打方向舵,否则飞机可能会甩尾侧翻; 2.升降舵需要预调2.5-3mm升舵; 升降 升降...
- Page 21 电子设备介绍 舵 机 使 用 介 绍 我们的舵机正、反向标准是: 当舵机输入信号从到时, 如果舵机摇臂, 顺时针旋转---正向舵机 逆时针旋转---反向舵机 如果您需要选购其它品牌的舵机进行安装, 请参考下面的表格选择的舵机 舵 机 位 置 舵 机 规 格 序号 方 向 性 线 长 前 轮 转 向 9 g 数 码 - 混 合 齿 反...
- Page 22 电子设备介绍 飞 机 调 机 说 明 1.B2飞机的集线板里面已经设置了3角翼混控程序,所以遥控器不需要设置3角翼混控,只需要使用普通固定翼模式即可, 另外集线板还设置了方向舵和副翼混控。 副翼2 升降2 升降1 副翼1 3.如果客户使用时出现副翼1和副翼2的打舵方向不正确, 2.如果客户使用时出现升降1和升降2的打舵方向不正确, 请尝试调换集线板上面两个排线插头的位置, 请尝试调换集线板上面的ELE两个插头的位置, 如下图所示位置: 如下图所示位置: 调换此两个插头 Take-off Take-off light light Door Door Gear Gear 调换此两个插头 Gear Gear + s + s + s + s B-2 Spirit Bomber Item No.:FJ317 Version No.: FJ317-01...
Need help?
Do you have a question about the Twin B-2 Spirit Bomber and is the answer not in the manual?
Questions and answers