Epygi QX50 Installation Manual
Hide thumbs
Also See for QX50:
- Administrator's manual (195 pages) ,
- Quick installation manual (2 pages) ,
- Manual (16 pages)
Table of Contents
Advertisement
Quick Links
Advertisement
Table of Contents

Related Manuals for Epygi QX50


Summary of Contents for Epygi QX50
- Page 1 Installation Guide Manual I: Edition 1, November 2014 SW Release 6.0.7 and higher...
- Page 2 (ii) external power sources such as a power line, telephone line or connected equipment; (iii) products that have been serviced or modified by a party other than Epygi or an authorized Epygi service center; (iv) products that have had their origi- nal manufacturer’s serial numbers altered, defaced or deleted;...
- Page 3 Music on Hold Copyright Vardanyan and kindly provided to Epygi Technologies, LTD. The recording is royalty free. You may not use the Epygi Materials for any illegal purpose or in any manner that violates applicable domestic or foreign law. Compliance with Laws You are responsible for compliance with all domestic and foreign laws governing Voice over Internet Protocol (VoIP) calls.
-
Page 4: Table Of Contents
Supported SIP Phones............................35 Step 2-A: Using IP Lines ....................32 Step 2-B: Using Receptionist ..................37 Step 3: Registering on Epygi’s Technical Support ............ 38 Appendix: Changing the Admin Password ..............40 Appendix: Configuring NAT Traversal ................ 42 Appendix: Registering on Epygi’s SIP Server............. 45 Appendix: Configuring QX IP PBX Extensions ............ - Page 5 QX50/QX200/QX2000 Manual I: Installation Guide Manual II: see Administrator's Guide This guide describes in detail the menus available for administrators only. Furthermore, it in- cludes all the system’s default values at a glance. Manual III: see Extension User's Guide This guide describes in detail the menus available for extension users. Furthermore, it includes all the call codes at a glance.
-
Page 6: About This Installation Guide
QX IP PBX, a user will be able to make SIP and local PBX calls, as well as calls to the PSTN and access the Internet from devices connected to the Local Area Network (LAN). QX50 offers 2 phone lines (FXO), 2 phone extensions (FXS), 1 Ethernet WAN port and 1 Ethernet LAN port •... -
Page 7: Requirements
QX50/QX200/QX2000 Manual I: Installation Guide Requirements One 100-240 VAC power outlet in close proximity to the QX IP PBX. One RJ45 Ethernet 10/100 broadband Internet connection. • One off-the-shelf analog phone with an RJ11 telephone cable. • One IP phone with CAT5 cable with RJ45 connector. -
Page 8: Hardware Overview
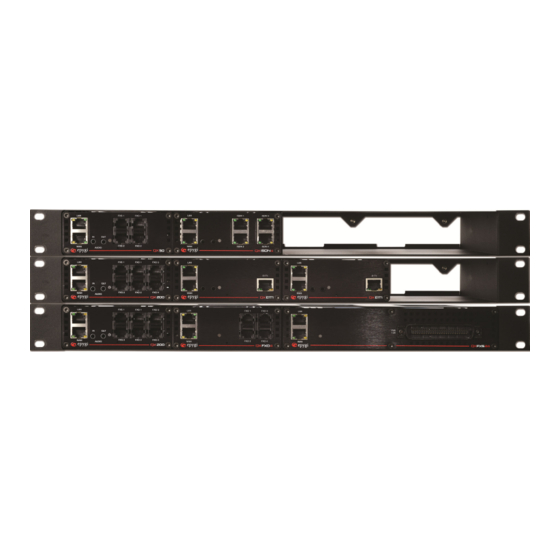
QX50/QX200/QX2000 Manual I: Installation Guide Hardware Overview The Connectors Panel of QX50/QX200 The illustration below includes the connector’s panel of QX50/QX200. Fig.I- 1: QX50’s connector panel, front Fig.I- 2: QX200's connector panel, front WAN RJ45 socket to attach the Internet Uplink (WAN) via an Ethernet CAT 5 cable. - Page 9 This will restore the factory defaults and clear all set- tings including the IP address and the administration password you entered. The default LAN IP address is 172.30.0.1 for QX50/QX200 and 192.168.0.200 for QX2000 (default username - admin and password – 19).
-
Page 10: The Connectors Panel Of Qx2000
QX50/QX200/QX2000 Manual I: Installation Guide The Connectors Panel of QX2000 Two USB ports to enable the connectivity of USB flash drive. The main power switch is used to apply or remove power from the power supply to the system. Turning off system power with this button removes the main power but keeps standby power supplied to the system. -
Page 11: Qx50/Qx200'S Front Panel Leds
QX50/QX200/QX2000 Manual I: Installation Guide QX50/QX200’s Front Panel LEDs System Status LED Color State Description Blinking: normal activity GREEN Busy Blinking: an event occurred; details speci- ORANGE fied in the System Event section of the Management interface Info On: steady red, system unusable... -
Page 12: Qx2000'S Front Panel Leds
QX50/QX200/QX2000 Manual I: Installation Guide QX2000’s Front Panel LEDs Status State Description On: power supply ok Off: no power supply or device is still Power LED booting Status of the Power Supply Off: no hard drive activity On or Blinking: DVD-ROM drive activity Hard drive activity LED when flashing. -
Page 13: Step 1: Installing The Qx Ip Pbx
QX IP PBX accessible to other QX IP PBX devices and the Epygi SIP Server on the Internet. Another configuration option is to use the QX IP PBX as the router, connected directly to the WAN, eliminating the traverse to the local NAT firewall. -
Page 14: Lan/Wan Connection Options
WAN port to one of the ports of Switch and get an IP address from the rou- ter. By default, the QX50/QX200 acts as a DHCP client on the WAN port. The IP phones and PCs are also connected to a Switch. - Page 15 QX50/QX200 LAN port. The QX50/QX200 can be configured as a DHCP server to provide the network parameters to the devices on its LAN. The Admin PC can be connected to the QX50/QX200 LAN or WAN port to access the QX50/QX200 Web Management.
- Page 16 The Admin PC, other PCs and IP phones are connected to the Switch that is connected to the QX50/QX200 LAN port. The QX50/QX200 can be configured as a DHCP server to provide the network parameters to the devices on its LAN.
-
Page 17: Qx2000 Networking Overview
NAT) feature. STUN will work without user configuration with the majority of basic routers. In some scenarios, port forwarding on the router is required to make the QX2000 accessible to other QX2000 devices and the Epygi SIP Server on the Internet. QX2000 Network Connection •... -
Page 18: Connecting The Hardware
QX50/QX200/QX2000 Manual I: Installation Guide Connecting the Hardware For QX50/QX200: Verify the product package contents are complete. Refer to the contents sheet included in the packaging to determine if all the items were shipped in the box. • Connect analog telephones and fax machines to the FXS ports on the QX’s rear panel. You may connect up to two analog phones. -
Page 19: Step 2: Configuring The Qx Ip Pbx
QX50/QX200/QX2000 Manual I: Installation Guide Step 2: Configuring the QX IP PBX Verify functionality of both IP and PSTN calls: PSTN telephony: If the QX IP PBX is connected to the PSTN network via the E1/T1, FXO or ISDN interface, verify the functionality of PSTN calls: •... -
Page 20: Step 2.1: Logging In To Qx Ip Pbx
If you consecutively enter a wrong password and/or username for five times the device will be unavailable for login for five minutes. Please Note: After log in, the Epygi QX Management page will be displayed. Fig.I- 9: Epygi QX Management page QX50/QX200/QX2000; (SW Version 6.0.x) -
Page 21: Step 2.2: Basic Setup - System (Lan)
Next button to start. Enter into the Host Name field the unique name (top left corner, under Epygi logo) for the QX IP PBX device. The Domain Name text field requires the LAN side do- main name which the QX IP PBX belongs to. -
Page 22: Dhcp Settings For The Lan Interface
QX50/QX200/QX2000 Manual I: Installation Guide Fig.I- 11: System Configuration page Clicking Next shows the page DHCP Settings for the LAN Interface. DHCP Settings for the LAN Interface If the DHCP server is enabled, the QX IP PBX will automatically assign dynamic IP addresses to the stations connected to its LAN port. -
Page 23: Regional Settings And Preferences
QX50/QX200/QX2000 Manual I: Installation Guide Regional Settings and Preferences If your QX IP PBX is located outside of the United States, it is important to properly configure your line connections to the PSTN in your location. Fig.I- 13: Regional Settings page Proper configuration of Regional Settings is important for the functionality of the voice sub- system. -
Page 24: Finishing The System Configuration Wizard
QX50/QX200/QX2000 Manual I: Installation Guide You may enter your local specific emergency codes into the appropriate field. For example, in the United States the emergency number is 911, whereas in Germany it is 112, 110. In case of an emergency you can then pick up any FXS phone and dial your configured emergency code without any prefixes for PSTN calls. - Page 25 QX50/QX200/QX2000 Manual I: Installation Guide After this is complete, the QX IP PBX will reply with the Confirm Settings page requesting con- firmation of the changes. Press on OK to confirm the settings. Fig.I- 17: Confirm Settings page You must confirm the settings within 20 minutes. Otherwise the device will...
-
Page 26: Step 2.3: Internet (Wan) - Internet Configuration Wizard
QX50/QX200/QX2000 Manual I: Installation Guide Step 2.3: Internet (WAN) – Internet Configuration Wizard Select the Basic Setup – Internet (WAN) from the Setup menu for QX50/QX200 and Basic Setup – Uplink Configuration Wizard from the Setup menu in case of QX2000 product. The Internet (WAN)/Uplink Configuration Wizard is a tool for the administrator to configure the WAN settings and to adjust QX IP PBX's connectivity in the global network. -
Page 27: Uplink Configuration
QX50/QX200/QX2000 Manual I: Installation Guide Uplink Configuration Select the desired WAN Interface Protocol and enter the WAN Interface Bandwidth to assure the quality of IP calls. Fig.I- 19: Uplink Configuration page If the available bandwidth is used to the point where the quality of an additional IP call would suffer, then new IP calls are rejected. -
Page 28: Ppp/Pptp Configuration
QX50/QX200/QX2000 Manual I: Installation Guide PPP/PPTP Configuration Enter the IP address of the PPTP server into the PPTP Server text field. Choose the encryption for the traffic over the PPTP interface from the Encryption drop down list. PPP/PPTP Settings are not available for QX2000. -
Page 29: Wan Ip Configuration
QX50/QX200/QX2000 Manual I: Installation Guide WAN IP Configuration Your Internet Service Provider (ISP) should provide this information. Assign automatically via DHCP - The parameters are set automatically by the ISP. This is common with cable modem and DSL service. •... -
Page 30: Dns Settings
QX50/QX200/QX2000 Manual I: Installation Guide Use the MTU drop down list to select the maximum packet size on the Ethernet (in bytes). Click Next to display the DNS Settings page. DNS Settings For DNS, the selection is set to Dynamically by Provider. When using a static IP address, fixed values must be entered. - Page 31 QX50/QX200/QX2000 Manual I: Installation Guide Press the OK button to confirm the settings. The settings should be confirmed within 20 minutes; otherwise, the device will Please Note: revert back to the previous configuration and reboot. QX50/QX200/QX2000; (SW Version 6.0.x)
-
Page 32: Step 2-A: Using Ip Lines
QX50/QX200/QX2000 Manual I: Installation Guide Step 2-A: Using IP Lines Before starting the IP Lines specific configuration, the appropriate IP Phone (the list of SIP phones supported by QX IP PBX is presented below) should be connected to the QX IP PBX either through its LAN or WAN port. - Page 33 QX50/QX200/QX2000 Manual I: Installation Guide Fig.I- 27: IP Line Settings – IP Line page Select the SIP Phone radio button. Select the SIP IP phone model from the Phone Model drop down list. Insert the SIP Phone’s MAC address in the corresponding fields. The MAC address of an IP phone is usually printed on the back of the phone’s base unit.
- Page 34 QX IP PBX to the SIP Phone. For automatic configuration, some SIP phones may require additional actions to follow the restart. You may also find the detailed installation instructions of the Epygi’s sup- Please Note: ported IP Phones in the “Configuring Epygi Supported IP Phones” document published on Epygi’s Web portal.
-
Page 35: Supported Sip Phones
QX50/QX200/QX2000 Manual I: Installation Guide Supported SIP Phones Below is the list of SIP phones that are officially supported by Epygi and can be configured to work with QX IP PBX using both Plug and Play and the automatically configuration options, as... - Page 36 QX50/QX200/QX2000 Manual I: Installation Guide CISCO SPA525G2 Polycom SoundPoint IP 450SIP* Yealink SIP-T22P • • • CISCO SPA303 Polycom SoundPoint IP 501SIP Yealink SIP-T26P • • • CISCO SPA501G Polycom SoundPoint IP 550SIP* Yealink SIP-T28P • • • CISCO SPA509G...
-
Page 37: Step 2-B: Using Receptionist
The Receptionist related setup, with detailed instructions on how to configure the QX IP PBX and the attached IP Phones, is described in the “Receptionist Setup on Epygi IP PBX” docu- ment, which you can find at the Epygi’s Web portal. -
Page 38: Step 3: Registering On Epygi's Technical Support
To register, you need to know the serial number of your QX IP PBX, which is located on a label on the bottom of QX IP PBX. You will also need the date of purchase. Next, open the Epygi support page (http://support.epygi... - Page 39 Support login and password already set up. In this case, an information sheet is in- Please Note: cluded in the packaged contents indicating the username and password to access Epygi’s Online Support and the Epygi SIP Server.
-
Page 40: Appendix: Changing The Admin Password
QX50/QX200/QX2000 Manual I: Installation Guide Appendix: Changing the Admin Password For security reasons, it is recommended that you change the default admin password. The username of the administrator (admin) cannot be changed. To change the administrator password, go to the Maintenance - User Rights - Users page. - Page 41 QX50/QX200/QX2000 Manual I: Installation Guide The New Password field requires a new password for the Administrator. Reenter- ing the new password in the Confirm New Password field will confirm the new • password. The New Password field is checked against its strength and you may see how strong is the inserted password right below that field.
-
Page 42: Appendix: Configuring Nat Traversal
QX50/QX200/QX2000 Manual I: Installation Guide Appendix: Configuring NAT Traversal NAT or Network Address Translation is a common feature to expand the use of connected PCs and other networked devices without having to use multiple public IP addresses. Most ISP’s will assign one public IP address to each customer that is connected to the Internet. Third- party routers typically are providing NAT capability and creating a private network of PCs and other devices not visible from the Internet. - Page 43 QX50/QX200/QX2000 Manual I: Installation Guide Fig.I- 33: NAT Traversal – General Settings page Go to the SIP Parameters page. • Fig.I- 34: NAT Traversal - SIP Parameters page Select Use Manual NAT Traversal and enter the WAN IP address of the router into the Mapped Host text field.
- Page 44 6000 (Min) and 6255 (Max), respectively. Click the Save button to save the contents. The QX IP PBX will activate the settings and register the extensions on the Epygi SIP Server af- ter a few minutes. You can verify the settings from the Status - System Status - SIP Registra- tion tab.
-
Page 45: Appendix: Registering On Epygi's Sip Server
Appendix: Registering on Epygi’s SIP Server Epygi maintains a SIP Server that can be used to call between QX IP PBX devices. QX IP PBX ex- tensions may already be defaulted to register to the SIP Server. To create additional registra- tions you may login directly to Epygi’s SIP Server if you have registered your QX IP PBX at... - Page 46 QX50/QX200/QX2000 Manual I: Installation Guide Fig.I- 38: SIP Services Add New Extension page The Authentication password validates the entry and must match the password entered on the QX IP PBX later. Make sure to record the name, Authentication Password and SIP extension number for entry into the QX IP PBX later.
-
Page 47: Appendix: Configuring Qx Ip Pbx Extensions
QX50/QX200/QX2000 Manual I: Installation Guide Appendix: Configuring QX IP PBX Extensions Login to the QX IP PBX and go to Extensions menu (see Fig.I- 41). When this page is accessed for the first time after the QX IP PBX’s initial boot-up or the default configuration settings restore, an intermediate page is displayed where the length of the ex- tension should be defined. - Page 48 In Registration SIP Server, the selected SIP server address must be entered. If you use the Epygi SIP server, you may enter sip.epygi.com. • Most SIP server providers, including Epygi, use port 5060 as the Registration SIP Port. You may leave the default entry as is. •...
- Page 49 QX50/QX200/QX2000 Manual I: Installation Guide Other settings of the extension might be also modified from Extensions Management – Edit Entry page (refer to the Manual II - Administrator’s Guide). Your settings will be verified, then after a few seconds the Extensions Management page is updated with the changes as shown in the example below (see Fig.I- 44).
-
Page 50: Appendix: Checking The Connections
QX50/QX200/QX2000 Manual I: Installation Guide Appendix: Checking the Connections If the system doesn’t seem to be working properly, even when all the cables are connected properly, it may be helpful to Start Network Diagnostics: The WAN link, IP configuration, ga- teway, DNS server, and STUN-NAT will all be checked. - Page 51 QX50/QX200/QX2000 Manual I: Installation Guide Checking for physical link: no WAN link Basic Tests: Please check the physical connection of the WAN interface. Cable not plugged or broken? Test failed. If diagnostics are successful, but you are still unable to place a call to 88888# then check the SIP registration status.
-
Page 52: Appendix: Software License Agreement
NOT AGREE TO THESE TERMS AND CONDITIONS, YOU MAY NOT USE THE HARDWARE OR SOFTWARE. License. Epygi Technologies, LTD. (the "Licensor"), hereby grants to you a non-exclusive right to use the Quadro or QX Operational Software program, the documentation for the software and such revisions for the software and documenta- tion as the Licensor may make available to you from time to time (collectively, the "Licensed Materials"). - Page 53 If you have any questions about this Agreement, please write to Epygi at 1400 Preston Road, Suite 300, Plano, Texas 75093 or call Epygi at (972) 692-1166.
Need help?
Do you have a question about the QX50 and is the answer not in the manual?
Questions and answers