Table of Contents
Advertisement
Quick Links
Advertisement
Table of Contents

Related Manuals for Moller Medical Docon 7


Summary of Contents for Moller Medical Docon 7
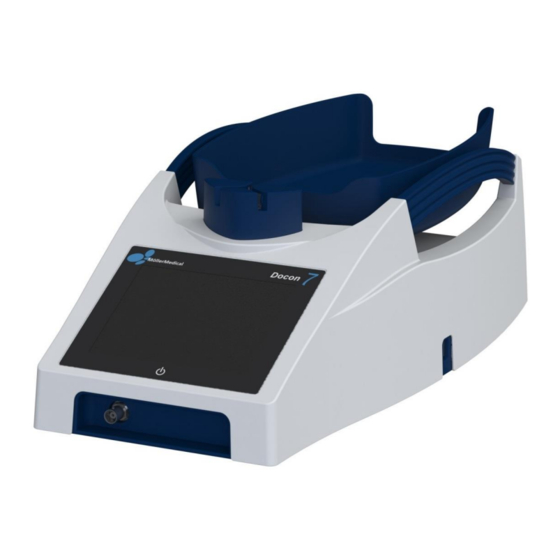
- Page 1 ® Docon Blood mixing scales...
- Page 3 IMPORTANT READ CAREFULLY BEFORE USE KEEP THESE INSTRUCTIONS FOR FUTURE CONSULTATION © Möller Medical GmbH. All rights reserved. No part of this documentation may be reproduced or translated in any way whatsoever without prior written approval from Möller Medical GmbH. The status of the information, specifications and figures in these instructions for use is indicated by the version number on the last page.
-
Page 4: Table Of Contents
Device handles ....................... 16 Accessories and options ..................16 Docon 7 mobile II LSC ................16 Holder for Docon 7 mobile II LSC ............... 17 Docon 7 Basic Barcodereader ..............18 Docon 7 status indicator ................18 Docon 7 sealing option – sealing handle ............ 19 Docon 7 battery .................. - Page 5 Start of blood collection ................39 Display collection information ..............40 Inflow error messages ................40 Cancel application ..................42 End of blood collection ................42 Docon 7 mobile II LSC ................42 Data recording ......................43 DMS Docon ....................43 Record donation data .................43 Save donation data ..................44...
- Page 6 Cleaning and disinfection ..................58 Maintenance......................58 Safety check ....................58 Service documents ..................58 Transport ........................ 59 Battery care when storing the Docon 7 ..............59 Disposal ......................... 60 Device options .................... 61 Notes ......................62 Technical data ......................62 Electromagnetic emissions ..................
-
Page 7: Docon
® Docon Contents Docon 7 Seal....................65 Docon 7 RFID ....................66 Docon 7 WLAN option ................67 Electromagnetic immunity ..................68 Recommended separation distances..............70 Accessories ......................71 Page 7 of 74... -
Page 8: General Safety Information
® Docon General safety information 1 General safety information 1.1 Explanation of the safety symbols employed In these instructions for use, important information is indicated visually. This information is essential for avoiding risks to the donor and operating personnel and also avoiding damage to and malfunctioning of the device. -
Page 9: Symbols On The Display
CAN/CSA 22.2 No. 60601-1-08 The rating plate is located below the tray. Symbols on the display A USB memory stick is connected Docon 7 is connected to the power supply Clamp open Clamp closed Battery operation + charge level display... - Page 10 ® Docon General safety information Do not use if package is damaged Stacking limit, do not store more than 4 packs high Keep dry Humidity, limitation Temperature limit Manufacturer Date of manufacture (YYYY-MM-DD) Total length Caution Fragile, handle with care Top, store the right way up Attention: Under US Federal law, this device may be only sold to a physician or ordered by a physician.
-
Page 11: Explanation Of The Format Conventions Employed
Whenever the Docon 7 is handled and used, precise knowledge and compliance with these instructions for use is necessary. These instructions do not replace user training to be pro- vided by the medical device consultant. - Page 12 The user must not touch one or several device connections (USB, LAN and docking connection) of the Docon 7 and the donor at the same time! The Docon 7 mobile and the sealing handle may be used in the vicinity of the donor.
-
Page 13: Non-Product-Related Additional Equipment
Should you have any queries, please contact your distributor or the manufacturer's tech- nical service. No additional active device (device with its own power supply) may be con- nected to the USB interface of the Docon 7. Page 13 of 74... -
Page 14: Intended Use
2.1 Proper use - intended use The Docon 7 is a medical device and serves to mix the blood during a blood donation with the anticoagulant in the blood bag and to stop the blood supply once an adjustable volume has been reached. -
Page 15: Product Description
This resets the Docon 7 to its original state. 3.2 Tray The Docon 7 tray which is used to hold the bag system is secured on the swing carrier by a magnet. This detaches if overloaded which reduces the risk of the Docon 7 being dam- aged. -
Page 16: Clamp
The Docon 7 mobile is used to input barcodes during donation. In order to ensure protection of the back, the Docon 7 can be operated using the scanner keyboard. The current status of the donation is also shown on the colour display and signal states are indicated by a flashing LED. -
Page 17: Holder For Docon 7 Mobile Ii Lsc
® Docon Product description Figure 2: Docon 7 mobile II LSC Holder for Docon 7 mobile II LSC Depending on the situation at hand, the following holders are available for the Docon 7 mobile II LSC: Table base ... -
Page 18: Docon 7 Basic Barcodereader
Product description Docon 7 Basic Barcodereader The Docon 7 Basic Barcode Reader can be used as an alternative to our Docon 7 mobile II LSC for the purposes of barcode scanning. It has the ability to scan a very large area, simplifying reading long barcodes from a shorter distance. -
Page 19: Docon 7 Sealing Option - Sealing Handle
The sealing handle corresponds to the electrical safety requirements of a type B applied part as per EN 60601. Only the original sealing handle may be connected to the Docon 7. Only position the designated object between the electrodes of the Docon 7 sealing handle. - Page 20 To guarantee the functionality and safety of the sealing handle, it must be cleaned regularly. You will find a list of products tested for cleaning on page 58. The Docon 7 sealing handle must always be cleaned after it has come in direct contact with blood.
- Page 21 ® Docon Product description Disassembly of the Docon 7 sealing handle To clean the electrodes, firstly remove the blue lever and the electrode (see Figure 6 to Figure 9). Plunger pins Figure 6 Figure 7 Plunger pins Figure 8 Figure 9 1.
- Page 22 ® Docon Product description Assembly of the handpiece and the lever with electrode after cleaning Figure 10 Figure 11 Plunger pins (on Correctly engaged both sides) (on both sides) Figure 12 Figure 13 1. Place the lever with electrode on the handpiece and ensure that the lever is in the vicinity of the handpiece (see Figure 10).
-
Page 23: Docon 7 Battery
Product description Docon 7 battery Except in the case of mains operation, you can operate the Docon 7 with a battery (see Figure 14) in the battery compartment of the case. Given optimum conditions, up to 80 donations can be performed with a battery charge. Up to 50 donations are possible with a battery that is integrated in the Docon 7. - Page 24 Charging is signalised both on the display and via a LED on the rear of the device next to the mains connection. The LED on the rear is also visible when the Docon 7 is being charged via a compartment which can be externally accessed in the closed case. The LED shows the various operating modes via the two states, "On"...
-
Page 25: Docon 7 Transport Case
The Docon 7 transport case performs two functions. Firstly, it serves to ensure safe transport of the Docon 7. Secondly, the top part of the case can be used as a platform for the bottom part of the case upon which the Docon 7 can be put in the necessary operating position. -
Page 26: Docon 7 Table
To remove the mixing scales from the case, firstly unlock the black rotating lever on the front directly below the display (see Figure 18). Then gently lift up the front of the Docon 7 and pull it toward you out of the case tray. -
Page 27: Docon 7 Tube Holder
Figure 19: Docon 7 table Docon 7 tube holder As described above, the tube holder is attached directly to the Docon 7 table. The sealing handle and blood tubes etc. can be safely stored in it. Figure 20: Docon 7 tube holder... -
Page 28: Docon 7 Stick
Product description Docon 7 stick The Docon 7 stick is a USB storage device with which data from the Docon 7 can be trans- mitted to a PC. It is not included in the scope of delivery. CAUTION: To allow the stick to be used in the Docon 7, it must be configured accordingly. -
Page 29: Connection Options
Figure 21: Connection options on the Docon 7. a: BNC (sealing handle); b: USB; c: Power plug socket; d: Network; e: Docking connection The following connection options are available with the Docon 7 (see Figure 21): a. BNC plug-in connector Sealing handle (only with Docon 7 with seal option) b. -
Page 30: User Interface
Should you have any queries, please contact your distributor or the manufac- turer's technical service. 3.7 User interface The following section provides an overview of the Docon 7 user interface. Information on settings can be found as of page 45. Figure 22: Basic setting display on the Docon 7... -
Page 31: Softkeys
The current time and date are also displayed. The symbols shown are explained on page 9. Mains operation If the Docon 7 is supplied with current via the power cord, the plug symbol confirms this operating mode. Battery operation The current charge level of the main battery is shown as a permanently coloured bar in the battery symbol and also as a percentage. -
Page 32: Setup And Commissioning
1 x 3-pole type F power cord 1 x instructions for use The Docon 7 scope of supply can vary depending on the device options which you have purchased. Docon 7 seal option 1 x sealing handle... -
Page 33: Commission The Docon 7
Docon 7 on this upper part. When the Docon 7 is set up for the first time or when set up for mobile blood donation, the accuracy of the weighing function should be checked by using a reference weight. For this, place a 500 g weight in the middle of the tray. -
Page 34: Connect And Switch On
After you have set up the device in the desired position, insert the power cord in the rear of the housing into the Docon 7. Insert the other end of the cord into a socket with a protective conductor. Note the voltage values stated on the rating plate. This is located on the rear of the device. -
Page 35: Operation In It Networks
The Docon 7 can exchange data with a PC using DMS software (see chapter 5.2) via the LAN or WLAN interface. The Docon 7 can be connected to a standard LAN as per IEEE 802.3 or WLAN as per IEEE 802.11 2.4 GHz, see chapter 3.6. -
Page 36: Preparation Of The Blood Bag System
Figure 24: Minimum distance between two Docon 7s during RFID operation Preparation of the blood bag system Prior to using the RFID function on the Docon 7, the blood bag systems have to be provided with RFID tags. To do this, attach tag 1 to the top of the whole blood bag as shown in Figure 25. - Page 37 ® Docon Setup and commissioning Figure 26: RFID tag position on middle bag Finally attach tag 3 to the bottom of the plasma bag as shown in Figure 27. It must be positioned at the bottom on the right and, again, the RFID chip must be aligned with the inside of the system.
- Page 38 ® Docon Setup and commissioning Middle tag chip chip Top tag chip Bottom tag Figure 28: RFID tag positions on the bag system Page 38 of 74...
-
Page 39: Application And Operation
Start of blood collection Press the start button to start donation. The Docon 7 then switches the display from g to ml and sets the volume and duration to 0. You can freely select how g and ml are displayed when adjusting the settings. -
Page 40: Display Collection Information
Press any position on the screen to return to the donation screen. Inflow error messages The Docon 7 can monitor inflow in ml per minute. The inflow is only measured when the system is resting, just before the tray starts to swing again. - Page 41 Signal state delay Duration of low flow [s] Delay in signal generation (device display) can be set by user Dependent on Docon 7 connection to PC (with Delay in signal visualisation in the communica- deactivated WLAN scan): tion software WLAN: < 2 s...
-
Page 42: Cancel Application
Docon 7. In addition, it allows back-friendly operation of the device. The signal messages from the Docon 7 are also shown on the Docon 7 mobile II LSC. The Docon 7 mobile II LSC is operated using softkeys, i.e. buttons whose functions are described in the display. -
Page 43: Data Recording
When recording donation data, the focus is on documenting a donation process in order to rule out mix-ups for example prior to the donation. With the setup program, the Docon 7 is a powerful tool for configuring data recording as required by the blood bank. -
Page 44: Save Donation Data
Application and operation Save donation data If the Docon 7 works with data recording, every donation is documented with a data set in the device. The structure of the data sets is also specified by the user with the setup pro- gram. -
Page 45: Settings
4. Press the Back button to exit the system menu. Please note that the system menu can only be accessed if the Docon 7 is set in the basic setting. General: You can freely select the colours and symbols for the system menu. -
Page 46: Password Submenu
Maximum value: Not specified, only text box is shown here Figure 30: Password submenu display on the Docon 7 1. Press the Password button to open the setting area. 2. Click on the field below the prompt to call up the screen keyboard. -
Page 47: Options Submenu
Load KEYS from the USB: 1. Save the file which contains the registration key on an USB stick. 2. Connect the USB stick to a free USB connection on the Docon 7. 3. Press the Options button. Page 47 of 74... -
Page 48: Display Submenu
Docon Settings Now press the Import button. The Docon 7 imports the keys saved on the stick and then switches back to the system menu. 4. Call up the Options submenu again to check that the options have been loaded correctly. -
Page 49: Energy Submenu
® Docon Settings 1. Press the Display button. 2. Regulate the display brightness using the slider or the +/- buttons. 3. Press Accept to confirm and save the settings. 6.1.3.2 Volume The volume of the audio signals can also be set in the display submenu. The changed setting is played back directly when you alter the value to enable you to easily find the correct setting. - Page 50 6.1.4.2 Switch off the Docon 7 With this setting, you define the switch-off time for the Docon 7 if it is not operated. If this function is not desired, set the parameter to Never power off the device. Default value:...
-
Page 51: Language Submenu
3. Press Accept to confirm and save the setting. Language submenu Define the desired language setting here. Figure 34: Language submenu display on the Docon 7 1. Press the Language button. 2. Make the desired setting by clicking on the relevant flag. -
Page 52: Locale Submenu
The button of the currently used language setting is highlighted blue. Locale submenu In this submenu the system clock of the Docon 7 can be set. The correct time is important for recording data. The date and time format for visualisation in the donation screen are also specified here. -
Page 53: Donation Submenu
3. Press Accept to confirm and save the setting. Communication submenu The Docon 7 includes various communication options for data transmission to the PC and for data recording via input devices such as the Docon 7 mobile II. The Docon 7 distinguishes between two interfaces. The interface to the PC (LAN) serves to transfer data to a PC. -
Page 54: Validation Submenu
Figure 37: Communication submenu display on the Docon 7 Validation submenu This function enables the 500 g validation of the Docon 7 to be repeated or checked. An internal data set is saved for each validation process, this documents the date/time, serial number and weight. -
Page 55: Info Submenu
2. Exit the submenu by pressing the Cancel button. 6.2 Remedying of errors A number of errors are listed in this chapter which could occur in connection with Docon 7. Several possible solutions are given for each error. The solutions proposed should be ex- ecuted in the order provided until the fault is remedied. - Page 56 Should this not bring about fixed frequency. a change, the device must be checked by the service team. The Docon 7 must not be opened by users. Service measures may only be performed by service teams who have received appropriate training from the manufacturer.
-
Page 57: Service
® Docon Settings 6.3 Service Should you be unable to remedy the error, please contact your Möller Medical GmbH service team or distributor. ® Whenever the Docon 7 is returned, a suitable disinfection process must be carried out in order to rule out the possible risk of infection. Consumables must be disposed of as per the hygiene guidelines. -
Page 58: Care
A safety check as per the German Medical Devices Operator Ordinance must be performed at least every 12 months. Only use the Docon 7 if the device is functioning safely and safe to operate. Otherwise it must be repaired immediately by the service team. -
Page 59: Transport
Inside this case, the Docon 7 is protected from external damage (see Docon 7 transport case on page 25). If the Docon 7 is sent to the service team, it must be packed in its original packaging as this provides the best possible protection from external damage. -
Page 60: Disposal
Docon Care 7.5 Disposal Docon 7 and accessories This device includes materials which must be disposed of in an environmen- tally friendly manner. The European Directive 2012/19/EU on waste electrical and electronic equipment (WEEE2) applies to this device. This device thus bears the symbol with a crossed out bin on the rating plate. -
Page 61: Device Options
3. Optional internal battery 4. RFID option If required, the desired device options can be activated on your Docon 7 with a valid key and a corresponding hardware update can be performed. In this case, please consult the manufacturer or your distributor (see page 57). -
Page 62: Notes
Protection class: Type of protection: IP 20 Lithium button cell: The Docon 7 features an internal button cell for the real-time clock. This must be disposed of as per the regulations at the end of its service life. Weighing range: 0.. - Page 63 ® Docon Notes Transport and storage information Temperature: -20°C to +50°C Humidity: less than 90% relative humidity Weight with packaging: 6.4 kg Packaging dimensions: Width x height x depth 585 mm x 370 mm x 380 mm 700 – 1050 hPa Air pressure: Operating conditions: Temperature:...
- Page 64 ® Docon Notes External battery: Type: Lithium ion battery Voltage: 22.2 V Capacity: 4500 mAh Energy: 99.9 Wh Internal battery: Type: Lithium ion battery Voltage: 22.2 V Capacity: 3000 mAh Energy: 66,6 Wh Page 64 of 74...
-
Page 65: Electromagnetic Emissions
9.2 Electromagnetic emissions The Docon 7 is intended for the use in the electromagnetic environment as specified below. The customer and/or operator of the Docon 7 should ensure that the Docon 7 is used in an electromagnetic environment as described below. -
Page 66: Docon 7 Rfid
Docon Notes The Docon 7 with seal option intentionally uses RF energy to seal tubes at a frequency of 40.66 ‑ 40.70 MHz. In this frequency range, the device has an effective radiated power of <150 dBµV. This radiated power level can interfere with devices located near the Docon 7 with seal option. -
Page 67: Docon 7 Wlan Option
® Docon Notes Docon 7 WLAN option The WLAN module integrated in the Docon 7 has the following electromagnetic properties: 802.11b: DSSSS (DBPSK, DQPSK, CCK) Modulation 802.11a/g: OFDM (BPSK, QPSK, 16-QAM, 64-QAM) 802.11n: OFDM (BPSK, QPSK, 16-QAM, 64-QAM) 802.11a ISM band: 5150 ~ 5,825 GHz Frequency 802.11g ISM band: 2400 ~ 2,4835 GHz... -
Page 68: Electromagnetic Immunity
Note: U is the AC mains voltage prior to application of the test level. The Docon 7 Standard, Docon 7 RFID and Docon 7 Seal versions fulfil all the test levels according to IEC 60601-1-2 edition 4 (table 4 to 9). - Page 69 Portable RF communications equipment (radio devices) (including their acces- sories such as antenna cables and external antennas) should not be used closer than 30 cm (or 12 inches) from the parts and cables of the Docon 7 indicated by the manufacturer. Non-observance may result in a reduction of the device's performance.
-
Page 70: Recommended Separation Distances
If the measured field strength in the location in which the Docon 7 is used exceeds the applicable RF compliance level above, the Docon 7 should be observed to verify normal operation. If abnormal performance is observed, additional measures may be necessary, such as reorienting or relocating the Docon 7. -
Page 71: Accessories
Procurement options for accessories: From Möller Medical GmbH or your direct distributor Please keep the Docon 7 serial number to hand when ordering device options. The key to activate the device options can only be used on the device stated when ordering and is only valid for 30 days. - Page 72 Notes Docon 7 Transport Case Basic Article Number 00003919 Docon 7 Transport Case Basic + Article Number 00003818 Docon 7 WALN Router Article Number 00003855 Docon 7 Scanner Cradle with swan neck, short Article Number 00003055 Page 72 of 74...
- Page 74 Revision status 2021-04 O Software version 0079.00.01 Order number for instruc- tions for use (REF) 93005861 Möller Medical GmbH Wasserkuppenstrasse 29-31 36043 Fulda, Germany Tel. +49 (0) 661 / 94 19 5 – 0 Fax +49 (0) 661 / 94 19 5 – 850 www.moeller-medical.com info@moeller-medical.com...
Need help?
Do you have a question about the Docon 7 and is the answer not in the manual?
Questions and answers