Table of Contents
Advertisement
Quick Links
User's Manual
1.6 Cu.Ft. Over the Range Microwave
BEFORE USING YOUR PRODUCT: Please read this manual carefully & follow all safety rules
& operating instructions. Keep this manual for future reference.
For any service-related Issues, please
contact us:
Phone Number: 718-576-6342
Email address: support@koolmore.com
Read This Manual
Inside you will find many helpful hints on how to use and
maintain your unit properly. Just a little preventative care
on your part can save you a great deal of time and
money over the life of your washing machine. You'll find
many answers to common problems in the chart of
troubleshooting tips. If you review the chart of
Troubleshooting Tips first, you may not need to call for
service.
Advertisement
Table of Contents

Related Manuals for KoolMore KM-MOT-1SS


Summary of Contents for KoolMore KM-MOT-1SS
- Page 1 If you review the chart of For any service-related Issues, please Troubleshooting Tips first, you may not need to call for service. contact us: Phone Number: 718-576-6342 Email address: support@koolmore.com...
-
Page 2: Table Of Contents
TABLE OF CONTENTS PRECAUTIONS TO AVOID POSSIBLE EXPOSURE TO EXCESSIVE MICROWAVE ENERGY SPECIFICATIONS IMPORTANT SAFETY INSTRUCTIONS GROUNDING INSTRUCTIONS UTENSILS MATERIALS YOU CAN USE IN MICROWAVE OVEN MATERIALS TO BE AVOIDED IN MICROWAVE OVEN PART NAMES OPERATION INSTRUCTIONS MAINTENANCE CLEANING AND CARE... -
Page 3: Precautions To Avoid Possible Exposure To Excessive Microwave Energy
PRECAUTIONS TO AVOID POSSIBLE EXPOSURE TO EXCESSIVE MICROWAVE ENERGY (a) Do not attempt to operate this oven with the door open since open door operation can result in harmful exposure to microwave energy. It is important not to defeat or tamper with the safety interlocks. (b) Do not place any object between the oven front face and the door or allows soil or cleaner residue to accumulate on sealing surfaces. -
Page 4: Important Safety Instructions
IMPORTANT SAFETY INSTRUCTIONS When using electrical appliances basic safety precautions should be followed, including following: WARNING - To reduce the risk of burns, electric shock, fire, injury to persons or exposure to excessive microwave energy: 1. Read all instructions before using the appliance. 2. - Page 5 IMPORTANT SAFETY INSTRUCTIONS (continued) THIS COULD RESULT IN VERY HOT LIQUID SUDDENLY BOILING OVER WHEN THE CONTAINER IS DISTURBED OR A UTENSIL IS INSERTED INTO THE LIQUID. To reduce the risk of injury to persons: 1) Do not overheat the liquid. 2) Stir the liquid both before and halfway through heating it.
-
Page 6: Grounding Instructions
GROUNDING INSTRUCTIONS This appliance must be grounded. In the event of an electrical short circuit, grounding reduces the risk of electric shock by providing an escape wire for the electric current. This appliance is equipped with a cord having a grounding wire with a grounding plug. -
Page 7: Utensils
UTENSILS CAUTION - Personal Injury Hazard Tightly-closed utensils could explode. Closed containers should be opened and plastic pouches should be pierced before cooking. See the instructions on "Materials you can use in microwave oven or to be avoided in microwave oven." There may be certain non-metallic utensils that are not safe to use for microwaving. -
Page 8: Materials To Be Avoided In Microwave Oven
MATERIALS YOU CAN USE IN MICROWAVE OVEN Utensils Remarks Plastic Microwave-safe only. Follow the manufacturer* instructions. Should be labeled "Microwave Safe". Some plastic containers soften, as the food inside gets hot. "Boiling bags" and tightly closed plastic bags should be slit, pierced or vented as directed by package. -
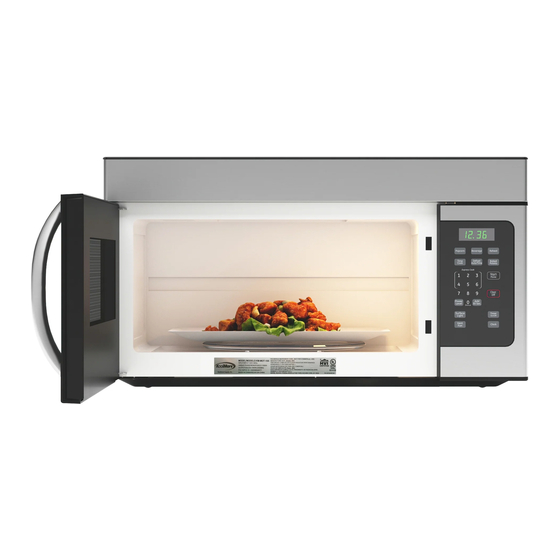
Page 9: Part Names
PART NAMES Microwave features Window FRONT VIEW Interlock system Door assembly Turntable ring assembly Turntable Shaft Turntable glass tray Control panel Front vent grill Surface lights Ventilation filters Bottom View Front Rear... -
Page 10: Operation Instructions
OPERATION INSTRUCTIONS Control Panel and Features (11 ) (10) (12) (13) (1) Clock timer setting (2) Timer On/Off (3) Auto Menu (4) Number Keys (5) Power Level (6) Display (7) Vent Fan (8) Time Cook (9) Defrost Auto/Time (10) Clear/Off: clears all previous settings before cooking starts. During cooking: press once to stop oven;... - Page 11 OPERATION INSTRUCTIONS(Continued) 1. Clock Setting 1). Press "CLOCK",the unit enters the clock setting mode.AM indicator will light up. "0:00" flashing will allow you to input the time. 2). Press "CLOCK" again to select AM or PM. The responding AM or PM indicator will light up.
- Page 12 OPERATION INSTRUCTIONS(Continued) 5) Press "1","5","0","0" to input cooking time; 6) Press "POWER LEVEL" to select the microwave power; 7) Press "8" to choose 80% microwave power; 8) Press "START PAUSE" to start cooking. Note: a.Microwave cooking can be set for two stages only. Defrost program and auto menu cannot be set here.
- Page 13 OPERATION INSTRUCTIONS(Continued) 6. Hood Function 1) When the exhaust fan is in the off mode, press "VENT FAN" once to select the fan with high speed; 2) Press "VENT FAN" twice to select the fan with low speed; 3) Press "VENT FAN" three times to select the fan to be off. 4) The fan can be adjusted anytime, except during the lock mode.
- Page 14 OPERATION INSTRUCTIONS(Continued) The menu chart: Menu Power Weight P100 1.75 Oz Popcorn P100 3.0 Oz P100 3.5 Oz P100 P100 Baked potato P100 P100 P100 Beverage P100 8.0 Oz P100 16.0 Oz P100 Reheat P100 24.0 Oz 11. Inquiring Function (1) During microwave cooking mode, press "...
-
Page 15: Maintenance
MAINTENANCE Troubleshooting Check your problem by using the chart below and try the solutions for each problem. If the microwave oven still does not work properly, contact the nearest authorized service center. TROUBLE POSSIBLE CAUSE POSSIBLE REMEDY a. Electrical cord for oven is a. -
Page 16: Cleaning And Care
CLEANING AND CARE Disconnect the power cord before cleaning or leave the door open to deactivate the oven during cleaning. Cleaning the exhaust filters Surface light replacement The oven ventilation exhaust filters should be removed and cleaned often; generally at least once every month. To avoid risk of personal injury or property damage, wear gloves when replacing the light bulbs. - Page 17 CLEANING AND CARE Disconnect the power cord before cleaning or leave the door open to deactivate the oven during cleaning. Charcoal filter replacement Oven light replacement Charcoal Filter installed in your microwave oven, is used Remove the vent grill per instructions 1-4 above and for nonvented, recirculated installation.
- Page 18 CLEANING AND CARE Disconnect the power cord before cleaning or leave the door open to deactivate the oven during cleaning. Cleaning suggestions For best performance and for safety reasons, keep the oven • Wash the oven door window with very mild soap and clean inside and outside.
- Page 19 LIMITED WARRANTY KOOLMORE SUPPLY, INC. warrants to the original consumer or purchaser this KOOLMORE product is free from defects in material or workmanship for a period of One (1) year from the date of purchase. If any such defect is discovered within the warranty period, KOOLMORE SUPPLY, INC., at its discretion, will repair or replace the product at no cost or pay for...
Need help?
Do you have a question about the KM-MOT-1SS and is the answer not in the manual?
Questions and answers