
Related Manuals for Gigaset easy E295


Summary of Contents for Gigaset easy E295
- Page 1 E295 easy E295 easy E295 You can find the most up-to-date user guide at www.gigaset.com/manuals...
-
Page 2: Table Of Contents
Contents Contents Overview ................4 Safety precautions . - Page 3 Contents Extending the functionality of the phone ..........34 Multiple handsets .
-
Page 4: Overview
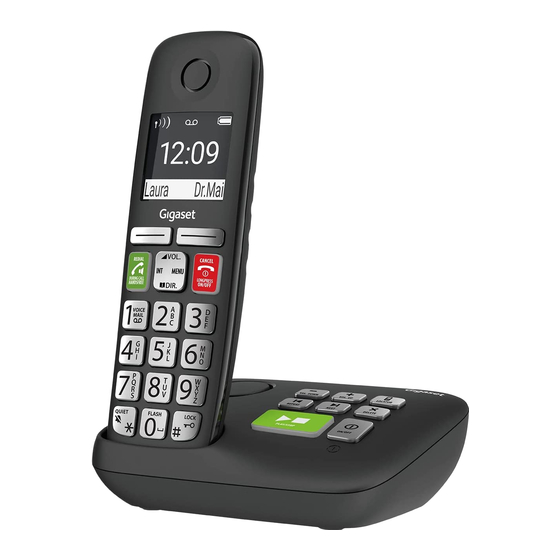
Overview Overview 4 Display keys and functions ( p. 14) Handset Various functions, depending on the operating situation 5 Talk key / Handsfree key Accepting call; selecting Press briefly displayed number; open redial list Start dialling Press and hold 6 End call key / On/Off key End call;... - Page 5 Overview Base without answer machine Registration/paging key Locate a handset (paging): Press briefly Registering handsets Press and hold...
- Page 6 Overview Base with answer machine A Volume keys (– = quieter; + = louder) During message playback: adjust the speech volume While the phone is ringing: adjust the ringtone volume B Registration/paging key Locate a handset (paging): Press briefly Register the handset: Press and hold C Back key During message playback:...
- Page 7 Overview Symbols used in the user guide Icons Warnings, the non-adherence to which can result in damage to devices or personal injury. Important information regarding function and appropriate handling or functions that could generate costs. Prerequisite for carrying out the following action. Additional helpful information.
-
Page 8: Safety Precautions
If you use a medical device (e.g., a pacemaker), please contact the device manufacturer. They will be able to advise you regarding the susceptibility of the device to external sources of high frequency energy (for the specifications of your Gigaset product see "Technical data"). -
Page 9: Getting Started
Getting started Getting started Package contents • One base, one power adapter, one phone cable • One handset, two batteries, one battery cover • One user guide Models with multiple handsets, per handset: • One handset, one charging cradle with power adapter, two batteries and one battery cover The base and charging cradle are designed for use in closed, dry rooms within a temperature range of +41 °F to +113 °F. -
Page 10: Handset
Getting started Device with answer machine The power adapter must always be connected as the phone does not work without a power supply. The local answer machine (if available) is not ready until about 30 seconds after the base has been connected. Handset (if included) Connect the charging cradle... -
Page 11: Changing The Display Language
Getting started Setting up the handset for use The display is protected by a plastic film. Please remove the protective film. Inserting the batteries Only use rechargeable batteries, as this could otherwise result in significant health risks and personal injury. For example, the outer casing of the batteries could be damaged beyond repair or the batteries could explode. - Page 12 Getting started Setting date and time Set the date/time so that the correct date and time can be assigned to incoming calls and to enable the alarm to be used. Menu Settings Date and Time Enter the date (day, month and year) in 8-digit format Enter the time (hours and minutes) in 4-digit format (Display: Saved)
-
Page 13: Using The Phone
Using the phone Using the phone Switch the handset on and off Switching on: When the handset is switched off, press and hold the End call key Switching off: When the handset is in idle mode, press and hold the End call key If you place a deactivated handset into the charging slot, it will automatically activate itself. -
Page 14: Display
Using the phone Display Display keys The display keys perform a range of functions depending on the operating situation. Blackl. Current display key functions Display keys Press the display key . . . Function shown in display above. Open the main menu / submenu Blackl. -
Page 15: Menu Navigation
Using the phone Battery charge level 0 - 10% 11 - 33% 34 - 66% > 66% symbol is shown at the front during the charge process. Flashing Battery almost flat (less than 10 minutes of talk time) Menu navigation The functions of your phone are displayed in a menu comprising several levels. -
Page 16: Making Calls
Making calls Making calls Making a call Enter the number Press the Talk key . . . The number is dialled Press and hold the Talk key . . . The dial tone can be heard Enter the number Ending a call / cancelling dialling: Press the End call key You can automatically prefix every number with a network provider prefix (Preselection). -
Page 17: Accepting A Call
Making calls One touch call A predefined number is dialled by pressing any key. This allows children, who are unable to enter a number, to call a certain number for example. Enabling one touch call mode: Menu Call Manager One Touch Call Activation Enter the number or use to take it from the directory... -
Page 18: Muting
Making calls Muting When the microphone is switched off, the people you are talking to can no longer hear you. During a call, press the control key (right) . . . The handset microphone is switched off Making internal calls Internal calls are free calls to other handsets registered to the same base. -
Page 19: Calling Line Identification
Making calls Listening in to an external call You are holding an external call. An internal subscriber can listen in to this call and take part in the conversation (conference). The Listening in function is enabled. Enabling/disabling internal listening in Menu Settings Telephony... -
Page 20: Automatic Network Provider Selection (Preselection)
Making calls No Calling Line Identification Instead of name and number, the following is displayed: • External call: No number is transferred. • Withheld: Caller has withheld Calling Line Identification. • Unavailable: Caller has not authorised Calling Line Identification. Automatic network provider selection (preselection) You can store a Call-by-Call number (preselection number), which automatically prefixes the number you dial. -
Page 21: Call/Message Lists
Call/message lists Disabling preselection permanently Menu Settings Telephony Preselection Presel. Number Clear the preselection number with the Display key Call/message lists The phone saves information about various events in lists: • Call list: Numbers of all incoming and missed calls •... -
Page 22: Call List
Call/message lists Call list Prerequisite: CLIP Depending on the type of list set, all numbers for the last 25 incoming calls are saved, or only the missed calls are saved. Setting the list type Menu Settings Telephony Call list type Missed calls / All calls OK ( = selected) -
Page 23: Directory
Directory Directory The local directory is unique to a handset. Entries can be sent to other handsets however p. 24). Up to 150 phone numbers (max. 30 digits) with associated names (max. 16 characters) can be stored. Open the directory: Press down the control key Menu Directory... - Page 24 Directory Assigning quick-dial keys Select entry Menu Shortcut Select key = selected) Clearing a key assignment: Select entry Menu Shortcut No Shortcut = selected) Deleting a directory (entry) Deleting a directory entry Select entry Menu Delete Entry Deleting a directory Menu Delete List Confirm deletion with OK...
-
Page 25: Local Answer Machine (If Available)
Local answer machine (if available) Local answer machine (if available) The handset is used to personalise settings on and operate the answering machine. Setting up the answer machine The default setting is answer machine already set up. You can change this. Recording your own announcements You can record your own announcements using the handset. -
Page 26: Operation Using The Handset
Local answer machine (if available) Listening in during recording Call Screening Handset / Base OK ( = enabled) Disable listening in for the current recording: Press the End call key Setting a different language (if available) You can change the voice prompt language and language of the standard announcement. Menu Answering Machine Language... - Page 27 Local answer machine (if available) Actions during playback Stop playback: Continue playback: Press again Menu Continue Go to the next message: During playback of the info block Go to the start of the previous message: Skip the information block: During playback of the content Go to the start of the current message: Go to the content of the next message: Call back a caller:...
-
Page 28: Operation When On The Move (Remote Operation)
Local answer machine (if available) Operation when on the move (remote operation) You can check and enable your answer machine from any other phone (hotel, pay phone, etc.). The system PIN is not 0000. The other phone has tone dialling (DTMF). Enabling the answer machine Call the telephone connection and let it ring until the announcement Please enter your PIN (approx. -
Page 29: Network Mailbox
Network mailbox Network mailbox The network mailbox is registered with the network provider. Entering a number Menu Answering Machine Net Mailbox Enter the number OK . . . The network mailbox is enabled To enable and disable the network mailbox, use the number and a function code from your network provider. -
Page 30: Additional Functions
Additional functions Additional functions Alarm clock Date and time have been set. Turning the alarm clock on and off Menu Alarm Clock Activation OK ( = turned on) Enter the wake-up time in hours and minutes Alarm clock turned on: Instead of the date, the display shows the wake-up time and left of it the alarm clock symbol. -
Page 31: Baby Monitor (Room Monitoring)
Additional functions Baby monitor (Room monitoring) When the baby monitor is switched on, the stored external phone numbers or all handsets reg- istered to the phone (internal) are called as soon as a defined noise level is exceeded in the vicin- ity of the handset. -
Page 32: Eco Dect
Additional functions Deactivate baby monitor / Cancel alarm Deactivate the baby monitor: In idle status press the display key Off Cancel the alarm: Press the End call key during an alarm Deactivate the baby monitor remotely The alarm is forwarded to an external destination number. The receiving phone supports tone dialling. -
Page 33: Protection From Undesired Calls
Additional functions Disabling radiation in idle mode The wireless signals of the base are also disabled with the No radiation setting. Menu Settings System ECO DECT No Radiation = Radiation disabled) All handsets registered must support this feature. For speedy set-up of connections for incoming calls, the handset keeps switching to "ready to receive"... -
Page 34: Extending The Functionality Of The Phone
(1 to 4). If internal numbers 1 to 4 are already assigned to other devices, number 4 is overwritten. Some Gigaset bases and bases/routers from third party manufacturers might not be fully compatible with the handset and not all functions are displayed correctly. In such cases, use menu entry Legacy (GAP) Registration. -
Page 35: Repeater Support
Extending the functionality of the phone De-registering a handset You can de-register any other registered handset from any registered Gigaset handset. Menu Settings Registration Deregister Handset Select the internal user to be de-registered. (The handset you are currently using is marked with <.) -
Page 36: Operating The Base On A Router/Pabx
Extending the functionality of the phone Operating the base on a router/PABX Operation with a router When operating on the analogue connection of a router, any echoes occurring can be reduced by enabling XES mode (XES = eXtended Echo Suppression). Menu Settings System... -
Page 37: Phone Settings
Phone settings Phone settings Date and time Setting Set the date/time so that the correct date and time can be assigned to incoming calls and to enable the alarm to be used. Menu Settings Date and Time Set Date and Time Enter the date (month, day and year) in 8-digit format Enter the time (hours and minutes) in 4-digit format... -
Page 38: Display
Phone settings Display language Menu Settings Language Select the language = selected) If you accidentally choose a language you do not understand: Menu Press keys one after the other Select the language Display Large dial keys Show large dial keys when dialling Menu Settings Display... -
Page 39: Tones And Signals
Phone settings The display flashes for new messages Menu Settings Display Backlight Control Flash Display for Notifications OK ( = enabled) Screensaver The screensaver is enabled when the phone is not used over a longer period of time. The time is shown as the screensaver. - Page 40 Phone settings Ringtone volume (ringer volume) Adjust the volume of the ringtone on 5 levels. For the handset: Menu Audio Settings Ringer Volume Select volume = selected) For the base (with answer machine): Menu Audio Settings Ringtones(Base) Ringer Volume Select volume OK ( = selected) Ringtone melody...
- Page 41 Phone settings Enabling/disabling advisory and warning tones The handset provides acoustic notification of different activities and statuses. Advisory tone: e.g. keypress tones, error tone, a new message Battery warning tone: The battery charge falls below a certain level during a call. Range warning tone: The handset moves outside the range of the base.
-
Page 42: System
Phone settings Permit/block VIP calls Specify whether, when time control is enabled, calls from those marked as VIP contacts in the directory are also suppressed. Menu Call Manager Time Control Suppress VIP Calls = enabled) Off for anonymous calls You can set your handset so that it does not ring for calls where Calling Line Identification has been withheld. -
Page 43: Innovation, Science And Economic Development Canada - Certification
Cet appareil numérique de la classe B est conforme à la norme NMB-003 du Canada. FCC / ACTA Information Warning: Changes or modifications to this unit not expressly approved by Gigaset Communications USA LLC could void the FCC authority to operate the equipment. This includes the addition of any external antenna device. - Page 44 FCC / ACTA Information If this equipment causes harm to the telephone network, the telephone company will notify you in advance, that temporary discontinuance of service may be required. But if advance notice isn’t practical, the telephone company will notify the customer as soon as possible. Also, you will be advised of your right to file a complaint with the FCC if you believe it is necessary.
-
Page 45: Safety Precautions
Safety precautions Notice to telephone company service: If you need service from your telephone company, please provide them with the information • Facility interface Code (FIC) • Service Order Code (SOC) • Universal Service Order Code (USOC) as indicated on the label on the bottom side of the base station. Safety precautions Before using your telephone equipment, basic safety instructions should always be followed to reduce the risk of fire, electric shock and injury to persons. -
Page 46: Service (Customer Care)
(collectively, "Product") provided by Gigaset Communications USA LLC or Gigaset Communications Canada Inc. (collectively "Gigaset NAM"). Gigaset NAM warrants to you that at the date of purchase, the Product is free of defects in workmanship and materials and the software included in the Product will perform in substantial compliance to its program specifications. - Page 47 God, riots, acts of terrorism, spills of food or liquids, viruses or other software flaws introduced into the Product or other acts which are not the fault of Gigaset NAM and which the Product is not specified to tolerate, including damage caused by mishandling or blown fuses.
- Page 48 EVENT OF THE FAULT, TORT (INCLUDING NEGLIGENCE), STRICT LIABILITY, BREACH OF CONTRACT OR BREACH OF WARRANTY OF GIGASET NAM OR SELLER OR ANY SUPPLIER, AND EVEN IF GIGASET NAM OR SELLER OR ANY SUPPLIER HAS BEEN ADVISED OF THE POSSIBILITY OF SUCH DAMAGES. REPAIR OR REPLACEMENT, AS PROVIDED UNDER THE WARRANTY, IS YOUR SOLE AND EXCLUSIVE REMEDY FOR BREACH OF THE LIMITED WARRANTY.
-
Page 49: Questions And Answers
Ontario and the federal laws of Canada applicable therein, and exclude the United Nations Convention on Contracts for the International Sale of Goods. If you want to learn more about Gigaset Service or for Support on your Gigaset phone, visit our web site at www.gigaset.com or please call 1-866 247-8758 tollfree... -
Page 50: Manufacturer's Advice
Data protection We at Gigaset take the protection of our customers’ data very seriously. It is precisely for this reason that we are ensuring all our products feature "Privacy by Design" as standard. All information we collect is used to make our products as good as possible. -
Page 51: Care
Capacity: 400 - 1000 mAh Handset operating times/charging times The operating time of your Gigaset depends on the capacity of the battery, its age and the way it is used. (All times are maximums). Standby time (hours) 180 / 110* Talktime (hours) Operating time for 1.5 h of calls per day (hours) - Page 52 Technical data Base power consumption Without answer machine Standby: • Handset in the charging cradle (charging) approx. 2.00 W • Handset in the charging cradle (sustained charge) approx. 0.60 W • Handset away from the charging cradle approx. 0.55 W During a call: approx.
-
Page 53: Character Set Tables
Technical data Character set tables The character set used on the handset is dependent on the language set. Entering letters/characters Press the relevant key several times. Briefly press the Hash key to switch from mode “Abc” to “123”, from “123” to “abc” and from “abc” to “Abc”. -
Page 54: Menu Tree
Menu tree Menu tree Not all functions described in the user guide are available in all countries or from all network providers. Opening the main menu: Press the control key Menu when the handset is in the idle mode. Alarm Clock p. - Page 55 Menu tree Settings Date and Time ............. . p.
- Page 56 Menu tree Baby Monitor p. 31 Activation ......... p.
-
Page 57: Index
Index Index Calling ....... . 16 external ......17 . - Page 58 Index ......20 ....... . 18 external call Internal call .
- Page 59 Index ......33 Name Radiation-free ... . . 19 displaying caller's name (CNIP) Receiver .
- Page 60 Index ....... . . 4, 16 ....4 Talk key Upper/lower case and digits .
- Page 61 Issued by Gigaset Communications GmbH Frankenstr. 2a, D-46395 Bocholt © Gigaset Communications GmbH 2022 Subject to availability. All rights reserved. Rights of modification reserved. www.gigaset.com...
Need help?
Do you have a question about the easy E295 and is the answer not in the manual?
Questions and answers