Table of Contents
Advertisement
Quick Links
Advertisement
Table of Contents

Summary of Contents for VIA Technologies SOM-9X35-STK
- Page 1 QUICK START GUIDE VIA SOM-9X35-STK Yocto 3.1 EVK 1.00-30032022...
- Page 2 VIA Technologies, Inc. reserves the right the make changes to the products described in this manual at any time without prior notice.
- Page 3 VIA SOM-9X35-STK Yocto 3.1 EVK Quick Start Guide Revision History Version Date Remarks 1.00 30/03/2022 Initial release...
-
Page 4: Table Of Contents
VIA SOM-9X35-STK Yocto 3.1 EVK Quick Start Guide Table of Contents Introduction ..............................1 EVK Package Contents ........................... 1 1.1.1 Firmware Folder Contents ......................1 1.1.2 Document Folder Contents ......................1 1.1.3 Tool Folder Contents ........................1 Version Information and Supported Features ..................2 Image Installation ............................ -
Page 5: Introduction
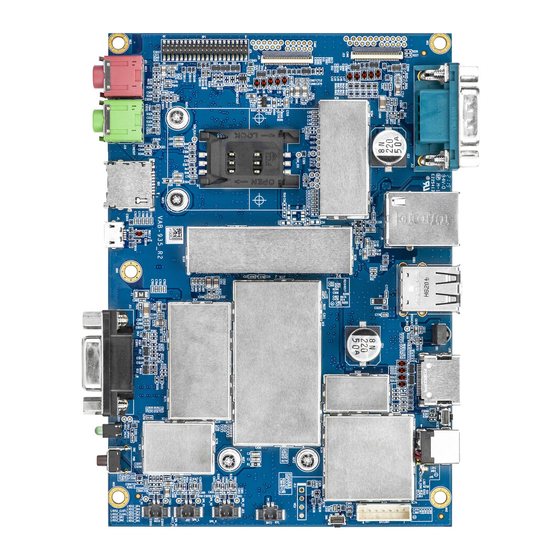
VIA SOM-9X35-STK Yocto 3.1 EVK Quick Start Guide 1. Introduction This Quick Start Guide provides an overview of how to boot the Yocto image for the VIA SOM-9X35-STK and configure the supported hardware functions in the build. Note: The VIA SOM-9X35-STK includes the VIA SOM-9X35 module and the VIA VAB-935 reference carrier board. -
Page 6: Version Information And Supported Features
VIA SOM-9X35-STK Yocto 3.1 EVK Quick Start Guide 1.2 Version Information and Supported Features • Kernel version: 4.14.87 • Evaluation image: Yocto 3.1 • Development based on MediaTek Yocto 3.1 BSP • Supports eMMC boot • Supports HDMI display •... -
Page 7: Image Installation
To install the "VIA USB driver", right-click on the mouse button to install the "android_winusb". When finished, it will show "The operation completed successfully". Then connect the Windows 10 host machine and the VIA SOM-9X35-STK through the Micro USB 2.0 port using the Micro USB cable. - Page 8 Windows 10 host machine. D:\platform-tools>adb reboot bootloader Unplug the AC-to-DC power adapter to power off the VIA SOM-9X35-STK. Unplug the Micro USB cable, press the Power Button for 2 seconds, then release it to power on the VIA SOM- 9X35-STK.
-
Page 9: Hardware Functions
VIA SOM-9X35-STK Yocto 3.1 EVK Quick Start Guide 3. Hardware Functions This section explains how to enable and test the hardware functions precompiled in the Yocto 3.1 EVK including using the debug console. 3.1 Using the Debug Console Insert one plug connector of the 4-pin FFC cable into the J3 port labeled "UART0" on the VIA SOM-9X35 module, ensuring that the gold finger of the FFC cable faces down. -
Page 10: Changing The Kernel Debug Level
Use a serial port communication program such as PuTTY or Tera Term to connect the debug console. Set the console Baud Rate to "921600". Next, power on the VIA SOM-9X35-STK to initiate the boot process. When the boot process has completed, log in to the debug console. The default account is "username: root / password: root"... -
Page 11: Dvfs
Note: There are only 17 (0~16) levels for the LCD backlight control. 3.6 Video playback The VIA SOM-9X35-STK supports H.265 and H.264 video decoding up to 1080p@60fps/40Mbps. To playback video, use the following command: root@aiv8365m1v1-aiot-emmc:~# gst-launch-1.0 -q playbin uri=file:/data/sda1/test. mp4 flags=0x42 video-sink="mtkmdp width=640 height=480 ! video/x-raw,format=I420 ! -
Page 12: Audio Output And Record
VIA SOM-9X35-STK Yocto 3.1 EVK Quick Start Guide 3.7 Audio Output and Record To set up the HDMI audio output, use the following command: root@aiv8365m1v1-aiot-emmc:~# amixer -c0 cset name='O00 I05 Switch' 1 root@aiv8365m1v1-aiot-emmc:~# amixer -c0 cset name='O01 I06 Switch' 1 root@aiv8365m1v1-aiot-emmc:~# aplay /data/sda1/test.wav... -
Page 13: Camera
VIA SOM-9X35-STK Yocto 3.1 EVK Quick Start Guide To set up the Mic-in audio recording, use the following command: root@aiv8365m1v1-aiot-emmc:~# setup_mic root@aiv8365m1v1-aiot-emmc:~# arecord -D hw:0,3 -f S16_LE -r 16000 /data/sda1/t1.wav 3.8 Camera To preview an image from the CSI camera, use the following command: root@aiv8365m1v1-aiot-emmc:~# gst-launch-1.0 v4l2src device="/dev/video5"... -
Page 14: Bluetooth
VIA SOM-9X35-STK Yocto 3.1 EVK Quick Start Guide Then use the "ping" command to verify the network connection: root@aiv8365m1v1-aiot-emmc:~# ping 8.8.8.8 3.10 Bluetooth To enter "interactive mode" for Bluetooth function verification, use the following commands: root@aiv8365m1v1-aiot-emmc:~# btmw-rpc-test increase the priority of btmw_rpc_test.i4_ret:0 @ main set btmw_rpc_test priority done [Client]Func:main Line:665--->: IPC/RPC initialize... - Page 15 Taiwan Headquarters Japan China 1F, 531 Zhong-zheng Road, 940 Mission Court 3-15-7 Ebisu MT Bldg. 6F, Tsinghua Science Park Bldg. 7 Xindian Dist., New Taipei City 231 Fremont, CA 94539, Higashi, Shibuya-ku No. 1 Zongguancun East Road, Taiwan Tokyo 150-0011 Haidian Dist., Beijing, 100084 Japan China...


Need help?
Do you have a question about the SOM-9X35-STK and is the answer not in the manual?
Questions and answers