Table of Contents
Advertisement
Quick Links
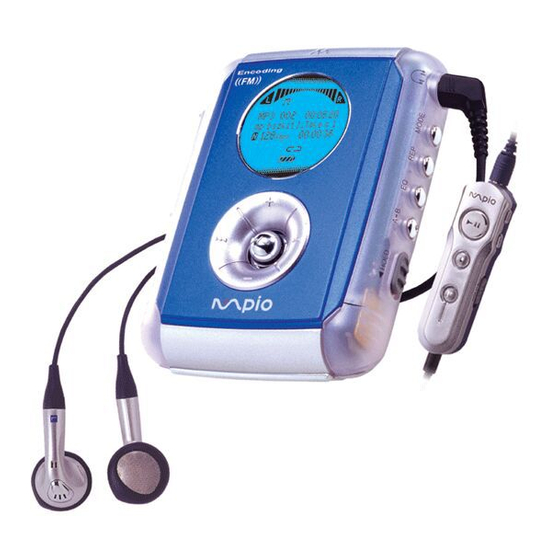
Better and new Encoding MP3 player
What is MP3?
Encoding Digital
Player!
MP3 stands for MPEG 1/2 layer 3.
Download files directly
to your MPIO and
MP3 files can be compressed up to 1/20 size of
enjoy the CD sound
Digital Sound
quality now!.
the original wave files.
What is the MPIO?
The MPIO maintains high
quality sound at all time.
The MPIO stands for Multi-Play Internet AudiO,
is a new generation digital audio player.
You can purchase MP3 files on the internet
and download them directly to your MPIO for
CD quality sound without the need of casette
tapes or CDs.
2
Advertisement
Table of Contents

Related Manuals for Mpio DMB Plus


Summary of Contents for Mpio DMB Plus
- Page 1 The MPIO stands for Multi-Play Internet AudiO, is a new generation digital audio player. You can purchase MP3 files on the internet and download them directly to your MPIO for CD quality sound without the need of casette tapes or CDs.
-
Page 2: Table Of Contents
Erasing Files on PC Connecting the MPIO to PC Arranging the Playback Order Functions of Jog button Downloading Additional Font to the MPIO Listening to the FM Radio Inserting the SMC(Smart Media Card) Listening to the Voice Record on PC... -
Page 3: Player Features And Controls
Mode button USB Connector (MP3/ FM Radio/ MP3 Record/ Erasing Files) Repeat/ FM Channel Mode Line-in Jack connecting the (INTRO/ NORMAL/ REPEAT ALL/ REPEAT1/ SHUFFLE) MPIO to Audio (Stereo Equalizer/ Record Selection Cable) Volume Control (FLAT/POP/ROCK/CLASSIC/X-BASS) Power on/ Play Repeat Segmentation/Record/... - Page 4 Rear Panel Optional Remote Control Earphone Jack SMC(Smart Media Card) Slot Rewind Power On/ Play/ Pause (MP3 Mode: Rewind FM Radio Mode: Frequency UP) (Changing the FM Radio Channel) Stop/ Power Off Forward (MP3 Mode: Forward Volume Control (+/-) FM Radio Mode: Frequency DOWN) Eject button(SMC) Hold Equalizer/ FM Mode...
-
Page 5: Accessories
ACCESSORIES User's Guide Installation CD USB Cable Stereo Cable Earphone Remote Control Pocket 1.5V AA type Battery (1EA) -
Page 6: Inserting The Battery
1. Slide the battery cover in the 2. Insert "AA" type battery with the 3. Close the cover and slide it as direction of the arrow. correct polarity. indicated until the battery cover latches. • You need one 1.5V AA type battery for your MPIO. -
Page 7: Display Lcd Panel
DISPLAY(LCD) PANEL Battery The indicator shows the amount of battery remaining as belows: Playback Icon MP3 Record Icon EQ (Equalizer Mode) Icon → By selecting Equalizer If the battery icon shows empty and starts blinking, menu, you will see 5 it indicates the battery is almost gone. -
Page 8: Listening To The Music
• If you do not press any buttons during in the : Press and hold to move backward within the • Only during the playback state, you can selection state, MPIO will automatically turn off current track. adjust the volume. -
Page 9: Installing Software On Pc
• MPIO Manager MPIO Manager is for transferring files between PC and the MPIO. You can download MP3 files and others to your MPIO. You can also upload any other files (except MP3 and WMA files) to your PC using this software. -
Page 10: Installing The Mpio Manager
INSTALLING THE MPIO MANAGER By pressing the 'Next' button you can install the MPIO Manager in order. Welcome to the Install Shield Wizard for MPIO Set up will install MPIO Manager in the following Manager. The Install Shield wizard will install folder (C:/ Program File/ Digitalway). - Page 11 Existing the MPIO Manager Folders. software setup. Select the Exiting Folders you desire and click the NEXT button to install the MPIO Manager. Click! • The installation of MPIO Manager has been finished well.
-
Page 12: Connecting The Mpio To Pc
CONNECTING THE MPIO TO PC Before you download MP3 files into the MPIO, you must connect the MPIO to your PC using the supplied USB cable. 1. Connect the USB Cable to the 2. Turn the MPIO on and connect USB port of the computer. -
Page 13: Functions Of Jog Button
FUNCTIONS OF JOG BUTTON By using Jog button, you can set the MPIO as you like. Press Jog button and four different modes are displayed on the LCD. Each mode has 'under mode'. ◆ File Arrangement ◆ Initial mode FM Radio mode... -
Page 14: Listening To The Fm Radio
LISTENING TO THE FM RADIO By using Jog button, you can listen to the FM Radio. You can also record the music files. Press Jog button and each of menu is displayed on LCD. 1. Selecting FM Radio mode by 2. - Page 15 3. To select Automatic Seeking mode for FM Channel 4. To stop Automatic Seeking mode ① Press and hold Press button to stop Automatic (Fast Forward) button, and the frequency will go up and start seeking channel automatically. Seeking mode. ②...
- Page 16 5. To store FM Channels ① Press ② Press REP button to ③ Select “YES” by ④ Store the selected (Fast Forward) (Rewind) button to select Store mode. You using button channel to the select the channel you can select the channel store the selected channel 01.
- Page 17 6. To listen to the FM Radio ① Press ② Press (Fast Forward) or (Rewind) button while listening to the button to select the channel you want. FM Radio, and you can listen to the You can also select the channel you preset FM channel in order.
- Page 18 8. To switch from STEREO to MONO 9. Recording FM Radio ① Press press the (+/-) button mode, press EQ button. (A B/REC) button to record during the current Your MPIO comes with pre-installed files during the play mode. playback. STEREO type.
- Page 19 ② Press ③ The recorded files will be stored in ④ To listen to the recorded files, go (A B/REC) button again to stop the the form of RADIO001.MP3, back to the initial page (Standby recording. RADIO002.MP3, RADIO003.MP3..., Status) and select the desired files in order.
-
Page 20: Listening To The Voice Record On Pc
LISTENING TO THE VOICE RECORD ON PC Set the mode from MPIO to MP3 RECORD first. ① Press the mode button twice to set ② Press (EQ/LINE) button, and the MP3 RECORD mode. the "RECORD INPUT IS LINE IN" The mode is in Selection State now. - Page 21 ③ Press ④ Press (EQ/LINE) button again, (A B/REC) button to start and the message "RECORD INPUT Voice Recording. IS MICROPHONE" will be When recording, you need to keep displayed on the LCD. adequate distance. It indicates the MP3 Record play time of mode recording voice.
- Page 22 ⑤ To stop the voice recording, press ⑥ To listen to the recorded files Select the MP3 Record mode by click the Mode button twice in the (A B/REC) button again. The recorded files will be stored in the initial page. And then choose the recorded files you desire before pressing (PLAY/STOP) button.
-
Page 23: Rep(Repeat) Mode
REP(REPEAT) MODE You can select REP mode in Play mode or MP3 REC mode. 1. Press Repeat mode, and you can select 5 different functions mode as below. ICON Repeat mode Intro : Plays first 10 seconds for each of the file Normal : Plays all stored files one time in order Repeat All... -
Page 24: Eq(Equalizer) Mode
EQ(EQUALIZER) MODE EQ mode can be selected in Play mode only. 1. Press EQ(Equalizer) mode to adjust the desired equalizer mode. There are 5 different EQ modes available as below: ICON Equalizer mode Flat : Normal balance : Balance suitable for pop music Rock : Balance suitable for rock music Classic : Balance suitable for classical music... -
Page 25: Repeat Segmentation Mode
REPEAT SEGMENTATION MODE Selecting Repeat Segmentation mode is available during the Play mode or MP3 REC mode. ◆You can listen to a specific section. 1. Make the music play 3. Press STOP button to stop 2. Press A B button again and then press A B at the end point. -
Page 26: Back Light Mode
BACK LIGHT MODE To select the Backlihgt Mode, you must stop all works in the MPIO first. Press button and four different modes will be displayed on the LCD in order as follow: 1. Stop all the 2. Press button 3. -
Page 27: Making Mp3 Files From An Audio Player
MAKING MP3 FILES FROM AN AUDIO PLAYER You can directly download desired files from an audio player such as CD or cassette player by connecting to the MPIO. ① Open the rubber lid of LINE-IN Jack, and ② Connect the other end of the Stereo Cable to the LINE- connect Stereo Cable provided with your OUT Jack of an audio player. - Page 28 ③ Turn the power of the MPIO ④ Press ⑤ Select your desired contents from the audio (EQ/LINE) button, on. Then double-click to select and the message RECORD player before pressing the Record mode. INPUT IS LINE-IN will be (A B/REC) button.
- Page 29 ⑥To cancel the REC Mode, press the ⑦To play the recorded files, select the (A B/REC) button again. desired file in selection state and press The recorded files will be stored in the form of (PLAY/STOP)button. MUSIC001.MP3, MUSIC002.MP3, MUSIC003.MP3..., in order.
-
Page 30: Formatting Internal Memory
FORMATTING INTERNAL MEMORY Before formatting internal memory, turn the MPIO on and connect the MPIO to PC using the USB cable. 1. Execute the MPIO Manager. 2. Click [Memory] and select [Format Internal Memory]. Double-Click! • Double-click the icon of the MPIO Manager on the •... -
Page 31: Downloading Files To The Mpio
DOWNLOADING FILES TO THE MPIO Before downloading files to your MPIO, turn the MPIO on and connect the MPIO to PC using the USB cable. 1. Execute the MPIO Manager. 2. Click Connect icon on the 3. Select File(s) to download to the Double-click the icon of the MPIO MPIO Manager. - Page 32 4. Click Download icon The selected file has been downloaded. Now Note you can listen to music with the MPIO after ■ Always check that 'USB removing the USB cable. CONNECTED' is displayed on the LCD of the MPIO before sending files.
-
Page 33: Listening To The Mp3 File On Pc
LISTENING TO THE MP3 FILE ON PC Before executing the MPIO Manager, turn the MPIO on and connect the MPIO to PC using the USB cable. 1. Select the MP3 file stored in your 2. Select the folder you want to store in 3. - Page 34 4. Excute the Windows Explorer 5. Select the recorded file 6. Play the recorded file Double-Click the Windows Explorer on Open the folder in which the recorded file The recorded file starts to play automatically your Windows desktop. stored and double-click the file. in Windows Media Player.
-
Page 35: Erasing Files On The Mpio
1. Press the MODE button to select Erase mode. 2. After selecting 'ERASE 3. Press the button to FILE', choose the file you'd erase file. like to erase by pressing button. Note Once the file erased from your MPIO, it cannot be restored. -
Page 36: Erasing Files On Pc
ERASING FILES ON PC Turn the MPIO on and connect your MPIO to PC and execute the MPIO Manager before erasing. 1. Click the file of the MPIO you would 2. Click [File] and select [Erase Files 3. Click [OK]. -
Page 37: Arranging The Playback Order
ARRANGING THE PLAYBACK ORDER Connect your MPIO to PC using the USB cable and execute the MPIO Manager. 1. Execute the MPIO Manager. 2. Click [File] and [Change File order 3. Arrange the files by dragging and in MPIO]. dropping. - Page 38 4. Click [OK] after moving files to the 5. The MPIO Manager displays the file desired position. arrangement you made.
-
Page 39: Downloading Additional Font To The Mpio
• Optional font file occupies about 2MB of the MPIO • Additional font supports following characters. memory. ① Korean • Select [Font] and [Erase Font in MPIO], if you want ② Japanese to recover 2MB due to font download. ③ Chinese (Traditional) -
Page 40: Inserting The Smc(Smartmedia Card)
Ejecting SMC 1. Insert the SMC into the SMC Slot. when the MPIO is turned on. Push the SMC Eject Switch upward. • To send file to the MPIO, you must format the SMC before using it. (refer to page 32) -
Page 41: Troubleshooting
TROUBLESHOOTING If you have problems with your MPIO, refer to this section first before calling for customer service. ■ Check and/or replace the new battery. 1. The MPIO does not work or nothing is displayed on the LCD. ■ Check the capacity of the battery. -
Page 42: Safety Precautions
3. Avoid areas of high humidity, strong magnetic fields, or sources of heat. 4. Do not use thinner, alcohol, or benzene when cleaning the MPIO. 5. To avoid damage to the MPIO, battery always must be taken out when not in use for a long time. -
Page 43: Technical Specifications
TECHNICAL SPECIFICATIONS MPIO(DMB Plus) Model DMB Plus Memory Capacity Internal Memory 32/64/128MB Battery 1.5V AA type (1ea) FSTN-type 3line LCD, 128 x 48pixels Dimensions / Weight 62.6 x 87.4 x 21mm/ 71g (without battery) (W x H x D) Case... -
Page 44: Warranty
WARRANTY This MPIO brand product, as configured and distributed by Digitalway for the loss or destruction of data or media resulting from the use or Co., Ltd. and delivered, in the original carton to the original con- for service of this product. - Page 45 altered serial numbers; failure to follow operating instruction, costomer adjustment, the use, misuse or inability to use this product, regardless of the legal maintenance and environment environmental instructions that are covered and theory on such the claim is based. And even if Digitalway has been prescribed in the instruction book;...
Need help?
Do you have a question about the DMB Plus and is the answer not in the manual?
Questions and answers