Table of Contents
Advertisement
Quick Links
Pressure
Washer
Instruction Manual
MODEL NO. SE01
1800 PSI
Congratulations on the purchase of your new
ACTIVE™ pressure washer. In order to ensure you
have the best possible experience, please read
through the following instructions.
If you require any help, please contact the
customer service department at: 1-844-777-4555
Version: 2022 V0
2.0 GPM
Advertisement
Table of Contents

Subscribe to Our Youtube Channel
Related Manuals for Active SE01


Summary of Contents for Active SE01
- Page 1 1800 PSI 2.0 GPM Congratulations on the purchase of your new MODEL NO. SE01 ACTIVE™ pressure washer. In order to ensure you have the best possible experience, please read through the following instructions. If you require any help, please contact the...
-
Page 2: Table Of Contents
Table of Contents 1. IMPORTANT PRECAUTIONS..................3 1.1 Definitions ..............................3 1.2 Safety Warnings ............................3 1.3 Intended Application ..........................5 2. SAFETY FEATURES AND ELECTRICAL INFORMATION ........... 5 2.1 Extension Cords ............................5 3. EXPLODED VIEW ......................6 4. PARTS LIST ........................6 5. -
Page 3: Important Precautions
Important Precautions 1. Important Precautions IMPORTANT, RETAIN FOR FUTURE REFERENCE 1.2 Safety Warnings AND READ CAREFULLY! Do not attempt to install or operate this device DANGER until you have read the safety instructions in this To reduce the risk of fire, electric shock, explosion manual. - Page 4 Important Precautions 1. Important Precautions (cont.) CAUTION — USE 1.2 Safety Warnings (cont.) • Learn how to stop the device and release the pressure quickly. Familiarize yourself with the controls. • Keep all connections dry and off the ground. • Avoid accidental starts.
-
Page 5: Intended Application
Important Precautions / Safety Features and Electrical Information 1. Important Precautions (cont.) 2.1 Extension Cords 1.3 Intended Application This product is designed for specific residential If possible, do not use extension cords with this applications. Do not modify or use this product product. -
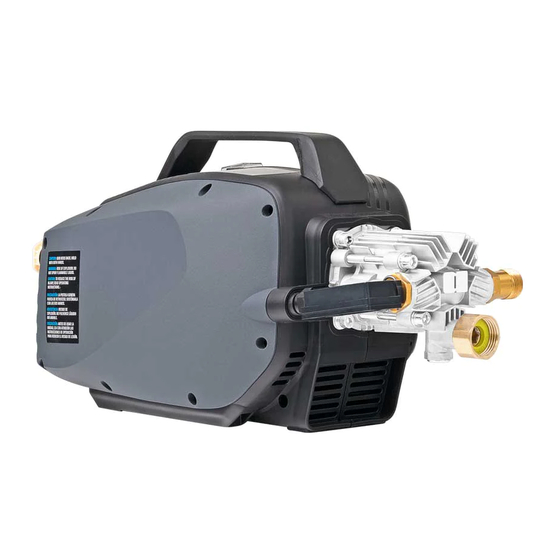
Page 6: Exploded View
Part # Item # Part Name Qty. Part # Pre-attached on Quick-connect wand XE16-020-0002 Water filter the machine Pre-attached on Gun assembly UG01-020-0003 Clean needle the machine Tips kit (4 pcs) VE50-020-0004 Foam blaster XE29-060-1000 High-pressure hose SE01-010-0005 Main unit SE01-001-0000... -
Page 7: Assembly Instructions
Assembly Instructions 5. Assembly Instructions 5.4 Assembly 5.1 Surface Preparation Before beginning any cleaning task, it is important to inspect the area for objects that could create a hazard. Remove any objects from the work area that could be tripped over, such as toys or outdoor furniture. - Page 8 Assembly Instructions 5. Assembly Instructions (cont.) 5.4 Assembly (cont.) To install tip, gently slide the collar back before inserting it, then release the collar to lock the tip. Attach the desired spray tip to the wand. The spray tips are for the following purposes: 0°...
- Page 9 Assembly Instructions 5. Assembly Instructions (cont.) 5.4 Assembly (cont.) RESET TEST Plug GFCI into power receptacle. Firmly press and release the TEST button, then press and release the RESET button. The light on the GFCI should be illuminated. WARNING Make sure your hands are dry. Plug the unit into an outlet.parts. Release the safety trigger if it is locked.
- Page 10 Assembly Instructions 5. Assembly Instructions (cont.) 5.4 Assembly (cont.) PURGING ON / OFF button Push ON/OFF button, switch is set in ON position, machine is ready to operate. Purge air by squeezing the trigger on the gun until there is a steady stream of water. CAUTION Drain unit after each use (for storage): remove water connection, turn ON the...
-
Page 11: Operating Instructions
Operating Instructions 6. Operating Instructions 6.1 Working with Foam Blaster Working with a detergent ensures quick soaking of the dirt, and allows the high-pressure water to penetrate and remove the dirt more effectively. Always spray detergent on a dry surface, do not pre-soak the area. -
Page 12: Shutting Down And Cleaning Up
Operating Instructions 6. Operating Instructions (cont.) 6.4 Warnings 6.2 Shutting Down and Cleaning Up Turn off water supply and disconnect the CAUTION garden hose from the water inlet on the pressure washer. Failure to clean this product properly will cause the detergent injection system to become Pull the trigger to release any remaining clogged and inoperable. -
Page 13: Winterizing And Long-Term Storage
Winterizing 7. Winterizing and Long-Term Storage 7.1 Optimum Winterizing Procedure 7.2 Quick Winterizing Procedure Winterizing your pressure washer will help protect If you are unable to perform the optimum and prolong its life. We strongly recommend you winterizing procedure, you can still protect your follow the below steps using a Pressure Washer pressure washer from winter damage by doing the Antifreeze before storing for the winter. -
Page 14: Cleaning And Maintenance
Cleaning and Mentenance 8. Cleaning and Maintenance 8.1 Connections 8.3 Water Filter Screen The connections on the pressure washer’s hoses, gun, and spray wand should be cleaned and lubricated with non-water soluble grease regularly. 8.2 Cleaning the Nozzles The pressure washer is equipped with a water inlet screen to protect the pump. -
Page 15: Troubleshooting
Troubleshooting 10. Troubleshooting Disconnect the device from the power source before making any repairs. Problem Cause Solution Push the ON/OFF button once to turn to the ON The device is in OFF mode. mode. The power cord is not plugged in. Plug in the power cord. - Page 16 Troubleshooting 10. Troubleshooting Disconnect the device from the power source before making any repairs. Problem Cause Solution Loose fittings. Tighten fittings. The garden hose connection leaks. Missing/worn rubber washer. Insert new washer. Ensure the quick-connect wand is attached The spray nozzle was not properly securely.
-
Page 17: Warranty
We’re here to help! If you have any questions or comments, call our toll-free hot-line 1-844-777-4555 or our e-mail at info@active-jobsite.com. Have your serial number and purchase order ID ready. The serial number can be found on the top plate, located on the top of the unit. - Page 18 Note...
- Page 19 Note...
Need help?
Do you have a question about the SE01 and is the answer not in the manual?
Questions and answers
I need the location of the serial number so I can register