Table of Contents
Advertisement
Quick Links
Advertisement
Table of Contents

Related Manuals for HyQuest Solutions HyQual


Summary of Contents for HyQuest Solutions HyQual
- Page 1 HyQual - Water Quality Multi- Probe HyQuest Solutions / KISTERS Group 2022-05-03...
-
Page 2: Table Of Contents
Table of Contents Required Accessories/Options General Safety Instructions Specific Safety Instructions Protection for unattended logging8 Operating limits SNAPSHOT, AUTOSNAP, and LOGGING 5.1.1 Using Snapshot and Autosnap 5.1.2 LOGGING Set Barometric Pressure Set Time and Date Sensor Warm Up Four Basic Deployment Methods 10 6.2.1 Manual Data Collection 6.2.2... - Page 3 HyQuest Solutions no se responsabiliza de ningún daño incidental, indirecto, es- pecial o consecuente que surja o esté relacionado con esta documentación y la información contenida en ella, incluso si HyQuest Solutions ha sido advertida de la posibilidad de tales da- ños.
- Page 4 Refers to unattended data capture, with the data stored in The HyQual probe Teleme- It means that you have connected the HyQual probe to a telemetry device, deployed the try Re- HyQual probe in the proper location in the water, and left the site.
-
Page 5: Required Accessories/Options
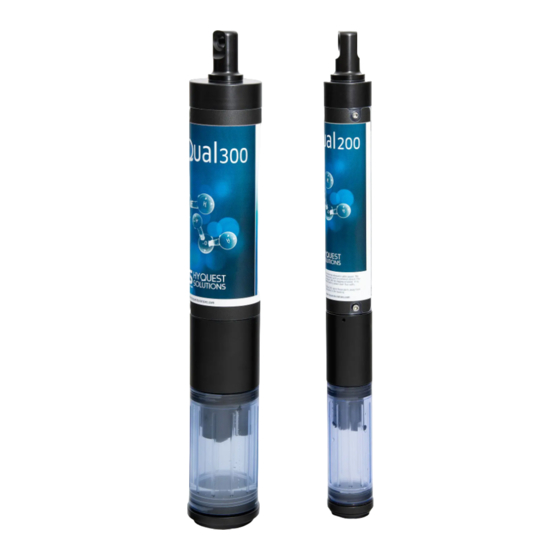
Instead of using power from the underwater cable you could use the optional EBP external re- chargeable battery pack. This battery is ideal for HyQual 300 and 300 T due to its 75 mm (3 “) diameter. It also works fine with the 200 version, only it makes it look top heavy. Use the EBP external battery pack when you do not wish to have downtimes of charging the battery. -
Page 6: General Safety Instructions
Barometric pressure is calculated with the use of the depth sensor therefore, you will need to add an optional depth sensor to any of your probes HyQual 200, HyQual 300 and HyQual 300T. When Absolute Pressure method is used (non-vented capacity) there... -
Page 7: Specific Safety Instructions
Before starting to work, you have to check the functioning and integrity of the system. Check for visible defects on the HyQual probe multi-probe, this may or may not include any or all of the following: mounting facilities, connectors and connections, mechanical parts, internal or external com- munication devices, power supplies or power supply lines, etc. -
Page 8: Operating Limits
“Logging” refers to unattended data capture, with the data stored in The HyQual probe. The data are tagged with time and date. Logging is useful if the HyQual probe needs to collect data for days or weeks at a remote location. -
Page 9: Using Snapshot And Autosnap
Activating Logging To initiate Logging, you must tell the HyQual probe that you want it to start logging. All of the user-in- terface versions have a Hot Button for turning Logging on, or off, on the Home Screen. Simply press the button to toggle between Logging ON and Logging OFF. -
Page 10: Set Time And Date
Unattended Logging means that you have set the HyQual probe into its Logging mode, deployed the HyQual probe in the proper location in the water, and left the site. The HyQual probe can run for weeks at a time with cable-supplied power or an optional HyQual Internal Lithium Battery Pack. You can, for instance, set the instrument to take a set of readings every half-hour, anchor it in an estuary, and return after two weeks to retrieve the instrument and download the data to a PC, laptop, tablet, or phone. -
Page 11: Telemetry Relay
Please note that this battery ads several inches to the length of the probe and that it can also be used with the HyQual 200 only that its diameter would be larger than the HyQual 200’s diameter which will make the probe look top heavy but it will work... -
Page 12: On-Line Monitoring
If you will be using an Underwater Cable, you can run power to the HyQual probe from a surface power supply to provide power to HyQual – you don’t need a HyQual Battery Pack. Or, the surface power supply can power HyQual with the optional internal lithium battery pack, thus saving your batteries for emergencies such as the failure of the surface power supply. -
Page 13: Maintenance - 1: Calibration
Display and the HyQual probe. You can become a minor expert in just a few minutes. The HyQual probe never guesses parameter values, so you must calibrate it from time to time by simply telling the instrument what it should read in a calibration situation for which the correct parameter value is known. -
Page 14: Sensor Response Factor (Srf)
SRF calculation, but the effect is the same). If your response is 80 μA, your SRF would be 80%. When you press the OK button to accept a calibration, the HyQual probe automatically accepts your calibration if the SRF is between 60% and 140%. If the SRF falls out- side that range, you will be cautioned to check your standard value, make sure the sensor is clean, make sure the reading has stabilized, etc. -
Page 15: Calibration Record (Cal Log)
7.3.4 Calibration Record (Cal Log) Every HyQual probe has a dedicated data file called CAL.LOG. The CAL.LOG records every calibration made to your instrument, whether you accepted the calibration or not. This file shows the time and date of the calibration, the parameter calibrated, the reading before the calibration was accepted, the read- ing after the calibration was accepted, the “raw”... - Page 16 Take the lid off the jar and let the water stand for about five minutes so air bubbles float out. 4. Screw your calibration cup onto the HyQual probe housing and remove the cup lid. With the sensors pointed upward, fill the calibration cup until your aerated water covers the DO sensor by a centimeter or so.
-
Page 17: Conductivity
1. Open the Calibration menu and select “SpCond µS/cm” or “SpCond mS/cm”, depending on your preference of units. 2. Screw your calibration cup onto the HyQual probe housing and remove the cup lid. Rinse your sensors several times with the standard you’ll use for calibration. -
Page 18: Reference Electrode
ORP is also known as Oxidation-Reduction Potential or Redox. The actual ORP sensor is the 1 mm plati- num dot you can see when looking down at the pH sensor – if The HyQual probe has ORP. Because plat- inum does not react with ions in the water, it won’t give or take any electrons from those ions unless they are very persuasive. -
Page 19: 7.3.11 Depth And Vented Depth
HyQuest Solutions’ Depth sensors are usually buried inside the instrument, with a small pressure port that can be seen on the outside of the HyQual probe bottom cap. They require no regular maintenance, but you might check occasionally to make sure the pressure port is not clogged. If it is, use something soft, like a toothpick, to clear the port of obstruction. -
Page 20: Use Status Led For Troubleshooting
1. Open the Calibration menu and select “Turb NTU” of “Turb FNU” depending on your preference for measurement units. 2. Screw your calibration cup onto the HyQual probe housing and remove the cup lid. Rinse your sensors several times with the standard you’ll use for calibration. -
Page 21: Check Active Components
(such as a PC or logger). When you first power-up the HyQual probe, a sequence of red and amber light flashes provides infor- mation about the voltage of the External Battery Pack (if any) and whether or not Logging is activated or not. - Page 22 – No Commercial value”. It is mandatory to have any returned goods accompanied by a commercial invoice on headed paper. HyQuest Solutions reserves the right to charge the customer for time spent rectifying incorrect customs documents.
- Page 23 EU WEEE Directive • As players in the environmental market, KISTERS AG and HyQuest Solutions are committed to supporting efforts to avoid and recycle waste. Please consider: o Avoidance before recycling! o Recycling before disposal! •...
Need help?
Do you have a question about the HyQual and is the answer not in the manual?
Questions and answers