Advertisement
Advertisement
Table of Contents

Related Manuals for Westcott drop Pro


Summary of Contents for Westcott drop Pro
- Page 1 Quick Start Guide...
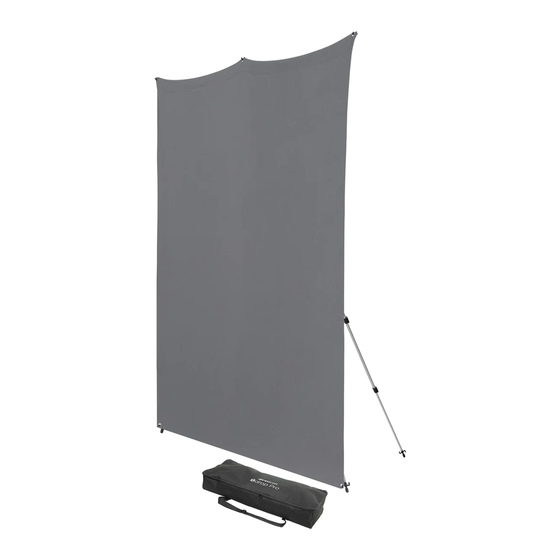
- Page 2 Included Components Expandable Base (3) Extension Arms Backdrop Carry Case Sizes & Colors Vary, Included in Kits & Sold Separately 8' x 8' and 8' x 13' Backdrop Assembly Lower Section Assembly 1. Locate the X-drop base. Loosen the dial on the runner located on the center tube and slide downward, extending each of the legs outward similar to a tripod.
- Page 3 6. Extend the remaining section until the top of the backdrop is straight and taut. Close the clasps to secure the position. 7. Locate the two grommets at the bottom of the backdrop and attach them to the hooks on the front legs. Step 6, Upper Section Step 7, Upper Section 5' x 7' and 5' x 12' Backdrop Assembly...
- Page 4 Upper Section Assembly 1. Insert the shortest extension arm into the middle receptacle of the X-drop’s center hub with the black hooks facing forward. 2. Slide the 2 remaining extension arms into position closest to the center tube of the outermost receptacle openings. The arms will click into place.
- Page 5 Rear Leg Fully Extended Rear Leg Partially Extended Adding Stability with a Weight Bag • Each foot on the X-Drop Pro Stand has a rear hook for attaching a weight bag (sold separately) for additional support. • Reducing the footprint of the stand increases the chance of it tipping forward.
- Page 6 In an effort to provide the best quality products possible, we periodically make product modifications. Actual products may not be identical to items pictured. Designed in Ohio, USA. Assembled in China. © F.J. Westcott Co. All rights reserved. EA0322...
Need help?
Do you have a question about the drop Pro and is the answer not in the manual?
Questions and answers