Advertisement
Quick Links
6. Lids
To each lid fit a lid front board using 2 x 35mm screws. Screw through the front board into the lid rails. Position the
lids between the side panels as shown. Align the predrilled bolt holes and insert a bolt. Secure each bolt with a washer
and a nut. Do not over tighten the nuts. Attach two chains to the inside of each lid using 1 x 15 mm screw per chain.
Position the chains so that they can be looped round the handles of the bin and hooked back on the chain. Attach the
lid stays using 1 x 40mm screws per stay as shown.
6/7
Lid rails
8
Drill
Important:
Drill pilot holes in the
lid front boards for
each screw to avoid
splitting the timber.
12mm
35mm
10
6
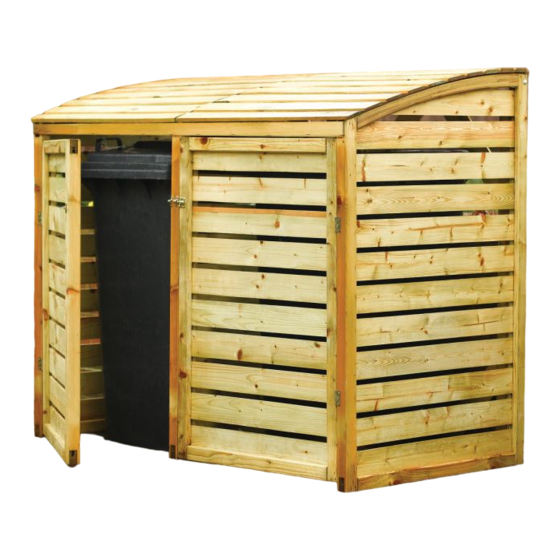
Using the bin store
Position the bin inside
the store, loop the
chains around the
100mm
handles of the bin and
attach the S hook to
one of the chain links.
Washer
Nut
If in doubt of any aspect regarding the assembly, use or safety of your bin store, please contact us:
Help Line (Normal Office Hours) 01829 261 121
Email: support@rowgar.co.uk
ROWLINSON GARDEN PRODUCTS LIMITED
Green Lane
Wardle Nr. Nantwich
Cheshire
CW5 6BN
www.rowgar.co.uk
Important Note: To determine which roof
panel is which, look at the front edge of each
lid, the overhang of the cladding at each side
is different.
View of the front edges of the two lids
Left Lid
Right Lid
Large
Small
overhang
overhang
40mm
10
17
17
17
17
150mm
Washer
Nut
Washer
We constantly improve the quality of our products, occasionally
the components may differ from the components shown and are
only correct at time of printing. We reserve the right to change the
specification of our products without prior notice.
2021 © Rowlinson Garden Products Ltd
Double Bin Store
Assembly Instructions
Before assembly
•
We recommend that time is taken to
read the instructions before starting
assembly, then follow the easy step
by step guide. The instruction sheet
is only a guide to the assembly.
Certain items may not be shown to scale.
•
Check all components prior to assembly
•
This product should be assembled
by no less than two people.
•
Never attempt to erect the assembly
Large
in high winds.
overhang
•
Drill pilot holes for each screw
x 2
Drill
Recommended tools for assembly
•
Power drill/screwdriver
•
Cross head screwdriver bit
•
3mm drill bit
• 13mm spanner
No.
Components
1
Base plates
7
2
Side panel
3
Centre panel
4
Back panel
5
Door
6
Left lid
7
Right lid
8
Lid front board
9
Front rail
100mm
10
Lid stay
No.
Fixing kit
11
Hinges
12
Slide bolt
13
150mm bolt
14
100mm bolt
15 Nuts
16 Washers
17
Chain
18
60mm screws
19
40mm screws
20
35mm screws
21
30mm screws
22
15mm screws
Biocidal Products Regulation EU 528/2012
Wolmanit
CX treated wood is a treated article that incorporates biocidal products: cop-
®
per hydroxide carbonate/II/ and boric acid. They protect wood against fungal decay /rot/
and insect attack. Keep away from food, drink and animal feeding stuffs. Avoid breathing
dust when cutting treated wood.
.
Qty
4
2
1
2
6
2
1
1
2
2
2
7
.
Qty
4
8
2
1
2
3
3
9
4
12
16
4
5
36
12
4
English SS250C
4
3
10
11
2
1
Advertisement

Subscribe to Our Youtube Channel
Related Manuals for Rowlinson Garden Products SS250C


Summary of Contents for Rowlinson Garden Products SS250C
- Page 1 35mm screws Wardle Nr. Nantwich only correct at time of printing. We reserve the right to change the Cheshire 30mm screws specification of our products without prior notice. CW5 6BN 2021 © Rowlinson Garden Products Ltd 15mm screws www.rowgar.co.uk...
- Page 2 1. Side, Centre & back panels 3. Front rails Secure the two side panels, centre panel and two back panels as shown below using 3 x 60mm screws for each join. Ensure Secure the two front rails to the top of the front face of the uprights as shown using 6x40mm screws. all panels are level along the bottom edge.
Need help?
Do you have a question about the SS250C and is the answer not in the manual?
Questions and answers