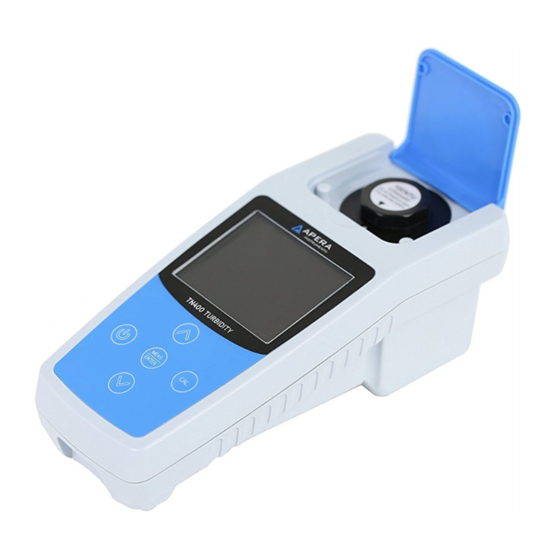
Summary of Contents for Apera TN400
- Page 1 TN400 Portable Turbidity Meter Instruction Manual APERA INSTRUMENTS LLC www.aperainst.com - 1 -...
-
Page 2: Table Of Contents
Table of Contents 1 Overview ...................... - 3 - 2 Technical Specifications ................- 4 - Technical Parameters ....................- 4 - Others ........................- 4 - 3 Instrument Description................. - 5 - Instrument Overview ....................- 5 - Meter and Accessories ....................- 6 - Display ........................ -
Page 3: Overview
This meter operates on the nephelometric principle of turbidity measurement and is designed to meet the criteria specified in ISO7027 and DIN 27027 standards. TN400 allows you to measure the turbidity of an aqueous sample both in laboratory and in the field. -
Page 4: Technical Specifications
2 TECHNICAL SPECIFICATIONS 2.1 Technical Parameters Measuring Method ISO 7027 compliant nephelometric method(90°) 0 to 1000 NTU, automatic range selection: 0.01 to 19.99 NTU Measuring Range 20.0 to 99.9 NTU 100 to 1000 NTU Resolution 0.01 / 0.1 / 1 NTU Reading Error ≤... -
Page 5: Instrument Description
3 INSTRUMENT DESCRIPTION 3.1 Instrument Overview Diagram-1 Housing Sampling well ⑥ ① Flip cover of the sampling well (Close the cover when Calibration vials or sample vials ⑦ ② measuring) Positioning mark (Align the mark Display with the mark on the calibration ⑧... -
Page 6: Meter And Accessories
Standard solution: 0.02NTU, Silicon oil (10 ml) ⑥ ① 20.0NTU, 100NTU, 800 NTU Portable case Sample vial×3 ⑦ ② Screwdriver (to remove TN400 Meter ⑧ ③ battery cover) Soft cloth Instruction manual ⑨ ④ “AA” Alkaline battery×4 ⑤ - 6 -... -
Page 7: Display
3.3 Display Measuring Mode ① — Measuring mode icon ② — reading/Unit ③ — Progress bar ④ — Operational directive ⑤ — Low battery display Calibration Mode ① — Calibration mode icon ② — Reading/Unit ③ — Progress bar ④ — Operational directive Calibration Menu Mode ①... -
Page 8: Battery Installation
3. Put on the battery cover and screw tightly. 4 METER CALIBRATION TN400 turbidity meter needs to be calibrated with the provided standard solution when used for the first time. For normal use, it is suggested to calibrate the meter monthly or weekly depending on the frequency of use; or the user can perform verification test, which is to test the standard solution that is close to the value of the test sample. -
Page 9: Calibration Standards
NIST and so on. The standard solution supplied in the TN400 turbidity meter kit has a shelf-life of 12 months (from the date of manufacture). Please check the date on the bottom of the vials before using. -
Page 10: Calibration Notes
8) When cursor indicates on 7) After calibration with 20.0 NTU 9) After calibration with 100 NTU 100NTU, put the calibration vial of standard, press key to standard, press key to 100NTU into the sample well and return to calibration menu. return to calibration menu. -
Page 11: Turbidity Measurement
If Formazin standard is used to calibrate, note the diluted Formazin standard is not stable. Please make sure to use new prepared Formazin standard to ensure calibration precision. 6) Please do not open the cap of calibration vial. Inspect the expiration of calibration standard. -
Page 12: For Single Measurement
ameliorate scratches and flaws and improve light scattering. 5) Place turbidimeter on a flat and level surface, please do not handheld the instrument. 6) Hold vial cap, align the arrow mark on vial cap with the arrow mark on the calibration well, and insert sample vial into the measuring well and close the cover 5.3 For Single Measurement... - Page 13 and scratches that may contribute to stray light. Do not apply large quantity of oil as this may collect dirt and dust and extra oil should be wiped off with soft cloth. When wiping, user should grip the cap to avoid leaving fingerprints on the surface of glass vial.
- Page 14 b) Use 1# sample vial to calibrate 0.02 NTU; Use 20.0 NTU calibration vial to calibrate 20 NTU. c) Dump the distilled water in 1# vial, and dry the vial (using a dryer). Pour your tested sample solution into the 1# vial; Screw on the cap and let it stand still for 3 minutes;...
-
Page 15: Warranty
6 WARRANTY We warrant this instrument to be free from defects in material and workmanship and agrees to repair or replace free of charge, at option of APERA INSTRUMENTS, LLC, any malfunctioned or damaged product attributable to responsibility of APERA INSTRUMENTS, LLC for a period of two years from the delivery (a six-month limited warranty applies to the calibration solutions). - Page 16 APERA INSTRUMENTS, LLC Address: 977 Old Henderson Rd, Columbus, Ohio 43220 Tel: 1-614-285-3080 Email: info@aperainst.com Website: www.aperainst.com - 16 -...


Need help?
Do you have a question about the TN400 and is the answer not in the manual?
Questions and answers