
Subscribe to Our Youtube Channel
Related Manuals for Apera EC400S


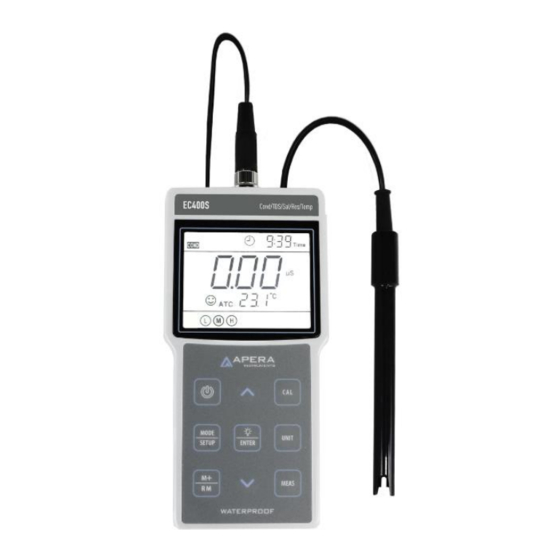
Summary of Contents for Apera EC400S
- Page 1 EC400S Portable Conductivity Meter Instruction Manual PH400S Portable pH Meter EC400S Portable Conductivity Meter PC400S Portable pH/Conductivity Meter APERA INSTRUMENTS (Europe) GmbH www.aperainst.de v3.2 - 1 -...
- Page 2 Table of Contents Brief Introduction ............................- 3 - Technical Specifications ..........................- 4 - Parameter Specifications ........................- 4 - Other Specifications .......................... - 5 - Instrument Description ..........................- 5 - pH Measurement ............................- 8 - Information regarding the pH Electrode .................... - 8 - Information regarding pH Calibration ....................
-
Page 3: Brief Introduction
BRIEF INTRODUCTI ON Thank you for purchasing Apera Instruments EC400S Portable Conductivity Meters. Before using the product, please read this manual carefully to help you properly use and maintain the product. For technical support, please contact us at info@aperainst.de or +49 202 51988998 Apera Instruments reserves the right to update the content of this manual without giving prior notices. -
Page 4: Technical Specifications
TDS: (0 to 100) g/l, including 5 ranges: Range (0.00 to 9.99) mg/l, (10.0 to 99.9) mg/l, (100 to 999) mg/l, (1.00 to 9.99) g/l, (10.0 to 100.0) g/l Salinity: (0 to 100) ppt, EC400S Conductivity Resistivity: (0 to 100) mΩ·cm PC400S Resolution 0.01/0.1/1 μS/cm, 0.01/0.1 mS/cm Accuracy ±1.0% F.S ±1 digit... -
Page 5: Other Specifications
Other Specifications PH400S, EC400S 500 Groups Data Storage PC400S 1000 Groups Storage Content Numberings, Date, Time, Measurements, Unit, Temperature Data Output Power Supply AA Batteries *4 (1.5V*4) IP Rating IP57 Waterproof and Dustproof Meter: (86x196x33) mm / 335 g. PH400S, EC400S... - Page 6 Table- 1 Keypad Operation and Functions Keypad Operation Functions Short Press Power on/off Choose measuring mode: PH400S pH Meter: → Short Press PC400S pH/Cond. Meter: → → EC400S Cond. Meter: N/A Long Press Enter parameter setting - 6 -...
-
Page 7: Display Mode
Short Press Enter calibration mode In pH mode: choose resolution 0.01 pH→0.1 pH Short Press In conductivity mode:choose: → → → In measurement mode: press to turn on/off the backlight In calibration mode: press to calibrate Short Press ... -
Page 8: Information Regarding Ph Calibration
3.5.2 Automatic Timing Data Storage In parameter setting P4.1, set up the time for timing measurements (e.g. Figure-5 3 minutes). will be displayed, meaning the meter is ready to enter the auto timing storage mode. Short press , the icon will start flashing, and the 1 group of data will be stored. - Page 9 4.2.2 pH Calibration Modes The instrument has two calibration modes for choice: 3-point calibration (3P) and 5-point calibration mode (5P). Users can make the selection in parameter settings P1.4 (refer to section 7.3) a) 3-point Calibration Mode The 3-point calibration mode is the most commonly used. Users can adopt 1 to 3 points to calibrate as needed. In the 3-point calibration mode, the 1 point must be 7.00 pH (or 6.86 if using NIST).
-
Page 10: Ph Calibration (Take 3-Point Calibration As An Example)
4.2.5 Check calibration date In this mode, users can see the date and time of last calibration to help determine if there is a need to re- calibrate. For details, please see parameter setting P1.3 (Section 7.3) pH Calibration (Take 3-point calibration as an example) 4.3.1 Press to enter calibration mode. -
Page 11: Sample Measurement
Sample Measurement 4.4.1 Rinse the pH electrode in distilled water or pure water, dry it, and dip it into sample solution. Stir the solution gently and let it stand still in the sample solution until icon appears and stays on LCD, get the pH reading, which is pH value of sample solution, please refer to Figure-9 for calibration and measurement process of the pH meter. -
Page 12: Maintenance Of The Ph Electrode
4.4.3 pH isothermal measurement principle According to the pH isothermal measurement principle, the closer the test sample’s temperature is to the calibration solution’s, the higher the accuracy of the measurement. So this principle is recommended to follow when conducting tests. 4.4.4 Restore to factory default The instrument has a function to return to factory default setting, which can be set up in P1.5 (refer to section 7.3). -
Page 13: Special Notes
Table-8 Clean contaminated glass bulb and junction Contamination Cleaning Solutions Inorganic metal oxide Dilute acid less than 1mol/L Organic lipid Dilute detergent (weak alkaline) Resin macromolecule Dilute alcohol, acetone, ether Proteinic haematocyte sediment Acidic enzymatic solution (saccharated yeast tablets) Paints Dilute bleacher, peroxide Special Notes: 1) The 201T-S Plastic 3-in-1 Combination pH Electrode that comes with this meter will NOT give... -
Page 14: Conductivity Measurement
5.2.2 Clean and activate ORP electrode After the electrode has been used over a long period of time, the platinum surface will get polluted which causes inaccurate measurement and slow response. Please refer to the following methods to clean and activate ORP electrode: (a) For inorganic pollutant, submerge the electrode in 0.1mol/L dilute hydrochloric acid for 30 minutes, then wash it in pure water, then submerge it in the soaking solution for 6 hours. -
Page 15: Information Regarding Conductivity Calibration
Information regarding Conductivity Calibration 6.2.1 Conductivity Standard Calibration Solutions The meter uses conductivity standard solution of 84 μS/cm, 1413 μS/cm, 12.88 mS/cm and 111.8 mS/cm. The meter can recognize the standard solution automatically, and can perform 1 to 4 points of calibration. The calibration indication icons correspond to the four standard values as shown in Table-8. -
Page 16: Conductivity Calibration
Table – 9 Temperature compensation coefficient of special solutions Solution Temperature compensation coefficient NaCl solution 2.12%/°C 5% NaOH solution 1.72%/°C Dilute ammonia solution 1.88%/°C 10% hydrochloric acid solution 1.32%/°C 5% sulfuric acid solution 0.96%/°C Precaution for calibration solution’s contamination 6.2.6 Conductivity standard solution has no buffer. -
Page 17: Tds, Salinity, Resistivity & Conductivity
4. For multi-point calibrations, please repeat the steps in 6.3.1 to 6.3.2 until all calibrations are finished. The meter can be calibrated in the same calibration solution repeatedly until the reading is stable and repeatable. TDS, Salinity, Resistivity & Conductivity 1. -
Page 18: Parameter Setting
4. Factory default setting For factory default setting, please refer to parameter setting P2.7 (Section 7.4). With this function, all calibration data is deleted and the meter restores to the theory value. Some functions restore to the original value (refer to appendix -1). - Page 19 Main Menu pH Setting Submenu P1.1 Select pH buffers P1.2 Set up calibration reminder P1.3 Check calibration date P1.4 Select pH calibration mode P1.5 Restore to factory default Conductivity Setting Submenu P2.1 Select electrode’s constant P2.2 Set up calibration reminder P2.3 Check calibration date P2.4 Select reference temp.
- Page 20 pH Setting Sub-Menu P1.1 — Select pH buffer series (USA—NIST) 1. In measurement mode, long press to enter P1.0, press to enter P1.1 2. Press USA flashes; Press to choose USA→NIST; Press to confirm. USA—USA NIS—NIST 3. Press to enter P1.2, or press to return to measurement mode.
- Page 21 P2.2 — Set up calibration reminder (No—H00—D00) 1. Press , “No” flashes. Press to choose No→H00→D00; NO—no setting; H00—set 0-99 hours; D00—set 0-99 days. 2. When “H” flashes, press , “00” flashes; Press to adjust hours, press to confirm; when “D” flashes, press , “00”...
- Page 22 P4.2 —(°C—°F) 1. Press , “°C” flashes, press , “°F” flashes; when parameter flashes, press confirm. 2. Press to enter P4.3, or press to return to measurement mode. P4.3—Select lasting time for backlight (1—2—3—On) 1. Press , “1” flashes, press to choose from 1→2→3→On;...
-
Page 23: Usb D Ata Communic Ati On
USB D ATA COMMUNIC ATI ON The instrument uses PC-Link software for data communication through USB connector and cable. Software Interface Figure-13 ① — Stored data (a)Press “Download” Key to upload the data in the meter to the software, including date, time, measurements, temperature, and temperature compensation mode. -
Page 24: Run Software
Click “Export” to export all the data to a Microsoft Excel file. Users can process, analyze, and print the data in the Excel file. COMPLETE KI T Content Quantity PH400S EC400S PC400S PH400S Portable pH Meter √ EC400S Portable Conductivity Meter √ PC400S Portable pH/Conductivity Meter √ 201T-S Plastic 3-in-1 Combination pH Electrode √ √ 2301T-S Plastic Combination Conductivity Electrode √... -
Page 25: Warranty
APERA INSTRUMENTS, any malfunctioned or damaged product attributable to responsibility of APERA INSTRUMENTS for a period of TWO YEARS (SIX MONTHS for the probe) from the delivery. This limited warranty does not cover any damages due to:... -
Page 26: Appendix 2: Ico Ns An D Abbrevi Ati On
12 APPENDIX 2: ICO NS AN D ABBREVI ATI ON Mode Symbol Abbreviation Content P1.1 Standard buffers P1.2 Due Calibration P1.0 P1.3 P1.4 Calibration mode P1.5 Factory default setting P2.1 Cell P2.2 Due Calibration P2.3 P2.0 P2.4 Reference temperature Conductivity Temperature compensation P2.5 coefficient... -
Page 27: Appendix 3: Table Of Self-Di Ag Nosis
√ or >60mV) √ pH electrode slope out of range (<85% or >110%) √ √ Enter in pre-set due calibration to remind re-calibration APERA INSTRUMENTS (Europe) GmbH Address: Wilhelm-Muthmann-Str.15 42329 Wuppertal, Germany Email: info@aperainst.de Website: www.aperainst.de Tel.: +49 202 51988998...
Need help?
Do you have a question about the EC400S and is the answer not in the manual?
Questions and answers