
Subscribe to Our Youtube Channel
Related Manuals for Apera SX811-BR


Summary of Contents for Apera SX811-BR
- Page 1 SX811-BR Portable pH Meter for Beverage Making Instruction Manual APERA INSTRUMENTS, LLC www.aperainst.com V1.0...
-
Page 2: Table Of Contents
Brief Introduction ......................- 1 - Features ..........................- 1 - ® Features of the LabSen 213 pH Electrode ................- 1 - ® Proper use and maintenance of the LabSen 213 Electrode ............ - 1 - Technical Specifications....................- 2 - Instrument Technical Specs.................... -
Page 3: Brief Introduction
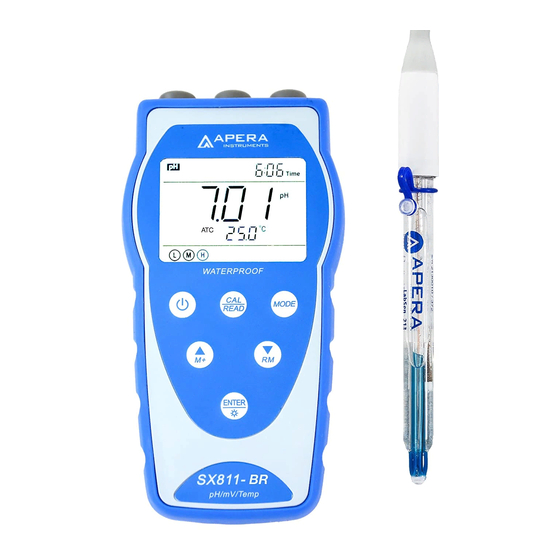
Brief Introduction Thank you for purchasing the Apera Instruments SX811-BR portable pH meter kit. This device is an outstanding combination of advanced electrical, sensor technology and software design. The meter is ® equipped with LabSen 213 pH Electrode, designed for testing pH level of all types of beverage e.g. wine, beer, juice, tea, etc. -
Page 4: Technical Specifications
the storage solution if the storage solution gets turbid and mildewed. The electrode should never be soaked in pure water or buffer solution for long. e) Please avoid measuring dehydrated medium like strong acid or alkaline solution, absolute ethyl alcohol and concentrated sulfuric acid. In case of measuring such solution, please try to reduce the immersion time and clean it carefully after use. -
Page 5: Instrument Description
Junction Ceramic Reference Electrode Long-Life Electrolyte 3M KCL Shape of glass membrane Semisphere Range 0 to 14 pH Temperature Range -5 to 100˚C (23 to 212˚F) Connector BNC and RCA Instrument Description 3.1 LCD Display Diagram-1 (1) — Measurement mode icons (2) —... -
Page 6: Keypad
(13) — Temperature compensation icons ATC — automatic temperature compensation, MTC — manual temperature compensation (14) — Calibration guide icon (15) — Stability icon of readings (16) — USB icon,when this icon appears, the meter connects the computer (17) — Low battery icon, when this icon appears, please renew the battery 3.2 Keypad Diagram-2 3.2.1. - Page 7 Table – 1 Keypad operations and descriptions Keypad Operations Descriptions Short press Press this key to turn on or turn off the meter. Select measurement parameters: Short press → pH meter: Long press In measurement mode, press this key to enter main menu. ...
-
Page 8: Display Mode
3.3 Display mode 3.3.1 Reading stability display mode When the measuring value is stable, smiley icon appears on LCD, see Diagram – 3. If icon does not appear or flash, please do not get the reading value or make calibration until the measuring value is stable. Diagram - 3 3.3.2 Automatic lock-up display mode Select On from parameter P4.6 to turn on automatic lock-up display function. -
Page 9: Ph Measurement
pH Measurement 4.1 Information regarding pH Calibration 4.1.1 Things needed in addition to what’s included in the kit A clean cup, distilled water (8-16oz), and tissue papers for rinsing and drying the probe. 4.1.2 Electrode Connectors The pH electrode has two connectors: the BNC connector connects the pH probe; the RCA connector connects the temperature sensor. - Page 10 Table-3 Calibration Mode Calibration When to adopt icon accuracy≤ ±0.1 1-Point 6.86 pH 7.00 pH 6.86 pH Calibration 6.86 pH and 7.00 pH and 6.86 pH and 0 to 7.00 pH 4.00/1.68 pH 4.00/1.68 pH 4.01/1.68 pH 2-Point Calibration 7.00 to 14.00 6.86 pH and 9.18 7.00 pH and 10.01 pH 6.86 pH and 9.18 pH 6.86pH, 4.00/...
-
Page 11: Ph Calibration (Use 3-Point, Usa Standard As An Example)
4.2 pH Calibration (use 3-point, USA Standard as an example) 1) Press to enter calibration mode. CAL1 icon will flash in the upper right corner of the LCD. 7.00 pH will flash in the lower right corner of the LCD, reminding you to use pH 7.00 buffer to conduct 1 point of calibration. -
Page 12: Customized Calibration
6) During the calibration process, press key to exit from the calibration mode. The meter can perform one-point, two-point and three-point calibration. Calibration guide icons appear on LCD. 4.3 Customized Calibration (take 1.60pH and 6.50pH calibration solution as an example) 1) Select CUS from parameter P1.1 (please refer to Section 6.3 for customer-defined solution). - Page 13 Diagram – 12 Calibration and measurement process of pH meter Submerge the After the 1 point point Press key to electrode in pH7.00 calibration is done, Press to turn calibration enter into the solution, press press key to on the meter. calibration mode.
-
Page 14: Mv Measurement
pH electrode zero electric potential out of range(<-60mV or >60mV) 1.Check whether pH buffer solution is correct. 2. Check if electrode is damaged. pH electrode’s slope is out of range 3.The pH electrode is aged. Replace a new one. (<85% or >110%) Enter in pre-set due calibration to Press key to perform calibration or cancel due... -
Page 15: Parameter Setup
(b) For organic or lipid pollutant, clean the platinum surface with detergent, then wash it in distilled water, then submerge it in the soaking solution for 6 hours. (c) For heavily polluted platinum surface on which there is oxidation film, polish the platinum surface with toothpaste, then wash it in distilled water, then submerge it in the soaking solution for 6 hours. - Page 16 6.3 Submenu of pH parameter setup (press key to switch) P1.1. – Select pH standard solution (USA-NIST-CUS-CH) 1. In P1.0 mode, press to enter in P1.1 mode, refer to the left diagram. 2. When press key,USA flashes,then press key, NIST flashes,etc. When parameter flashes, press to make confirmation(USA –...
- Page 17 6.4 Submenu of basic parameter setup (press key or key to switch) P4.1. – Adjust timing storage time 1. In mode P4.0, press key to enter in mode P4.1, refer to the left diagram: “00:”: hours (0-99), “:00”: minutes (0-59). 2.
-
Page 18: Usb Communication
P4.7. – Adjust date 1. Press key, “Month” flashes, then press key, “Date” flashes, then press key, “Year” flashes. When the number flashes, press key or key to adjust date, then press key to confirm. Date display: Month - Date 2. -
Page 19: Load Software
1 — Meter serial number 2 — Stored value display area 3 — Keys Clear — press this key to clear the data Download — press this key to download the data from the meter to the computer, pH, mV, conductivity and dissolved oxygen are classified in the file. - Page 20 APERA INSTRUMENTS, LLC, any malfunctioned or damaged product attributable to responsibility of APERA INSTRUMENTS, LLC for a period of two years from the delivery (a six-month limited warranty applies to electrodes). Warranty period is the time limit to provide free service for the products purchased by customers, not the service life of the tester or electrodes.
-
Page 21: Appendix
10 Appendix 10.1 Appendix I: Parameter setup and factory default setup Restore Modes Prompts Parameter setting items Description factory Abbreviation default setup P1.1 Select pH buffer solution USA-NIST-CUS-CH - P1.2 Set due calibration No-H00-D00 Check the date of the last P1.3 -... -
Page 22: Appendix Ii: Abbreviation Glossary
10.2 Appendix II: Abbreviation glossary Code and Modes Prompts Description abbreviation P1.1 Standard buffer solution P1.2 Due for calibration P1.0 P1.3 P1.4 Distilled water Distilled water mixed with P1.5 ammonia P1.6 Factory default setting P4.1 P4.2 P4.3 Backlight P4.0 P4.4 Auto power-off Basic P4.5... -
Page 23: Recommended Ph Electrodes For Other Specific Applications
11 Recommended pH Electrodes for Other Specific Applications Application Ideal Apera pH Electrodes to Use with SX811-BR Meter Regular water solutions 201T-F, LabSen 213 Beverage, beer, or wine analysis LabSen 213 Cosmetics LabSen 851-1, (MP500 temp. probe required) Dairy products (milk, cream, yogurt, mayo, etc.) - Page 24 APERA INSTRUMENTS, LLC Address: 6656 Busch Blvd, Columbus Ohio 43229 Tel: 1-614-285-3080 Email: info@aperainst.com Website: www.aperainst.com - 22 -...
Need help?
Do you have a question about the SX811-BR and is the answer not in the manual?
Questions and answers