Table of Contents
Advertisement
Quick Links
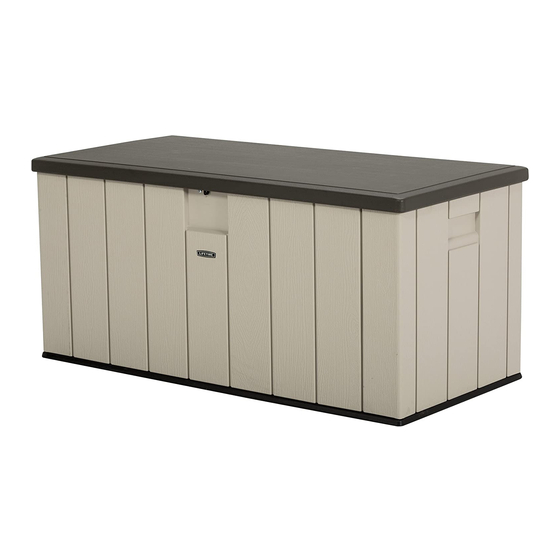
150-GALLON (567.8 L)
DECK BOX
MODEL 60254
BEFORE ASSEMBLY:
• Assemble on a level surface
• At least 2 people are recommended for setup
WATCH
3D ANIMATION
OF THE FULL ASSEMBLY
SCAN THE
CODE
YouTube
TOOLS REQUIRED
7/16" (11 mm)
QUESTIONS?
CONTACT LIFETIME CUSTOMER SERVICE:
Call: 1-800-225-3865
7:00 am-5:00 pm (Monday-Friday) MST
and 9:00 am-1:00 pm Saturday MST
OR WATCH THE HOW-TO ON YOUTUBE
OR SEARCH
1200975
Scan the code, or visit go.lifetime.com/150playlist
®
and the YouTube logo are trademarks of Google, LLC.
3/8" (10 mm), 7/16" (11 mm),
1/2" (13 mm)
Live Chat: www.lifetime.com
(click on "LIVE CHAT" tab)
For Customer Service in mainland Europe:
E-mail: cs@lifetimeproducts.eu
ASSEMBLY INSTRUCTIONS
Pour le français, voir la page 2. Para el español, ver la página 3.
1/2" (13 mm)
TABLE OF CONTENTS
Icon Legend...............................4
Warnings & Notices.....................5
Parts Identifi er............................6
Box Assembly.............................7
Lid Assembly............................13
Additional Warnings..................23
Cleaning & Care........................27
Registration...........................28
Warranty..............................29
MODEL# AND PRODUCT ID
(both are needed when when contacting us)
Model Number: 60254
Product ID:
Advertisement
Table of Contents

Related Manuals for Lifetime 60254


Summary of Contents for Lifetime 60254
-
Page 1: Table Of Contents
OF THE FULL ASSEMBLY OR WATCH THE HOW-TO ON YOUTUBE SCAN THE OR SEARCH CODE 1200975 Scan the code, or visit go.lifetime.com/150playlist ® YouTube and the YouTube logo are trademarks of Google, LLC. TOOLS REQUIRED TABLE OF CONTENTS Icon Legend.......4 Warnings &... - Page 2 Nettoyage et entretien....27 Enregistrement......28 Garantie......30 ® QUESTIONS ? CONTACTER AUX SERVICES À LA CLIENTÈLE LIFETIME N° DE MODÈLE ET RÉFÉRENCE DU PRODUIT t’Chat en direct: www.lifetime.com (il faut avoir les deux au moment de nous contacter) Composer le 1-800-225-3865 (cliquer sur la languette « LIVE CHAT ») N°...
- Page 3 Limpieza y cuidado....27 Registro........28 Garantía........31 ® ¿PREGUNTAS? PONERSE EN CONTACTO CON LOS SERVICIOS DE CLIENTES LIFETIME Chat en vivo: www.lifetime.com MODEL E ID DEL PRODUCTO Marcar : 1-800-225-3865 (se necesitan los dos al contactarnos) (cliquee en la lengüeta «LIVE CHAT») Número de modelo: 60254...
-
Page 4: Icon Legend
ICON LEGEND / LÉGENDE DES ICÔNES / SIGNIFICADO DE LOS ÍCONOS • Indicates special heed should be taken when reading. • Indique qu’une attention spéciale doit être portée à la lecture. • Indica que uno debe prestar atención al leer. •... -
Page 5: Warnings & Notices
This includes features such as a water-resistant enclosure that helps keep your things protected from rain, snow, and the elements. It should be noted that Lifetime storage boxes are not waterproof. The storage boxes are not meant for uses other than outdoor storage. -
Page 6: Parts Identifi Er
PARTS IDENTIFIER / IDENTIFICATEUR DE PIÈCES / IDENTIFICADOR DE PIEZAS HARDWARE REQUIRED / QUINCAILLERIE REQUISE / HERRAJE REQUERIDO Hardware Bag / Sac de quincaillerie Bolsa de herraje PARTS REQUIRED / PIÈCES REQUISES / PIEZAS REQUERIDAS Metal Parts / Pièces en métal Piezas de metal BET (x4) EZA (x1) -
Page 7: Box Assembly
BOX ASSEMBLY / ASSEMBLAGE DE LA BOÎTE / ENSAMBLE DE LA CAJA HARDWARE REQUIRED / QUINCAILLERIE REQUISE / HERRAJE REQUERIDO Hardware Bag / Sac de quincaillerie Bolsa de herraje ADW (x26) DRC (x1) ADJ (x1) PARTS REQUIRED / PIÈCES REQUISES / PIEZAS REQUERIDAS Metal Parts / Pièces en métal Piezas de metal... - Page 8 • En caso de problemas con esta sección, seguir el código debajo para ver un video sobre la instalación y ensamblaje en esta sección. http://go.lifetime.com/150boxassembly • Slide the rear panel to the left until it stops. • Insert the six (6) tabs at the bottom of the rear panel •...
- Page 9 SECTION 1 (CONTINUED) / SECTION 1 (SUITE) SECCIÓN 1 (CONTINUACIÓN) TOOLS AND HARDWARE REQUIRED / OUTILS ET QUINCAILLERIE REQUIS INSTRUMENTAL Y HERRAJE REQUERIDOS • Repeat steps 1.1–1.2 for the front panel (AMZ). • Répéter les étapes 1.1 – 1.2 pour le panneau avant (AMZ). •...
- Page 10 SECTION 1 (CONTINUED) / SECTION 1 (SUITE) SECCIÓN 1 (CONTINUACIÓN) TOOLS AND HARDWARE REQUIRED / OUTILS ET QUINCAILLERIE REQUIS INSTRUMENTAL Y HERRAJE REQUERIDOS ADW (x16) • Secure the left side panel to the rear panel with four (4) screws (ADW). Then, secure the panel to front panel using four (4) more screws (ADW).
- Page 11 SECTION 1 (CONTINUED) / SECTION 1 (SUITE) SECCIÓN 1 (CONTINUACIÓN) TOOLS AND HARDWARE REQUIRED / OUTILS ET QUINCAILLERIE REQUIS INSTRUMENTAL Y HERRAJE REQUERIDOS ADW (x10) • Insert a screw (ADW) through each of the five (5) tabs on the left side panel. •...
- Page 12 SECTION 1 (CONTINUED) / SECTION 1 (SUITE) SECCIÓN 1 (CONTINUACIÓN) TOOLS AND HARDWARE REQUIRED / OUTILS ET QUINCAILLERIE REQUIS INSTRUMENTAL Y HERRAJE REQUERIDOS 7/16 in/po (≈11 mm) DRC (x1) ADJ (x1) • Attach the locking tab (DRD) to the front panel using the hadware indicated. •...
-
Page 13: Lid Assembly
LID ASSEMBLY / ENSAMBLE DE LA TAPA / ASSEMBLAGE DU COUVERCLE HARDWARE REQUIRED / QUINCAILLERIE REQUISE / HERRAJE REQUERIDO Hardware Bag / Sac de quincaillerie Bolsa de herraje BCK (x6) BES (x6) DRF (x4) AAB (x6) PARTS REQUIRED / PIÈCES REQUISES / PIEZAS REQUERIDAS Metal Parts / Pièces en métal Piezas de metal... - Page 14 • En caso de tener problemas con esta sección, seguir el código debajo para ver un video sobre la instalación y ensamblaje en esta sección. http://go.lifetime.com/150gallidassembly • Attach the lid locking tab (DRE) to the lid support (EZA) using the hardware indicated.
- Page 15 SECTION 2 (CONTINUED) / SECTION 2 (SUITE) SECCIÓN 2 (CONTINUACIÓN) TOOLS AND HARDWARE REQUIRED / OUTILS ET QUINCAILLERIE REQUIS INSTRUMENTAL Y HERRAJE REQUERIDOS • Insert an end of the lid support into the slot in the front corner of the lid (AND). •...
- Page 16 SECTION 2 (CONTINUED) / SECTION 2 (SUITE) SECCIÓN 2 (CONTINUACIÓN) TOOLS AND HARDWARE REQUIRED / OUTILS ET QUINCAILLERIE REQUIS INSTRUMENTAL Y HERRAJE REQUERIDOS BET (x2) AAO (x2) 1/2" (≈13 mm) 1/2" BCK (x6) (≈13 mm) • By design, the screws (BCK) are slightly larger than the holes; therefore, it is easier to perform this step using an electric drill.
- Page 17 SECTION 2 (CONTINUED) / SECTION 2 (SUITE) SECCIÓN 2 (CONTINUACIÓN) TOOLS AND HARDWARE REQUIRED / OUTILS ET QUINCAILLERIE REQUIS INSTRUMENTAL Y HERRAJE REQUERIDOS DRF (x2) • Insert the left hinge into the slot and rotate it downard as shown. The ball studs face toward the inside. •...
- Page 18 SECTION 2 (CONTINUED) / SECTION 2 (SUITE) SECCIÓN 2 (CONTINUACIÓN) TOOLS AND HARDWARE REQUIRED / OUTILS ET QUINCAILLERIE REQUIS INSTRUMENTAL Y HERRAJE REQUERIDOS 1/2 in/po (≈13 mm) 1/2 in/po (≈13 mm) AAO (x2) BET (x2) • The hinge (BEP) goes together this way for the right side of the lid. •...
- Page 19 SECTION 2 (CONTINUED) / SECTION 2 (SUITE) SECCIÓN 2 (CONTINUACIÓN) TOOLS AND HARDWARE REQUIRED / OUTILS ET QUINCAILLERIE REQUIS INSTRUMENTAL Y HERRAJE REQUERIDOS DRF (x2) 2.10 • By design, the screws (DRF) are slightly larger than the holes; therefore, it is easier to perform this step using an electric drill.
- Page 20 SECTION 2 (CONTINUED) / SECTION 2 (SUITE) SECCIÓN 2 (CONTINUACIÓN) TOOLS AND HARDWARE REQUIRED / OUTILS ET QUINCAILLERIE REQUIS INSTRUMENTAL Y HERRAJE REQUERIDOS 2.12 • Set the hinges down onto the rear panel as shown. • Placer les charnières sur le panneau arrière comme indiqué. •...
- Page 21 SECTION 2 (CONTINUED) / SECTION 2 (SUITE) SECCIÓN 2 (CONTINUACIÓN) TOOLS AND HARDWARE REQUIRED / OUTILS ET QUINCAILLERIE REQUIS INSTRUMENTAL Y HERRAJE REQUERIDOS 7/16" (≈11 mm) 7/16" (≈11 mm) BES (x4) AAB (x4) 2.13 • Secure the left hinge to the side panel using the hardware provided. Repeat the last step for the right hinge. •...
- Page 22 SECTION 2 (CONTINUED) / SECTION 2 (SUITE) SECCIÓN 2 (CONTINUACIÓN) TOOLS AND HARDWARE REQUIRED / OUTILS ET QUINCAILLERIE REQUIS INSTRUMENTAL Y HERRAJE REQUERIDOS AKF (x2) 2.14 • Orient the gas spring (AKF) as shown, and press until the ball studs snap into place in the ends of the spring. •...
-
Page 23: Additional Warnings
ADDITIONAL WARNINGS / AVERTISSEMENTS SUPPLÉMENTAIRES / ADVERTENCIAS ADICIONALES • The gas spring helps prevent the automatic closing of the lid. Do not open the lid more than 90°. • Le piston aide à empêcher le fermeture automatique du couvercle. N’ouvrer le couvercle que 90°. •... - Page 24 NOTES / REMARQUES / NOTAS...
- Page 25 NOTES / REMARQUES / NOTAS...
- Page 26 NOTES / REMARQUES / NOTAS...
-
Page 27: Cleaning & Care
LIMPIEZA Y CUIDADO Felicidades por la compra de su producto Lifetime®. Al seguir las siguientes instrucciones, su nuevo producto Lifetime le brindará años de servicio y satisfacción. Los paneles de polietileno son resistentes a las manchas y solventes. La mayoría de las manchas puede removerse usando un jabón suave y un cepillo de cerdas suaves. -
Page 28: Registration
à des tiers, et ne leur permettra pas d’utiliser vos données personnelles à leurs propres fi ns. Nous vous invitons à lire notre politique de confi dentialité à www.lifetime.com (en anglais seulement) ENREGISTRER CE PRODUIT aujourd’hui! REGISTRAR EL PRODUCTO EN LÍNEA EN WWW.LIFETIME.COM... -
Page 29: Warranty
This warranty is expressly in lieu of all other warranties, expressed or implied, including warranties of merchantability or fi tness for use to extent permitted by Federal and state law. Neither Lifetime Products, Inc., nor any representative assumes any other liability in connection with this product. This warranty gives you specifi c legal rights, and you may also have other rights which vary from state to state. - Page 30 à cette condition et aucun représentant de la société ne peut renoncer à l’application de cette politique ou la modifi er. Ce produit n’est pas destiné à des fi ns institutionnelles ou commerciales; Lifetime Products, Inc. n’assume aucune responsabilité à cet égard. Toute utilisation institutionnelle ou commerciale annule la garantie.
- Page 31 NO ESTÁN DISPONIBLES O SON OBSOLETAS. El comprador original recibe una garantía de que los productos de césped y jardín de Lifetime están libres de defectos de material o mano de obra durante un período de 10 años a partir de la fecha de compra original al por menor.
- Page 32 ® AMÉLIORER VOTRE ACHAT LIFETIME EN AJOUTANT DES ACCESSOIRES OU DES AUTRES PRODUITS ® Pour acheter des accessoires ou des autres produits Lifetime , visiter le : www.lifetime.com Ou composer au 1-800-424-3865 Du lundi au vendredi 7 h – 17 h (HNR) et samedi 9 h – 13 h (HNR) (Français) ®...
Need help?
Do you have a question about the 60254 and is the answer not in the manual?
Questions and answers