
Related Manuals for Spirit XT175


Summary of Contents for Spirit XT175
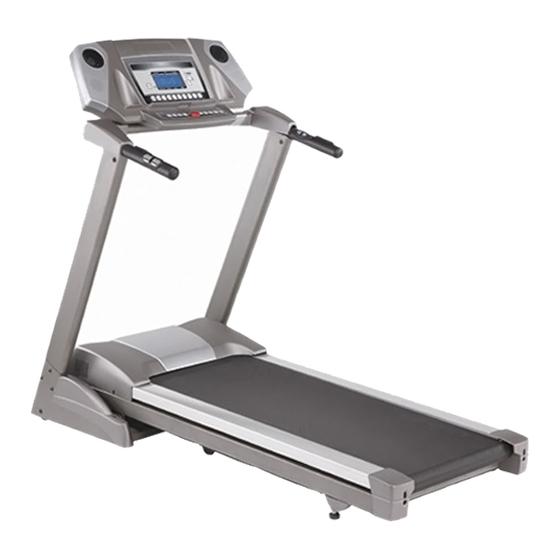
- Page 1 OWNER’S MANUAL PLEASE CAREFULLY READ THIS ENTIRE MANUAL BEFORE OPERATING YOUR NEW TREADMILL!
-
Page 2: Table Of Contents
Target Heart Rate Using a Heart Rate Transmitter Heart Rate Control Operation General Maintenance. Service Checklist - Diagnosis Guide Manufacturer s Limited Warranty .. 3 .. 4 .. 20 .. 22 .. 23 .. 26 . 27 XT175 / XT275... -
Page 3: Product Registration
Through your dealer, Spirit will do all we can to make your ownership experience as pleasant as possible for many years to come. The local dealership where you purchased this treadmill is your administrator for all Spirit warranty and service needs. -
Page 4: Important Safety Instructions
Important Safety Instructions WARNING - Read all instructions before using this appliance. DANGER - To reduce the risk of electric shock disconnect your Spirit treadmill from the electrical outlet prior to cleaning and/or service work. WARNING - To reduce the risk of burns, fire, electric shock, or injury to persons, install the treadmill on a flat level surface with access to a 120-volt, 15-amp grounded outlet. -
Page 5: Important Electrical Information
Whenever the adapter is used, it must be held in place by a metal screw. Grounded Outlet Grounding Pin Grounded Outlet Box Adapter Tab of Grounding Metal Screw Screw XT175 / XT275... -
Page 6: Important Operation Instructions
NEVER mount or dismount the treadmill while the belt is moving. Spirit treadmills start with at a very low speed and it is unnecessary to straddle the belt during start up. Simply standing on the belt during slow acceleration is proper after you have learned to operate the unit. - Page 7 Assembly Pack Check List (XT175 / XT275) 5/16 x 19 x 1.5T Curved Washer (4 pcs) M5 x 5/16 x15m/m Button Head Socket Bolt (14 pcs) Phillips Head Screw (6 pcs) Lubricant (1pc) Safety Key (1pc) Combination M5 Allen Wrench M6 Allen Wrench (1pc) &...
-
Page 8: Assembly Instructions
Assembly Instructions (XT175 / XT275) Assembly STEP 1 Remove all parts from the carton. - Page 9 Assembly Instructions (XT175 / XT275) XT175 / XT275...
-
Page 10: Folding & Transport Instructions
*At the rear roller area to relieve pressure on the locking system. Transport The treadmill is equipped with four transport wheels that are engaged when the treadmill is folded. After folding simply roll the treadmill away. XT175 / XT275... -
Page 11: Operation Of Your New Treadmill
0.5 mph, the time will count up from zero and all data will begin accrual. You can adjust the speed and elevation manually by pressing the desired speed and elevation buttons or the quick keys. Press stop to end workout. XT175 / XT275... - Page 12 5 preset buttons for rapid speed: 2Mph, 4Mph, 6Mph, 8Mph, 10Mph. You can press the 5 buttons, mentioned above, at any time during a program and the treadmill will automatically adjust to the preset speed. 10 mph. XT175 / XT275...
- Page 13 14, just smaller. After adjusting the top speed, press enter. Step 4. Press the START button to start training. Press the Fast / Slow buttons to adjust the speed or press the up / down button to adjust the incline. You can also use the Rapid XT175 / XT275...
- Page 14 Step 4. Press the START button to start training. You can make changes in speed and incline during a User program and these changes will be saved to the program at the end of the workout. XT175 / XT275...
- Page 15 SPEED PROFILE P1 SPEED PROFILE P2 SPEED PROFILE P3 SPEED PROFILE P4 SPEED PROFILE P5 SPEED PROFILE INCLINE PROFILE P1 INCLINE PROFILE P2 INCLINE PROFILE P3 INCLINE PROFILE P4 INCLINE PROFILE P5 INCLINE PROFILE XT175 / XT275...
-
Page 16: Getting Started
STEP 3: To slow tread-belt press and hold the Slow key (console or handgrip) to the desired speed. You may also press the rapid speed adjust keys, 2 through 10. STEP 4: To stop the tread-belt press Stop key or pull away Safety key. XT175 / XT275... -
Page 17: Incline Feature
The 1/4-mile track will be displayed around the dot matrix window. The flashing dot indicates your progress. Once the 1/4-mile is complete this feature will begin again. The number of completed laps is displayed in the laps window, which is below the PULSE window. (Program Operation): XT175 / XT275... - Page 18 (about as much as your television when it is turned off). (2) Remove tether cord. (3) Turn of the main switch on the front of the treadmill, below the motor cover. XT175 / XT275...
- Page 19 (if desired). Press ENTER key. This is a must to continue even if time is not adjusted. STEP 3: The Calorie window will now be blinking a bodyweight value. Enter your bodyweight and press Enter. STEP 4: The Calorie window will now be blinking an Age value. Adjust the age and press enter. XT175 / XT275...
- Page 20 The first column will be blinking again. This is for the incline programming. Repeat the above process to program all segments for incline. STEP 6: Press the Start button to begin the workout and also save the program to memory. XT175 / XT275...
-
Page 21: Target Heart Rate
Maximum Heart Rate on a schedule approved by your physician. Consult your physician before participating in any exercise program. With all Spirit Heart Rate Control treadmills, you may use the heart rate monitor feature without using the Heart Rate Control program. This function can be used during manual mode or during any of the nine different programs. -
Page 22: Using A Heart Rate Transmitter
REGISTERING PROPERLY ON THE TREADMILL’S DISPLAY! Special Operations of Heart Rate Functions: All Spirit treadmills that are factory equipped with a Heart Rate Control system have many distinct features both in the Heart Rate Control program and during heart rate monitoring. This section will give you a more detailed background to use your treadmill in the most effective manner. -
Page 23: Heart Rate Control Operation
STEP 4: The Pulse window will now be blinking showing age. Adjust and press enter or press enter to accept default. STEP 5: The Time window will now be blinking. Adjust the time and press enter. STEP 6: Press Start to begin program. XT175 / XT275... -
Page 24: General Maintenance
Allen bolts an equal amount of turns. The tracking adjustment should be made by turning both bolts clockwise no more than a 1/4 turn at a time. DO NOT OVERTIGHTEN failure. Over tightening will cause belt damage and premature bearing Tracking / Tension Adjustment XT175 / XT275... - Page 25 Proper belt tracking is an owner responsibility common with all treadmills. ATTENTION: DAMAGE TO THE RUNNING BELT RESULTING FROM IMPROPER TRACKING / TENSION ADJUSTMENTS IS NOT COVERED UNDER THE SPIRIT WARRANTY. XT175 / XT275...
- Page 26 Spirit. There are commercially available lube kits, but the only one currently approved by Spirit is Lube-N-Walk. These kits come with an application wand that makes applying the lubrication easier. The kits can be purchased from Spirit or directly from Lube-N-Walk here: http://www.jadfitness.com/...
-
Page 27: Service Checklist - Diagnosis Guide
If an extension cord is required it should be as short as possible and heavy duty 16 gauge minimum. Low household voltage. Contact an electrician or your Spirit dealer. A minimum of 110 volt AC current is required. -
Page 28: Manufacturer S Limited Warranty
3. If there is a question as to where to obtain service, contact our service department at (870) 935-1107. 4. If no local service is available, Spirit will repair or replace the parts, at Spirit s option, within the warranty period at no charge for parts.