
Subscribe to Our Youtube Channel
Related Manuals for Wouxun KG-S72C


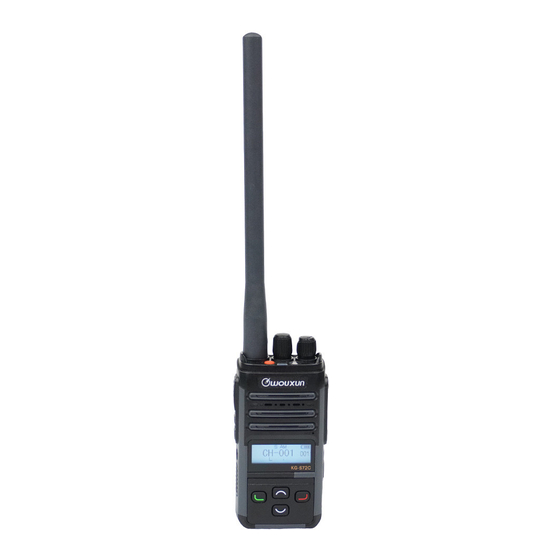
Summary of Contents for Wouxun KG-S72C
- Page 1 Thank you for purchasing the Wouxun KG-S72C portable business radio. Your feedback makes our products better. Please share your thoughts. feedback@buytwowayradios.com www.buytwowayradios.com...
-
Page 2: Table Of Contents
Contents Safety Information ������������������������������������������������������������������������������������ 8 FCC Licensing Information .................12 Getting Started ��������������������������������������������������������������������������������������� 13 Feature Summary ..................13 What’s Included ...................14 Front Panel Guide ..................15 Right / Left Side Guide ................16 Display Guide ....................17 Dust and Water Protection ................18 Installing and Removing the Battery ............19 Charging the Battery ..................19 Antenna Information ..................21 Installing the Belt Clip .................22... - Page 3 Introducing the KG-S72C ................23 Your First Transmit ..................24 Channels and Privacy Codes.................25 Channel Scan ....................27 Priority Channel Scan ..................28 Programmable Key Functions ..............28 Menu Functions ������������������������������������������������������������������������������������� 33 [01: SQUELCH] Squelch ................33 [02: MODE] Modulation Mode ..............33 [03: TX-POWER] Output Power ..............33 [04: CH-DISP] Channel Display Mode ............34...
- Page 4 [08: RX-DCS] Receive DCS Code ..............35 [09: TX-CTCSS] Transmit CTCSS Tone ...........36 [10: TX-DCS] Transmit DCS Code ............36 [11: SCANMODE] Scan Mode ..............37 [12: SCAN-ADD] Scan Add / Delete ............37 [13: SCAN-QT] Tone Scanning Compatibility Check .......38 [14: PRI-SCAN] Priority Scan ..............38 [15: PRI-CH] Priority Channel ..............38 [16: TONESCAN] CTCSS/DCS Scanning ..........39 [17: TONESAVE] CTCSS/DCS Tone Save Options .........39...
- Page 5 [22: ROGER] Roger Beep ................41 [23: BEEP] Button Beeps ................42 [24: VOICE] Voice Guide ................42 [25: BUSYLOCK] Busy Channel Lockout ..........42 [26: CH-NAME] Channel Name ..............43 [27: CH-FAV] Favorite Channel ..............43 [28: CH-ADD] Add Memory Channel ............44 [29: CH-DEL] Delete Memory Channel ............44 [30: STARTUP] Power On Message ............44 [31: ST-MSG] Custom Power On Message ..........45 [32: TIMER] Stopwatch Timer ..............45...
- Page 6 [36: PF1-SHRT] Side Key PF1 Short Press Assignment ......47 [37: PF1-LONG] Side Key PF1 Long Press Assignment ......47 [38: PF2-SHRT] Side Key PF2 Short Press Assignment ......48 [39: PF2-LONG] Side Key PF2 Long Press Assignment ......48 [40: TOP-SHRT] Top Key Short Press Assignment ........49 [41: TOP-LONG] Top Key Long Press Assignment ........49 [42: VOLTAGE] Voltage ................49 [43: RESET] Factory Reset................50...
- Page 7 Default CB Channels and Frequencies ............59 Optional Accessories ������������������������������������������������������������������������������� 60 Limited Warranty ����������������������������������������������������������������������������������� 61...
-
Page 8: Safety Information
Safety Information Safety Information The KG-S72C is an electrical apparatus, as well as a generator of RF (Radio Frequency) energy, and you should exercise all safety precautions as are appropriate for this type of device. Please read the suggestions and warnings below before using the transceiver. - Page 9 Use of other accessories may exceed RF exposure guidelines. Notice ▪ These tips are important for safe operation of your KG-S72C radio and its accessories. If the transceiver does not function normally, please get in touch with your dealer immediately.
- Page 10 Safety Information Caution Please read this manual before using the radio, as it includes important instructions for the safe handling, use and operation of your radio. FCC Compliance This device complies with Part 15 of the FCC Rules. Operation is subject to the follow- ing two conditions: (1) This device may not cause harmful interference, and (2) This device must accept any interference received, including interference that may...
- Page 11 Safety Information Safety Information Note: This equipment has been tested and found to comply with the limits for a Class B dig- ital device, pursuant to part 15 of the FCC Rules. These limits are designed to provide reasonable protection against harmful interference in a residential installation. This equipment generates, uses and can radiate radio frequency energy and, if not installed and used in accordance with the instructions, may cause harmful interference to radio communications.
-
Page 12: Fcc Licensing Information
DO NOT attempt to use the radio with a damaged antenna. FCC Licensing Information The Wouxun KG-S72C is FCC Part 95D type accepted for use on the CBRS. The KG-S72C operates on CB Radio Service (CBRS) frequencies according to the Fed- eral Communications Commission (FCC) Rules in the United States. -
Page 13: Getting Started
Getting Started Getting Started Getting Started Getting Started Feature Summary ▪ ▪ Up to 400 Custom Channels Channel Scan ▪ ▪ 40 CB Channels Priority Channel Scanning ▪ ▪ AM and FM Modes Favorite Channels Function ▪ ▪ Up to 2 Watts Output Power (AM) Superheterodyne Receiver ▪... -
Page 14: What's Included
Getting Started What’s Included Carefully unpack the contents of the box and be sure that you have the items in the list below. If any items are missing or damaged, please contact your dealer. Transceiver High gain antenna Lithium-ion batterypack Intelligent charger Beltclip Handstrap... -
Page 15: Front Panel Guide
Getting Started Getting Started Front Panel Guide Channel Knob Antenna Volume Knob Flashlight Top Key RX/TX LED (Green/Red) Speaker Microphone Display Up Key Menu/Enter Exit/Cancel 4 Key Keypad Down Key... -
Page 16: Right / Left Side Guide
Getting Started Right / Left Side Guide Top Key Short Press: FLASHLT Long Press: CH-DISP Transmit/PTT Key Earphone Jack Short Press: FAVORITE Long Press: SCAN Short Press: MODE USB Charging Port Long Press: MONITOR Note: Defaults are shown for PF1 / PF2 / Top. These buttons can be assigned different functions in the menu. -
Page 17: Display Guide
Getting Started Getting Started Display Guide Battery Save AM/FM Indicator Keypad Lockout CTCSS/DCS Battery Voltage Current Channel Channel Number DT/QT Signal Strength Indicator TX Power... -
Page 18: Dust And Water Protection
Getting Started Dust and Water Protection The KG-S72C is waterproof to IP65 standards. It is dust resistant and rated to with- stand any ingress of solid objects. It can withstand direct jets of water projected by a nozzle (6.3 mm) against the enclosure for a limited period. This radio is dust and water- proof only while the battery is properly installed and locked in place with no gaps and all ports are completely sealed with their port covers. -
Page 19: Installing And Removing The Battery
Charging the Battery The KG-S72C features two charging options for the battery pack. It can be charged using the included desktop charger or the built-in USB-C port on the side of the radio. - Page 20 Getting Started Charging with the Desktop Charger The KG-S72C includes an intelligent desktop charger. It can charge the battery pack with or without the radio attached. 1. Insert the AC plug into an available 100~240v outlet. The LED light on the charger base will flash red for 2-3 seconds.
-
Page 21: Antenna Information
Getting Started Charging with the USB-C Port The KG-S72C can charge the battery from the USB-C charging port on the side of the radio using an optional USB-C cable (not included). The battery pack can be fully charged with a USB cable connected to a USB to AC adapter plugged into an AC outlet or a to a USB port in a vehicle, power bank or computer. -
Page 22: Installing The Belt Clip
Getting Started Warning: To avoid injury, DO NOT attempt to operate your radio if the antenna is damaged or defective. DO NOT attempt to operate your radio without an antenna connected to the radio. Transmitting without an antenna or a correctly tuned antenna directly and properly connected to the radio may damage the radio and void the warranty. -
Page 23: Operation
CB radio. The KG-S72C was designed to take advantage of all that CB has to offer and more. It is easy to use with minimal setup by practically anyone, young or old. Right out of the box this radio is configured to transmit on the 40 CB channels in either AM or FM modes with no special programming required. -
Page 24: Your First Transmit
Your First Transmit Selecting a Channel When you power on your KG-S72C for the first time, the screen will likely display “CB-01” in the center with “001” on the right side. CB-01 is the name of the currently selected channel. 001 is the channel number. Turn the Channel Knob or the [UP] / [DOWN] keys to navigate through the list of channels. -
Page 25: Channels And Privacy Codes
Channels and Privacy Codes Channels The KG-S72C is pre-configured with 40 CB channels, but allows users to create addi-... - Page 26 The KG-S72C can only transmit and receive on frequencies in the CB band. Privacy Codes The KG-S72C supports 50 CTCSS tones and 105 DCS codes in FM Mode, for a total of 155 privacy tones and codes. To successfully communicate between your stations or members of your group, all the connecting radios must be using the same channel and privacy (CTCSS or DCS) code.
-
Page 27: Channel Scan
Operation Channel Scan The KG-S72C has a channel scan feature, which is assigned to the [PF1] key by de- fault. To activate Channel Scan, press and hold the [PF1] key for two seconds or until you hear “Scan Begin”. The radio will scan each channel for activity, starting from the current channel. -
Page 28: Priority Channel Scan
Priority Channel Scanning feature, use the [PRI-SCAN] menu item (page 38). Programmable Key Functions The KG-S72C has two programmable keys called [PF1] and [PF2] located on the left side of the radio below the PTT key. It also has a programmable [TOP] key. Each key... - Page 29 Operation Operation can perform two different functions, one activated with a short press and one with a long press. These functions can be assigned to the [PF1], [PF2] and [TOP] buttons from the menu (page 47-49). They can also be assigned via the programming software.
- Page 30 [TOP] key using the menu (page 47-49). Flashlight The KG-S72C has a built-in LED flashlight at the top of the radio. It is assigned to a short press of the [TOP] key by default, but can be disabled or otherwise assigned to the [PF1], [PF2] or [TOP] key using the menu (page 47-49).
- Page 31 Operation Operation pressing the key will produce an error beep. Channels 9 and 19 are favorite channels by default. The current channel can be activated or deactivated as a Favorite Channel by using the CH-FAV menu option (page 43). The Favorite Channels function is assigned to a short press of the [PF1] by default, but can be disabled or otherwise assigned to the [PF1], [PF2] or [TOP] key using the menu (page 47-49).
- Page 32 Operation can be set for each individual channel. The KG-S72C has two power options: Low (2W) and High (4W). Wattage is approximate. It is preset to 2 watts on all channels and cannot be changed in AM mode, but can be toggled in FM Mode. This function is...
-
Page 33: Menu Functions
Menu Functions Menu Functions Menu Functions Menu Functions [01: SQUELCH] Squelch Function: The squelch function mutes the speaker when no signal is detected. Adjusting the squelch sensitivity allows you to control how strong of a signal is required in order to unmute the speaker. Selecting a lower number will allow weaker signals to be heard, higher numbers require a stronger signal. -
Page 34: [04: Ch-Disp] Channel Display Mode
Menu Functions Function: Sets the transmit power of the radio. The radio has two power optons: Low (2W) and High (4W). Wattage is approximate. Note: the transmit power for CB channels in AM mode is limited to 2 watts and can be used on low power only. -
Page 35: [06: Bat-Save] Battery Saver
Menu Functions Menu Functions be set to turn off imediately or always remain on. Options: OFF/1-30S/ALWAYS Default: 10 Seconds [06: BAT-SAVE] Battery Saver Function: Activate the battery saver feature. When active, the radio will scan less fre- quently for signals, improving battery life. Options: ON/OFF Default: ON [07: RX-CTCSS] Receive CTCSS Tone... -
Page 36: [09: Tx-Ctcss] Transmit Ctcss Tone
Menu Functions Function: Sets the receiving DCS code for the selected channel. Short press the [PF2] key to choose DCS+ or DCS- codes. Use the arrow keys to select your pre- ferred code and then MENU to confirm. Available in FM Mode only. Options: OFF/105 DCS+ Codes/105 DCS- Codes Default: OFF [09: TX-CTCSS] Transmit CTCSS Tone... -
Page 37: [11: Scanmode] Scan Mode
Menu Functions Menu Functions Default: OFF [11: SCANMODE] Scan Mode Function: Scan mode settings Options: TO/CO/SE Default: TO TO: When a signal is detected, scanning stops. Scan will pause to wait for further activity and will then resume if no operation is carried out within 5 seconds. Pressing PTT will transmit on the currently selected channel. -
Page 38: [13: Scan-Qt] Tone Scanning Compatibility Check
Menu Functions [13: SCAN-QT] Tone Scanning Compatibility Check Function: Determines if the incoming transmissions are filtered by CTCSS/DCS tones during scan mode. Available in FM Mode only. Options: ON/OFF Default: OFF [14: PRI-SCAN] Priority Scan Function: Activates scanning of the Priority Channel. During scan, the priority channel will be scanned more frequently. -
Page 39: [16: Tonescan] Ctcss/Dcs Scanning
Menu Functions Menu Functions Options: 400 channels Default: CH 001 [16: TONESCAN] CTCSS/DCS Scanning Function: Scans the incoming signal for CTCSS or DCS tones to identify or confirm the correct tone. This function must be activated while receiving a signal. Available in FM Mode only. -
Page 40: [18: Vox] Voice Activated Transmit
Menu Functions Default: TX BOTH: Saves the scanned tone to both RX and TX settings. RX: Saves the scanned tone to the RX-CTCSS/DCS setting TX: Saves the scanned tone to the TX-CTCSS/DCS setting. [18: VOX] Voice Activated Transmit Function: The VOX function allows you to transmit without pressing the PTT key. The VOX function will detect that you are speaking into the microphone and then automatically begin transmitting. -
Page 41: [20: Tot] Transmit Overtime Timer
Menu Functions Menu Functions [20: TOT] Transmit Overtime Timer Function: When the transmission time exceeds the time set by the Transmit Overtime Timer, the unit will emit an error prompt and stop transmitting. Options: 15-900 seconds (15 second increments) Default: 60 seconds [21: TOA] Transmit Overtime Alarm Function: The Transmit Overtime Alarm warns when the Transmit Overtime Timer (TOT) is about to be exceeded. -
Page 42: [23: Beep] Button Beeps
Menu Functions mode only. Options: OFF/BOT/EOT/BOTH Default: OFF BOT: Sets the roger beep prompt at the beginning of transmission EOT: Sets the roger beep at the end of transmission BOTH: Sets the roger beep at the beginning and end of transmission [23: BEEP] Button Beeps Function: Enables an audio prompt to alert the operator of a key press, input or fault. -
Page 43: [26: Ch-Name] Channel Name
Menu Functions Menu Functions Function: Enabling Busy Channel Lockout prevents the transceiver from transmitting on a selected channel while another station or group is transmitting on it. Options: ON/OFF Default: OFF [26: CH-NAME] Channel Name Function: Allows you to edit the name for the currently active channel. To edit a chan- nel name, press [MENU] and choose the CH-NAME option. -
Page 44: [28: Ch-Add] Add Memory Channel
Menu Functions nels can be activated quickly by using the FAVORITE function. This fea- ture is assigned to the [PF1] key by default. Channels 9 and 19 are favorite channels by default. Options: YES/NO Default: NO [28: CH-ADD] Add Memory Channel Function: Adds a channel to the memory channel list. -
Page 45: [31: St-Msg] Custom Power On Message
Menu Functions Menu Functions Options: MESSAGE/VOLTAGE Default: MESSAGE MESSAGE: Customized Message VOLTAGE: Battery voltage [31: ST-MSG] Custom Power On Message Function: Allows you to customize the Power On Message. To edit the message, press [MENU] and choose the ST-MSG option. the current message will be in edit mode and the first character will flash to indicate it is currently being edited. -
Page 46: [33: Rpt-Rct] Squelch Tone
Menu Functions [EXIT] in standby mode. Press [MENU] to stop the timer. Press the [EXIT], [UP] or [DOWN] keys to exit the timer. Options: ON/OFF Default: OFF [33: RPT-RCT] Squelch Tone Function: Enables or disables the squelch tail sent to the receiving radio at the end of a transmission. -
Page 47: [35: Lockmode] Lock Mode
Menu Functions Menu Functions [35: LOCKMODE] Lock Mode Function: Select which keys are disabled when the radio is locked. Options: KEY/KEY+PTT/KEY+ENC/ALL Default: KEY KEY: Locks the front keypad and [PF1] and [PF2] side keys. KEY+PTT: Locks the front keypad, [PF1], [PF2] and [TOP] keys, and [PTT]. KEY+ENC: Locks the front keypad, [PF1] and [PF2] side keys, and channel knob. -
Page 48: [38: Pf2-Shrt] Side Key Pf2 Short Press Assignment
Menu Functions Function: Assigns a function to the [PF1] side key. A function is assigned to a long button press. Options: OFF/BACK-LT/SCAN/TXPOWER/FLASHLT/MONITOR/VOX/CH- DISP/FAVORITE/MODE Default: SCAN [38: PF2-SHRT] Side Key PF2 Short Press Assignment Function: Assigns a function to the [PF2] side key. A function is assigned to a short button press. -
Page 49: [40: Top-Shrt] Top Key Short Press Assignment
Menu Functions Menu Functions Default: MONITOR [40: TOP-SHRT] Top Key Short Press Assignment Function: Assigns a function to the [TOP] key. A function is assigned to a short button press. Options: OFF/BACK-LT/SCAN/TXPOWER/FLASHLT/MONITOR/VOX/CH- DISP/FAVORITE/MODE Default: FLASHLT [41: TOP-LONG] Top Key Long Press Assignment Function: Assigns a function to the [TOP] key. -
Page 50: [43: Reset] Factory Reset
Menu Functions Options: None Default: None [43: RESET] Factory Reset Function: Resets the transceiver to factory defaults. Options: VFO/ALL Default: VFO VFO: Resets function settings to factory defaults but retains channel parameters. ALL: Resets all of the function settings and channel parameters to factory defaults. -
Page 51: Advanced Operation
Standard and non-standard CTCSS tones and DCS codes are available in FM Mode only. How to Set Non-Standard CTCSS The KG-S72C supports non-standard CTCSS tone in the range of 65.0-255.0Hz with a minimum spacing of 0.1Hz. CTCSS tones are enabled and assigned to a channel using the user programming software. - Page 52 Advanced Operation code with the digit 8 or 9. For example, 680.719 is not a legitimate non-standard DCS code. DCS codes are enabled and assigned to a channel using the user programming software. When entering a non-standard DCS code, add the letter I after the code number to set it as a positive code or the letter N to set it as a negative code.
-
Page 53: Troubleshooting
Troubleshooting Troubleshooting Before assuming your KG-S72C is defective, please check the following list of possi- ble problems and solutions. The RESET option provided in the menu can be used to restore factory standard settings and programming, and will often solve issues. - Page 54 Troubleshooting Problem Solution ▪ Cannot power on Check that the battery pack is attached correctly. ▪ Check that the battery pack is fully charged. ▪ Battery life lower than Be sure the charger indicates the battery is fully expected charged. ▪...
-
Page 55: Technical Information
Technical Information Technical Information Technical Information Technical Information Specifications Entire Radio Frequency Range 26-27 MHz Memory Channels Frequency Stability ±2.5 PPM Work Temperature -30°C~+60°C / -22°F~140°F Antenna Impedance 50Ω Power Supply 7.4VDC Weight 8.32oz / 236g Size 4.53 × 2.14 × 1.36 (in) / 115 × 54.3 × 34.6 (mm) Dust/Waterproof IP65... - Page 56 Technical Information Receiver Transmitter Adjacent Channel RF Carrier Power 2W (AM) / 4W (FM) ≤60dB Selectivity Adjacent Channel ≥60dB ≤65dB Inter-modulation Power ≤84dB Spurious ≤-30dBm Resistance +1~3dB +3dB Audio Response Audio Modulation (0.3~3KHz) (0.3~2.55KHz) Audio Distortion ≤5% Max Frequency ±2.5KHz Offset Output Power 500mW...
-
Page 57: Standard Ctcss And Dcs Tones
The following is a list of the standard CTCSS and DCS tones supported by the KG-S72C in FM Mode. Many radios display a number instead of a specific tone. The number to the left of the tone matches what is used by some manufacturers. - Page 58 Technical Information DCS codes ending in N are positive. Negative DCS codes end in I. The KG-S72C includes 105 positive and 105 negative codes. D462N D627N D023N D074N D165N D261N D356N D464N D631N D025N D114N D172N D263N D364N D465N D632N...
- Page 59 Technical Information Technical Information Default CB Channels and Frequencies The following channels are pre-programmed to default CB frequencies. Frequency Frequency Frequency Frequency CB-01 26.96500 CB-11 27.08500 CB-21 27.21500 CB-31 27.31500 CB-02 26.97500 CB-12 27.10500 CB-22 27.22500 CB-32 27.32500 CB-03 26.98500 CB-13 27.11500 CB-23 27.25500 CB-33 27.33500 CB-04 27.00500 CB-14 27.12500 CB-24 27.23500 CB-34 27.34500 CB-05 27.01500 CB-15 27.13500 CB-25 27.24500 CB-35 27.35500 CB-06 27.02500 CB-16 27.15500 CB-26 27.26500 CB-36 27.36500...
- Page 60 Optional Accessories Optional Accessories Shop Wouxun Accessories: www.buytwowayradios.com/accessories/by-radio-brand/wouxun-radio-accessories.html...
- Page 61 Limited Warranty Limited Warranty Limited Warranty Limited Warranty We warrant this product against defects in material and workmanship as follows: Radio and its original primary components for a period of one (1) year from date of purchase. Accessories (including battery, charger, belt clip, antenna and adapter) for a period of six (6) months from date of purchase.
- Page 62 This warranty is valid only within the United States of America. Note: Product features, specifications and warranty terms are subject to revision by the manufacturer without notice. We are not responsible for unintentional errors or omis- sions on product packaging. Version: KG-S72C-2205-V2...
Need help?
Do you have a question about the KG-S72C and is the answer not in the manual?
Questions and answers