Table of Contents
Advertisement
Quick Links
Quick Installation Guide
Warning
• Only qualified service personnel should install and service this
product to avoid injury.
• Observe all ESD procedures during installation to avoid damaging
the equipment.
1
Preparing tools
Unpack the equipment and make sure the following tools are
available and delivered contents are correct before you begin the
installation procedure.
1-1. User-provided tools
• Anti-static wrist wrap
1-2. Packing List
Item
Description
01
NRU-52S system
3-pin pluggable terminal block
02
Force Recovery Button
4
The force recovery button is reserved for engineering or system
reflash purposes.
Please follow the below steps to boot NRU-52S into recovery mode
for reflash:
1. Make sure the ignition power mode is set to 0.
2. Make sure the system has powered down.
3. Press and hold down the force recovery button.
4. Simultaneously press the power button.
5. After 5 seconds, release the force recovery button.
6. The NRU-52S has booted into force recovery mode and can be
reflashed via the microUSB cable.
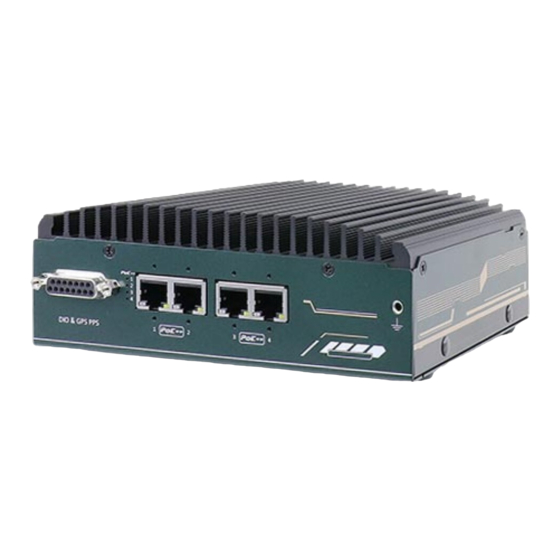
2
NRU-52S Front Panel
NRU-52S
Quantity
1
1
Micro SIM Slot
5
The Micro SIM slot can be coupled with the M.2 B key and five
antenna holes for 4G LTE or 5G NR module expansion.
MicroSD Slot
6
Compatible with standard MicroSD card, the front-accessible slot
allows for easy data storage access or swap the MicroSD card.
3-pin DC Terminal Block
3
The system allows an 8 to 35V DC power input from via a 3-pin pluggable
terminal block. The screw clamping mechanism is a reliable way to wire
DC power. In addition to DC power, this terminal block also accepts
ignition signal input (IGN).
Warning
Please make sure the voltage of DC power is correct before you connect
it to the system. Supplying a voltage over 35V will damage the system.
7
DisplayPort
The system has a DisplayPort (DP) output which is a digital display
interface that mainly connect video source and carry audio to a display
device. When connecting a DP, it can deliver up to 4K UHD (3840 x 2160
@ 30Hz) in resolution. The system is designed to support active DP
adapter/ cable from NVIDIA's recommended display adapters. You may
refer to NVIDIA's page to find more information:
(
https://nvidia.custhelp.com/app/answers/detail/a_id/4449/~/nvidia-
recommended-display-adapter
)
8
USB3.1 Gen1
The system offers two USB3.1 Gen1(SuperSpeed USB) ports on its
front panel. They are backward compatible with USB 2.0, USB 1.1 and
USB 1.0 devices.
Advertisement
Table of Contents

Related Manuals for Neousys Technology NRU-52S


Summary of Contents for Neousys Technology NRU-52S
- Page 1 4. Simultaneously press the power button. 5. After 5 seconds, release the force recovery button. USB3.1 Gen1 6. The NRU-52S has booted into force recovery mode and can be reflashed via the microUSB cable. Compatible with standard MicroSD card, the front-accessible slot allows for easy data storage access or swap the MicroSD card.
- Page 2 485 operations, please refer to the user manual. System Status LED Power Button NRU-52S Series Rear Panel There are three LED indicators on the front panel: IGN, OS and The power button is a non-latched switch for ATX mode on/off PWR.
- Page 3 0 > /sys/class/gpio/gpio446/value The Gigabit PoE ++ port supply power and data on a standard CAT-5 or powering the NRU-52S using an isolated power supply, please make # Set DO0 to 1 better Ethernet cable. Acting as a PSE (Power Sourcing Equipment), sure the chassis grounding point is connected.
Need help?
Do you have a question about the NRU-52S and is the answer not in the manual?
Questions and answers