Table of Contents
Advertisement
Quick Links
Imported by Amart Furniture Pty Ltd, Qld, Brisbane Australia.
For any assistance with assembly or for missing parts please
phone Amart Furniture Ewing Road, Customer Service Free call 1800 351 084
ASSEMBLY INSTRUCTION
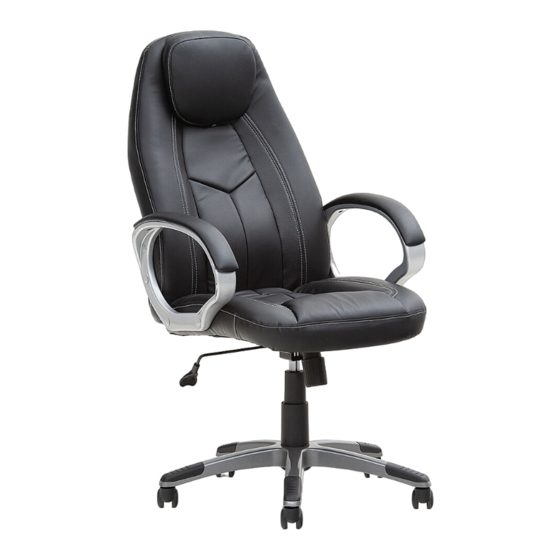
Lucida Office Chair
ITEM CODE:62902
Imported by Amart Furniture Pty Ltd, Qld, Brisbane Australia.
For any assistance with assembly or for missing parts please phone
Amart Furniture Ewing Road, Customer Service Free call 1800 351 084
69.5CM
1-7
62902
Advertisement
Table of Contents

Related Manuals for Amart Furniture Lucida 62902


Summary of Contents for Amart Furniture Lucida 62902
- Page 1 Amart Furniture Ewing Road, Customer Service Free call 1800 351 084 69.5CM Imported by Amart Furniture Pty Ltd, Qld, Brisbane Australia. For any assistance with assembly or for missing parts please phone Amart Furniture Ewing Road, Customer Service Free call 1800 351 084 62902...
- Page 2 PRE-ASSEMBLY PREPARATION Before you start: Choose a clean, level, spacious assembly area. Avoid hard surfaces that may damage the product. Take care when lifting.Product should be assembled as near as possible to the point of use. Ensure that you have all required contents for complete assembly. Always read the assembly instructions carefully before beginning assembly .
- Page 3 PARTS LIST BACK ARMREST (L)&(R) SEAT MECHANISM GAS LIFT GAS LIFT COVER BASE CASTOR rubber plug bolt bolt Φ15mm M8x25mm 8xPCS 8XPCS M6x16mm 4xPCS 62902...
- Page 4 STEP 1: STEP 1: Insert castor 8 to base 7 . STEP 2: Put gas lift 5 into base 7 as instruction shown, then put gas lift cover 6 on gas lift 5 .Remove gas lift cover before assembly. 62902...
- Page 5 STEP 3: Attach mechanism 4 to seat 3 using bolt A. STEP 4: Attach armrest ② to seat ③ and back ① using bolt A.Fasten by allen key. 62902...
- Page 6 STEP 5: Put rubber plug C into armrest bolt holes. STEP 6: Put chair body into gas lift ⑤ 62902...
- Page 7 STEP 9: Assembly is complete. CARE AND MAINTENANCE OFFICE CHAIR DO NOT REMOVE THIS LABEL DO NOT STAND ON THIS CHAIR-DO NOT USE THIS CHAIR AS STEP LADDER. USE THIS PRODUCT ONLY FOR SEATING ONE PERSON AT A TIME. DO NOT USE THIS CHAIR UNLESS ALL BOLTS, SCREWS AND KNOBS ARE FIRMLY SECURED.
Need help?
Do you have a question about the Lucida 62902 and is the answer not in the manual?
Questions and answers