Table of Contents
Advertisement
Available languages
Available languages
Quick Links
MANUAL DE INSTRUCCIONES
INSTRUCTION MANUAL
USM3102-20/ USM3103-20
Microondas integrable en cristal negro 20 litros /
Microondas integrable en cristal blanco 20 litros
Built in black glass microwave 20 litres/
Built in white glass microwave 20 litres
www.universalblue.es
P.I. Media Legua C/Decenio,1 30565
Las Torres de Cotillas (Murcia)
Advertisement
Table of Contents

Related Manuals for universalblue USM3102-20


Summary of Contents for universalblue USM3102-20
- Page 1 MANUAL DE INSTRUCCIONES INSTRUCTION MANUAL USM3102-20/ USM3103-20 Microondas integrable en cristal negro 20 litros / Microondas integrable en cristal blanco 20 litros Built in black glass microwave 20 litres/ Built in white glass microwave 20 litres www.universalblue.es P.I. Media Legua C/Decenio,1 30565...
-
Page 2: Table Of Contents
Microondas integrable en cristal negro 20 litros / Microondas integrable en cristal blanco 20 litros Built in black glass microwave 20 litres / Built in white glass microwave 20 litres ÍNDICE ESPAÑOL 1. INSTRUCCIONES DE SEGURIDAD ..........3 2. CARACTERÍSTICAS DEL PRODUCTO..........7 3. -
Page 3: Español
ESPAÑOL Felicidades por haber adquirido este producto. recomendamos dedique algún tiempo leer cuidadosamente este Manual de Instrucciones / Instalación con el fin de hacer un buen uso del mismo. Lea cuidadosamente todas las instrucciones de seguridad antes de utilizar el aparato y conserve este Manual de Instrucciones / Instalación para poder consultarlo en el futuro. - Page 4 enchufe esté conectado a una toma de tierra correctamente. • Para reducir el riesgo de incendio del microondas: o No cocine demasiado la comida. o Retire los precintos de metal del papel o del plástico aptos de ser usados en microondas antes de colocar las bolsas en el microondas.
- Page 5 o Las patatas, salchichas y castañas son alimentos que deben ser introducidos en el aparato una vez que han sido pelados o por lo menos, perforados antes de la cocción. Los huevos con cáscara o los huevos duros cocinados no tienen que ser calentados en el microondas, ya que podrian explotar, incluso despues del funcionamiento del aparato.
- Page 6 • Si la puerta o las juntas estan dañadas no lo utilice hasta que no sea reparada por un técnico o persona competente. • Si emite humo, apague o desconecte el aparato y mantenga la puerta cerrada para sofocar las llamas. •...
-
Page 7: Características Del Producto
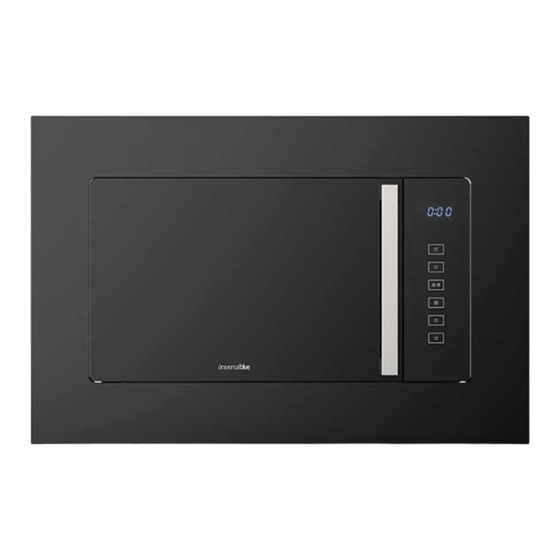
• La puerta o la superficie exterior puede calentarse cuando el aparato esté en funcionamiento. 2. CARACTERÍSTICAS DEL PRODUCTO. USM3102-20 Microondas integrable en cristal negro 20 litros / USM3103-20 Microondas integrable en cristal blanco 20 litros Consumo eléctrico 230V – 50Hz, 1080 W... -
Page 8: Instalación
Panel de control: 3. INSTALACIÓN. • MICROONDAS Saque todo el embalaje. Si hay una película de seguridad sobre el horno, quítela antes de su uso. Compruebe cuidadosamente si hay daños (puerta desalineada o dañada, abolladuras u orificios en la puerta o rejilla o... - Page 9 abolladuras en la cavidad) si hay alguno de estos daños notifíquelo inmediatamente al distribuidor. Los microondas deben ser colocados en ambientes secos y no corrosivos, manténgalo lejos del calor y de la humedad, por ejemplo lejos del quemador de gas o del tanque de agua.
- Page 10 El cable de color verde y Amarillo debe conectarse al • terminal del enchufe marcado con la letra E o con un símbolo de tierra de color verde o verde y amarillo. • El cable de color azul debe conectarse al terminal marcado con la letra N o de color negro.
- Page 11 CÓMO INSTALAR SU MICROONDAS Asegúrese dimensiones del hueco sean de 565 mm de ancho por 365 mm de alto por 550 mm de profundidad. Ponga la placa indicadora en el hueco y ensamble la placa de orientación en la posición tres tornillos.
- Page 12 Introduzca el microondas en el hueco. Por favor, preste atención para dejar el mismo espacio en el lado izquierdo y el lado derecho del armario. A asegúrese de que la placa de orientación se inserte en el soporte de la parte posterior del microondas.
-
Page 13: Funcionamiento
4. FUNCIONAMIENTO ICONO NOMBRE Botón TIEMPO + Botón TIEMPO - Botón MICRO/DESCONGELAR Botón COMBI/GRILL Botón RELOJ/TEMPORIZADOR Botón EMPEZAR/RESETEAR COCINA SIMPLE Únicamente necesita presionar “INICIO/RESETEAR” para comenzar a cocinar durante 1 min con potencia P100. Una vez cocinado escuchará 5 pitidos para recordar que ha terminado. Toque “INICIO/RESETEAR”... - Page 14 o Toque el botón de temporizador “RELOJ/TEMPORIZADOR” para seleccionar el tiempo “10:00”. o Pulse “TIEMPO +” y/o “TIEMPO -” para establecer el tiempo. o Toque el botón “INICIO/RESETEAR” para comenzar. Puede presionar el botón “MICRO/DESCONGELAR” para seleccionar la potencia. La potencia del microondas tiene 5 niveles, los cuales son P100, P70, P50, P30 y P10 desde la más alta a la más baja.
- Page 15 GRILL/PARRILLA Esta función tiene cuatro modos, puede elegir su modo favorito presionando el botón “GRILL/COMBI” . (El tiempo máximo son 60 minutos). La potencia del grill tiene dos niveles, tomando como referencia la potencia del microondas. Son C-1 y C-2 de potencia alta a baja. En grill (el uso del grill va siempre combinado con el de cocina microondas) el cocinado se pausará...
- Page 16 • Presione “RELOJ/TEMPORIZADOR” de nuevo, ajuste los minutos con los botones “TIEMPO +” y “TIEMPO -“ • Presione “RELOJ/TEMPORIZADOR” otra vez y el reloj quedará fijado. • Si quiere cambiar la hora, repita el procedimiento anterior. PROGRAMADOR Esta herramienta le permite seleccionar cuando empieza y termina funcionar el microondas a una hora preestablecida.
-
Page 17: Mantenimiento
INICIO/RESETEAR • Abra la puerta. o Toque el botón “INICIO/RESETEAR” para cancelar el programa de cocción fijado. • Cierre la puerta. o Toque el botón “INICIO/RESETEAR” para empezar a cocinar después de haber seleccionado el programa de cocción. o Toque “INICIO/RESETEAR” para continuar la cocción cuando ésta esté... - Page 18 Si siguiendo las indicaciones arriba detalladas el aparato continúa sin responder, compruebe que no hay ningún fusible fundido o que no ha saltado o que no ha saltado el interruptor eléctrico automático. Si ninguna de las indicaciones anteriores soluciona el problema encontrado, rogamos se ponga en contacto con nuestro servicio técnico.
- Page 19 Nunca utilice detergente duro, gasolina, polvo abrasivo o un cepillo metálico para limpiarlo. No retire la tapa de la guía de ondas. Cuando el microondas se haya utilizado durante mucho tiempo, pueden aparecer algunos olores extraños en el horno, siguiendo 3 métodos puede deshacerse de ellos: •...
-
Page 20: Informacion Inherente Medioambiente
6. INFORMACION INHERENTE MEDIOAMBIENTE Este aparato se ha marcado de acuerdo con la Directiva Europea 2012/19/EU referente eliminación de los Desperdicios de Aparatos Eléctricos y Electrónicos (RAEE). El símbolo del que consta en el aparato indica que el producto al final de su vida útil no se debe tratar como basura doméstica normal, sino que se debe llevar a los centros de recogida diferenciada de desperdicios eléctricos y electrónicos o bien entregar al vendedor... -
Page 21: Servicio Postventa
• Para hacer uso de la garantía acuda al centro donde compró este producto o bien contacte con nosotros de cualquiera de las siguientes formas: A través del email sat@universalblue.es, adjuntando la factura de compra e indicando sus datos de contacto y brevemente qué problema presenta su producto. -
Page 22: English
ENGLISH Congratulations on the purchase of your product. We recommend you to spend some time to read this Instruction Manual in order to fully understand how to use it correctly.. Read all the safety instructions carefully before use and keep this Instruction / Installation Manual for future reference. - Page 23 • If materials inside the oven should smoke or ignite, keep oven door closed, turn oven off and disconnect the power supply. • When heating food in plastic or paper containers, keep an eye on the oven due to the possibility of ignition. •...
- Page 24 • Slowly lift the furthest edge of dishes cover and microwave plastic wrap and carefully open popcorn and oven cooking bags away from the face. • To prevent the turntable from breaking: • Let the turntable cool down before cleaning. •...
- Page 25 • This appliance is intended to be used in household and similar applications only. • The microwave oven is intended for heating food and beverages. Drying of food or clothing and heating of warming pads, slippers, sponges, damp cloth and similar may lead to risk of injury, ignition or fire.
-
Page 26: Product Features
2. PRODUCT FEATURES USM3102-20 Built in black glass microwave 20 liters / USM3103-20 Built in white glass microwave 20 liters Power consumption 230V – 50Hz, 1080 W Output 700 W Grill Heater 800W Operating Frequency 2.450 MHz Outside Dimensions 595 mm (w) x 330 mm (d) x... -
Page 27: Installation
Panel de control: 3. INSTALLATION • MICROWAVE Take out all the packing. If there is a safe film over the oven, take it off before use. Check carefully for damage. If any, immediately notify dealer. Microwave ovens must be placed under dry and non- corrosiveness environments, kept away from heat and humidity, such as gas burner or water tank. - Page 28 To ensure sufficient ventilation, the distance of the back of microwave to the wall should be at least 10 cm, the side to the wall should be at least 15 cm, the free distance above the top surface at least 30 cm. the distance of the microwave to the ground should be at least 85 cm.
- Page 29 • BUILT IN Assamble indicator figure: Indicator plate Orientation plate 4x10 screws Screw cover Screw 4×35 HOW TO INSTALL THE MICROWAVE Ensure that the dimensions of the opening are 565 mm wide by 365 mm high by 550 mm deep.
- Page 30 Place the indicator plate into the hole and assemble the orientation in position with three screws. This position is marked on the indicator plate. Caution: The indicator plate must be aligned with the left edge, the right edge and the front edge. The orientation is shown fixed as picture 3.
-
Page 31: Operation
Once the position is fixed, open the microwave door, you will find a hole in the front of the cavity, screw the screws (4x35mm) to tighten microwave cabinet. Place the screw covers to finish the last step. Attention: The back and bottom of the microwave must maintain a distance of no less than 10 cm from the wall and floor of the kitchen. - Page 32 SIMPLE COOKING You only need touch "START/RESET" to start cooking for 1 min with P100 microwave power. After cooking hev finished you will hear five beeps for remind it has finished. Touch "Start/Reset" to stop. MICROWAVE COOKING • Fast cooking method. (For example: Select P100 power to cook foods for 5 minutes.) o Touch “Time+”...
- Page 33 For example: defrost 0.4kg frozen foods • Touch "MICRO/DEFROST" button to choose defrost function. • Set weight "0.4kg" by touch "Time+" and "Time-" buttons. • Touch "START/RESET" button. Remark: the maximum weight is 2kgs. GRILL/COMBINATION COOKING FUNCTION This function has four modes, you can choose the favourite one by touching the "GRILL/COMBI"...
- Page 34 CLOCK The oven has a 24-hour digital clock. To input the time, for example to 16:30: • Touch “CLOCK/TIMER” , the display will flash, adjust the hour with buttons “Time+” and “Time-“ • Touch "CLOCK/TIMER" again, adjust the minute with buttons "Time +"...
-
Page 35: Manteinance
At 18:15 you will hear 10 beeps and the appliance will be switched off. START/RESET • Open door status o Touch "START/RESET" button to cancel setting or cooking program. • Close door status o Touch "START/RESET " button to start cooking after setting cooking program. - Page 36 If still the microwave is still not working, please check if there is any circuit electric problem. If you don’t find the answer to the problem please contact us directly. CLEANING & MAINTENANCE Warnings: It is hazardous for anyone other than a competent person to carry out any service or repair operation that involves the removal of a cover which gives protection against exposure to microwave energy.
-
Page 37: Environmental Information
able to use the oven in a safe way and understands the hazards of improper use. TIPS FOR CLEANING Exterior: Wipe the enclosure with a dampened soft cloth. Door: Using a dampened soft cloth, wipe clean the door and window. Wipe the door seals and adjacent parts to remove any spill or spatter. -
Page 38: After Sales Service
This appliance requires specialist waste disposal. For further information regarding the treatment, recover and recycling of this product please contact your local council, your household waste disposal service, or the shop where you purchased it. For more detailed information about treatment, recovery and recycling of this product, please contact your local city office, your household waste disposal service or the shop where you purchased the product. - Page 39 • To make use of the guarantee go to the store where you purchased this product or contact us by: • By email, sat@universalblue.es. Please, attach the invoice, add your contact details and explain briefly what the issue is. • By phone, calling us to (0034) 968 893691.
- Page 40 www.universalblue.es...
Need help?
Do you have a question about the USM3102-20 and is the answer not in the manual?
Questions and answers