Table of Contents
Advertisement
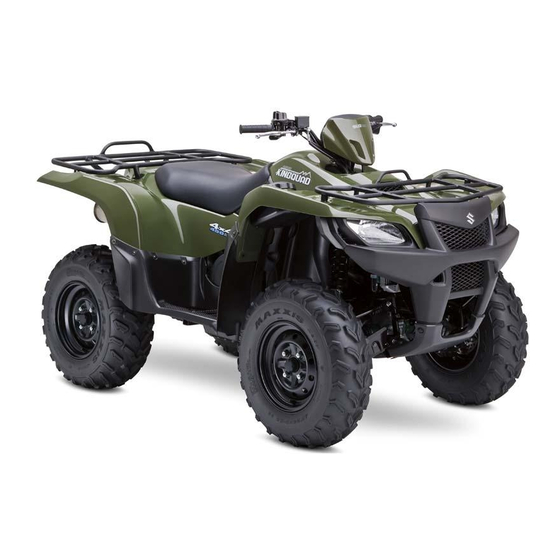
LT-A450X
MANUEL DU PROPRIETAIRE
This owner's manual contains
important safety information.
Please read it carefully.
Never allow anyone under 16
years old to ride this ATV.
OWNER'S MANUAL
HANDLEIDING
Ce 'Manuel du propriétaire contient
des informations importantes
concernant la sécurité.
Le lire soigneusement.
Ne jamais autoriser les enfants
âgés de moins de 16 ans à
piloter ce V.T.T.
Deze handleiding bevat belangrijke
veiligheidsinformatie.
Lees de handleiding zorgvuldig door.
Laat nooit iemand onder 16 jaar
op deze ATV rijden.
Part No. 99011-11H50-01L
July, 2006
EN, FR, DU
TK
Advertisement
Chapters
Table of Contents

Related Manuals for Suzuki LT-A450X 2006


Summary of Contents for Suzuki LT-A450X 2006
- Page 1 LT-A450X OWNER’S MANUAL MANUEL DU PROPRIETAIRE HANDLEIDING This owner’s manual contains Ce ’Manuel du propriétaire contient Deze handleiding bevat belangrijke important safety information. des informations importantes veiligheidsinformatie. Please read it carefully. concernant la sécurité. Lees de handleiding zorgvuldig door. Le lire soigneusement. Never allow anyone under 16 Laat nooit iemand onder 16 jaar years old to ride this ATV.
- Page 2 ENGLISH LT-A450X OWNER’S MANUAL This manual should be considered a permanent part of the vehi- cle and should remain with the vehicle when resold or otherwise transferred to a new owner or operator. The manual contains important safety information and instructions which should be read carefully before operating the vehicle.
- Page 3 IMPORTANT • WARNINGs and CAUTIONs are arranged like this: WARNING/CAUTION/NOTE WARNING - or - CAUTION Please read this manual and follow its instructions carefully. To emphasize This first part will identify a special information, the symbol POTENTIAL HAZARD. and the words WARNING or CAU- TION and NOTE have special mean- This second part will describe...
- Page 4 • Never operate an ATV without wearing an approved motorcycle helmet that fits properly. You should also wear eye protection (goggles or face shield), gloves, boots, long-sleeved shirt or jacket, and long pants. © COPYRIGHT SUZUKI MOTOR CORPORATION 2006...
- Page 5 • Never consume alcohol or drugs • Always follow proper procedures before or while operating this ATV. for climbing hills as described in • Never operate excessive this manual. Check the terrain speeds. Always go at a speed that carefully before you start up any is proper for the terrain, visibility hill.
- Page 6 • Always use proper procedures if • Always be sure there are no you stall or roll backwards when obstacles or people behind you climbing a hill. To avoid stalling, when you operate in reverse. use the proper gear and maintain When it is safe to proceed in a steady speed when climbing a reverse, go slowly.
-
Page 8: Table Of Contents
TABLE OF CONTENTS FUEL, OIL AND ENGINE COOLANT RECOMMENDATION CONTROLS, EQUIPMENT AND ADJUSTMENTS RIDING YOUR ATV ACCESSORY USE AND VEHICLE LOADING INSPECTION AND MAINTENANCE TROUBLESHOOTING PREPARATION FOR WINTER RIDING TRANSPORTING CLEANING PROCEDURE AND STORAGE PROCEDURE CONSUMER INFORMATION SPECIFICATIONS INDEX... -
Page 10: Fuel, Oil And Engine Coolant Recommendation
FUEL, OIL AND ENGINE COOLANT RECOMMENDATION FUEL ........................1-2 ENGINE OIL ......................1-3 DIFFERENTIAL GEAR OIL ................. 1-4 ENGINE COOLANT SOLUTION ................. 1-5 FRONT DIFFERENTIAL GEAR OIL ..............1-6 REAR DIFFERENTIAL GEAR OIL ..............1-6... -
Page 11: Recommendation
Suzuki and may not Oxygenated fuels which meet the be covered under the New Vehicle minimum octane requirement and the... -
Page 12: Engine Oil
Organization Spilled gasoline containing alco- SAE Engine Oil Viscosity hol can harm your ATV. Suzuki recommends the use of SAE 10W-40 engine oil. If SAE 10W-40 Alcohol can damage painted sur- engine oil is not available, select an faces. -
Page 13: Differential Gear Oil
JASO T903 Energy Conserving The JASO T903 standard is an index Suzuki does not recommend the use to select engine oils for 4-stroke of “ENERGY CONSERVING” oils. motorcycle and ATV engines. Motor- Some engine oils which have an API cycle and ATV engines lubricate... -
Page 14: Engine Coolant Solution
ENGINE COOLANT SOLUTION CAUTION Use engine coolant that is compatible with an aluminum radiator, mixed with Spilled engine coolant can harm distilled water at a 50:50 mixture ratio your ATV. for engine coolant solution. An engine coolant mixture other than 50:50 can Engine coolant damage... -
Page 15: Front Differential Gear Oil
FRONT DIFFERENTIAL GEAR OIL REAR DIFFERENTIAL GEAR OIL Use a SAE90 hypoid gear oil which is Use Mobil Fluid 424 or an equivalent. rated GL-5 under the API classifica- tion system. If you normally operate the vehicle where ambient tempera- ture is below 0°C (32°F), use a SAE80 hypoid gear oil. -
Page 16: Controls, Equipment And Adjustments
CONTROLS, EQUIPMENT AND ADJUSTMENTS LOCATION OF PARTS ..................2-2 KEY ........................2-5 IGNITION SWITCH ....................2-6 INSTRUMENT PANEL ..................2-7 SHIFT LEVER ....................2-11 SELECTION SWITCH ..................2-13 LEFT HANDLEBAR ................... 2-15 CHOKE LEVER ....................2-18 HORN SWITCH (Australia and Sweden) ............2-18 EMERGENCY STOP SWITCH (Sweden) ............ -
Page 17: Location Of Parts
CONTROLS, EQUIPMENT AND ADJUSTMENTS LOCATION OF PARTS 1 Rear brake lever 2 Left handlebar switches 3 Speedometer and indicator lights 4 Ignition switch 5 Front brake fluid reservoir 6 Front brake lever 7 Shift lever 8 Throttle lever 9 2WD/4WD/DIFF LOCK selection switch... - Page 18 0 Battery A Fuel tank cap B Seat lock C Recoil starter D Footrests...
- Page 19 E Rear brake pedal...
-
Page 20: Key
WARNING Indicates a potential hazard that could result in injury or death. Two keys come with this vehicle. Keep the spare key in a safe place. An iden- tifying number is stamped on the keys. Use this number when making a replacement key. -
Page 21: Ignition Switch
IGNITION SWITCH CAUTION Leaving the ignition switch in the “ ” position for a long time can damage the ATV’s battery. The battery will run down if the lights are no for a long time when the engine is not running. Always leave the ignition switch in the “OFF”... -
Page 22: Instrument Panel
Reverse Indicator 3 INSTRUMENT PANEL A red light comes on when the shift lever is in reverse gear. The shift posi- tion display 9 also shows “R”. Neutral Indicator 4 A green light comes on when the shift lever is in neutral position. The shift position display 9 also shows “N.”... - Page 23 Shift Position Indicator 9 The shift position indicator indicates shift lever positions: R, N, H and L R: Shift lever is in “R” (Reverse) posi- tion. The reverse indicator 3 also comes on. N: Shift lever is in “N” (Neutral) posi- tion.
- Page 24 Odometer/Trip meter A Clock/Hour Meter/ Fuel Injection Indicator B The display has three functions, clock, hour meter and fuel injection indicator. To change the display, push TRIP A TRIP B ODOMETER the button 7. The display changes between clock and hour meter alter- nately.
- Page 25 D and red indicator light 6 running and bring your vehicle to comes on in following two modes; an authorized Suzuki dealer. If the engine stalls, try restarting the A. The symbol mark “FI” D and the engine after turning the ignition red indicator light 6 comes on switch off.
-
Page 26: Shift Lever
SHIFT LEVER When the display indicates “CHEC”, check following items; • Make sure that the engine stop switch is in the “” position. If the display still indicates “CHEC” after above procedure, inspect the ignition fuse and connection of lead wire couplers. - Page 27 NOTE: Shift the shift lever into neutral WARNING before turning off the engine when parking the vehicle on an incline. If Operating the shift lever from Neu- you parked on an incline with shift tral without applying the brake can lever in H, L or R position, vehicle be hazardous.
-
Page 28: Selection Switch
SELECTION SWITCH WARNING Shifting the selection switch when the ATV is moving can be hazard- ous. Removing a hand while riding can lose control. Shifting the selection lever while ATV is moving can damage the shifting mechanism. Always come to a complete stop before shifting. - Page 29 DIFFERENTIAL LOCK 2WD: Engine power is supplied only DIFFERENTIAL LOCK: Engine to the rear wheels. Use this position power is supplied to the front and rear for normal riding on dry, hard sur- wheels. Since the front differential faces. gear is locked, all wheels will always turn at the same speed.
-
Page 30: Left Handlebar
NOTE: The selection lever can only LEFT HANDLEBAR be shifted into the DIFFERENTIAL LOCK position if the switch is in the 4WD position. NOTE: • When the switch is set to “DIFF LOCK”, the differential gear lock indicator will blink until the differ- ential gear is locked. - Page 31 Override Switch 5 The override switch allows the rider to increase the power available by over- riding the normal speed limiter in for- ward Differential Lock or Reverse. For example, the rider may need to use extra power when stuck in the mud. To override the normal speed limiter the rider must push the override but- ton and hold it in.
- Page 32 WARNING CAUTION Going too fast in “R” (Reverse) Engaging the starter motor for can be hazardous. more than five seconds at a time can damage the ATV. Going too fast in “R” (Reverse) with override switch on can cause The starter motor and wiring har- a loss of control and accident ness may overheat.
-
Page 33: Choke Lever
CHOKE LEVER HORN SWITCH (Australia and Sweden) This ATV has a choke system to pro- vide easy starting when the engine is Push the button to sound the horn. cold. When starting a cold engine, turn the choke lever all the way to the left. -
Page 34: Emergency Stop Switch (Sweden)
EMERGENCY STOP SWITCH RIGHT HANDLEBAR (Sweden) Front Brake Lever 1 Apply the front brake by squeezing This switch consists of a plastic cap the front brake lever towards the grip. fitted over a plastic switch body. When the cap is removed from the switch Throttle Lever 2 body, the engine can not be started. -
Page 35: Throttle Limiter
THROTTLE LIMITER REAR BRAKE PEDAL Use the throttle limiter to restrict max- Pressing the rear brake pedal will imum engine power by limiting throttle apply the rear brake. lever travel. Adjust this limiter accord- ing to the rider’s skill and experience. NOTE: The rear brake may also be applied by squeezing the rear brake To adjust the throttle limiter:... -
Page 36: Recoil Starter
RECOIL STARTER NOTE: • The engine can be started in any gear if you squeeze the rear brake lever until the interlock switch clicks. • Switch off the headlight when starting the engine with the recoil starter. The recoil starter is used to start the engine if the battery is weak. -
Page 37: Fuel Tank Cap
FUEL TANK CAP WARNING Overfilling the fuel tank can be hazardous. If you overfill the fuel tank, fuel may overflow when it expands. Fuel expands due to engine heat or heating by the sun. Fuel that overflows can catch fire. Stop adding fuel when the fuel To open the fuel tank cap. -
Page 38: Seat Lock
SEAT LOCK WARNING Improperly installing the seat can be hazardous. Failure to install the seat properly could allow the seat to move and cause loss of rider control. Make sure to properly position and securely attach the seat when you install it. -
Page 39: Front And Rear Suspension Adjustment
FRONT AND REAR SUSPENSION ADJUSTMENT FRONT Front: Position 2 Rear: Position 2 WARNING REAR Unevenly adjusting the right and left front suspensions can be haz- ardous. Making one spring stiffer than the other will result in handling prob- lems that may cause an accident. Adjust the right and left springs to the same pre-load setting. -
Page 40: Flag Bracket
FLAG BRACKET A bracket is provided so you can Small and light articles such as the mount a flag on your vehicle. owner’s manual, rain gear or a wind breaker can be placed in the box. 2-25... -
Page 41: Front Fender Box
FRONT FENDER BOX Small and light articles such as gloves, maps, or sealed food pack- ages can be placed in the front fender box. WARNING Carrying fuel in the front fender box can be hazardous. The fender box is designed for carrying dry, light articles. -
Page 42: Riding Your Atv
RIDING YOUR ATV WHAT YOU SHOULD KNOW BEFORE RIDING ..........3-2 INSPECTION BEFORE RIDING ................3-3 WHAT TO WEAR ....................3-6 BREAK-IN ......................3-7 STARTING THE ENGINE ..................3-8 STARTING OFF AND SHIFTING ................ 3-9 BRAKING ......................3-14 TURNING ......................3-15 SKIDDING OR SLIDING .................. -
Page 43: What You Should Know Before Riding
RIDING YOUR ATV WARNING WARNING Operating this ATV after consum- ing alcohol or drugs can be haz- Indicates a potential hazard that ardous. could result in injury or death. Alcohol and drugs could seriously affect your judgment and cause you to react more slowly. -
Page 44: Inspection Before Riding
Protect your riding areas. When you INSPECTION BEFORE RIDING ride, remember to keep the terrain in WARNING good condition. Don’t destroy plant life. Don’t litter and don’t bother wild- life. With your help, your riding areas Failure to inspect the ATV before can remain open for you to use in the operating it can be hazardous. - Page 45 Check the condition of the ATV to WARNING help make sure that you do not have mechanical problems, or you might Operating this ATV with improper get stranded somewhere when you modifications can be hazardous. ride. Before riding the ATV, be sure to check the following items.
- Page 46 WHAT TO Throttle 1. Proper cable play CHECK FOR: CHECK 2. Smooth response 3. Quick return to idle Steering 1. Smoothness position 2. No restriction of movement Shift lever 1. No damage 3. No play or looseness 2. Smooth operation Brakes 1.
-
Page 47: What To Wear
WHAT TO WEAR A helmet is the most important piece of gear you should wear. A helmet WARNING can help prevent a serious head injury. Choose a helmet that fits snugly. Ask your dealer for help in Operating this ATV without wear- ing an approved motorcycle hel- selecting a good quality helmet that fits properly. -
Page 48: Break-In
BREAK-IN Allow the Engine Oil to Circulate Before Riding The first month is the most important Allow enough idling time after warm in the life of your vehicle. Proper oper- or cold engine starting before revving ation during this break-in period will the engine or placing the transmission help assure maximum life and perfor- in gear. -
Page 49: Starting The Engine
STARTING THE ENGINE When the Engine is Cold: 1. Move the choke lever all the way Before attempting to start the engine, to the left. make sure to follow these steps. 2. Close the throttle completely and push the electric starter button or 1. -
Page 50: Starting Off And Shifting
When a Engine is Hard Start: STARTING OFF AND SHIFTING Open the throttle 1/8 and push the WARNING electric starter button or use the recoil starter as described above to start the engine. Carrying a passenger on this ATV can be hazardous. - Page 51 WARNING WARNING Operating this ATV on paved sur- Operating this ATV on public faces, including sidewalks, paths, streets, roads or highways can be parking lots, driveways, hazardous. streets can be hazardous. You can collide with another vehi- ATV tires are designed for off-road cle if you ride on public roads.
- Page 52 WARNING WARNING Operating this ATV at excessive Attempting wheelies, jumps, and speeds can be hazardous. other stunts can be hazardous. Riding excessive speeds Stunt riding increases the chance increases your chances of losing of an accident, including an over- control of the ATV, which can turn.
- Page 53 WARNING WARNING Removing your hands from the Failure to use extra care when handlebars or feet from the foot- operating on excessively rough, rests during operation can be haz- slippery, or loose terrain can be ardous. hazardous. If you remove even one hand or Failure to use extra care can foot from the ATV, you can reduce cause loss of traction or vehicle...
- Page 54 Place your feet on the footrests. Plac- WARNING ing a foot on the footrest board area can interfere with rear brake pedal Failure to use extra care when operation and weight shifting. operating this ATV on unfamiliar terrain can be hazardous. After making sure that the engine is warm, apply the rear brake and shift You can come upon hidden rocks,...
-
Page 55: Braking
BRAKING WARNING To stop the vehicle, first release the throttle lever. Next, apply the front and Braking on hills when in 4WD can rear brakes evenly and at the same be hazardous. time. When in 4WD, using either the ... -
Page 56: Turning
TURNING To turn the vehicle, use the following technique: WARNING • Turn the handlebars in the direc- tion of the turn. • Shift body weight slightly forward Turning the ATV improperly can be hazardous. and support your weight on the outer footrest. -
Page 57: Skidding Or Sliding
SKIDDING OR SLIDING OPERATION ON HILLS WARNING WARNING Skidding or sliding improperly can Operating this ATV on excessively be hazardous. steep hills can be hazardous. You may lose control of your ATV, The ATV can overturn more easily or regain traction unexpectedly, on extremely steep hills than on which may cause the ATV to over-... - Page 58 Climbing a Hill To climb a hill with the vehicle, follow the directions below. WARNING 1. Shift the shift lever into L (low) position. 2. Speed up and maintain a steady Climbing hills improperly can be speed before reaching the bottom hazardous.
- Page 59 You may start to climb a hill and may WARNING be unable to make it to the top. If this happens, use the correct procedure Stalling, rolling backwards or described below to turn around to get improperly dismounting the ATV back down the hill.
- Page 60 5. Use one of the following proce- 6. Remount the vehicle, apply the dures to turn the vehicle around. brakes, release the parking brake a. If you are able to, drag the rear ride down hill end of the vehicle around until instructed in the Descending a the vehicle points downhill.
- Page 61 Descending a Hill WARNING WARNING Braking on hills when in 4WD can be hazardous. Going down a hill improperly can be hazardous. When in 4WD, using either the front brake alone or the rear brake Going down a hill improperly can alone will actually brake all four cause loss of control or cause the wheels.
- Page 62 Traversing a Slope When traversing a slope, you should: 1. Lean your body uphill. WARNING 2. Steer slightly uphill, if necessary, to maintain a straight course. Crossing hills or turning on hills improperly can be hazardous. Crossing hills or turning on hills improperly can cause loss of con- trol or cause the ATV to overturn.
-
Page 63: Riding Over Obstacles
RIDING OVER OBSTACLES RIDING THROUGH WATER WARNING WARNING Improperly operating this ATV Operating this ATV through deep over obstacles can be hazardous. or fast flowing water can be haz- ardous. Improperly crossing obstacles can cause loss of control or a colli- The ATV tires may float, causing sion. -
Page 64: Riding In Cold Weather
Using engine power to free up fro- ATV in these conditions, bring it to zen wheels can damage your ATV. your Suzuki dealer to have the brakes inspected and cleaned. Severe damage to the drive train may occur if you use engine power to free frozen wheels. - Page 65 After the brakes thaw, dry them by applying them sev- eral times while riding slowly. If the brakes do not regain full stopping power, have your local Suzuki dealer check them before you continue riding your ATV. 3-24...
- Page 66 Dressing for Cold Weather Riding We strongly recommend that if you do any cold-weather riding, you familiar- WARNING ize yourself with the symptoms, treat- ment, and prevention of hypothermia. Information is available at libraries Operating your ATV in cold and through government agencies.
- Page 67 Riding your ATV on Snow and Ice WARNING WARNING Failure to use extra care when operating on slippery surfaces Riding on snow-covered terrain such as hard-packed snow and ice without care can be hazardous. can be hazardous. The snow may be covering rocks, Failure to use extra care can holes, ice or other hazards that cause loss of traction or loss of...
-
Page 68: Riding In Reverse
RIDING IN REVERSE WARNING WARNING Sudden application of the throttle or making abrupt turns in reverse Improperly riding this ATV in gear can be hazardous. reverse can be hazardous. Throttle surges or abrupt turns You could hit an obstacle or per- could cause you to lose control of son behind you, resulting in the ATV. -
Page 69: Parking
PARKING After stopping the ATV, shift to neu- tral. Neutral position can be confirmed by observing the neutral indicator light. Park the ATV on a flat surface and set the parking brake lock. Turn the ignition switch to the “OFF” posi- tion. -
Page 70: Accessory Use And Vehicle Loading
ACCESSORY USE AND VEHICLE LOADING ACCESSORY USE AND VEHICLE LOADING ........... 4-2 ATV WINCH LEAD WIRES (For Canada) ............4-4... - Page 71 Use caution when choosing and on this ATV. Install and use them installing accessories for your Suzuki. according to their instructions. If Your Suzuki dealer may be able to you have any questions, contact help you choose accessories and your Suzuki dealer.
- Page 72 Accessory Use and Vehicle Loading Guidelines. 1. The combined weight of the rider, gear trailer tongue weight, and any accessories or cargo must never exceed the vehicle’s load capacity of 172 kg (380 lbs). 2. Check accessory mounting brack- ets and other attachment hard- ware to make sure they provide a rigid, non-movable mount.
- Page 73 Suzuki genuine accessory ATV winch, rated line pull: 1134 kg (2500 lbs). The part number of the Suzuki ATV winch for this vehicle is 99000-990YW-016. Consult your Suzuki dealer for details about attach-...
-
Page 74: Inspection And Maintenance
INSPECTION AND MAINTENANCE MAINTENANCE SCHEDULE ................5-2 TOOLS ......................... 5-5 BATTERY ......................5-6 SPARK PLUG ...................... 5-7 FUEL HOSE ......................5-8 THROTTLE CABLE ADJUSTMENT ..............5-9 ENGINE OIL ....................... 5-10 ENGINE OIL AND FILTER CHANGE ..............5-11 AIR CLEANER ....................5-15 AIR CLEANER DRAIN TUBES ................. -
Page 75: Maintenance Schedule
INSPECTION AND MAINTENANCE WARNING Indicates a potential hazard that could result in injury or death. MAINTENANCE SCHEDULE Perform maintenance according to odometer reading or time interval, which- ever comes first. Interval 1000 2000 miles 1200 Item months Air cleaner element –... - Page 76 Interval 1000 2000 miles 1200 Item months – Brake fluid *Replace every 2 years – – Brake hoses *Replace every 4 years Tires – * Steering * Suspensions – – * Chassis nuts and bolts * General lubrication – I: Inspect and clean, adjust, lubricate or replace, if necessary, C: Clean, R: Replace, T: Tighten, L: Lubricate...
- Page 77 Perform maintenance more often than shown in the chart. If you Keep your ATV in good condition. have any questions regarding Ask your Suzuki dealer or a quali- maintenance intervals, consult fied mechanic to do the mainte- your Suzuki dealer.
-
Page 78: Tools
ATV to wear more quickly and may shorten its useful life. When replacing parts on your vehicle, use only genuine Suzuki A tool kit is provided with your ATV. It replacement parts or their equiva- is located under the seat. -
Page 79: Battery
BATTERY CAUTION Exceeding the maximum charging rate for the ATV battery can dam- age your ATV. If you charge the battery at a rate too high, it will decrease the life of the battery. Never exceed the maximum charg- ing rate. The battery is located under the seat. -
Page 80: Spark Plug
Consult your Suzuki dealer if your plug insulator is not a light brown color. CAUTION Improper installation of the spark CAUTION plug can damage your ATV. -
Page 81: Fuel Hose
FUEL HOSE CAUTION Dirt can damage your ATV if it enters an open spark plug hole. Dirt can damage engine parts that move. Cover the spark plug hole while the spark plug is out of the hole. Replace the fuel hose every 4 years, even if they appear to be in good con- dition. -
Page 82: Throttle Cable Adjustment
THROTTLE CABLE ADJUSTMENT WARNING Operating the vehicle with an inadequate throttle cable play can be hazardous. 3.0 – 5.0 mm Inadequate throttle cable play can cause engine speed to rise sud- denly when you turn the handle- bars. This can lead to loss of rider control. -
Page 83: Engine Oil
ENGINE OIL CAUTION Long engine life depends much on the selection of a quality oil and the Operating the vehicle with an periodic changing of the oil. Daily oil incorrect amount of oil can dam- level checks and periodic changes age your ATV. -
Page 84: Engine Oil And Filter Change
ENGINE OIL AND FILTER CHANGE Change the engine oil and oil filter at the scheduled times. The engine should always be warm when the oil is changed so the oil will drain easily. The procedure is as follows: 4. Remove the drain plug 2 from the bottom of the engine and drain the oil into a drain pan. - Page 85 Available from Suzuki dealer Oil filter wrench (Part No. 09915-40610) 6. Turn the oil filter 4 counterclock- wise with a Suzuki “cap type” oil filter wrench or a “strap type” filter wrench of the proper size. 5. Remove the screw and fasteners.
- Page 86 Engine damage may occur if you use oil filter with the wrong design or thread specifications. Be sure to use a genuine SUZUKI oil filter or an equivalent one 7. Wipe off the mounting surface 5 designed for your ATV.
- Page 87 In the position at which the filter Engine damage may occur if you gasket first contacts use oil that does not meet the mounting Suzuki’s specifications. surface. Be sure to use the oil specified in the FUEL, OIL AND ENGINE COOLANT RECOMMENDATION section.
-
Page 88: Air Cleaner
AIR CLEANER CAUTION The air cleaner element must be kept clean to provide good engine power Failure to inspect the air cleaner and gas mileage. If you use your vehi- element frequently if the vehicle is cle under normal, low-stress condi- used in dusty, wet, or muddy con- tions, you should service the air ditions can damage your ATV. - Page 89 Removing the Element 1. Remove the seat. 4. Carefully use an air hose to blow the dust from the air cleaner ele- ment. 2. Remove the fasteners and cover NOTE: Always apply air pressure on the throttle body side of the air cleaner element only.
-
Page 90: Air Cleaner Drain Tubes
AIR CLEANER DRAIN TUBE CAUTION A torn air cleaner element will allow dirt to enter the engine and can damage the engine. Carefully examine the air cleaner element for tears during cleaning. Replace it with a new one if it is torn. -
Page 91: Engine Coolant
ENGINE COOLANT Engine Coolant Level The engine coolant solution should be between “F” (full) and “L” (low) level lines on the engine coolant reservoir. If the level is lower than “L” (low) level line, bring it up to “F” (full) level by adding 50:50 mixture of distilled water and engine coolant. -
Page 92: Gear Oil Change
GEAR OIL CHANGE Inspect and change the gear oil according to the MAINTENANCE SCHEDULE. When changing the gear oil, use specified gear oil described FUEL, ENGINE COOLANT RECOMMEN- DATION section. The procedure for changing the front and rear differen- tial gear oil is as follows: Front differential gear oil 1. -
Page 93: Tires
(Front differential gear) TIRES 5. Reinstall the drain plug and This vehicle is equipped with low tighten it securely after all the oil pressure tubeless tires of the size and has been drained out. Remove type listed below: the bolt 2. Pour fresh oil through the filler hole until the oil flows out Front Rear... - Page 94 Tire Tread Condition Tire Pressure A low pressure gauge is provided in the tool kit, so you can measure the air pressure in your vehicle’s tires. Check the air pressure in all tires before each use of the vehicle. 4.0 mm Improper air pressure can affect han- dling, steering response, traction, tire life and rider comfort.
- Page 95 Have this work done by your Suzuki dealer or a qualified tire repair station. When breaking the tire bead loose from the wheel, be extremely careful not to damage the inner wheel sur- face or the tire bead.
-
Page 96: Front Brake
FRONT BRAKE WARNING WARNING Operating the ATV in harsh condi- tions can be hazardous if you do Failure to properly inspect and not inspect brake wear often. maintain your ATV’s brake sys- tems can be hazardous. Operating in mud, water, sand or other extreme conditions can Improper maintenance of the cause accelerated brake wear. - Page 97 If there is frequent loss with water and seek medical atten- of fluid, take your vehicle to a tion. Wash thoroughly after han- Suzuki dealer for inspection. dling. Solution can be poisonous to animals. Keep out of the reach of children and animals.
- Page 98 2. If you find that the pads are worn to the grooved wear limit line, bring the vehicle to your autho- rized Suzuki dealer to have the brake pads replaced. After inspecting or replacing a brake pads, reinstall the front wheel as described in the FRONT AND REAR WHEEL REMOVAL section.
- Page 99 Replace both pads together. If you need to replace brake pads, have your Suzuki dealer do this work. Inspect and maintain the brake pads as recommended. WARNING Riding this ATV after brake system...
-
Page 100: Rear Brake
REAR BRAKE Brake Pedal Adjust the brake pedal as follows: Adjust the rear brake by adjusting the brake pedal first and then adjust the brake lever. WARNING Misadjusting the rear brake pedal and lever can be hazardous. 20 – 30 mm The rear brake lever and brake pedal operate the rear brake in a complementary manner. - Page 101 Brake lever (Parking Brake) 5. After adjusting the play, check that The rear brake lever play as mea- the rear wheels roll freely with the sured at the lever holder should be 6 brake disengaged, the transmis- – 8 mm (0.2 – 0.3 in) when the lever is sion in neutral and the rear wheels lightly pulled in toward the grip.
-
Page 102: Rear Brake Lining Wear Limit
(Fig.A). 3. If the extension line is out of the limit (Fig.B), have the brake plates replaced by your Suzuki dealer to insure safe operation. 5-29... -
Page 103: Front And Rear Wheel Removal
5. Remove the wheel. To reinstall the not know how to use one, ask wheel, reverse these steps. Use your authorized Suzuki dealer to the tightening torque chart to check the nuts. determine the tightness of the wheel nuts. -
Page 104: Spark Arrester
SPARK ARRESTER The muffler has a spark arrester which must be periodically cleaned to maintain good efficiency. At the inter- vals shown in the maintenance chart, clean the spark arrester as follows. WARNING A hot muffler can harm you. 1. -
Page 105: Drive Shaft Boots
Use only the light bulbs shown in the chart as replacement bulbs. Check the drive shaft rubber boots for damage and grease leak. Ask your Suzuki dealer if replacement is nec- essary. 5-32... - Page 106 HEADLIGHT To replace the headlight bulb, use the following procedure: 4. Unhook the bulb holder spring 4 and pull out the bulb 5. 5. To replace the headlight bulb, reverse above complete 1. Remove the cover 1. sequence. CAUTION Touching the headlight bulb glass with a bare hand may damage the bulb.
- Page 107 BRAKE/TAILLIGHT REVERSING LIGHT (Sweden) Replace the brake/taillight bulb as fol- Replace the reversing light bulb as lows: follows: 1. Remove the screws 1 and the 1. Turn the socket counterclockwise cover 2. and pull it off. 2. Push the bulb in and turn it to the 2.
-
Page 108: Fuses
FUSES The fuses are located under the seat. One 10A and one 15A spare fuses are provided inside the fuse box. The fuses are designed to open when a circuit overload exists in individual electrical system circuits. If any elec- trical system fails to operate, then the fuses must be checked. -
Page 109: Output Terminal
Always replace a blown fuse with Check voltage and wattage before a fuse of the same type and rating. connecting electrical accessories. If the new fuse blows in a short time, consult your Suzuki dealer immediately. 5-36... -
Page 110: General Lubrication
Increase intervals when you use your ATV in severe conditions. Your authorized Suzuki dealer should do general lubri- cation as shown in the MAINTE- NANCE SCHEDULE. CAUTION Lubricating switches can damage your ATV. -
Page 111: Trailer Towing
We strongly advise you to use a genuine Suzuki trailer or an equivalent ATV trailer. 5-38... - Page 112 WARNING WARNING Overloading your trailer can be Riding your ATV without extra hazardous. caution when towing a trailer can be hazardous. An overloaded trailer can affect the handling of the ATV. Trailer towing can affect the han- dling and braking of your ATV. Never overload your trailer.
-
Page 114: Troubleshooting
TROUBLESHOOTING FUEL SUPPLY CHECK ..................6-2 IGNITION SYSTEM CHECK ................6-3... - Page 115 “FI”, showing signs of trouble in the This troubleshooting guide is provided fuel injection system, take your to help you find the cause of some machine to an authorized Suzuki common complaints. dealer. Refer to the “INSTRUMENT PANEL” section for an explanation of CAUTION fuel injection system indicator.
- Page 116 If there is no spark, take your sary. machine your authorized 3. Make sure the fuel valve is not Suzuki dealer. clogged. Also check to be sure the air vent hose connected to the fuel tank is not clogged.
-
Page 118: Preparation For Winter Riding
PREPARATION FOR WINTER RIDING ENGINE OIL CHANGE ..................7-2 SPARK PLUG CHANGE ..................7-2 BATTERY CHECK ....................7-2... - Page 119 ENGINE OIL CHANGE the engine or replace with battery with Use of improper viscosity engine oil a new one. Ask Suzuki dealer or a can result in hard engine starting at qualified mechanic to inspect battery the cold temperature. Clutch dragging...
-
Page 120: Transporting
TRANSPORTING TRANSPORTING ....................8-2... - Page 121 TRANSPORTING CAUTION TRANSPORTING Failure to properly secure the ATV It is best to transport the vehicle in the when transporting it can be haz- normal position. It may also be trans- ardous. ported on its back wheels, but this is not as stable as the normal position.
-
Page 122: Cleaning Procedure And Storage Procedure
CLEANING PROCEDURE AND STORAGE PROCEDURE CLEANING PROCEDURE ................... 9-2 PREPARATION FOR CLEANING ............... 9-2 WASHING YOUR ATV ..................9-3 INSPECTION AFTER CLEANING ............... 9-4 STORAGE PROCEDURE ..................9-4 MAINTENANCE DURING STORAGE ..............9-5 PROCEDURE FOR RETURNING TO SERVICE ..........9-5... -
Page 123: Cleaning Procedure
PREPARATION FOR CLEANING CLEANING PROCEDURE Wash the ATV before any mud dries AND STORAGE on the ATV. PROCEDURE Block or seal the end of the exhaust CLEANING PROCEDURE pipe (muffler) using a piece of plastic A thorough cleaning of your ATV is a wrap, cloth rag or another method to necessary part of maintenance and prevent water from entering the... -
Page 124: Washing Your Atv
WASHING YOUR ATV CAUTION With some care, your ATV can be washed in a similar manner to wash- Improper cleaning can damage the ing an automobile. radiator. NOTE: Avoid spraying or allowing Radiator fins can be damaged by water to flow over the following spraying high pressure water on places: them. -
Page 125: Inspection After Cleaning
For this reason, lected in them. For extended lift of Suzuki recommends that you trust your ATV, lubricate according to this maintenance work to your dealer. “GENERAL LUBRICATION” section. -
Page 126: Maintenance During Storage
ENGINE MAINTENANCE DURING STORAGE Remove the spark plug and pour one Once a month, recharge the battery. tablespoon of motor oil into the spark standard charging rate plug hole. Reinstall the spark plug 1.4A × 5 to 10hr. and crank the engine a few times to spread the oil in the cylinder. -
Page 128: Consumer Information
CONSUMER INFORMATION SERIAL NUMBER LOCATION ................10-2 INFORMATION REGARDING EC-DIRECTIVE ..........10-2 LOCATION OF LABELS ................... 10-3 10-1... - Page 129 INFORMATION REGARDING CONSUMER EC-DIRECTIVE INFORMATION (For European countries) SERIAL NUMBER LOCATION Noise level Noise levels of this ATV measured under related EC Directives are as follows: Regulation Condition Noise level In motion 86 dB(A) 97/24/EC Chapter 9 Stationary 92 dB(A) 77/311/EEC At drivers ear 80 dB(A)
- Page 130 ATV. Do not remove them for any reason. If a label comes off or becomes difficult to read, you can get a replacement by contacting your Suzuki dealer. 1 (For Canada) WARNING AVERTISSEMENT Keep hands, hair, clothing, Garder les mains, les cheveux, les vêtements,...
- Page 131 WARNING UNDER UNDER Operating this ATV if you are under the age of 16 increases your chance of severe injury of death. NEVER operate this ATV if you are under age 16. WARNING Improper ATV use can result in SEVERE INJURY or DEATH WARNING Failure to stop vehicle completely before doing the following could result in your...
- Page 132 WARNING WARNING NEVER ride as a passenger Improper tire pressure or overloading can cause loss of control. Passengers can cause a loss of control, Loss of control can result in severe resulting in injury or death. SEVERE INJURY or DEATH ALWAYS maintain proper tire pressure as shown below.
- Page 133 7 (For Canada) WARNING AVERTISSEMENT NEVER carry passenger on AUCUN passager ne doit monter this carrier or on ATV. sur ce porte-bagages ou ce VTT. MAXIMUM LOAD: 60kg (132 lbs) CHARGE MAXIMUM: 60kg (132 lbs) 7 (Except for Canada) WARNING N E V E R c a r r y p a s s e n g e r...
- Page 134 9 (For Optional trailer hitch) WARNING Exceeding vehicle towing limit could lead to an accident. Reduce speed when towing a trailer. Read owner’s manual for details. Trailer Tongue Weight should be about 10 % of the Gross Trailer Weight, and should not exceed 45 kg (99 lbs).
-
Page 135: Specifications
SPECIFICATIONS DIMENSIONS AND DRY MASS Overall length ..........2115 mm (83.3 in) ... Canada 2135 mm (84.1 in) ... Others Overall width............1210 mm (47.6 in) ... Canada 1215 mm (47.8 in) ... Others Overall height ..........1220 mm (48.0 in) Wheelbase ............1280 mm (50.4 in) Ground clearance.......... - Page 136 CHASSIS Front suspension ..........Independent, double wishbone, coil spring, oil damped Rear suspension ..........Independent, double wishbone, coil spring, oil damped Front wheel travel ..........180 mm (7.1 in) Rear wheel travel..........200 mm (7.9 in) Caster..............1.6° Trail..............3.4 mm (0.13 in) Toe-in...............12 mm (0.47 in) Camber............0.64°...
- Page 137 INDEX ACCESSORY USE AND VEHICLE FLAG BRACKET ......2-25 LOADING......... 4-2 FRONT AND REAR SUSPENSION AIR CLEANER....... 5-15 ADJUSTMENT....... 2-24 AIR CLEANER DRAIN TUBES..5-17 FRONT AND REAR WHEEL ATV WINCH LEAD WIRES REMOVAL ........5-30 (For Canada) ........4-4 FRONT BRAKE ......
- Page 138 KEY..........2-5 SEAT LOCK........2-23 SELECTION SWITCH ....2-13 SERIAL NUMBER LOCATION ..10-2 SHIFT LEVER........ 2-11 LEFT HANDLEBAR ....... 2-15 SKIDDING OR SLIDING....3-16 LIGHT BULB REPLACEMENT..5-32 SPARK ARRESTER ...... 5-31 LOCATION OF LABELS....10-3 SPARK PLUG........5-7 LOCATION OF PARTS ....
Need help?
Do you have a question about the LT-A450X 2006 and is the answer not in the manual?
Questions and answers