
Related Manuals for ADE STAN07


Summary of Contents for ADE STAN07
- Page 1 Operating Manual Industrial Electronic Scales Industrial Indicator STAN07 STAN07-210324-Rev005-UM-en...
-
Page 2: Table Of Contents
Programming the two multi-function keys ..............21 RS232 interface ..........................22 Print the data ........................23 Settings for serial interfaces [dAtA] ................. 24 Data output via serial port (second display or PC)............26 Printer settings ........................26 Date and time input ........................28 STAN07-210324-Rev005-UM-en... - Page 3 Care, maintenance, recalibration ....................29 Cleaning ..........................29 Error messages ........................29 Safety information ......................30 Disposal ..........................30 Storage and Transport Conditions ................... 31 Guarantee ..........................31 Recalibration........................31 Technical Data ..........................31 Declaration of Conformity ......................33 STAN07-210324-Rev005-UM-en...
-
Page 4: Installation And Startup
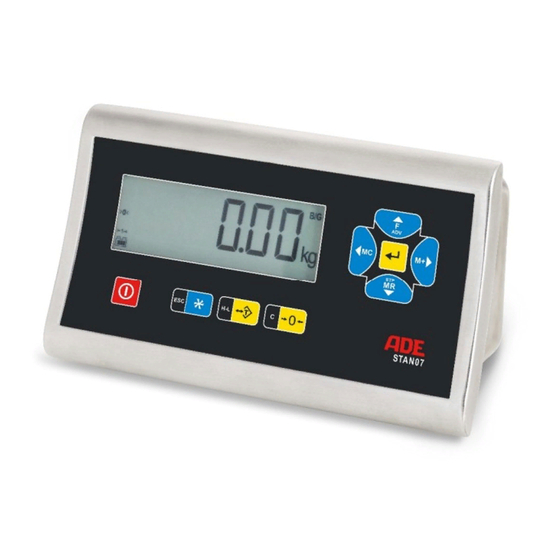
Please note all safety instructions! Assembly The ADE indicator STAN07 is suitable for wall and base mounting and as a standalone unit on a table. The installation of the device will enable the correct reading of the weight values and the ease of use. -
Page 5: Warnings
(see recalibration)! Quality features ADE applies the relevant EC Directives and European standards in order to offer equipment worldwide according to the latest state of the art and with a long service life. Certified scales bear this symbol in accordance with precision class III of the European Directive for calibration. -
Page 6: Display And Key Functions
The compact design and the option of battery operation of the STAN07 make it ideal for portable use. The device is particularly characterized by its ease of use and high performance. -
Page 7: Lcd Display
Addition key for memory: Adds the displayed weight to the weight memory in weighing or counting mode. Key for memory recall: Displays the total accumulated value in weighing or counting mode. Confirmation key. For print output. Confirm input. LCD display STAN07-210324-Rev005-UM-en... -
Page 8: Function
If a weight is displayed in spite of an empty weighing platform, perform manual zeroing by pressing the key. Once the scale is in zero position, the display shows STAN07-210324-Rev005-UM-en... -
Page 9: Weighing With High Resolution
This process can be repeated any number of times (up to 999 repetitions) by pressing the M+ key. After each summing operation, the number of weighings and weight are displayed respectively. STAN07-210324-Rev005-UM-en... -
Page 10: Piece Counting
Start counting pieces with a small reference quantity, e.g. 10 parts, as described above. In a second step, count twice the number of the reference quantity, 20 parts here, and confirm it again as a new reference quantity as described above. In a third step, place the missing 50 parts on the scale and STAN07-210324-Rev005-UM-en... -
Page 11: Sum Function In Piece Counting Mode
By pressing the MR key, the total value will be called up and displayed. To print the total value, press the key as soon as the total value is displayed. To delete the total value, press the MC key and confirm the security query [CLEAr] with STAN07-210324-Rev005-UM-en... -
Page 12: Tolerance Weighing In Weighing And Piece Counting Mode
Target = 1000g, HI = 100g, LO = 50g. Using the navigation keys ▲ and ▼ or ► and ◄, you can change for each PLU/ALU the target value and the HI (for maximum value) and LO (for minimum value) tolerances and store with the key. STAN07-210324-Rev005-UM-en... -
Page 13: Average Piece Weights Apw (Clu)
Using the navigation keys ▲ and ▼ or ► and ◄, the flashing digits can be changed and stored with key. The indicator will automatically return to piece counting mode. STAN07-210324-Rev005-UM-en... -
Page 14: Performing Check Weighing In Weighing Mode
Check weighing can also be supported visually by a colour change of the display. Using three different, changing background colours, the degree of achievement of the target weight can be viewed. The settings are made in the parameter settings. STAN07-210324-Rev005-UM-en... -
Page 15: Conducting Quantity Inspections In Piece Counting Mode
The indicator has a dynamic filter to compensate for animal movements during the weighing process. To determine the weight of animals, place the animal on the weighing platform. Press the key, the display shows [-----] during the measuring period. After determining the weight, the weight is shown in the display. STAN07-210324-Rev005-UM-en... -
Page 16: Switching Between Weight Units
CLOCK (Date and time settings) tESt (System test - for authorized personnel only) To enable the parameter settings, press the key. The selection of parameter settings is done via the navigation keys ▲, ▼, ► and ◄, the confirmation STAN07-210324-Rev005-UM-en... -
Page 17: Storing Target Values - Plu Memory Menu [Plupro]
In this menu item, you can make the basic settings of the audible signal as well as warning tone settings for tolerance weighing and tolerance counts and the keyboard. To configure, hold the key for more than one second until [PLUPrO] appears in the display. Then repeatedly press the ► key until [bUZZEr] appears in the display. STAN07-210324-Rev005-UM-en... - Page 18 Keyboard - warning tone on. By means of the ▲ and ▼ keys, select the desired setting and confirm your choice with to change to the next menu item or press the key to return to the previous menu item. STAN07-210324-Rev005-UM-en...
-
Page 19: Menu Backlight [Blight]
The following diagram shows the procedure: Basic setting of background colour [CoLr] Press the key twice when [bLIGht] appears in the display. [CoLr] appears in the display. STAN07-210324-Rev005-UM-en... -
Page 20: Configuration Menu [Config]
To set the configuration parameters, hold the key for more than one second until the display shows [PLUPrO]. Then repeatedly press the ► key until [COnFIG] appears in the display. The following diagram shows the procedure: STAN07-210324-Rev005-UM-en... - Page 21 By means of the ▲ and ▼ keys, select the desired setting and confirm your choice with to change to the next menu item or press the key to return to the previous menu item. The following diagram shows the procedure: STAN07-210324-Rev005-UM-en...
-
Page 22: Programming The Two Multi-Function Keys
Change the weight units. Animal weighing function. By means of the ▲ and ▼ keys, select the desired setting and confirm your choice with to change to the next menu item or press the key to return to the previous menu item. STAN07-210324-Rev005-UM-en... -
Page 23: Rs232 Interface
The following diagram shows the procedure: RS232 interface The indicator STAN07 has two RS232C interfaces and also an input for taring via an optional footswitch. The RS232C interfaces can be used for connecting a printer, PC or a secondary display. -
Page 24: Print The Data
Animal weighing Print format Weighing mode Piece counting Check weighing mode Form 1 Form 2 Form 3 Form 4 For printers with 16 characters, select the small printer format. With this selection, the data labels are printed as abbreviations. STAN07-210324-Rev005-UM-en... -
Page 25: Settings For Serial Interfaces [Data]
The data output formats for the settings C1 and C2 are further described below. Selection of the baud rate for serial port 1 [br] Press the key twice when [SPOrt1] appears in the display. [br] appears in the display. STAN07-210324-Rev005-UM-en... - Page 26 Selection of the baud rate for serial port 2 [br] Press the key twice when [SPOrt2] appears in the display. [br] appears in the display. To select the baud rate, you have six options: 1200 baud 2400 baud 4800 baud 9600 baud 19200 baud 38400 baud STAN07-210324-Rev005-UM-en...
-
Page 27: Data Output Via Serial Port (Second Display Or Pc)
In this menu, the print format, line feed, printing language, number of printouts, and the printer type can be specified. To make changes, first press the key when the display reads [dAtA] and ► many times until [Print] appears in the display. Confirm with the key. STAN07-210324-Rev005-UM-en... - Page 28 Printer with a narrow print format. Maximum 16 characters per line. Printer with wide print format. Maximum 25 characters per line. Once [tyPE] appears in the display, press the key and select the desired printer type using the ▲ and ▼ keys. STAN07-210324-Rev005-UM-en...
-
Page 29: Date And Time Input
Using the ◄, ►, ▲ and ▼ keys, set the desired date. Using the ◄ and ► keys, select the digit to be changed, and change with ▲ and ▼. Confirm the input with . You automatically go to the next menu item for entering the time. STAN07-210324-Rev005-UM-en... -
Page 30: Care, Maintenance, Recalibration
► key until the display shows [tESt]. Confirm with the key and [iCoUnt] appears. This function is only for authorized personnel! To return to the [tESt] menu, press the key. To return to the weighing mode, press the key again. STAN07-210324-Rev005-UM-en... -
Page 31: Safety Information
Used electrical equipment and batteries do not belong in the domestic waste. Please dispose of defective or old products and batteries with the legal and authorised channels! Please make sure that only discharged batteries or batteries with insulated "poles" are disposed of as otherwise they may short-circuit! STAN07-210324-Rev005-UM-en... -
Page 32: Storage And Transport Conditions
Guarantee ADE will repair or replace this product if there is evidence is that it failed within one year from the date of sale (proof of purchase required) by poor workmanship or defective material. All moving parts, such as batteries, cables, etc. - Page 33 (Depending on the version of the scale) Ambient conditions Temperature range -10°C to + 40°C Humidity Max. 85% non-condensating Housing Dimensions 224 x 134 x 74 mm Net weight 1.5 kg Material Solid stainless steel housing Protection class IP65 STAN07-210324-Rev005-UM-en...
-
Page 34: Declaration Of Conformity
RoHS Directive 2011/65/EC in their respectively applicable versions. The declaration becomes invalid if a change not agreed with us was made to the indicator. Hamburg, March 2021 ADE Germany GmbH Neuer Höltigbaum 15 22143 Hamburg / Germany Manufacturer: ADE Germany GmbH... - Page 35 STAN07-210324-Rev005-UM-en...
- Page 36 Distributor: STAN07-210324-Rev005-UM-en...
Need help?
Do you have a question about the STAN07 and is the answer not in the manual?
Questions and answers