Advertisement
Available languages
Available languages
Quick Links
Advertisement

Subscribe to Our Youtube Channel
Related Manuals for Honeywell Home HE360


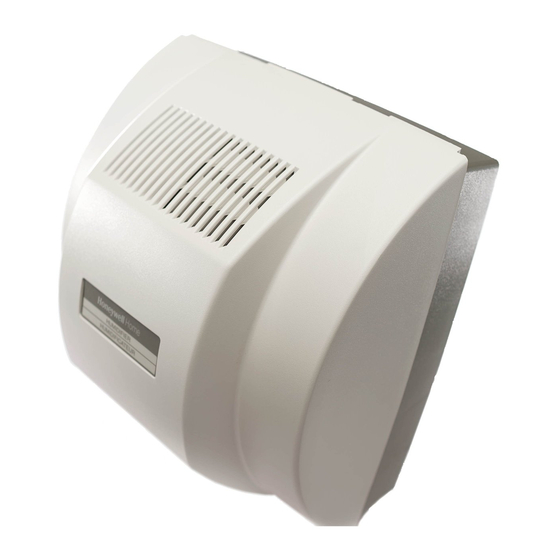
Summary of Contents for Honeywell Home HE360
- Page 1 HE360 Humidifier and Installation Kit INSTALLATION INSTRUCTIONS 69-2629EF-09...
- Page 2 Congratulations! You have just made a great investment in improving the comfort of your home. APPLICATION This kit contains your new HE360 Humidifier, H6062 Humidistat and all the accessories required for installation. INSTALLATION Preparing for the Installation Be sure to identify all the required (Table 1) accessories (included) and make sure the appropriate tools are available before beginning the installation.
- Page 3 HE360 HUMIDIFIER AND INSTALLATION KIT Determining Best Location for Humidifier CAUTION Temperature and Static Pressure Hazard. Can cause property or equipment damage. Locate humidifier where ambient temperature is between 32°F (0°C) and 160°F (71°C). Do not install humidifier where freezing temperatures could occur.
- Page 4 HE360 HUMIDIFIER AND INSTALLATION KIT Selecting Location for Humidistat • Select a location for the humidistat on the return plenum or on the wall in the living space. — Mounting on the return plenum is the easiest installation for the control wiring circuit.
- Page 5 HE360 HUMIDIFIER AND INSTALLATION KIT FEED TUBE NOZZLE WATER DISTRIBUTION TRAY HUMIDIFIER PAD ASSEMBLY HUMIDIFIER HOUSING COVER THUMB ASSEMBLY SCREW M12809A Fig. 3. Disassembling humidifier. 7. Position the securing clips as shown in Fig. 4. TOP VIEW – HUMIDIFIER HOUSING...
- Page 6 HE360 HUMIDIFIER AND INSTALLATION KIT DUCT LEVEL SHEET METAL SCREWS (4) OPENING TO AIR DUCT PLASTIC TABS (2) M20204 DRAIN TUBING Fig. 5. Installing humidifier on duct. 11. Reinstall the humidifier pad assembly in the humidifier housing. IMPORTANT Be sure to reconnect the water feed tube and ensure that the tube is not pinched or kinked.
- Page 7 HE360 HUMIDIFIER AND INSTALLATION KIT SCREW DRIVER WATER LINE M20175 Fig. 6. Installing the saddle valve. 3. Use 1/4 in. (6 mm) OD tubing and connect the saddle valve to the inlet side of the solenoid valve on the humidifier (see Fig. 7).
- Page 8 Fig. 8. Installing the drain tubing. Installing the Pressure Switch NOTE: When a Honeywell Home IAQ thermostat controls the humidifier, the pressure switch is optional because the thermostat can be configured to only run the humidifier with a call for heat.
- Page 9 HE360 HUMIDIFIER AND INSTALLATION KIT 3. The return duct is recommended, however the switch can also be mounted to the supply duct. 4. Cut a 3/4-in. diameter hole in the duct within 10 feet of the switch to ensure the provided tubing reaches the pressure tap elbow.
- Page 10 HE360 HUMIDIFIER AND INSTALLATION KIT Installing the Humidistat 1. Separate wallplate from humidistat. PULL HERE Replace Batt Replace Batt Inside Setting HUMIDITY BOOST Light System Next Auto M34565A Fig. 12. CAUTION Electrical Hazard Can cause electrical shock or equipment damage. Disconnect power before beginning installation.
- Page 11 HE360 HUMIDIFIER AND INSTALLATION KIT 4. Insert the duct tube. Insert the duct tube through the wallplate before securing to the duct. M34671A Fig. 15. 5. Secure the wallplate. Secure the wallplate to the duct with sheet metal screws (provided).
- Page 12 M39012 Fig. 18. Wiring the controls. NOTE: When a Honeywell Home IAQ thermostat controls the humidifier, the pressure switch is optional because the thermostat can be configured to only run the humidifier with a call for heat. 1. Run two, two-strand thermostat wire bundles from the humidifier to the humidistat. Run one, two-strand thermostat wire bundle from the humidistat to the pressure switch.
- Page 13 HE360 HUMIDIFIER AND INSTALLATION KIT Humidified air feels warmer and more comfortable so you may be able to lower your thermostat heating setpoint, which saves money on your heating fuel bills. The end result is that your humidifier gives you a comfortable environment that is also energy efficient.
- Page 14 HE360 HUMIDIFIER AND INSTALLATION KIT FEED TUBE NOZZLE WATER DISTRIBUTION TRAY HUMIDIFIER PAD ASSEMBLY HUMIDIFIER HOUSING COVER THUMB ASSEMBLY SCREW M12809A Fig. 19. Cleaning your humidifier. 7. Disconnect the drain hose from the drain fitting on the bottom of the humidifier housing.
- Page 15 HE360 HUMIDIFIER AND INSTALLATION KIT TROUBLESHOOTING YOUR HUMIDIFIER Table 3. Troubleshooting Humidifier. Problem What to look for What to do Water leakage Leaking joints. Shut off water. Tighten connections. Brass tubing inserts Verify that brass tubing inserts are used. Saddle valve leaking.
- Page 16 © 2022 Resideo Technologies, Inc. All rights reserved. The Honeywell Home trademark is used under license from Honeywell International, Inc. This product is manufactured by Resideo Technologies, Inc. and its affiliates. Tous droits réservés. La marque de commerce Honeywell Home est utilisée avec l’autorisation d’Honeywell International, Inc.
- Page 17 Humidificateurs HE360 et trousse d'installation NOTICE D'INSTALLATION...
- Page 18 également les meubles et les boiseries. Félicitations ! En rendant votre maison plus confortable, vous venez de réaliser un investissement important. APPLICATION Cette trousse comprend un humidificateur HE360 et un humidistat H6062 ainsi que tous les accessoires nécessaires à l'installation. INSTALLATION Avant d'installer ce produit Il est important d'identifier tous les accessoires nécessaires (fournis) énumérés au Tableau 1 et d'avoir sous la...
- Page 19 HUMIDIFICATEURS HE360 ET TROUSSE D'INSTALLATION Choix du meilleur endroit pour l'humidificateur MISE EN GARDE Risques liés à une température ou une pression statique élevée. Peut causer des dommages matériels ou endommager l'équipement. Installer l'humidificateur dans un endroit où la température ambiante se situe entre 0° C (32 °F) et 71 °C (160 °F).
- Page 20 HUMIDIFICATEURS HE360 ET TROUSSE D'INSTALLATION Choix de l’emplacement de l'humidistat • Installer l'humidistat dans le plenum de reprise ou sur le mur d'une pièce occupée. — L'installation du circuit de câblage des commandes est beaucoup plus simple lorsque l'humidistat est installé...
- Page 21 HUMIDIFICATEURS HE360 ET TROUSSE D'INSTALLATION GICLEUR D'ARRIVÉE D'EAU PLATEAU DE DISTRIBUTION D’EAU ENSEMBLE ÉCRAN ÉVAPORATEUR D'HUMIDIFICATEUR BOÎTIER D'HUMIDIFICATEUR COUVERCLE VIS À OREILLES MF12809 Fig. 3. Démontage de l'humidificateur. 7. Placer les pinces de fixation comme l’indique la Fig. 4. VUE DU DESSUS – BOÎTIER DE L’HUMIDIFICATEUR...
- Page 22 HUMIDIFICATEURS HE360 ET TROUSSE D'INSTALLATION GAINE NIVEAU VIS À TÔLE (4) OUVERTURE VERS LA GAINE D'AIR ATTACHES EN PLASTIQUE (2) MF20204 TUYAU DE VIDANGE Fig. 5. Installation de l'humidificateur sur une gaine. 11. Remettre l'ensemble écran évaporateur dans le boîtier de l'humidificateur.
- Page 23 HUMIDIFICATEURS HE360 ET TROUSSE D'INSTALLATION TOURNEVIS CANALISATION D'EAU MF20175 Fig. 6. Installation du robinet-vanne à étrier. 3. Utiliser un tuyau de 6 mm (1/4 po) de diam. ext. pour raccorder le robinet-vanne à étrier à l'entrée de l'électrovanne sur l'humidificateur. (Voir la Fig. 7) a.
- Page 24 Fig. 8. Installation du tuyau de vidange. Installation de Pressostat REMARQUE : Lorsque l’humidificateur est commandé par un thermostat QAI Honeywell Home, le manocontact est facultatif, car le thermostat peut être configuré de manière à ne faire fonctionner l’humidificateur que lors d’une demande de chauffage.
- Page 25 HUMIDIFICATEURS HE360 ET TROUSSE D'INSTALLATION 3. Il est recommandé d'installer le pressostat au conduit de retour, bien qu'il soit aussi possible de l'installer au conduit d'alimentation. 4. Percez un trou d'un diamètre de 3/4 po dans le conduit à moins de 3,05 m du pressostat, afin que la tuyauterie incluse puisse atteindre le coude de la prise de pression.
- Page 26 HUMIDIFICATEURS HE360 ET TROUSSE D'INSTALLATION Installation de l'humidistat 1. Séparez la plaque murale de l’humidistat. TIREZ ICI Replace Batt Replace Batt Inside Setting HUMIDITY BOOST Light System Next Auto MF34565A Fig. 12. CAUTION Risque de choc électrique. Peut provoquer des chocs électriques ou endommager le matériel. Coupez l’alimentation électrique avant d’effectuer le raccordement.
- Page 27 HUMIDIFICATEURS HE360 ET TROUSSE D'INSTALLATION 4. Insérez le tube de la gaine. Insérez le tube de la gaine par la plaque murale avant de fixer à la gaine. M34671A Fig. 15. 5. Fixez la plaque murale. Fixez la plaque murale à la gaine avec des vis à tôle (fournies).
- Page 28 MF39012 Fig. 18. Câblage des appareils. REMARQUE : Lorsque l’humidificateur est commandé par un thermostat QAI Honeywell Home, le manocontact est facultatif, car le thermostat peut être configuré de manière à ne faire fonctionner l’humidificateur que lors d’une demande de chauffage.
- Page 29 HUMIDIFICATEURS HE360 ET TROUSSE D'INSTALLATION FONCTIONNEMENT Fonctionnement de l'humidificateur L'humidificateur fonctionne selon le principe suivant : la vapeur (eau évaporée) se forme lorsque l'air chaud souffle dans un endroit où il y a de l'eau; en circulant, la vapeur fait augmenter l'humidité relative.
- Page 30 HUMIDIFICATEURS HE360 ET TROUSSE D'INSTALLATION À intervalles de 1 à 3 mois (selon la qualité de l'eau) 1. Couper l’alimentation électrique et fermer l’arrivée d’eau de l’humidificateur. 2. Enlever le couvercle de l’humidificateur en débranchant le connecteur et en dévissant la vis à oreilles.
- Page 31 HUMIDIFICATEURS HE360 ET TROUSSE D'INSTALLATION DÉPANNAGE DE L'HUMIDIFICATEUR Tableau 3. Dépannage de l'humidificateur. Problème Ce qu'il faut vérifier Ce qu’il faut faire Fuite d'eau Joints qui fuient. Couper l'alimentation d'eau. Resserrer les raccords. Garnitures de tuyau en Vérifier si les garnitures utilisées sont bien en laiton.
- Page 32 © 2022 Resideo Technologies, Inc. All rights reserved. The Honeywell Home trademark is used under license from Honeywell International, Inc. This product is manufactured by Resideo Technologies, Inc. and its affiliates. Tous droits réservés. La marque de commerce Honeywell Home est utilisée avec l’autorisation d’Honeywell International, Inc.
Need help?
Do you have a question about the HE360 and is the answer not in the manual?
Questions and answers