Advertisement
Quick Links
092767 RevA
OmniPL Retrofit Kit
Automation and Chlorination
Installation Manual
Contents
Before You Begin.........................1
Worksheet..................................2
Installation.................................4
Connection Table........................7
Configuration .............................8
HLXPROUPG
Hayward Industries
400 Connell Drive, Suite 6100
Berkeley Heights, NJ 07922
Phone: (908) 355-7995
www.hayward.com
USE ONLY HAYWARD GENUINE REPLACEMENT PARTS
Advertisement

Subscribe to Our Youtube Channel
Related Manuals for Hayward OmniPL HLXPROUPG


Summary of Contents for Hayward OmniPL HLXPROUPG
-
Page 1: Table Of Contents
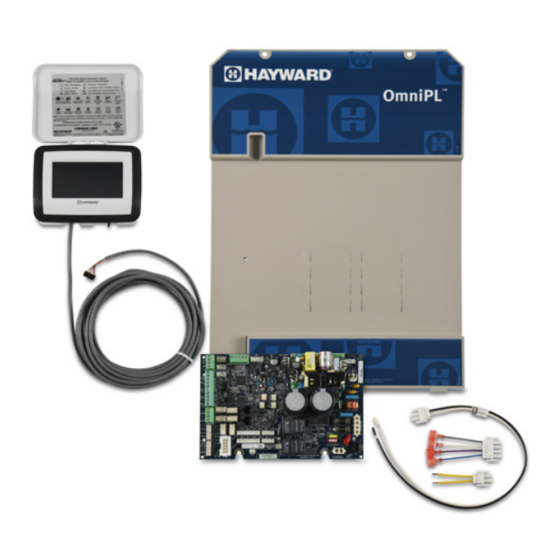
OmniPL Retrofit Kit Automation and Chlorination Installation Manual Contents Before You Begin......1 Worksheet........2 Installation.........4 Connection Table......7 Configuration ......8 HLXPROUPG Hayward Industries 400 Connell Drive, Suite 6100 Berkeley Heights, NJ 07922 Phone: (908) 355-7995 www.hayward.com USE ONLY HAYWARD GENUINE REPLACEMENT PARTS... - Page 2 Compatibility The Hayward OmniPL Retrofit Kit is designed to convert your old ProLogic, AquaLogic or AquaPlus into a web enabled pool automation control with convenient touchscreen interface. The conversion offers the next generation of technology to manage pool/spa equipment, allowing communication to web connected computers and mobile devices.
-
Page 3: Before You Begin
NOTE: The configuration menu automatically “locks” after 2 minutes of no buttons being pressed to prevent unauthorized people from changing the control logic inadvertently and possibly damaging the pool equipment or causing a “call back” to fix the configuration. USE ONLY HAYWARD GENUINE REPLACEMENT PARTS... -
Page 4: Worksheet
(2 speed filter pump) Interlock Enabled Disabled ____________________ Freeze Protection Enabled Disabled name Aux6 Config Function Manual On/Off Timeclock Countdown Timer Solar Low Speed (2 speed filter pump) Interlock Enabled Disabled ____________________ Freeze Protection Enabled Disabled name USE ONLY HAYWARD GENUINE REPLACEMENT PARTS... - Page 5 All Days/Weekends _______to_______ Weekdays _______to_______ Aux4 All Days/Weekends _______to_______ Weekdays _______to_______ Aux5 All Days/Weekends _______to_______ Weekdays _______to_______ Aux6 All Days/Weekends _______to_______ Weekdays _______to_______ Valve3 All Days/Weekends _______to_______ Weekdays _______to_______ Valve4 All Days/Weekends _______to_______ Weekdays _______to_______ USE ONLY HAYWARD GENUINE REPLACEMENT PARTS...
-
Page 6: Installation
Relay wiring - this wiring will plug into Transformer wiring - These blue, purple, white and gray an identical connector on the OmniPL primary transformer wires will be connected to a wiring mainboard. harness that plugs into the OmniPL mainboard. USE ONLY HAYWARD GENUINE REPLACEMENT PARTS... - Page 7 (refer to Step 3). Cut off the spade connectors and strip wires back 0.4”. Insert stripped bare leads down on the lever to secure. into the wire nuts and close the levers to secure. Be sure that no bare wire can be seen coming out of the wire nuts. USE ONLY HAYWARD GENUINE REPLACEMENT PARTS...
- Page 8 The Ethernet port is available if a wired connection to the access point is desired over the built-in wifi. For Ethernet connections, use outdoor rated Cat5e or Cat6 Ethernet cable. Connect one end to the Controller and the other to an available LAN port (not WAN) on the home router or access point as shown. Ethernet port LAN port USE ONLY HAYWARD GENUINE REPLACEMENT PARTS...
-
Page 9: Connection Table
Connection ID. Because the control was previously wired, take this time to go through each connection and fill out the table. Refer to the graphic below for the physical location of these connections. HVR1 HVR2 HVR3 HVR4 HVR5 HVR6 HVR7 HVR8 When using Optional Smart Relays USE ONLY HAYWARD GENUINE REPLACEMENT PARTS... -
Page 10: Configuration
In this case, a keyboard will be displayed and you’ll be able to type the desired name. After naming the equipment, save then advance. This method is repeated throughout the Configuration Wizard. USE ONLY HAYWARD GENUINE REPLACEMENT PARTS... - Page 11 How Many Filter Pumps? - This question is for THIS BODY OF WATER ONLY. For example: If you have 2 pumps; one for the pool Body of Water and one for the spa Body of Water, you would answer “1” to this question. USE ONLY HAYWARD GENUINE REPLACEMENT PARTS...
- Page 12 If VSP is selected: Which Hayward Unique Address? If using a VSP, you’ll be asked what is the Hayward Unique Address (HUA). If a value is already shown in the box, advance to the next screen. If no value is shown, selecting the box will bring you to a table showing all detected devices.
- Page 13 Heater Priority Level? Because more than one heater is configured to heat this Body of Water, you can set the Priority for which heater you’d like to use first (selection “1”). If the priority heater can’t meet the demand, the next heater will start (selection “2”). USE ONLY HAYWARD GENUINE REPLACEMENT PARTS...
- Page 14 The next few screens will configure the OmniPL to use Sense and Dispense. The OmniPL automatically detects smart components like the HL- CHEM, and assigns a Hayward Unique Address. If multiple components are detected, the OmniPL will show a table of devices and prompt you to select the proper device.
- Page 15 Type of Chlorinator? Select the Hayward TurboCell model, liquid chlorinator or tablet feeder that is installed in your system. A flow switch must be installed when using a chlorinator. If TurboCell model is selected (requires a connected Hayward TurboCell or AquaRite with HLAQRPCB communication board): Select Salt Monitoring Level - Select Standard Salt or Low Salt.
- Page 16 If VSP is selected: Which Hayward Unique Address? If using a VSP for your cleaner pump, you’ll be asked what is the Hayward Unique Ad- dress (HUA). If a value is already shown in the box, advance to the next screen. If no value is shown, selecting the box will bring you to a table showing all detected devices.
- Page 17 If VSP is selected: Which Hayward Unique Address? If using a VSP for your water feature pump, you’ll be asked what is the Hayward Unique Address (HUA). If a value is already shown in the box, advance to the next screen. If no value is shown, selecting the box will bring you to a table showing all detected devices.
- Page 18 If VSP is selected: Which Hayward Unique Address? If using a VSP for your accessory pump, you’ll be asked what is the Hayward Unique Address (HUA). If a value is already shown in the box, advance to the next screen. If no value is shown, selecting the box will bring you to a table showing all detected devices.
- Page 19 Do You Have an Air Temperature Sensor? Select whether there is an air temperature sensor wired to the OmniPL. If Yes is selected: Where is the Sensor Wired? Touching the box will bring you to a table showing all detected sensors connections. Select the sensor connection used for the air sensor (typi- USE ONLY HAYWARD GENUINE REPLACEMENT PARTS...
- Page 20 Advance button. When finished configuring accessories, you’ll be returned to this same screen. Touch the Done button and advance to the next section of configuration. Refer to the following information when configuring accessories: Name of Accessory - Touch the box and use the keyboard to name the accessory. USE ONLY HAYWARD GENUINE REPLACEMENT PARTS...
- Page 21 A summary screen will be displayed after configuring this interlock. Read through the description and make sure the interlock will function as desired. Configuration Summary The OmniPL displays all configured equipment in a table for you to view. Scroll through all configured devices and make sure they’ve been properly assigned. USE ONLY HAYWARD GENUINE REPLACEMENT PARTS...
- Page 22 From the Quick Main Menu Screen, select one of the following buttons and follow the directions on the next page to configure your equipment. • Bodies of Water • Backyard • Sensors • Interlocks/Add Interlock • System Options • Spa Side USE ONLY HAYWARD GENUINE REPLACEMENT PARTS...
- Page 23 Type - Change the type of Filter Pump that is configured (Single Speed, 2-Speed, or VSP) HUA - Match the HUA (Hayward Unique Address) to the configured Filter Pump. This option only appears if the Filter Pump is configured as a Variable Speed Pump.
- Page 24 Freeze Protect - Select whether you want the cleaner to turn on for Freeze Protection. Also set the Freeze Protect air temperature threshold from this menu. Valve Cycle - Configure the valve cycling time period for the cleaner. This option is only available if the cleaner has an assigned valve. USE ONLY HAYWARD GENUINE REPLACEMENT PARTS...
- Page 25 Delete an Existing Group of Lights - From this screen, if you wish to delete a group of lights that is currently configured, select the group and then select the trash can button next to it. USE ONLY HAYWARD GENUINE REPLACEMENT PARTS...
- Page 26 Backyard. These steps are described in the Configuration Wizard portion of this manual. Select an Accessory - Once you select an accessory, all of the options for that Backyard accessory will appear on the next screen. These USE ONLY HAYWARD GENUINE REPLACEMENT PARTS...
- Page 27 Diagnostic - This selection will re-establish a connection to your wireless network and display current network information such as wifi SSID, signal strength, and the local/gateway ip addresses. Not Now - Skip network setup and continue with Configuration Wizard. USE ONLY HAYWARD GENUINE REPLACEMENT PARTS...
- Page 28 Aux buttons. Select the desired Theme that you want to assign to the Aux button Unconfigured - If set to “Unconfigured”, the Aux button will have no function. Controller Mounting Template Control Pad Mounting Template USE ONLY HAYWARD GENUINE REPLACEMENT PARTS...
- Page 29 Plus and SwimPure chlorination products to be free of defects in materials and workmanship, under normal use and service, for a period of three (3) years. Hayward also warrants its Aqua Trol chlorina- tion products to be free of defects in materials and workmanship, under normal use and service for a period of one (1) year.
- Page 30 USE ONLY HAYWARD GENUINE REPLACEMENT PARTS...
- Page 31 USE ONLY HAYWARD GENUINE REPLACEMENT PARTS...
- Page 32 Hayward is a registered trademark and Omni is a trademark of Hayward Industries, Inc. © 2021 Hayward Industries, Inc. All other trademarks not owned by Hayward are the property of their respective owners. Hayward is not in any way affiliated with or endorsed by those third parties.
Need help?
Do you have a question about the OmniPL HLXPROUPG and is the answer not in the manual?
Questions and answers