Table of Contents
Advertisement
Available languages
Available languages
Quick Links
Advertisement
Table of Contents

Related Manuals for windirect TOTAL CRUNCH EVOLUTION


Summary of Contents for windirect TOTAL CRUNCH EVOLUTION
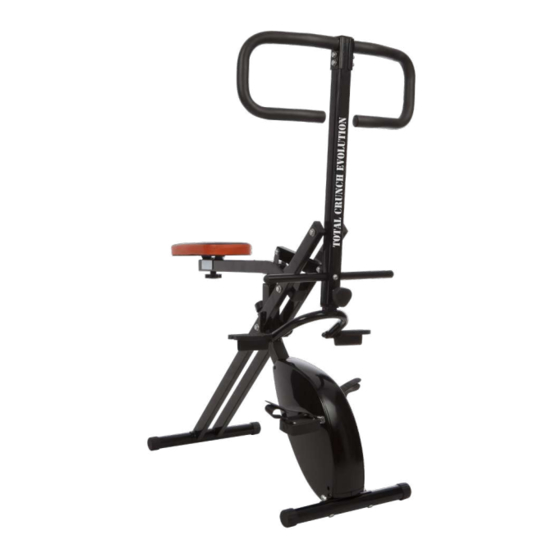
- Page 1 TOTAL CRUNCH EVOLUTION...
-
Page 3: Part List
TOTAL CRUNCH EVOLUTION PART LIST Main frame tube (1 pc) Foot tube pedals (2 pcs) Handlebar R (1 pc) Rear frame pipe (1 pc) Bike pedals (2 pcs) Seat tube (1 pc) Front stabilizer (1 pc) Upper foot tube (1 pc) Large piece (1 pc) Rear stabilizer (1 pc) Vertical pipe (1 pc) - Page 4 STEP 1 - Fix the rear stabilizer (4) to the main frame tube (1) (1A), using the screw 20 (2 pcs.). - Fix the front stabilizer (3) to the rear frame pipe (2) (1B), using the screw 19 (2 pcs.). - Assemble the main frame tube with the rear frame pipe (1C), using the screw 25 (1 pc.).
- Page 5 STEP 3 - Fix the foot tube (5) to the vertical pipe (3A), using the knob (15). - Attach foot tube pedals (6) to the foot tube (3B), using the screw 26 (2 pcs.). STEP 4 - Fix each handlebar (10 / 11) to the vertical pipe (4A), using the screw 21 (2 pcs.).
- Page 6 Evolution, you can work all the main muscle groups. The muscles are contracted, To use the Total Crunch Evolution bike mode is necessary to remove first the foot tube toned, and shaped through a simple movement that uses your own body weight to from the vertical pipe, using the knob.
-
Page 7: Safety Warning
C) Work your biceps SAFETY WARNING Check Total Crunch Evolution before use and again at regular intervals. Make sure that all screws, bolts, nuts, and other connections are securely fastened and that all the training equipment is in safe operating condition. -
Page 8: Lista De Piezas
TOTAL CRUNCH EVOLUTION LISTA DE PIEZAS Soporte delantero (1 ud) Pedal crunch (2 uds) Manillar derecha (1 ud) Soporte trasero (1 ud) Pedal bicicleta (2 uds) Tubo del sillín (1 ud) Estabilizador delantero (1 ud) Tubo pedal superior (1 ud) Pieza de unión (1 ud) Estabilizador trasero (1 ud) Barra vertical (1 ud) - Page 9 PASO 1 Fije el estabilizador frontal (4) al soporte delantero (1A) usando el tornillo 20 (2 uds.). - Fije el estabilizador trasero (3) al soporte trasero (2) (1B) usando el tornillo 19 (2 uds.). - Monte el soporte delantero al trasero (1C) con el tornillo 25 (1 ud.). ...
- Page 10 PASO 3 - Fije el tubo de pedal crunch (5) a la barra vertical (3A) con la rueda de ajuste (15). - Monte los pedales crunch (6) al tubo de pedal crunch (3B) con el tornillo 26 (2 uds.). ...
- Page 11 Con Total Crunch Evolution se trabajan todos los grupos Para utilizar el modo bicicleta del Total Crunch Evolution hay que retirar primero el tubo de músculos principales. Los músculos se contraen, tonifican y esculpen mediante un de pedal crunch de la barra vertical usando la rueda de ajuste.
-
Page 12: Advertencias De Seguridad
- Coloque siempre Total Crunch Evolution en una superficie plana. no cubre los daños resultantes de un uso inadecuado, uso comercial negligente, - Asegúrese de que ningún niño utilice Total Crunch Evolution sin la supervisión de un desgaste anormal, accidentes o manipulación indebida. -
Page 13: Lista Dei Componenti
TOTAL CRUNCH EVOLUTION LISTA DEI COMPONENTI Supporto principale (1 ud) Pedale Crunch (2 pezzi) Manubrio destro (1 pz) Supporto posteriore (1 pz) Pedale della bicicletta (2 pezzi) Tubo sella (1 pz) Stabilizzatore anteriore (1 pz) Tubo superiore del pedale (1 pz) Pezzo di collegamento (1 pz) Stabilizzatore posteriore (1 pz) Barra verticale (1 pz) - Page 14 FASE 1 - Fissare lo stabilizzatore anteriore (4) alla staffa anteriore (1A) usando la vite 20 (2 pezzi). - Fissare lo stabilizzatore posteriore (3) alla staffa posteriore (2) (1B) con la vite 19 (2 pezzi). - Montare la staffa anteriore sulla staffa posteriore (1C) usando la vite 25 (1 pz.). ...
- Page 15 FASE 3 - Fissare il tubo del pedale di scricchiolio (5) alla barra verticale (3A) con la rotella di regolazione (15). - Montare i pedali crunch (6) sul tubo del pedale crunch (3B) con la vite 26 (2 pezzi). ...
- Page 16 Total Crunch Evolution lavora tutti i principali gruppi muscolari. I muscoli vengono Para utilizar el modo bicicleta del Total Crunch Evolution hay que retirar primero el tubo contratti, tonificati e scolpiti attraverso un facile movimento che utilizza il proprio peso de pedal crunch de la barra vertical usando la rueda de ajuste.
-
Page 17: Norme Di Sicurezza
Controllare Total Crunch Evolution prima dell’uso e controllare regolarmente il suo stato. - Leggere sempre il manuale di istruzioni prima di usare Total Crunch Evolution e Assicuratevi che tutte le viti, i bulloni, i dadi e gli altri collegamenti siano stretti e che tutte conservare il manuale per riferimento futuro. - Page 18 TOTAL CRUNCH EVOLUTION LISTER DER TEILE Hauptrahmenrohr (1 Stück) Fußrohr-Pedale (2 Stück) Lenker R (1 Stück) Hinteres Rahmenrohr (1 St.) Fahrradpedale (2 Stück) Sitzrohr (1 Stück) Vorderer Stabilisator (1 Stück) Oberes Fußrohr (1 Stück) Großes Stück (1 Stück) Hinterer Stabilisator (1 Stück) Vertikales Rohr (1 Stück) Sitz (1 Stück) Fußrohr (1 Stück)
- Page 19 SCHRITT 1 - Befestigen Sie den hinteren Stabilisator (4) mit der Schraube 20 (2 St.) am Hauptrahmenrohr (1) (1A). - Befestigen Sie den vorderen Stabilisator (3) mit der Schraube 19 (2 St.) am hinteren Rahmenrohr (2) (1B). - Befestigen Sie das Hauptrahmenrohr am hinteren Rahmenrohr (1C) mit Schraube 25 (1 St.). ...
- Page 20 SCHRITT 3 - Befestigen Sie das Fußrohr (5) mit Hilfe des Knopfes (15) am vertikalen Rohr (3A). - Befestigen Sie die Fußrohrpedale (6) mit der Schraube 26 (2 Stck.) am Fußrohr (3B). SCHRITT 4 - Befestigen Sie jeden Lenker (10 / 11) mit der Schraube 21 (2 St.) am vertikalen Rohr (4A).
- Page 21 Fehlhaltungen zu vermeiden. TIPPS ZUR VERWENDUNG VON TOTAL CRUNCH EVOLUTION Trainieren Sie Ihren Körper anaerob, um die Muskelmasse zu erhöhen, und aerob, um Benutzen Sie Total Crunch Evolution eine halbe Stunde pro Tag, dreimal pro Woche. Kalorien zu verbrennen.
- Page 22 - Um die Stabilität von Total Crunch Evolution zu gewährleisten, überprüfen Sie alle Verbindungen und stellen Sie sicher, dass sie fest verschraubt sind. - Wie bei jedem Fitnessgerät sollten Sie vor der Benutzung von Total Crunch Evolution immer Für dieses Produkt gilt eine Garantie gegen Fabrikationsfehler gemäß den in den Ihren Arzt konsultieren, wenn Sie Fragen zu Ihrer körperlichen Verfassung haben oder an...
-
Page 23: Lista De Peças
TOTAL CRUNCH EVOLUTION LISTA DE PEÇAS Suporte frontal (1 pc) Pedais (2 pcs) Barra de punho direita (1 pc) Apoio traseiro (1 pc) Pedal de bicicleta (2 pcs) Tubo de sela (1 pc) Estabilizador frontal (1 pc) Tubo superior do pedal (1 pc) Peça de ligação (1 pc) Estabilizador traseiro (1 pc) Barra vertical (1 pc) - Page 24 PASSO 1 - Fixar o estabilizador frontal (4) ao suporte frontal (1A) usando o parafuso 20 (2 pcs.). - Fixar o estabilizador traseiro (3) ao suporte traseiro (2) (1B) usando o parafuso 19 (2 pcs.). - Montar o suporte frontal ao suporte traseiro (1C) utilizando o parafuso 25 (1 pç.). ...
- Page 25 PASSO 3 - Fixar o tubo do pedal (5) à barra vertical (3A) com a roda de ajuste (15). - Montar os pedais (6) no tubo do pedal (3B) com parafuso 26 (2 pcs.). PASSO 4 ...
- Page 26 GUIA DE FORMAÇÃO COM TOTAL CRUNCH EVOLUTION, O CORPO INTEIRO FUNCIONA AO MESMO TEMPO: Total Crunch Evolution é um sistema de treino inovador que ajuda a moldar as costas, ombros, peitorais, bíceps, tríceps, abdominais, glúteos, ancas, coxas e pernas ao mesmo tempo.
-
Page 27: Avisos De Segurança
óptimas condições de funcionamento. - Leia sempre o manual de instruções antes de usar a Total Crunch Evolution e guarde O peso máximo admissível para a utilização do aparelho é de 100 kg. - Page 28 TOTAL CRUNCH EVOLUTION MADE IN CHINA...
Need help?
Do you have a question about the TOTAL CRUNCH EVOLUTION and is the answer not in the manual?
Questions and answers